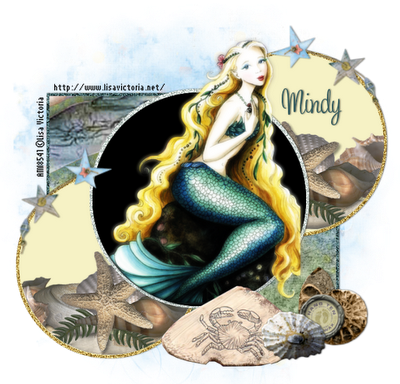
For this tutorial you will need the following:
Paint Shop Pro, I am using PSP X, you should be able to use any version.
Tube of choice, I am using the artwork of Lisa Victoria which you need a license to use. You can get it at AMI.
Scrap kit of choice. I am using a FTU kit by Artmama, called Beach Morning, which you can find at her blog, Artmama's Studio.
Font of choice, I am using Sweetheart Script
Mask: gemsmask21 from Gems Taggin Scraps
Plugins: No outside plugins used.
Just remember that my choices of papers and elements is just a suggestion, change it up and make it yours! You don't have to follow mine exactly.
Let's get started!
Open a new canvas, 700 x 700 white background. You can crop and resize at the end, this just gives us room to work.
Set your background to black, foreground to null and with your preset shapes tool, draw out a largish circle in the middle
of your canvas, objects, align, center in canvas. Convert to raster layer, selections, select all, float, defloat, invert.
Open your tube, copy and paste as a new layer and arrange it in the circle, erase the bits that hang off where you don't want them.
Selections, invert, make sure you are back on your black circle layer, make your foreground a color from your tube, selections, modify,
expand by 5, add a new raster layer and fill with that color from your tube. Deselect and drag that layer below your black circle.
Adjust, add/remove noise with the following settings: Random, monochrome checked, noise at 100%, add a drop shadow of your choice.
Back on your tube layer, duplicate the tube. On the original layer, gaussian blur of 3. On the duplicate layer change the blend mode to overlay
and add a drop shadow to the top duplicate layer.
Pick another color from your tube and set it as your background color, draw out a largish circle and pull it over to the left of your tag so its
sort of peeking out from under your black circle. Convert to raster layer, and follow the instructions above for making a frame around it. This time,
choose a color that is a few shades darker than what you used to draw the circle. When you are finished, merge the circle and the frame together, duplicate,
image mirror, image flip, add a drop shadow to both.
Pick another darkish color from your tube and set it as your foreground, background is null. Take your preset rectangle shape, with width set at about 5
and draw out a rectangle to the left of your circle (see my tag as a reference), and then convert to raster layer. Drag it below your circles. Add the noise
with the same settings as above.
Click inside it with your magic wand, selections, modify, expand 2, open a paper of your choice, copy and paste as a new layer, selections, invert, click delete
on your keyboard.
Click inside one of your circles with your magic wand, invert. Open the seashell embellishment, copy and paste as a new layer, arrange it how you want it
click delete on your keyboard. Do the same for the other circle.
Add embellishment 31, resize and rotate as needed to have it lay correctly on the tops of both of the bottom circle layers. The amounts you will have
to resize and rotate will depend on how big you drew out your circles, so just play with the settins til you get something you like. My resize was at 45%,
and I rotated mine about 57, so that might give you something to go from. Also, add a drop shadow to each one.
Add any seashell embellishments along the bottom that you like, resizing as necessary.
Open Beach Mornings 4 paper, copy and paste as a new layer, drag it just above your white background layer, open your mask, Layers, new mask layer, from image, search for
your mask in the drop down bar and apply it. Delete the mask, then merge the group together.

No comments:
Post a Comment