Pages

Showing posts with label Tony Tzanoukakis. Show all posts

Wednesday, November 20, 2013

Kiss My...


For this tutorial you will need the following:

Paint Shop Pro, I am using PSP X, you should be able to use any version.

Tube of choice, I am using the artwork of  Tony Tzanoukakia (Kiss This)which you need a license to use.  
This tube is coming soon and will not be in the store until a day or two after this tutorial is published

Scrap kit of choice. I am using the matching kit (Kiss This) by Irish Princess Designs 
which will be in Tony's store as soon as the tube is released

Font of choice, I am using Skyblue Clues


Plugins: Eye Candy 4000 Gradient Glow
I do use Eye Candy 4000 Gradient Glow on all my copyrights/credits layers
I do this because some forums will make a .png tag show up with a black background and then your
copyright doesn't show. 


Just remember that my choices of papers and elements is just a suggestion, change it up and make it yours! You don't have to follow mine exactly.

Add a drop shadow of your choosing to tubes & elements throughout. I usually use 1, 1, 50, 5 unless otherwise noted.


Let's get started!

Open a new canvas 850 x 850 pixels with a white background

Add the following, checking my tag for reference
City arrange a little to the right, duplicate & mirror merge together, add gradient glow using the 
pink & white in the city lights width about 6 or 7
Car resize 80% arrange to the right
add your tube resize 35% arrange by car
stars arrange on left, duplicate & mirror, erase where they overlap
make your background black, foreground pink, take your color changer tool and 
go over the stars, add white gradient glow
cuupy resize 25% arrange on left
nail polish resize 25% arrange on left
lispstick resize 35% arrange on left
dice resize 35% arrange in middle
diamonds resize 45% arrange in front of dice, duplicate & mirror several times
place around the tag

Add paper 4 above white background
Apply your mask

crop and resize
add your copyright and credits as needed
add your text and save

Thursday, November 7, 2013

Chocolate Love


For this tutorial you will need the following:

Paint Shop Pro, I am using PSP X, you should be able to use any version.

Tube of choice, I am using the artwork of Tony Tzanoukakis, (Danny Longhair) which you need a license to use.  This tube has not yet been released into the store, but will be within a day or two of this tut being posted.

Scrap kit of choice. I am using  the matching scrap kit for the tube by Misty Lynn's Creations
It will be released into Tony's store as soon as the tube is

Font of choice, I am using Cutie Pop

Plugins: No outside plugins used
I do use Eye Candy 4000 Gradient Glow on all my copyrights/credits layers
I do this because some forums will make a .png tag show up with a black background and then your
copyright doesn't show. 


Just remember that my choices of papers and elements is just a suggestion, change it up and make it yours! You don't have to follow mine exactly.

Add a drop shadow of your choosing to tubes & elements throughout. I usually use 1, 1, 50, 5 unless otherwise noted.


Let's get started!

Open a new canvas 850 x 850 pixels with a white background

open  Element 30 (frame) copy and paste as a new layer resize 85%  & mirror
click inside with your magic wand, selections, modify, expand 2, selections, invert
open paper 7 copy and paste as a new layer click delete on your keyboard


layer  use paper
click inside with your magic wand, selections, modify, expand 2, selections, invert

NOTE: I spent time erasing bits of her hair that went over the ribbon in the frame, and by the time the tag was all done, I had that section covered with elements and didn't need to erase all of it. If you think you're going to cover her hair like I did, skip that bit below. If you aren't going to cover the tube on the right side, then go ahead and follow it and erase the hair bits on the right side

Open your tube, copy and paste as a new layer, resize 30% then arrange in the frame
Take your eraser tool and erase where her hair hangs over the right portion of the ribbon, leave it so that
it looks like her feet and hair at the bottom portion of the ribbon are hanging over it outside the frame & ribbon

For the elements I used the following:

element 16 resize  55% arrange on bottom right
element 19 resize  45% arrange to the left of the purse
element 06 arrange behind purse & slightly above
element 14 resize  30% arrange by flower
element 3 resize  30% arrange on bottom left
element 2 resize  40% arrange on bottom left
element 29 resize  40% arrange on bottom left, above & behind cupcakes
element 26 resize  50% arrange beside lips candy
element 08 arrange behind candies on left, duplicate & mirror
element 24 resize  45% arrange to the left of the shoe on the bottom right
element 21, resize 45% arrange to the right of the heart

copy and paste element 17
click on your recoloring tool, set your foreground at #4b3228 and background as white
go over the sparkles with the recolor tool.
drag this layer below the frame & background paper on the left, duplicate & mirror, merge together
duplicate & drag the duplicate layer down

crop and resize
add your copyright and credits as needed
add your text and save

Friday, October 25, 2013

Tag Show Off - Tony Tzanoukakis

Tag show off using the artwork of Tony Tzanoukakis


(above) Gilian

(above) Serina


(above) November Rain

(above) Little Miss Red Riding Hood


Thursday, October 24, 2013

Mz. Officer


For this tutorial you will need the following:

Paint Shop Pro, I am using PSP X, you should be able to use any version.

Tube of choice, I am using the artwork of  Tony Tzanoukakis (Under Arrest) which you need a license to use.  This tube has not been released into Tony's store yet, and will be released within a day or two of this tutorial being posted. 

Scrap kit of choice. I am using a PTU kit, Under Arrest by Rissa's Designs, which is the matching kit for the tube, and it will be available in Tony's store as soon as the tube is released.

Font of choice, I am using God's Monsters


Plugins: No outside plugins used
I do use Eye Candy 4000 Gradient Glow on all my copyrights/credits layers
I do this because some forums will make a .png tag show up with a black background and then your
copyright doesn't show. 


Just remember that my choices of papers and elements is just a suggestion, change it up and make it yours! You don't have to follow mine exactly.

Add a drop shadow of your choosing to tubes & elements throughout. I usually use 1, 1, 50, 5 unless otherwise noted.


Let's get started!

Open your template, shift D to duplicate and close the original
Delete raster 1 layer

Change the canvas size to something a little bigger so you have room to work, I made mine 850 x 850 pixels

Fill the layers with papers, to do this make sure the layer you want to fill has been clicked on in your layer palette. 
Click inside the shape with your magic wand, selections, modify, invert, open your paper, copy and paste as a new layer, 
click delete on your keyboard.
Delete the original template layer

Some layers, like the frames, you may just want to flood fill with a color from your kit. To do this, click on the layer in your layer palette, add another raster layer above it,
click inside the shape with your magic wand, and flood fill it with your color
Delete the original template layer

layer 1 use paper 2
layer 2 use paper 9
layer 3 use paper 6
layer 4 use paper 5
layer 5 add noise uniform, monochrome, 45
layer 6 change the background to #bb9b2b and background to black
take the color changer tool and go over it to change the color to black

Make the top rectangle on the left active, selections, select all, float, defloat, invert
copy and paste your tube as a new layer, arrange in the rectangle, click delete on your keyboard
Lower the opacity to 75

Paste the tube again, resize by 35% mirror, arrange on the right & erase any bits that hang over where you don't want them showing. I also moved the word art a little to the left

Now for the elements
element 5 resize 65% arrange over left rectangles
element 13 resize 25% arrange in the center
element 7 resize 35% arrange on bottom left
element 3 resize 40%  arrange next to clock
element 8 resize 25% arrange in front of clock
element 23 resize20%  arrange beside cup
element 1 resize 25% arrange in front of cup
element 12 resize 20% arrange behind handcuffs

copy and paste paper 8 just above the white background
apply your mask

crop and resize
add your copyright and credits as needed
add your text and save

Tuesday, October 15, 2013

Care For a Drink


For this tutorial you will need the following:

Paint Shop Pro, I am using PSP X, you should be able to use any version.

Tube of choice, I am using the artwork of Tony Tzanoukakis, (Care For a Drink) which you need a license to use.  This tube will be released into Tony's store within a day or two of this tutorial being posted. It's a preview of tubes "coming soon."

Scrap kit of choice. I am using a PTU kit, by Kandii Popz, called Care For a Drink, which is the matching kit for the Care For a Drink tube by Tony T, and will be available in his store when the tube is released.

Font of choice, I am using Abaddon


Plugins: No outside plugins used
I do use Eye Candy 4000 Gradient Glow on all my copyrights/credits layers
I do this because some forums will make a .png tag show up with a black background and then your
copyright doesn't show. 


Just remember that my choices of papers and elements is just a suggestion, change it up and make it yours! You don't have to follow mine exactly.

Add a drop shadow of your choosing to tubes & elements throughout. I usually use 1, 1, 50, 5 unless otherwise noted.


Let's get started!

Open a new canvas 850 x 850 pixels with a white background

open Frame 1 copy and paste as a new layer resize 75%
click inside with your magic wand, selections, modify, expand 2, selections, invert
open paper 7 copy and paste as a new layer click delete on your keyboard & deselect

Open your tube, copy and paste as a new layer, resize 45% & arrange so it looks like she's sitting on the frame

add the following elements
Heart cross arrange on upper right
thorned rose resize 50% arrange on bottom left
Rose with feather resize 60% arrange just above thorned rose
wine resize 70% arrange on right
bleeding hearts resize 75% arrange on top left
Fan arrange on bottom left behind heart & flowers
Rose 1 resize 45% arrange between tube & thorned rose

Copy & paste paper 3 just above the white background
apply your mask

crop and resize
add your copyright and credits as needed
add your text and save

Saturday, October 5, 2013

November Rain


For this tutorial you will need the following:

Paint Shop Pro, I am using PSP X, you should be able to use any version.

Tube of choice, I am using the artwork of Tony Tzanoukakis which you need a license to use.  

Scrap kit of choice. I am using a PTU kit called Fall Splendor by Bookworm Dezines
available at Scrap Candy 

Font of choice, I am using South Beaches 9

Plugins: No outside plugins used
I do use Eye Candy 4000 Gradient Glow on all my copyrights/credits layers
I do this because some forums will make a .png tag show up with a black background and then your
copyright doesn't show. 


Just remember that my choices of papers and elements is just a suggestion, change it up and make it yours! You don't have to follow mine exactly.

Add a drop shadow of your choosing to tubes & elements throughout. I usually use 1, 1, 50, 5 unless otherwise noted.


Let's get started!

Open a new canvas 850 x 850 pixels with a white background
open element 38 copy and paste as a new layer 
click inside with your magic wand, selections, modify, expand 2, selections, invert
open a new raster layer and make sure you are on that layer
open  paper 13 copy and paste paper into selection. Leave selected
Open your tube, copy & paste as a new layer, resize 70%
arrange in frame and erase bits you don't want hanging out of the frame

element 58 arrange and right between tube & frame
element 37 resize 45% mirror & arrange on bottom left
element 16 arrange across bottom
element 34 resize 40% arrange over the bottom of the tree on the right
element 15 arrange on left, duplicate, merge together, duplicate, mirror & flip

crop and resize
add your copyright and credits as needed
add your text and save

Wednesday, October 2, 2013

Monique


For this tutorial you will need the following:

Paint Shop Pro, I am using PSP X, you should be able to use any version.

Tube of choice, I am using the artwork of Tony Tzanoukakis, which you need a license to use.  
This tube, Monique is a preview of a coming soon tube and is not yet released in the store
it will be in the store within a day or two of this tut being posted.

Scrap kit of choice. I am using the matching scrap kit, Monique, by Desirena Designs
which will be released in Tony's store when the tube is released. 

Font of choice, I am using Dagobert


Plugins: No outside plugins used
I do use Eye Candy 4000 Gradient Glow on all my copyrights/credits layers
I do this because some forums will make a .png tag show up with a black background and then your
copyright doesn't show. 


Just remember that my choices of papers and elements is just a suggestion, change it up and make it yours! You don't have to follow mine exactly.

Add a drop shadow of your choosing to tubes & elements throughout. I usually use 1, 1, 50, 5 unless otherwise noted.


Let's get started!

Open a new canvas 850 x 850 pixels with a white background

open 26 copy and paste as a new layer, resize 80%
click inside with your magic wand, selections, modify, expand 2, selections, invert
open paper 7 copy and paste as a new layer, click delete on your keyboard, leave selected
Open your tube, copy and paste as a new layer, resize 60%
arrange in the frame, erase the bits you don't want hanging out of the bottom of the frame. Deselect

Now for our elements
element 4 resize 50% arrange on the bottom of the frame in the middle
element 11 resize 30% arrange on right side of wing, duplicate & mirror
element 8 resize 45%  arrange behind element 11 on right, duplicate & mirror
element 16 resize 45% arrange above element 8 on right, duplicate & mirror
element 14  resize 30%  arrange on left, duplicate & mirror
element 15 resize 45% arrange on left, duplicate & mirror
element 29  resize 75%  & rotate left 90  arrange on left, duplicate & mirror
element resize arrange

Open paper 2, copy and paste as a new layer above the white background 
and apply your mask. I then resized the mask by 110%


crop and resize
add your copyright and credits as needed
add your text and save

Saturday, September 21, 2013

Halloween Witch


For this tutorial you will need the following:

Paint Shop Pro, I am using PSP X, you should be able to use any version.

Tube of choice, I am using the artwork of Tony Tzanoukakis which you need a license to use.  
This tube is a preview of tubes coming soon to his store and is not yet released. It will be in the store within a day or two of this post.

Scrap kit of choice. I am using the matching kit, called Halloween Witch, by Irish Princess Designs
which will also be available in Tony's store when the tube is released

Font of choice, I am using CAC Shishioni Brush

Plugins: No outside plugins used
I do use Eye Candy 4000 Gradient Glow on all my copyrights/credits layers
I do this because some forums will make a .png tag show up with a black background and then your
copyright doesn't show. 


Just remember that my choices of papers and elements is just a suggestion, change it up and make it yours! You don't have to follow mine exactly.

Add a drop shadow of your choosing to tubes & elements throughout. I usually use 1, 1, 50, 5 unless otherwise noted.


Let's get started!

Open a new canvas 850 x 850 pixels with a white background

Open your tube, copy and paste as a new layer, resize 35% if you are using the same one as me

Open and add the following, checking my tag, if you'd like for placement
gravestone resize 55% arrange to the right of the tube & behind it
log resize 40% arrange to the left of gravestone & behind it
familiar resize 30% arrange on top of gravestone
spellbook  resize 30% arrange on log
candle resize 30% arrange on log, by book
cauldron resize 55% arrange in front of log
bushes arrange on left in front of everything, erase the part that is going downward on the right
duplicate & mirror, merge together
tree arrange behind log
clouds arrange behind tree, duplicate, mirror, drag down lower
broom resize 65% rotate left 65, arrange by log & cauldron


crop and resize
add your copyright and credits as needed
add your text and save

Baddest Witch


For this tutorial you will need the following:

Paint Shop Pro, I am using PSP X, you should be able to use any version.

Tube of choice, I am using the artwork of Tony Tzanoukakis, which you need a license to use.  
This tube,called Halloween Witch is a preview of one of the tubes coming soon to Tony's store and is not yet out. It will be out within a day or two of the date this tut is posted.

Scrap kit of choice. I am using Witch Broom'n,  by BLT Dezignz which is also for sale at Tony T's store. It was made to go with the Witch Broom'n tube. 


Font of choice, I am using Grenouille

Plugins: No outside plugins used
I do use Eye Candy 4000 Gradient Glow on all my copyrights/credits layers
I do this because some forums will make a .png tag show up with a black background and then your
copyright doesn't show. 


Just remember that my choices of papers and elements is just a suggestion, change it up and make it yours! You don't have to follow mine exactly.

Add a drop shadow of your choosing to tubes & elements throughout. I usually use 1, 1, 50, 5 unless otherwise noted.


Let's get started!

Open your template, shift D to duplicate and close the original
Delete the CR layer
Change the canvas size to 850 x 900 to give yourself some room to work

Fill the layers with papers, to do this make sure the layer you want to fill has been clicked on in your layer palette. 
Click inside the shape with your magic wand, selections, modify, invert, open your paper, copy and paste as a new layer, 
click delete on your keyboard.
Delete the original template layer

Some layers, like the frames, you may just want to flood fill with a color from your kit. To do this, click on the layer in your layer palette, add another raster layer above it,
click inside the shape with your magic wand, and flood fill it with your color
Delete the original template layer

These are the papers or colors I used for each layer
layer 1 use paper 11
layer 2 use paper 2
layer 3 use paper 2
layer 4 use paper 6
layer 5 use paper 1 resize 60%
layer 6 use paper 7
layer 7 use paper as is add drop shadow
layer 8 use paper 7
layer 9 use paper as is add drop shadow
layer 10 use paper 7
layer 11 use paper as is add drop shadow
layer 12 ad noise monochrome, uniform, set at 65

Make your right front square layers active, selections, select all, float, invert
copy and paste a tube as a new layer, resize 55% arrange in frame, duplicate & mirror

Open your main tube, resize 40% if you're using the same one as me, place in center below the word art

Now for our elements
Hat resize 40% arrange on the bottom left
Cat resize 40% arrange on bottom left
Wiches Brew resize 45% arrange on bottom left
element resize arrange

crop and resize
add your copyright and credits as needed
add your text and save

Tuesday, September 3, 2013

Eek!


For this tutorial you will need the following:

Paint Shop Pro, I am using PSP X, you should be able to use any version.

Tube of choice, I am using the artwork of Tony Tzanoukakis, which you need a license to use.  
This tube is a preview of tubes that are coming soon to Tony's store. At the time of this 
tutorial this tube was not yet in the store, but it will be there within a day or two of this 
tutorial being posted.

Scrap kit of choice. I am using  the matching scrap kit called Witch Broom'n by BLT Dezines,
it will be out as soon as the tube is released at Tony's store.

Font of choice, I am using Zombified

Plugins: No outside plugins


Just remember that my choices of papers and elements is just a suggestion, change it up and make it yours! You don't have to follow mine exactly.

Add a drop shadow of your choosing to tubes & elements throughout. I usually use 1, 1, 50, 5 unless otherwise noted.


Let's get started!

Open a new canvas 850 x 850 pixels with a white background.

Open frame 1, copy and paste as a new layer, resize 70%
Click inside with your magic wand, selections, modify, expand 2, selections, invert
Open paper 11, resize to 800 x 800 pixels,
copy and paste as a new layer, just above the white background layer
click delete on your keyboard.

Open the haunted house, copy and paste as a new layer under the frame layer
resize 60% arrange in the frame, click delete on your keyboard & deselect

Open the tube, copy and paste as a new layer, resize 35%, arrange on the left

Add your elements. I used the following ( you can check my tag for exact placement)
cat, resize 35%
skeleton, resize 45%
ghost, resize 45%
bat, resize 30%
word art, resize 45%

crop and resize
add your copyright and credits
add your text and save

Thursday, July 18, 2013

Bang Bang


For this tutorial you will need the following:

Paint Shop Pro, I am using PSP X, you should be able to use any version.

Tube of choice, I am using the artwork of Tony Tzanoukakis which you need a license to use.  
This tube is a preview of one of the tubes coming soon to Tony's store and has yet to be released.
It will be in the store within a day or two of this tutorial being posted.

Scrap kit of choice. I am using a PTU kit, Bang Bang by Wicked Creationz Scraps, which matches the tube and  is also coming soon to Tony's store and will be released at the same time as the tube.

Font of choice, I am using Mont Royal


Plugins: No outside plugins used


Just remember that my choices of papers and elements is just a suggestion, change it up and make it yours! You don't have to follow mine exactly.

Add a drop shadow of your choosing to tubes & elements throughout. I usually use 1, 1, 50, 5 unless otherwise noted.


Let's get started!

Open a new canvas 850 x 850 with a white background

Open element 26, copy and paste as a new layer
Using your selection tool, click inside the frame
selections, modify, expand 3, invert
Open paper 8, copy and paste as a new layer, click delete on your keyboard
drag this layer below the frame

Open element 20, copy and paste as a new layer, resize 67%, drag that layer below the frame 
layer in your layer palette and drag it up so it's showing across the top of the frame

Open element 22, copy and paste as a new layer, drag below the frame but above the paper layer,
arrange in the frame where you want it resize 67%
Do the same with element 15

Open element 19, copy and paste as a new layer, flip, arrange on bottom left, duplicate & mirror

Element 25, arrange on top left

Open your tube, copy and paste as a new layer, arrange on the left. If you are using the same tube as me, resize it 40%

Open element 24, copy and paste as a new layer, resize 80%

Open element 23 copy and paste as a new layer, resize %

Open paper 10, copy and paste as a new layer right above the white background, 
apply your mask. Mine wasn't big enough or dark enough so I resized it
by 105% and then duplicated it and merged the two layers together.

now just crop & resize
add your copyrights and credits as needed
add your text and save

Wednesday, June 12, 2013

American Muscle


For this tutorial you will need the following:

Paint Shop Pro, I am using PSP X, you should be able to use any version.

Tube of choice, I am using the artwork of Tony Tzanoukakis, which you need a license to use.  

Scrap kit of choice. I am using the matching scrap kit by Rissa's Designs called American Muscle, which is also available in Tony's store.  

Font of choice, I am using Radius

Mask of your choice

Plugins: No outside plugins


Just remember that my choices of papers and elements is just a suggestion, change it up and make it yours! You don't have to follow mine exactly.

Add a drop shadow of your choosing to tubes & elements throughout. I usually use 1, 1, 50, 5 unless otherwise noted.


Let's get started!

Open a new canvas 1000 x 750 pixels with a white background.

Open frame 3, copy and paste as a new layer, resize by 75%
duplicate, move the copy over and down and leave them just overlapping in the middle.
Click inside with you  magic wand, selections, modify, expand 3, invert
Fill the frames with papers 4 & 6 by copy and paste the papers into the frames, and clicking delete on your keyboard.

Open your tube, copy and paste as a new layer, resize. 
If you're using the same tube as me, I resized mine by 40%
Arrange in the middle of the frames.
Open America word art, copy and paste as a new layer
arrange over the bottom of the tube

star tree arrange on the right
Open blocks, copy and paste as a new layer, resize 55%
Open start dangle, copy and paste as a new layer, resize 30%, duplicate
arrange them over the letter in the america word art

Heart, resize 45% rotate left by 30 arrange on the left

Add paper 7, just above the white background layer. 
Add your mask.

Crop, resize
add your copyrights and credits as needed
add your text and save

Tuesday, June 11, 2013

Hot Summer


For this tutorial you will need the following:

Paint Shop Pro, I am using PSP X, you should be able to use any version.

Tube of choice, I am using the artwork of Tony Tzanoukakis which you need a license to use.  At the time of this tutorial this tube is a preview of a tube that is coming soon and not available in the store. It will be available in a day or so.

Scrap kit of choice. I am using the scrap kit that matches the tag which is also coming soon to Tony Tzanoukakis' store
It's called Hot Summer by Irish Princess Designs 

Font of choice, I am using Carrington


Plugins: No outside plugins used


Just remember that my choices of papers and elements is just a suggestion, change it up and make it yours! You don't have to follow mine exactly.

Add a drop shadow of your choosing to tubes & elements throughout. I usually use 1, 1, 50, 5 unless otherwise noted.


Let's get started!

Open a new canvas 950 x 850 pixels white background

Open paper 4, copy and paste as a new layer, apply your mask to this. 

Open your tube, copy and paste as a new layer. If you're using the same one as me, resize about 35%

Add the following elements, see my tag for placement

Board fence resize 115%
sand, duplicate a few times and move around to cover across the bottom
blanket
Lighthouse, resize 40%, drop opacity down to 70 so it blends into the mask
Sandcastle resize 40%
Chair, resize 55%
Umbrella, resize 60%
Drink resize 45%
Boombox, resize 30%
Beach bag, resize 35%
Beach ball resize 25%
Flowers, resize 25%

Crop & resize
add your copyright and credits as needed
add your text and save!

Wednesday, May 29, 2013

Alice's Wonderland


For this tutorial you will need the following:

Paint Shop Pro, I am using PSP X, you should be able to use any version.

Tube of choice, I am using the artwork of Tony Tzanoukakis, which you need a license to use.  

Scrap kit of choice. I am using Wonderland by Grunge & Glitter, available at Pimp My Tags With Scraps.

Tracy's Template #46 at Freebie Friends Scraps and More

Font of choice, I am using Electronica

Plugins: No outside plugins used.


Just remember that my choices of papers and elements is just a suggestion, change it up and make it yours! You don't have to follow mine exactly.

Add a drop shadow of your choosing to tubes & elements throughout. I usually use 1, 1, 50, 5 unless otherwise noted.


Let's get started!

Open your template, shift D to duplicate and close the original. 

Delete the Tracy F. Designs layer.

Change the canvas size to 600 x 850

Fill the template layers with papers by making them active in the layer palette, 
click inside the shape with your magic wand,
selections, invert,
open your paper, copy and paste as a new layer
click delete on your keyboard and deselect.
Delete the original template layer.

I used the following papers on each template layer:

Rectangle 1 and rectangle 2, use paper 1
Grey part of circle, use paper 4
White part of circle use paper 6
Square use paper 13
Square 2, use paper 12
Frame 1 & 2, use paper 7

Move the 2 frame layers so that they are right below each other, then
the two square layers will be right together. Merge the two square layers together.
Selections, select all, float, defloat, invert.
Open your close up tube, mirror, then copy and paste as a new layer
arrange in the frames, click delete on your keyboard, deselect.
Change the blend mode to Luminance(L) and drop the opacity to about 75.

Do the same with your tube in the circle layer.

Add your elements, check my tag for placement:
Grass 2, resize 50%, arrange on bottom, duplicate and slide over so it goes all the way across the bottom rectangle.

Tree 1
Pond, resize 65% arrange below all layers, in middle of ta
Open your main tube, and place in the middle of the tag. I resized mine 85%
Ladder, resize 65%
Hat, resize 25%
Pocket watch 25%
Mushrooms 3, resize 45%, mirror
Mushrooms 1, resize 30%
Flower 1, resize 30%
Drink me bottle, resize 30%
Eat Me Cupcake, resize 30%
Teacup1, resize 25%
Element 1, resize 45%
Butterfly 1, resize 20% change Hue & Saturation to  H 239, S 166
Bird, resize 20%


Tuesday, May 28, 2013

Luau


For this tutorial you will need the following:

Paint Shop Pro, I am using PSP X, you should be able to use any version.

Tube of choice, I am using the artwork of Tony Tzanoukakis which you need a license to use.  

Scrap kit of choice. I am using the matching Hula Girl kit by Irish Princess Designs which you can purchase along with the tube at Tony's store also.

Font of choice, I am using Waking Up


Plugins: No outside plugins


Just remember that my choices of papers and elements is just a suggestion, change it up and make it yours! You don't have to follow mine exactly.

Add a drop shadow of your choosing to tubes & elements throughout. I usually use 1, 1, 50, 5 unless otherwise noted.


Let's get started!

Open a new canvas 850 x 850 with a white background.

Open palm tree, copy and paste as a new layer, resize by 85%, arrange on the left side.
Duplicate, mirror, resize by 70%, and arrange near the larger one on the left.
Duplicate the large one again, and mirror it.

Sand, arrange along the bottom of the tag, drag the layer below the palm tree layers

Drinks, resize 50% arrange near base of the trees

Open your tube, copy and paste as a new layer. I resized mine by 30%, and then 
adjust, sharpen

Surfboard, resize 85% arrange on the right, behind your tube

Sun, resize 55%, arrange behind trees

Rainbow, arrange so it looks like it's coming from the sun and then over top of the trees on the right side

Pineapple, resize 30%, arrange near the surfboard.

Coconut, resize 30% arrange in front of the surfboard and pineapple

Torch, resize 60%

Flowers, resize 20%, arrange over the coconuts, duplicate, mirror, arrange behind pineapple

Flower cluster, resize 20% arrange on left side of the tag

Wordart, resize 30%, arrange over trees on the left.

Open paper 6, copy and paste as a new layer, just above the white background layer.
Open your mask in psp, go to layers, new mask layer, from image, find the mask in the dropdown box, click ok. In the layers palette, delete your mask, then merge group.
If you save your masks in a folder outside of PSP and do them this way, they won't bog down your program. That's why I do them like this. 

Crop and resize
Add your copyright and credits as needed
Add your text and save

Wednesday, May 1, 2013

Summer Splash


For this tutorial you will need the following:

Paint Shop Pro, I am using PSP X, you should be able to use any version.

Tube of choice, I am using the artwork of  Tony Tzanoukakis which you need a license to use. At the time of this tutorial the tube is not in the store but coming soon.

Scrap kit of choice. I am using the matching scrap kit to Blue Bikini tube
 which will also be coming soon to
Tony T's store

Font of choice, I am using Dagobert

Summer Splash Template by Brutal Designs

Mask of choice

Plugins: No outside plugins used


Just remember that my choices of papers and elements is just a suggestion, change it up and make it yours! You don't have to follow mine exactly.

Add a drop shadow of your choosing to tubes & elements throughout. I usually use 1, 1, 50, 5 unless otherwise noted.


Let's get started!

Open your template, shift D to duplicate, close the original template.
Delete the credits layer.
Change the canvas size to 850 x 850 so you have room to work
Flood fill the background layer white.

We will fill each of the template layers with a paper by making it active in the layers palette
then click inside it with your magic wand, go to selections, invert.
Open your paper, copy and paste as a new layer and click delete on your keyboard, then deselect and delete the original template layer.
When you go to fill the word art layers, instead of clicking inside it with your magic wand,
selections, select all, float, defloat, invert, then you can go ahead and copy and paste your paper.

I used the following papers & you can look at my tag for reference
Paper 9 on blue circle top and blue circle bottom
Paper 7 on beige rect top and bottom
Paper 3 on all orange squares
Paper 6 on the two small green circles
Paper 13 on middle green circle

On yellow lines, click inside them, open a new raster layer, and flood fill with #294e6f
On blue circle flood fill with white, add/remove noise
add noise, uniform, 45, monochrome checked

Paper 2 on "summer" and "splash" word art
 Leave the white background on the word arts white, just add noise as above

Add your tube, resize by 40% if you're using the same one as I am.

Add your elements.
I used the following, check my tag for placement.

Sand, resize 80% arrange on the bottom
wave1, duplicate, mirror, duplicate and pull that one towards the middle,
merge the 3 together, arrange on the bottom over the bottom edge of the sand
Surf board 2, resize 70%, arrange just behind your tube
Bag 1, resize 85% arrange on left, just behind the sand
Beach ball, resize 70%, arrange on left
Suntan lotion resize 55% arrange on right
Sparkle 1, arrange in the lower part of the tag, just above tube

Set your foreground color to #67a3f7 and your background to #356fa3
Set this as a foreground/background gradient
style lines (the first box) repeats 4, angle 60
Add a new raster layer above your white background, flood fill with your gradient
Apply your mask

Crop and resize
Add your credits & copyright info
add your text and save

Note: I added noise to my name with the same settings we did above on the white circle.

Saturday, March 30, 2013

Love Spring


For this tutorial you will need the following:

Paint Shop Pro, I am using PSP X, you should be able to use any version.

Tube of choice, I am using the artwork of Tony Tzanoukakis which you need a license to use.

Scrap kit of choice. I am using Turtle Crush, a PTU kit by Alika's Scraps

Font of choice, I am using

Mask 75 from Designs by Mindy Mae, you'll find the links on the right hand side of the blog

Plugins: Xero Porcelain


Just remember that my choices of papers and elements is just a suggestion, change it up and make it yours! You don't have to follow mine exactly.

Add a drop shadow of your choosing to tubes & and elements throughout. I usually use 1, 1, 50, 5 unless otherwise noted.


Let's get started!

Open a new canvas 850 x 850 with a white background.

Open as15, resize 80%, copy and paste as a new layer,
click inside it with your magic wand, selections, modify, expand by 3,
open paper 4, copy and paste as a new layer, click delete on your keyboard, 
drag this layer below the frame layer. Leave selected.
Open your tube, copy and paste as a new layer, arrange in the frame, 
click delete on your keyboard and deselect.
Duplicate your tube, on the top layer, adjust blur, gaussian 3, change the blend mode to soft light.
On the bottom layer, adjust Hue & Saturation, change both to 0
Apply Xero Porcelain with preset settings, except change the blue to 0.

Hide your white background layer, merge visible, then unhide the background again.

Add the following elements as described, see tag also for placement

as03 resize 70% arrange on bottom left, under the chair layer, duplicate and mirror

as53 resize by 60% arrange in between the two flower images you just added above
duplicate and drag to the far left

as9, arrange on the right, duplicate and drag one of the layers up a little higher so the grass looks taller.  

as63, arrange on the right, below the grass

as64 arrange on the left below the frame

as67, resize by 50%, mirror, arrange on the bottom right

as65, resize by 55% arrange on the right over the grass

as66 resize by 55% arrange on the right side over the grass

Continue resizing 65 and 66 and arranging along the right side until it's to your liking while adding 
other elements in on that side.

as28, resized by 40% and arranged on the right side under the other flowers

as52 resized by 45 arranged on the right side

as53 Resized by 35% arranged on the right

as76, resized by 30, arrange on the right in flowers

as11, resized by 75% arranged on the right side in the flowers

as76, resized by 55% rotate to the right 25 arrange on right side

as62, arrange along top below the frame layer

as50, take your eraser tool and erase the top section of hearts, arrange what is left over the clouds, below the frame layer

as 71, arrange on the bottom right

Copy and paste your main tube, resize if needed, arrange where you like it

as31, arrange on left top, duplicate, mirror, bring the copy back to the left side and arrange below the original

as11, resized 65% arrange on left over leaves

as2, resize 75% rotate left 20 arrange on bottom left

as43, resize by 60, mirror and arrange on bottom left

as54, arrange along bottom

Make your background layer active, by clicking on it in the layer pallet.
Open paper 5, copy and paste as a new layer.
Apply your mask by opening it in PSP 
(I don't install all my masks, I just keep them in a separate folder and open them in psp to use them, just like we open our scrap kit files so that it doesn't bog down psp)
once you open your mask, go to layers, new mask layer, from image
find your mask in the drop down box and click it, then click ok. 
Then go in your layers pallet and click on the mask and click delete, 
answer yes to the pop up, then click on the mask layer and choose merge group.

Crop and resize your image,
add your copyrights and credits and text then save.


Monday, February 11, 2013

Friday, August 26, 2011

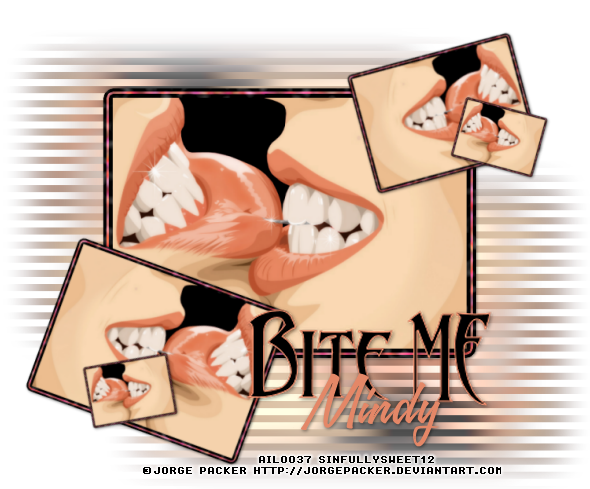
Bite Me

For this tutorial you will need the following:
Paint Shop Pro, I am using PSP X, you should be able to use any version.
Tube of choice, I am using the artwork of Tony Tzanoukakis, which you need a license to use. You can get it at PSP Tubes Emporium.
Scrap kit of choice. I am using Justice Vampire by Wicked Princess Scraps. You can find it on her blog HERE and the stores she sells at are shown on the top left side of her blog.
Font of choice, I am using Sanitarium BB & Nightmare 5
Mask: gemsmask158 from Gem's Taggin Scraps
Plugins: no outside plugins
Just remember that my choices of papers and elements is just a suggestion, change it up and make it yours! You don't have to follow mine exactly.
Let's get started!
Open a new canvas 650 x 650 white background.
Open element VJ_Frame, copy and paste as a new layer, resize by 70%
Click inside the frame with your magic wand, selections, modify, expand by 5.
Make the background layer active, open paper 12, copy and paste as a new layer, selections, invert, click delete on your keyboard, leave activated.
Open your closeup, mirror, copy and paste as a new layer, arrange how you want it, click delete on your keyboard. Deselect.
Duplicate your tube, and on the duplicate layer, adjust, blur, gaussian blur 3. Change the blend mode to soft light.
On the original tube layer, adjust hue and saturation, change both to 0. Now change the blend mode of this layer to hard light, drop the opacity to 65, add a drop shadow.
Add a drop shadow to your frame layer.
Open the bloody bling element.
Make the background paper layer active, selections, select all, float, defloat. Copy and paste your bling layer and resize by 70%. Selections, invert, click delete on your keyboard. Deselect.
Drop the opacity to about 70-75%. Make sure it is below both tube layers and above the background layer.
Add whichever elements you like. I used the following & added drop shadows if needed:
Moon 3 resized @ 45% - place below frame background to top right
Cemetary resized @ 60% place just above frame layer across bottom
Demon skull resized @ 60% place above cemetary layer on left side
Spiderweb resized @ 30% place above frame on top left side
Cross banner resized @ 45% place above frame on top right side
Broken heart resized @ 25% place above cemetary on bottom right side
Open a paper of your choice, copy and paste as a new layer. Drag this layer down so it is just above your white background layer.
Open your mask, go to layers, new mask layer, from image, find the mask in the drop down box, click ok. Delete the mask and merge group. Resize by 88% and drop the opacity to around 80.
Add your name, copyright and credits, resize/crop as needed and save!