Pages

Showing posts with label Seasons: Autumn. Show all posts

Monday, September 4, 2017

Autumn Senses - Alicia Mujica


New tag using the artwork of Alicia Mujica, tube Autumn Senses tube 1 from the Special Edition Set

The scrap kit is also by Alicia, called Autumn Senses


This tag uses only the scrap kit


This tag also uses the Autumn Senses tube, but the scrap kit I used is Autumn Days by Alicia Mujica


Wednesday, August 16, 2017

Friday, October 31, 2014

October Girl


For this tutorial you will need the following:

Paint Shop Pro, I am using PSP X, you should be able to use any version.

Tube of choice, I am using the artwork of Alicia Mujica (October tube) which you need a license to use. 

Scrap kit of choice. I am using a PTU kit, Golden Girl, by Niqui's Designs

Font of choice, I am using Sweet Memories

Mask: Vix big mask 1

Plugins: No outside plugins used
I do use Eye Candy 4000 Gradient Glow on all my copyrights/credits layers
I do this because some forums will make a .png tag show up with a black background and then your
copyright doesn't show.


Just remember that my choices of papers and elements is just a suggestion, change it up and make it yours! You don't have to follow mine exactly.

Add a drop shadow of your choosing to tubes & elements throughout. I usually use 1, 1, 50, 5 unless otherwise noted.


Let's get started!

Open a new canvas 850 x 850 pixels with a white background

open element 45 copy and paste as a new layer resize 65%
click inside with your magic wand, selections, modify, expand 2, selections, invert
open paper 12 copy and paste as a new layer
click delete on your keyboard,
copy and paste your tube as a new layer, resize by 70%
arrange in your frame
erase the bits that hang out of your frame where you don't want them

 add your elements:
element 34 resize 45% arrange on bottom left
element 14 resize 30% arrange on bottom right on the right side of the bag
element 7 resize 30% mirror arrange to the left of the purse, in front of the bag
element 47 resize 45% mirror & arrange on bottom right
element 39 resize 30% arrange between purse and cat on bottom
element 36 resize 60% arrange behind cat
element 51 resize 25% arrange above & behind bag layers
element 30 resize 35% arrange behind brown flower
element 42 resize 45% arrange between the two flowers, duplicate, rotate right 90, drag down
element 2 resize 45% rotate right 90 arrange behind flowers on left
element 43 resize 30% arrange on top right


add paper 3 above the white background
apply your mask, merge group
drop the opacity to 60

crop and resize
add your copyright and credits as needed
add your text and save

Wednesday, October 22, 2014

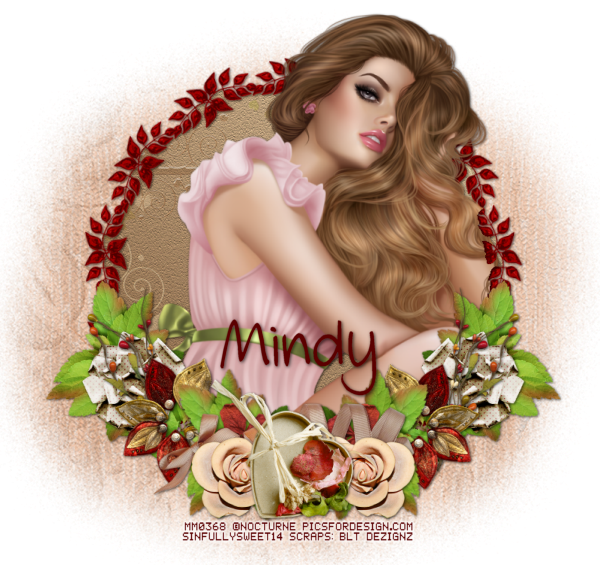
September Romance


Snaggable tag set for this tag is available in my Fotki album

For this tutorial you will need the following:

Paint Shop Pro, I am using PSP X, you should be able to use any version.

Tube of choice, I am using the artwork of Nocturne (Statice tube) which you need a license to use. 


Scrap kit of choice. I am using a PTU kit, September Romance by BLT Dezignz
I am using the tagger size kit, if you use the full size kit, you will need to resize your elements a bit differently  

Font of choice, I am using Geordie Girl

Mask: DVB Mask 80
Plugins: No outside plugins used
I do use Eye Candy 4000 Gradient Glow on all my copyrights/credits layers
I do this because some forums will make a .png tag show up with a black background and then your
copyright doesn't show.


Just remember that my choices of papers and elements is just a suggestion, change it up and make it yours! You don't have to follow mine exactly.

Add a drop shadow of your choosing to tubes & elements throughout. I usually use 1, 1, 50, 5 unless otherwise noted.


Let's get started!

Open a new canvas 850 x 850 pixels with a white background

open frame 2 copy and paste as a new layer resize 85%
click inside with your magic wand, selections, modify, expand 2, selections, invert
open paper 4 copy and paste as a new layer
click delete on your keyboard, leave selected
copy and paste your tube as a new layer, resize by 60%
arrange in your frame
erase the bits that hang out of your frame where you don't want them
 Now add your elements:
branch 3 resize 45% arrange on bottom left, duplicate, mirror, 
duplicate again, rotate left 30, drag down so it's below the original, duplicate, mirror

wreath resize 35% arrange between 2 leaves on left, duplicate, mirror, 
arrange between the other two leaf layers

heart 1 resize 35% arrange on bottom center
branch 4 resize 45% arrange below wreath on left, duplicate, mirror arrange below other wreath

flower 5 resize 35% arrange behind heart on left, duplicate & mirror
flower 4 resize 35% arrange behind flower 5, duplicate & mirror
 flower 7 resize 30% arrange between branch and leaves, duplicate & mirror

ribbon 1 resize 45% arrange behind heart

 apply paper 5 above the white background
apply your mask, merge group, resize 110%

crop and resize
add your copyright and credits as needed
add your text and save

Rosita tag & snaggables

New tag using the artwork of Alicia Mujica. 
This little cutie is called Rosita and you can find her in Alicia's store

Snaggable tags for this are in my Fotki album

Friday, October 17, 2014

All For Fall


For this tutorial you will need the following:

Paint Shop Pro, I am using PSP X, you should be able to use any version.

Tube of choice, I am using the artwork of Keith Garvey (Spoiled tube) which you need a license to use. 

Scrap kit of choice. I am using  a PTU kit, All For Fall by Scrappin With Lil Ole Me 

Font of choice, I am using Good Karma

Mask: Horse Play's Pasture, mask 11

Plugins: No outside plugins
I do use Eye Candy 4000 Gradient Glow on all my copyrights/credits layers
I do this because some forums will make a .png tag show up with a black background and then your
copyright doesn't show.


Just remember that my choices of papers and elements is just a suggestion, change it up and make it yours! You don't have to follow mine exactly.

Add a drop shadow of your choosing to tubes & elements throughout. I usually use 1, 1, 50, 5 unless otherwise noted.


Let's get started!

Open a new canvas 850 x 850 pixels with a white background

open element 22 (frame) copy and paste as a new layer resize 85%

Take your freehand selection tool set on point to point and click around the center edge of the frame, slightly inside the blue area. When you get back where you started, put the mouse pointer over where you started and double click instead of single click, this brings the two points together

open paper 14, make a new raster layer below the frame make sure you are on that layer, copy the paper and paste into selection

copy and paste your tube as a new layer, resize by %
arrange in your frame, selections, invert
erase the bits that hang out of your frame where you don't want them

 add the following elements:
 element 119 resize 60% arrange on bottom right, duplicate & mirror
element 117 resize 50% arrange on bottom right
element 92 resize 55% arrange on bottom right
element 103 resize 40% arrange to the left of the birdhouse

element 71 resize 30% arrange in front of birdhouse
element 113 resize 15% arrange in front of candle
element 2 resize 55% rotate left 90 arrange along the bottom
element 140 resize 75% arrange on bottom left

element 133 resize 36% mirror and arrange to the right of and behind the rabbit
element 25 resize 35% arrange between birdhouse and glass bottles
element 75 resize 20% arrange between glass bottle and candle

element 57 resize 25% arrange below the yellow flower cluster layer on the bottom right
element 56 resize 15% arrange in front of rabbit
element 55 resize 25% then 90% arrange on top of birdhouse

element 7 resize 25% arrange by white vase that is right of the rabbit
element 66 resize 45% arrange on left behind rabbit, duplicate, mirror, resize 65% arrange below original layer

element 18 resize 40% rotate left 25 arrange below both layers of blue leaves
element 31 resize 40% arrange above the blue leaves layers
element 45 resize 40% arrange behind white leaves layers

copy and paste paper 10 above the white background
apply your mask merge group

crop and resize
add your copyright and credits as needed
add your text and save

Wednesday, October 15, 2014

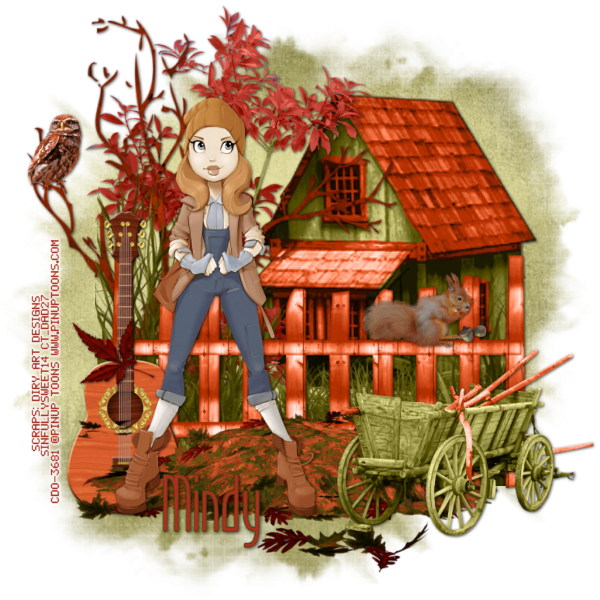
CT Tag Diry Art Designs


New CT tag using the artwork of Pinup Toons
and PTU scrap kit Autumnal Melancholy by Diry Art Designs available at the following stores:

Snaggable tags for this tag available in my fotki album
Click here for all snaggables
Click here for fall snaggables where this tag is located

Monday, October 13, 2014

Glorious Autumn


For this tutorial you will need the following:

Paint Shop Pro, I am using PSP X, you should be able to use any version.

Tube of choice, I am using the artwork of Alicia Mujica which you need a license to use. 

Scrap kit of choice. I am using a PTU kit by Mellie Beans called Autumn, Glorious Autumn 

Font of choice, I am using Mademoiselle Camille

Mask of your choice

Plugins: No outside plugins used
I do use Eye Candy 4000 Gradient Glow on all my copyrights/credits layers
I do this because some forums will make a .png tag show up with a black background and then your
copyright doesn't show.


Just remember that my choices of papers and elements is just a suggestion, change it up and make it yours! You don't have to follow mine exactly.

Add a drop shadow of your choosing to tubes & elements throughout. I usually use 1, 1, 50, 5 unless otherwise noted.


Let's get started!

Open a new canvas 850 x 850 pixels with a white background

open element 21 copy and paste as a new layer
click inside with your magic wand, selections, modify, expand 2, selections, invert
open paper 7 copy and paste as a new layer
click delete on your keyboard and deselect

Copy and paste your tube as a new layer, resize 45% arrange so she's sitting on the bottom of the frame
 
 now add your elements:
element 7 resize 65% arrange on bottom right below tube layer, duplicate & mirror
element 20 resize 45% arrange on bottom right
element 2 resize 25% arrange behind basket on right

element 3 resize 40% arrange to the left of the pink flower
 element 23 resize 25% & 90% arrange in front of basket
element 22 rotate right 90 and mirror, arrange under other elements on right side
element 4 resize 35% arrange behind tube on left side

duplicate the two flowers and the leaves that are on the right side, mirror them and arrange on the left

element 7 resize 75% arrange across center of tag, duplicate & drag down & to right

add paper 3 above the white background
apply your mask and merge group

crop and resize
add your copyright and credits as needed
add your text and save

Saturday, October 11, 2014

Harvest Festival Tutorial & Snaggable Tags


For this tutorial you will need the following:

Paint Shop Pro, I am using PSP X, you should be able to use any version.

Tube of choice, I am using the artwork of Ellie Milk (Jessica tube) which you need a license to use. 

Scrap kit of choice. I am using a PTU kit, Harvest Festival by BLT Dezignz

Font of choice, I am using DJB Danielle

Mask of your choice

Plugins: No outside plugins used
I do use Eye Candy 4000 Gradient Glow on all my copyrights/credits layers
I do this because some forums will make a .png tag show up with a black background and then your
copyright doesn't show.


Just remember that my choices of papers and elements is just a suggestion, change it up and make it yours! You don't have to follow mine exactly.

Add a drop shadow of your choosing to tubes & elements throughout. I usually use 1, 1, 50, 5 unless otherwise noted.


Let's get started!

Open a new canvas 850 x 850 pixels with a white background

Open frame 1 copy and paste as a new layer, resize 30%
click inside with your magic wand, selections, modify, expand 2, selections, invert
open paper 11, resize 850 x 850 pixels copy and paste as a new layer below the frame
click delete on your keyboard,
copy and paste your tube as a new layer, resize by 50%
arrange in your frame
erase the bits that hang out of your frame where you don't want them & then deselect

 add the elements:
bags resize 13% arrange on bottom left
bowls resize 13% arrange behind and to the left of the bags
flower pots resize 13% arrange to the right of and in front of the bags

milk can resize 9% arrange on bottom right
tea pot resize 9% arrange to the left of milk can
pumpkin resize 13% arrange behind tea pot and flower pots
rabbit resize 25% arrange to the left of cups

branch resize 25% arrange behind the other elements at the bottom, erase the bits that stick out
duplicate & mirror

flower 2 resize 15% arrange over leaves on right, duplicate & mirror
branch 2 resize 15%, flip, arrange behind other branches on the bottom
feather resize 9% arrange in front of milk can
birdhouse resize 15% arrange on left, below the tube layer
bird resize 6% arrange on birdhouse

copy and paste paper 8 as a new layer
apply your mask, merge group, resize 90%, duplicate & merge 

crop and resize
add your copyright and credits as needed
add your text and save


Here are some snag tags for you.


Sunday, October 5, 2014

Rowena 3 Forum Set


For this tutorial you will need the following:

Paint Shop Pro, I am using PSP X, you should be able to use any version.

Tube of choice, I am using the artwork of Alicia Mujica (Rowena tube) which you need a license to use.

Scrap kit of choice. I am using Autumn Bliss by Scrappin With Lil Ole Me

Font of choice, I am using Articulate

Plugins: No outside plugins
I do use Eye Candy 4000 Gradient Glow on all my copyrights/credits layers
I do this because some forums will make a .png tag show up with a black background and then your
copyright doesn't show.


Just remember that my choices of papers and elements is just a suggestion, change it up and make it yours! You don't have to follow mine exactly.

Add a drop shadow of your choosing to tubes & elements throughout. I usually use 1, 1, 50, 5 unless otherwise noted.


Let's get started!

Banner Tag
Open a new canvas 600 x 250 pixels with a white background

open paper 27 copy and paste as a new layer
copy and paste your tube as a new layer, resize by 55% then 90%

add the following elements
element 13 resize  75% arrange on right, duplicate & mirror
element 15 resize  75% arrange on left, duplicate & mirror
element 107 resize  35% arrange behind tube on bottom, duplicate & mirror
element 85 resize  45% arrange above rocks on left
element 118 resize  45% arrange behind grass
element 23 resize  45% arrange behind element 118
element 68 resize  20% arrange in leaves on right
element 55 resize  20% arrange on the rocks
element 110 resize  16% arrange on stump

Make sure you are on your white background
activate your crop tool, and snap crop rectangle to layer opaque

still on the white background
selections, select all, modify, set selection borders 5
add a new raster layer at the top
flood fill with #4a3525
add noise, uniform, monochrome 45
add drop shadow 1, 1, 50, 5 then -1, -1, 50, 5

add your copyright and credits as needed
add your text and save


Avatar
 
open a new raster layer 200 x 200 or whatever size you need for your forum

Go back to your banner tag, hide the copyright, tube and frame, 
copy merged, paste into your avatar, arrange it where you want
 
unhide tube, copy and paste the tube into your avatar & arrange, 
then unhide the other layers on your banner

Make sure you are on your white background
activate your crop tool, and snap crop rectangle to layer opaque

still on the white background
selections, select all, modify, set selection borders 3
add a new raster layer at the top
flood fill with #4a3525
add noise, uniform, monochrome 45
add drop shadow 1, 1, 50, 5 then -1, -1, 50, 5

add your copyright and credits as needed
add your text and save
 

Rowena 2


For this tutorial you will need the following:

Paint Shop Pro, I am using PSP X, you should be able to use any version.

Tube of choice, I am using the artwork of Alicia Mujica (Rowena tube) which you need a license to use. 

Scrap kit of choice. I am using a PTU kit, Autumn Bliss by Scrappin With Lil Ole Me

Font of choice, I am using Articulate

Mask: gemsmasks192 by Gems Taggin Scraps

Plugins: no outside plugins
I do use Eye Candy 4000 Gradient Glow on all my copyrights/credits layers
I do this because some forums will make a .png tag show up with a black background and then your
copyright doesn't show.


Just remember that my choices of papers and elements is just a suggestion, change it up and make it yours! You don't have to follow mine exactly.

Add a drop shadow of your choosing to tubes & elements throughout. I usually use 1, 1, 50, 5 unless otherwise noted.


Let's get started!

Open a new canvas 850 x 850 pixels with a white background

open element 43 copy and paste as a new layer
click inside with your magic wand, selections, modify, expand 2
make a new raster layer below the frame, make sure you are on it
open paper 5, copy & paste into selection

 Copy and paste your tube as a new layer, resize by 60%
arrange in your frame, selections, invert
erase the bits that hang out of your frame where you don't want them

 add your elements:
 element 15 resize  85% arrange below tube on left, duplicate & mirror
element 23 resize  45% arrange on bottom right corner
element 45 resize  55% arrange on bottom of frame in the center

element 16 resize  55% arrange on right under element 23
element 5 resize  30% arrange below sticks layer on bottom left
element 51 resize 40% arrange behind the sticks

 element 17 resize  45% mirror & arrange in the center of the flowery 
element that runs along the left side, duplicate & mirror

element 49 resize  25% arrange on right side, above the yellow sunflower

add paper 27 above the white background
apply your mask, merge group, resize 85%

crop and resize
add your copyright and credits as needed
add your text and save

Sunday, September 28, 2014

Snags using BLT Designs Fall Y'all kit

Snag tags made using BLT Dezignz PTU kit, Fall Y'all available here
artwork by Katherine available here
tutorial for this tag here


Fall Y'all


For this tutorial you will need the following:

Paint Shop Pro, I am using PSP X, you should be able to use any version.

Tube of choice, I am using the artwork of Katharine (Milla tube) which you need a license to use. 

Scrap kit of choice. I am using a PTU kit, Fall Y'all by BLT Dezignz

Font of choice, I am using Les Sensations de Cerise

Mask: DBV Mask 80 by Designs by Vaybs

Plugins: No outside plugins used
I do use Eye Candy 4000 Gradient Glow on all my copyrights/credits layers
I do this because some forums will make a .png tag show up with a black background and then your
copyright doesn't show.


Just remember that my choices of papers and elements is just a suggestion, change it up and make it yours! You don't have to follow mine exactly.

Add a drop shadow of your choosing to tubes & elements throughout. I usually use 1, 1, 50, 5 unless otherwise noted.


Let's get started!

Open a new canvas 850 x 850 pixels with a white background

Open frame 1 copy and paste as a new layer
click inside with your magic wand, selections, modify, expand 2, selections, invert
open paper 3, resize to 850 x 850 pixels copy and paste as a new layer
click delete on your keyboard, leave selected

copy and paste your tube as a new layer, resize by 40%
 erase the bits that hang out of your frame where you don't want them
 deselect

 Now we'll add our elements. I used the following:
cornucopia resize 11% mirror &arrange on bottom right, duplicate & mirror
Take your eraser tool and erase the darker part that curls up, so you just see the front and the veggies

flower 9 resize 13% arrange behind and left of cornucopia, duplicate, arrange above cornucopia, duplicate & mirror

barrel  resize 12% arrange on right, behind cornicopia
owl resize 12% arrange in the center on the bottom
bird cage resize 12% rotate left 12 arrange between barrel and cornicopia on the left
flower 6 resize 5% arrange on the far right side, duplicate & mirror

flower 1 resize 11% arrange on right, between the flowers there and duplicate, mirror
flower 5 resize 11% arrange on left, between the other flowers, duplicate & mirror
rosette resize 15% arrange behind flowers on left, duplicate & mirror
feather resize 15% rotate left 30 arrange over rosette on right, duplicate & mirror

open paper 9, resize 850 x 850 pixels, copy and paste as a new layer
apply your mask & merge group


crop and resize
add your copyright and credits as needed
add your text and save

Wednesday, September 17, 2014

Lazy Autumn Day


For this tutorial you will need the following:

Paint Shop Pro, I am using PSP X, you should be able to use any version.

Tube of choice, I am using the artwork of Alicia Mujica (Drusila tube) which you need a license to use. 

Scrap kit of choice. I am using a PTU kit, Harvest Nights by Scrappin With Lil Ole Me

Font of choice, I am using Anysome

Mask of your choice

Plugins: no outside plugins used
I do use Eye Candy 4000 Gradient Glow on all my copyrights/credits layers
I do this because some forums will make a .png tag show up with a black background and then your
copyright doesn't show.


Just remember that my choices of papers and elements is just a suggestion, change it up and make it yours! You don't have to follow mine exactly.

Add a drop shadow of your choosing to tubes & elements throughout. I usually use 1, 1, 50, 5 unless otherwise noted.


Let's get started!

Open a new canvas 950 x 850 pixels with a white background

open element 61 copy and paste as a new layer rotate left 90 resize 80%
click inside with your magic wand, selections, modify, expand 2, selections, invert
open paper 22 copy and paste as a new layer
click delete on your keyboard, leave selected
open your tube, copy & paste as a new layer, resize 45%
arrange in frame & erase the bits that hang out of your frame where you don't want them

add the following elements

element 6 resize  25% arrange on bottom left, duplicate several times until you have enough to
go across the bottom and arrange how you like

element 4 resize 25% duplicate several times & arrange between acorns

element 11 resize  43% arrange on far right
element 12 resize  25% arrange left of the apple bushel
element 16 arrange on right, just above the frame layer
element 14 resize  25% , duplicate 3 times arrange on the bottom in between the other leaves
element 55 resize  25% rotate left 25 arrange in the leaves

add paper 8 above the white background
apply your mask, merge group

crop and resize
add your copyright and credits as needed
add your text and save

Friday, September 12, 2014

Maddy Pumpkin


For this tutorial you will need the following:

Paint Shop Pro, I am using PSP X, you should be able to use any version.

Tube of choice, I am using the artwork of Ninaste at Beehive Studio which you need a license to use. 
This tube is called Maddie Pumpkin and she has several layers with different outfit choices to chose from.

Scrap kit of choice. I am using a PTU kit, Fall Flowers by Tiny Turtle Designs. 
This kit is the matching kit for this layer.

Font of choice, I am using KG Manhattan Script

Mask: WSL84 by Weescotslass Creations mask links on right sidebar, part way down the page

Plugins: No outside plugins
I do use Eye Candy 4000 Gradient Glow on all my copyrights/credits layers
I do this because some forums will make a .png tag show up with a black background and then your
copyright doesn't show.


Just remember that my choices of papers and elements is just a suggestion, change it up and make it yours! You don't have to follow mine exactly.

Add a drop shadow of your choosing to tubes & elements throughout. I usually use 1, 1, 50, 5 unless otherwise noted.


Let's get started!

Open a new canvas 850 x 850 pixels with a white background

open element 101 copy and paste as a new layer resize 130%
click inside with your magic wand, selections, modify, expand 2, 
add a new raster layer above the white background, make sure you are on that layer
edit, paste into selection
copy and paste your tube as a new layer, selections invert,
take your eraser tool and erase the bits that hang out of your frame where you don't want them
deselect

add the following elements:
element 121 arrange on bottom right
element 104 resize  65% arrange to the left of element 121
element 69 mirror & arrange below and left of element 104
element 88 arrange on right, just above frame, duplicate & mirror, merge together

element 29 resize  20% arrange on  right, duplicate 3x and mirror some and resize some, arrange on the
left side of the frame

element 91 resize  25% arrange in the flowers on the bottom

add paper 4 above the white background
apply your mask, merge group

crop and resize
add your copyright and credits as needed
add your text and save

Tuesday, September 2, 2014

Autumn Fairy Tale


For this tutorial you will need the following:

Paint Shop Pro, I am using PSP X, you should be able to use any version.

Tube of choice, I am using the artwork of Misticheskaya (Samantha tube)
which you need a license to use. 

Scrap kit of choice. I am using a PTU kit, Autumn Fairy Tale by Graphics of Fantasy

Font of choice, I am using Caprica Sans It

Mask: Vix Big Mask 1

Plugins: No outside plugins
I do use Eye Candy 4000 Gradient Glow on all my copyrights/credits layers
I do this because some forums will make a .png tag show up with a black background and then your
copyright doesn't show.


Just remember that my choices of papers and elements is just a suggestion, change it up and make it yours! You don't have to follow mine exactly.

Add a drop shadow of your choosing to tubes & elements throughout. I usually use 1, 1, 50, 5 unless otherwise noted.


Let's get started!

Open a new canvas 850 x 850 pixels with a white background
open frame 4 copy and paste as a new layer resize 90%
click inside with your magic wand, selections, modify, expand 2, selections, invert
open paper 7 copy and paste as a new layer
click delete on your keyboard,
leave selected

Copy and paste your tube as a new layer, resize by 75%
arrange in your frame
erase the bits that hang out of your frame where you don't want them
 deselect

 Add the following elements:
 element 14 resize  45% arrange on bottom left corner
element 66 resize  60% rotate left 15 arrange behind & to the right of element 14
element 22 arrange behind the two elements at the bottom

element 84 resize 50% arrange on top left side of frame
element 104 resize  40% arrange to the left of element 84, behind the tube

element 1 mirror & arrange on left, duplicate, resize 50% arrange a little lower than the original, duplicate & mirror, arrange that one to the left and a little lower

element 28 resize  25% arrange in front of basket
element 88 resize 25% arrange behind sunflowers, duplicate, mirror, arrange behind sunflowers
element 86 resize 25% arrange behind sunflowers at the top, duplicate, arrange near the bottom of the sunflowers, above the sunflower layers


copy and paste paper 5 as a new layer above the white background
rotate left 90
resize 110%
crop the tag down to the size of the paper
apply your mask, merge ground


crop and resize
add your copyright and credits as needed
add your text and save

Thursday, August 28, 2014

Fall Harvest


For this tutorial you will need the following:

Paint Shop Pro, I am using PSP X, you should be able to use any version.

Tube of choice, I am using the artwork of Alicia Mujica. This tube is from one of her special edition 3 packs, which you need a license to use. 

Scrap kit of choice. I am using a PTU kit, Harvest Blessing by Graphics of Fantasy 

Font of choice, I am using MF Summertime

Plugins: No outside plugins used
I do use Eye Candy 4000 Gradient Glow on all my copyrights/credits layers
I do this because some forums will make a .png tag show up with a black background and then your
copyright doesn't show.


Just remember that my choices of papers and elements is just a suggestion, change it up and make it yours! You don't have to follow mine exactly.

Add a drop shadow of your choosing to tubes & elements throughout. I usually use 1, 1, 50, 5 unless otherwise noted.


Let's get started!

Open a new canvas 950 x 950 pixels with a white background

Copy and paste your tube as a new layer, resize by 45%

Add the following elements:
element 17 arrange behind & to the left of your tube

element 16 arrange behind the tube so that the top of it is just showing over the top of element 17
then duplicate and drag down & right, duplicate again and drag down
merge the 3 layers together

element 10 arrange behind the tube & to the right
element 85 arrange in front of your tube at the bottom
element 80 resize  55% arrange on bottom left corner

element 71 arrange behind fountain on left side
element 87 resize  55% arrange on bottom right corner

element 76 resize  80% arrange on bottom left corner
element 1 resize  80% arrange across top of brick wall
element 69 resize  75% arrange on left side of fountain wall, below the pumpkin sign


crop and resize
add your copyright and credits as needed
add your text and save

Thursday, August 21, 2014

Autumn Feeling


For this tutorial you will need the following:

Paint Shop Pro, I am using PSP X, you should be able to use any version.

Tube of choice, I am using the artwork of Keith Garvey (November tube)
which you need a license to use. 

Scrap kit of choice. I am using a PTU scrap kit, Harvest Nights by Scrappin With Lil Ole Me

Font of choice, I am using Restaurant

Plugins: No outside plugins used
I do use Eye Candy 4000 Gradient Glow on all my copyrights/credits layers
I do this because some forums will make a .png tag show up with a black background and then your
copyright doesn't show.


Just remember that my choices of papers and elements is just a suggestion, change it up and make it yours! You don't have to follow mine exactly.

Add a drop shadow of your choosing to tubes & elements throughout. I usually use 1, 1, 50, 5 unless otherwise noted.


Let's get started!

Open a new canvas 850 x 850 pixels with a white background

open 57 copy and paste as a new layer resize 90%
click inside with your magic wand, make sure you get all the little areas between the twigs, selections, modify, expand 2, selections, invert
open paper 8 copy and paste as a new layer
click delete on your keyboard
take your close up tube, mirror it, copy and paste as a new layer above the background paper
arrange in the frame, click delete on your keyboard and deselect.

Duplicate the tube, on the top layer, adjust blur, gaussian at 3, change blend mode to soft light
on the bottom layer, apply Xero Porcelain with the default settings, except change blue to zero

 Copy and paste your main tube as a new layer arrange on the right side

 add the following elements
 element 11 resize  55% arrange on bottom left
element 77 resize  45% arrange behind apple basket
element 12 resize 35% arrange in front of and to the right of the apple basket
element 55 resize  20% arrange on the top left
element 6 resize  20% arrange over the top of the sign

element 3 mirror & arrange behind the tube, below all the other layers
element 16 arrange under the frame so the leaves are showing at the top of the frame to the left of the other tree

element 51 resize  20% arrange in front of barrels on the bottom right
 element 20 resize  45% arrange in front of the basket of apples


crop and resize
add your copyright and credits as needed
add your text and save


Tuesday, August 19, 2014

Autumn Days


For this tutorial you will need the following:

Paint Shop Pro, I am using PSP X, you should be able to use any version.

Tube of choice, I am using the artwork of Alex Prihodko (Umbrella tube)
which you need a license to use. 

Scrap kit of choice. I am using a PTU kit, Autumn by Daniela E.

Font of choice, I am using Bronze Script

Mask: gemsmask189 by Gem's Taggin Scraps

Plugins: no outside plugins used
I do use Eye Candy 4000 Gradient Glow on all my copyrights/credits layers
I do this because some forums will make a .png tag show up with a black background and then your
copyright doesn't show.


Just remember that my choices of papers and elements is just a suggestion, change it up and make it yours! You don't have to follow mine exactly.

Add a drop shadow of your choosing to tubes & elements throughout. I usually use 1, 1, 50, 5 unless otherwise noted.


Let's get started!

Open a new canvas 850 x 950 pixels with a white background

Open frame 8 copy and paste as a new layer resize 75%
click inside with your magic wand, selections, modify, expand 2, selections, invert
open paper 1 copy and paste as a new layer
click delete on your keyboard
Copy and paste your tube as a new layer, resize by 60%
arrange in your frame
erase the bits that hang out of your frame where you don't want them

Now add your elements, I used the following:
 element 143 resize 60% arrange in the bottom left corner
element 130 resize  30% arrange over basket

element 68 resize  65% arrange on bottom right corner
element 74 resize  40% mirror & arrange behind pine cones on bottom right
element 16 resize  30% mirror & arrange behind pumpkins

element 38 resize  65% arrange on bottom in between some of the elements
element 88 resize  30% arrange  between pine cones & pumpkins
element 11 resize  20% arrange bottom center

element 90 arrange on right side, duplicate, mirror, drag back to arrange on the left side of the original
erase what sticks out below the other elements

element 32 resize 50%  mirror & arrange over the left side
element 33 resize  30% arrange at the top of & between the two leafy layers on the left
element 43 resize  35% arrange behind the other elements on the bottom right
element 31 resize  35% arrange behind element 43 on the bottom right
element 87 resize  15% arrange in the leaves on the left
element 56 resize 15% arrange bottom center
element 59 resize  25% arrange in front of umbrella
element 58 resize  25% arrange to the right of the duck

add paper 3 above the white background
apply your mask, merge group
duplicate & merge together

crop and resize
add your copyright and credits as needed
add your text and save