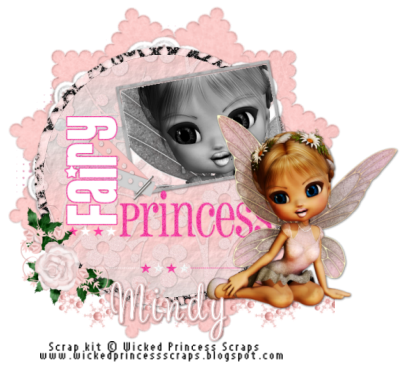
For this tut you will need the following:
Any version of Paint Shop Pro. I am using PSP X for this tut.
Tube of choice. I am using the tube that came with the kit.
Missy's tag template #312 at
Divine Intentionz.
PTU scrap kit Whispered Pixie by
Wicked Princess Scraps. Go to her site, and on the right hand side, about a quarter of the way down are blinkies to take you to the stores where you can get the kit.
Font of choice, I am using Sweetheart Script.
Optional plugin for name: Alien Skin Eye Candy 3.1
Let's get started!
Open your tag template and resize it by 85%, then change the canvas size by going to image, canvas size and change it to 650 x 650. Delete the layer called "by Missy" and then unhide the background layer if you like to have that there to see things better while you're working.
On the circle one layer, take your magic wand and click inside it. Open paper 12, copy and paste as a new layer, selections, invert, and make sure you are on the paper layer, hit the delete button on your keyboard. Deselect and delete the original circle one layer. Add a drop shadow. I used 1, 1, 60, 5. I then deleted the dotted circle layer because it didn't show with the paper I used. If you use a different paper, you might choose to keep that layer.
Make circle 2 layer active and click on it with your magic wand. Open paper 8, copy and paste as a new layer, resize by 60%, selections, invert, and make sure you are on the paper layer, hit delete on your keyboard, deselect, add a drop shadow, then delete the original circle 2 layer.
Make the Brush by Starwalk layer active. Click on adjust, hue and saturation, colorize, change the Hue to 238, and the Saturation to 149.
Make the frame layer active and click on it with the magic wand. Open paper 7, copy and paste as a new layer, selections, invert, on the paper layer, click delete on your keyboard. Deselect, add your drop shadow, and delete the original frame layer.
Make the background frame layer active and click on it with the magic wand, open paper 9, copy and paste as a new layer, resize by 60%, selections invert, and click delete on your keyboard. Leave selected.
Open your tube, copy and paste as a new layer, resize if necessary, arrange your tube so you have whatever part you want showing in the frame, click delete on your keyboard, deselect, delete the original background frame layer.
Now go to adjust, Hue & Saturation, Colorize, and change the Hue & Saturation settings both to 0 to make the tube grey.
You can colorize the word art and the stars if you want, or fill them in with a paper like we did the other layers. I chose to leave mine as they were.
Copy and paste your tube as a new layer. Arrange it to the right side of your tag. If you use the same one that came in the kit, you'll need to resize it around 60 or 70%.
Open the bubble string element, resize by 60% and arrange near the bottom of your tag, drag that layer just below your tube.
Open ribbon 2, resize by 40% arrange it under the word art, and so that the staples are on the bottom left corner of the frame.
Open the mat element, resize by 60% then resize by 90%. Drag it just below the bottom circle layer, and just above the Brush by Starwalt layer, duplicate, image, free rotate to the left by 30, duplicate that layer and rotate again to the left by 30.
Open the Doily element, resize by 105% drag that layer down just above the mat layer you just did.
Open the Rose Clusters element, resize by 40% rotate to the left by 90, arrange to the bottom left of your tag. See mine for reference.
Add your name and any © info that is needed. For my name, I typed it in white then added a glow with the Eye Candy 3.1 set at 3, fat using #ffd2d1 as the color.
If you want to save as a transparent tag, delete the white background layer and save as a .png file.
No comments:
Post a Comment