For this tutorial you will need the following:
Paint Shop Pro, I am using PSP X but you should be able to use any version.
Tube of choice. I am using the artwork of Amy Matthews, which you have to purchase at
AMI.
Scrap kit of choice. I am using Monti's It's Snow Time, which is a PTU kit that must be purchased at
AMI.
Mask of choice. I am using a mask by
EssexGirl called SnowflakeStar. Scroll to the bottom of the page, it's the last one.
Font of choice. I used FFF Urban on the sign and CAC Pinafore for my name.
Plugins: Eye Candy 3.1 Glow (optional)
Please remember that a tutorial is just a guide. You can use a different tube, scrap kit, or just use the same, and change the elements and papers used and have it come out looking completely different. Feel free to experiment and make it your own.
Let's begin.
Open a new 700 x 700 blank canvas and flood fill with white. This gives us a white background to be able to see what we're doing and room to work. We'll delete the white at the end and crop the image down.
In your kit, open Frame Square 9, copy and paste as a new layer, resize about 75%, image, flip.
Take your selection tool and click inside the frame, make sure you get all the little sections in between the ribbon and the frame, selections modify, expand by 5, selections invert.
Open paper 5, rotate by 90 in either direction, copy and paste as a new layer, image resize about 55% making sure resize all layers is unchecked. Click delete on your keyboard. Drag below your frame layer. Leave selected and open your tube, copy and paste as a new layer.
Duplicate your tube, and hide the top tube layer. Take your eraser tool and erase the bits that hang over your frame. Deselect and drag the original tube layer below your frame, add a drop shadow. Add a drop shadow to your frame also.
Unhide your duplicated tube layer. Make sure it is above your frame layer. Erase the bits that hang over the frame and ribbon. You don't have to be super careful, because you've already erased the bits on the bottom tube and that one will show through below your top tube. Basically you have the top tube to show the parts that are above the frame layer so you don't have to be super careful using one tube and erasing all the bits pixel by pixel.
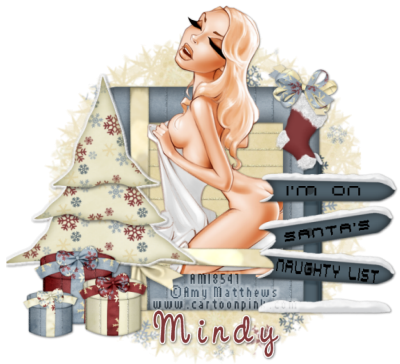
Open the It's Snowtime Sign 5 element, resize by 60% and add a drop shadow. Use your text tool and type out on the boards "I'm on Santa's Naughty List" You'll have to put a few words on each board and rotate them slightly to make them fit right. Merge all 3 text layers together after converting them to raster layers.
Open a few other elements, place them on your tag, resizing and adding a drop shadow as necessary. When I added the tree, I also put a glow of about 5 around the tree before adding the drop shadow.
Open paper 2, copy and paste as a new layer, bring down to the bottom just above the white background layer. Open your mask in psp, and go to layers, new mask layer, from image, find your mask in the drop down box, and for this mask, you need to be sure that invert mask data is ticked. Apply the mask, then delete that layer and merge the 2 layers into one group. You may want to resize it and/or change the opacity of the mask layer.
Add your name. I used CAC Pinafore with my background set to #7f3738. Then I converted to a raster layer, selections, select all, float, defloat, modify, expand 2 and added a new raster layer below my name layer. Flood fill with white, deselect add a drop shadow to the white layer and merge the two layers together.
Add your Copyright and license info and then crop your image, delete the white background layer and save as a .png so it's transparent.
No comments:
Post a Comment