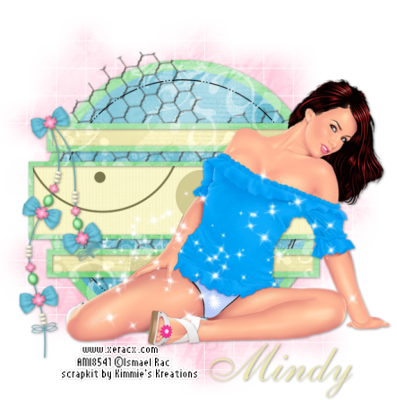
For this tutorial you will need the following:
Paint Shop Pro, any version should work fine, I am using PSP X.
Tube of your choice. I am using the work of Ismael Rac which you must purchase. You can find his tubes at
AMI.
Scrap kit of your choice. I am using a PTU kit called Summertime Fun by
Kimmie's Kreations which you can also find at AMI.
Template #6 by JackieBeth, which she made for the Xeracx Stalkers Forum creation challenge. You can find it on the Xeracx Stalker Creations blog
HERE and you can also find it on her own site
HERE.
Font of choice. I am using ALS Script
WSL Mask84 from
Weescotslass Creations
Let's get started!
Open your template and delete the top copyright layer, then resize the canvas by going to image, canvas size and resize by 650x650.
I will tell you what papers, etc I am using in my tag, but please feel free to change it up on your tag. You want it to be yours, not mine, right?
Make the circle fill layer active, click on it with your magic wand. Open paper 11, copy and paste as a new layer, selections, invert and on the paper layer, click delete on your keyboard, then deselect. Delete the original layer.
Make the black circle layer active and click on it with your magic wand, selections, modify, expand by 2, invert. Open paper 13, copy and paste as a new layer, click delete on your keyboard, deselect and add a drop shadow. I used 1, 1, 60, 5. Drag it below the inner circle layer. Delete the original circle layer.
Make the frame fill layer active, click on it with your magic wand, selections, invert, open paper 9, copy and paste as a new layer, and click delete on your keyboard. Delete the original layer.
Make the strip fill layer active, and do the same as above with it. I used paper 14 for the strip fills.
Fill the frames the same way you did the fill layers, when finished add a drop shadow to them. I used paper 13 on each of the rectangle frames.
Open your tube, copy and paste as a new layer, arrange it where you want and add the drop shadow.
Add whatever elements you'd like to your tag. I just used one of the string elements from the kit and some other wire and glitter elements I had from other kits.
Copy and paste a paper onto your canvas, drag it to the bottom, open up your mask, go to layers, new mask layer, from image, find the mask in the drop down box, and apply it to your paper. Delete the mask layer and merge the group. If you want it a little lighter, lower the opacity. I lowered mine to about 65%.
Add your name, copyright info and credits as needed.
Crop, resize, delete the white background if you want it transparent, and save.
No comments:
Post a Comment