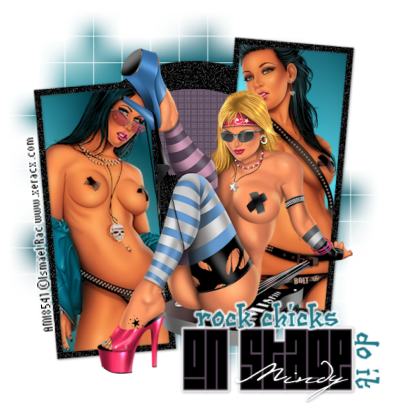
For this tutorial you will need the following:
Paint Shop Pro, I am using PSP X, but any version should work.
3 tubes of your choice. I am using the awesome artwork of Ismael Rac, which you can purchase at
AMI.
Template #3 by JackieBeth which was made for the Xeracx Stalkers Forum's Creation Challenge. You can find it on the
Xeracx Stalker Creations blog or at her blog
Cupquakez Craze
WSL Mask 84 from
Weescotslass Creations.
My wordart, which you can find
HERE.
Font of choice. I used Puskin.
Plugin: Xero Porcelain, Penta.com Dot and Cross
Let's get started!
Open your template, delete the top copyright layer, resize the canvas to 650x650.
Make the frame fill layer active, click inside them with your magic wand while holding down the shift key. Choose two colors from one of your tubes. Click on the foreground color and click on gradient set as follows, style: line, angle 34, repeats 3. Add a new raster layer and flood fill with the gradient.
Open one of your tubes, arrange it on the left side, resize if necessary. Once you get it where you want, click delete on your keyboard. Do the same for the right side. Leave selected.
Duplicate the left tube, on the duplicate tube, adjust blur, gaussian blur, 20, change the blend mode to soft light. On the original tube layer apply Xero Porcelain with the default settings.
Do the same on the right side tubes. Deselect and then delete the original fill layer.
On the frame layer, adjust, add/remove noise with these settings: Random, monochrome checked, percent at 60. Add a drop shadow.
Make the circle 2 layer active, click inside it with the magic wand, add a new raster layer and flood fill with another color from your tube, deselect and apply the Penta.com Dot and Cross plugin with default settings, delete the original circle 2 layer.
Make the circle 1 layer active, apply the same noise settings as you did for the frame layer, and add a drop shadow.
Do the same for the strip layer.
Make the white background layer active, add a new raster layer. Click on your foreground color and open it up, go to the gradient tab, and check invert. Flood fill with this gradient. Open your mask and apply it by going to Layers, New mask layer, from Image, and search for your mask in the drop down box. Then, delete your mask layer and merge the group.
Add your main tube and add a drop shadow.
Open the word art and apply as a new layer, resize if necessary.
Add your name and copyright info/credits as needed.
Crop, resize and save!
No comments:
Post a Comment