Tuesday, September 21, 2010
Returning to College
I'm so excited and I wanted to share with all of you. As of 10/5 I am returning to college. I am entering the Graphic Design program at the Art Institute of Pittsburgh, through their online program. I'm going to be taking classes in drawing, painting, and digital art, learning how to use the Adobe Creative Suite (Photoshop, Illustrator, InDesign and more). I'm hoping when I get done to be able to do some work from home, whether it be a little extra income on the side or being able to have a career out of it. You never know, when I get done, I might be creating tubes for you!
Thursday, September 16, 2010
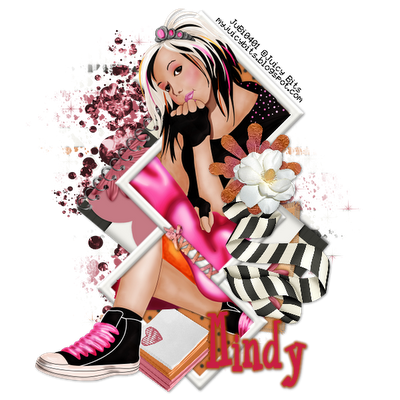
Little Emo Love Notes

For this tutorial you will need the following:
Paint Shop Pro, I am using PSP X, you should be able to use any version.
Tube of choice, I am using the artwork of Juicy Bits, which you need a license to use. You can get it at her store HERE.
Scrap kit of choice. I am using a PTU kit called Love Notes, which is also by Juicy Bits.
Font of choice, I am using Carrington
Mask: WSL170 by weescotslass, you can find it HERE.
Plugins: Eye Candy 4000 Gradient Glow (optional for name text)
Just remember that my choices of papers and elements is just a suggestion, change it up and make it yours! You don't have to follow mine exactly.
Let's get started!
Open a new canvas 600x600 white.
Open Frame 1, copy and paste as a new layer, resize by 75%, rotate to the right by 45.
Take your magic wand, hold down the shift key and click inside each of the parts of the frame. Selections, modify, expand by 3.
Open paper 4, copy and paste as a new layer, drag below your frame layer, selections, invert, click delete on your keyboard and leave selected.
Open your tube, copy and paste as a new layer, drag below your frame layer. If you are using the same tube as I am, resize by about 95%.
Take your eraser tool and erase the bits that hang over the frame on the right side. (part of her skirt, her foot, and her shirt)
Now, take your eraser and erase the bits of her skirt that show above the middle frame and bottom frame on the left side. Do not erase her shoe or her head.
Deselect and duplicate what is left of your tube. Drag the duplicate layer above your frame layer and lower the opacity to around 20%. You want to be able to see the frame through your tube.
Take your eraser tool and erase the bits of her leg and skirt that show over the bottom part of the middle frame and then raise the opacity back to 100%.
Now you should have her shoe sticking out of the lower frame and her head popping out of the top/middle frame.
Add a drop shadow to the bottom tube layer and the frame. I used 1, 1, 50, 5.
Open paper 9, copy and paste it above your white background layer. Open your mask, go to Layers, New Mask Layer, From Image, and on the drop down box, find your mask and then click ok. Delete the mask and merge the group together. Rotate it to the left by 90.
Now it's just a matter of adding whatever elements you'd like into your kit.
I used the glitter, pasted it above the mask and dragged it so it showed over to the left side of the frame.
Then open Journal Tag2, copy and paste as a new layer, resize by 70, rotate to the left by 40, image flip, add a drop shadow. Arrange it near the middle of the frames.
Open flower 1, copy and paste as a new layer, resize by 40, arrange it on the right side where the top and middle frame parts come together.
Open flower 2, copy and paste as a new layer, resize by 25%, arrange it over the other flower so it's how you like it, add a drop shadow.
Open the ribbonstriped element, copy and paste as a new layer, resize by 35%, add a drop shadow, drag that layer below the flower layers and arrange it how you want it.
Open notepad3, copy and paste as a new layer, resize by 27%, add a drop shadow, arrange under her foot.
Add your copyright info.
Add your name. I did mine using #c91f44 with a stroke 1 using the same color to make it a bit thicker. Then I added a gradient glow of 4 using #b44500 and then added my drop shadow.
Crop your tag and resize, then save!
Friday, September 10, 2010
Beautiful Disaster

For this tutorial you will need the following:
Paint Shop Pro, I am using PSP X, you should be able to use any version.
Tube of choice, I am using the artwork of Ismael Rac which you need a license to use. You can get at his store HERE.
Scrap kit of choice. I am using Sweet by Juicy Bits which you can find HERE.
Template 186 by Blissfully Beth. You can get it HERE.
Filters: Eye Candy 4000 Gradient Glow (optional for name text)
Just remember that my choices of papers and elements is just a suggestion, change it up and make it yours! You don't have to follow mine exactly.
Let's get started!
Open your template, delete the copyright layer, click on the background layer, add a new raster layer, flood fill with white then delete the gradient background layer. This step isn't necessary if you don't like to have the white background there, I just find it easier to see my work with it there. We will delete it at the end.
Make the white circle layer active, click inside it with your magic wand. Open paper 11, copy and paste as a new layer, selections, invert, click delete on your keyboard. Leave selected.
Open your close up tube, copy and paste, then arrange it into the large circle. Once you have it where you want it, click delete on your keyboard and deselect. Change blend mode on tube to Luminance (L). Delete the original white circle layer.
Make the circle frame layer active, click inside it with your magic wand. Open paper 8, copy and paste as a new layer, selections, invert, click delete on your keyboard. Deselect, add a drop shadow of your choice and delete the original layer.
Do the same for the small circle and frame. This time use a smaller tube. I also made the tube face the opposite way of the large tube.
Make rectangle 2 layer active, click inside with your magic wand. Open paper 16, copy and paste as a new layer, resize by 85%, arrange in the rectangle how you like it, selections, invert, click delete on your keyboard. Delete the original layer.
Do the same for rectangle 3 layer.
Make copy of rectangle frame layer active, click on it with your magic wand, open paper 13, copy and paste as a new layer, selections, invert, click delete on your keyboard. Deselelect, add drop shadow, delete original layer.
Do the same for copy (2) of rectangle frame.
Do the same on rectangle 1 and the frame layer as we have been doing above. I used paper 14 inside the rectangle and paper 2 for the frame.
Add your tube, arrange and resize as needed, add drop shadow.
Open bracket 2, mirror, resize by 65%, arrange near the bottom right, drag the layer below your rectangle layer that has your word art on it. Duplicate it, mirror and flip it. Add drop shadow to each layer.
Open tag 1, copy and paste as a new layer, rotate to the left by 30. Arrange it so it is showing over the top of your tag, then drag the layer down to the bottom, just above your white background layer. Add drop shadow.
Open brad 3, resize by 50%, arrange over the pointy part of the bracket. Duplicate and put over the other bracket. Add drop shadows.
Add any other elements if you'd like to add them.
Add your name. I did mine in black then added a gradient glow of 6 using #b7d4c0, and a slight drop shadow.
Add your copyright info.
Crop your tag and resize, then save.
Subscribe to:
Posts (Atom)
