Pages

Showing posts with label Seasons - Spring. Show all posts

Sunday, February 21, 2021

Alicia Mujica Tag Show Off

After a long absence, I'm back. My computer died on me and I hadn't 

been able to get a new one until now. It's ben a long time away from tagging, and I'm glad to be back. 


Tag made using  tube February Special Edition 1 by Alicia Mujica, 


and scrap kit also by Alicia Mujica, called Saint Patricks 2021  


Tag made using the artwork of Alicia Mujica, tube February Special Edition 2 and 
scrap kit Saint Patrick Day 2021, also by Alicia Mujica


Thursday, January 24, 2019

Alicia Mujica - Cecile


For this tutorial you will need the following:

Paint Shop Pro, I am using PSP X7, you should be able to use any version.

Tube of choice, I am using the artwork of Alicia Mujica, Cecile tube
which you need a license to use.  

Scrap kit of choice. I am using Alicia's kit called Just Be
Font of choice, I am using


Plugins: No ouside filters used


Just remember that my choices of papers and elements is just a suggestion, change it up and make it yours! You don't have to follow mine exactly.

Add a drop shadow of your choosing to tubes & elements throughout. I usually use 1, 1, 50, 5 unless otherwise noted.
 

Let's get started!

Open a new canvas 900 x 900 pixels with a white background

Open frame 2, copy and paste as a new layer, resize 35%, click
inside it with your selection tool, selections, invert


open paper 1ca5 resize 35%, copy and paste as a new layer below the frame
take your eraser tool and erase everything outside the frame,
because of the open spaces between the flowers, hitting delete on your 
keyboard doesn't work for this step


Copy and paste your tube as a new layer, resize by 35%
arrange in your frame, duplicate, drag one layer below the frame, leave one above
erase the bits that hang out of your frame where you don't want them on each tube
With one tube below the frame layer, you don't have to be super careful with the
one that's above, because you'll have the lower one showing as well
Now we'll add our elements:
garden 1 resize 35% arrange on the bottom of the frame
Deco 3 resize 35% mirror, arrange on bottom right
flower 1F resize 35% mirror, arrange on bottom right
word art 4 resize 35% arrange across bottom

crop and resize
add your copyright and credits as needed
add your text and save
EN ESPANOL:
Para este tutorial necesitarás lo siguiente: Paint Shop Pro, estoy usando PSP X7, deberías poder usar cualquier versión. Tubo de elección, estoy usando la obra de arte de Alicia Mujica, tubo Cecile el cual necesitas una licencia para usar. Kit de chatarra de elección. Estoy usando el kit de Alicia llamado Just Be Fuente de elección, estoy usando Complementos: No se utilizan filtros externos. Solo recuerda que mi elección de papeles y elementos es solo una sugerencia, cámbiala y hazla tuya. No tienes que seguir la mía exactamente. Agregue una sombra de su elección a los tubos y elementos a lo largo. Usualmente uso 1, 1, 50, 5 a menos que se indique lo contrario.   ¡Empecemos! Abre un nuevo lienzo de 900 x 900 píxeles con un fondo blanco. Abra el cuadro 2, copie y pegue como una nueva capa, cambie el tamaño al 35%, haga clic en En su interior con su herramienta de selección, selecciones, invertir. abrir papel 1ca5 cambiar el tamaño al 35%, copiar y pegar como una nueva capa debajo del marco toma tu herramienta de borrador y borra todo lo que esté fuera del marco, Debido a los espacios abiertos entre las flores, pulsa eliminar en tu el teclado no funciona para este paso Copia y pega tu tubo como una nueva capa, cambia el tamaño en un 35% Organice en su marco, duplique, arrastre una capa debajo del marco, deje una arriba borre los bits que cuelgan de su marco donde no los quiere en cada tubo Con un tubo debajo de la capa de marco, no tiene que ser muy cuidadoso con el una que está arriba, porque también tendrá la inferior mostrando Ahora agregaremos nuestros elementos: Jardín 1 redimensionar 35% disponer en la parte inferior del marco. Deco 3 redimensiona 35% espejo, arregla en la parte inferior derecha flor 1F redimensionar 35% espejo, colocar en la parte inferior derecha word art 4 redimensiona 35% organiza en la parte inferior recortar y redimensionar agregue sus derechos de autor y créditos según sea necesario agrega tu texto y guarda

Tuesday, May 15, 2018

Passions


For this tutorial you will need the following:

Paint Shop Pro, I am using PSP X7, you should be able to use any version.

Tube of choice, I am using the artwork of Alex Prihodko which you need a license to use.  

Scrap kit of choice. I am using Passions by Scrappin With Lil Ole Me available at
Designer Scraps
Mystical Scraps
Scraps N Company

Font of choice, I am using Painter


Plugins: Xero Porcelain


Just remember that my choices of papers and elements is just a suggestion, change it up and make it yours! You don't have to follow mine exactly.

Add a drop shadow of your choosing to tubes & elements throughout. I usually use 1, 1, 50, 5 unless otherwise noted.
 

Let's get started!

Open a new canvas 900 x 900 pixels with a white background

Open element 24 copy and paste as a new layer, rotate left 25
click inside with your magic wand, selections, modify, expand 2, selections, invert
open paper 15 copy and paste as a new layer under the frame, click delete on your keyboard

Copy and paste your tube as a new layer, resize by 75%
arrange in your frame
erase the bits that hang out of your frame where you don't want them
apply xero porcelain with default settings on the tube

Now we'll add our elements
element 1 resize 55% arrange on bottom right of frame,
duplicate, mirror, rotate right 25, arrange on left side of frame

element 28 resize 55% mirror, arrange below and right of element 1 on the left, duplicate, mirror,
rotate right 90 arrange below flower on bottom right
element 149 resize 65% arrange on bottom left corner
element 51 resize 45% arrange on bottom right
element 13 resize 45% then 55% arrange between layers on bottom right
element 126 resize 75% arrange below the other layers on the left, 
duplicate, rotate right 90, arrange on bottom right
element 45 arrange on top right, below other layers, duplicate drag down to bottom, merge
together, duplicate, mirror, drag to left

crop and resize add your copyright and credits as needed add your text and save

Tuesday, May 1, 2018

Oh Honey


For this tutorial you will need the following:
Paint Shop Pro, I am using PSP X7, you should be able to use any version.
Tube of choice, I am using the artwork of Stella Felice (Sweet Strawberry tube) which you need a license to use.
Scrap kit of choice. I am using Oh Honey Mega kit by Scrappin With Lil Ole Me available only at
Mystical Scraps. 

Font of choice, I am using
Plugins: No outside plugins
Just remember that my choices of papers and elements is just a suggestion, change it up and make it yours! You don't have to follow mine exactly.
Add a drop shadow of your choosing to tubes & elements throughout. I usually use 1, 1, 50, 5 unless otherwise noted. Let's get started!
Open element 39, copy and paste as a new layer, resize 115%
Open a new canvas 900 x 900 pixels with a white background
click inside with your magic wand, selections, modify, expand 3, selections, invert
Open paper 8 copy and paste as a new layer below the frame, click delete on your keyboard

Open your tube, copy and paste as a new layer, resize 85%
erase the bits that hang outside your frame where you don't want them

Now we'll add our elements resizing as necessary

element 26 resize 75% arrange center bottom


element 111 resize 50% arrange behind element 26 on the left,
duplicate 3 times & mirror one
arrange these on the right side

element 13 arrange between the layers on the right side,
duplicate, resize 75% bring to the left and up a couple layers

element 17 resize 50% arrange on the right between layers, duplicate twice, 
mirror one, arrange between the layers

element 108 resize 50%, mirror, arrange at top behind other layers on right
element 100 arrange just above the white background on the left, duplicate, mirror, 
drag to the bottom then merge the two


crop and resize
add your copyright and credits as needed
add your text and save

Alicia Mujica Naida

New tag using the artwork of Alicia Mujica. The tube is called Naida and 
she's available as a single tube here
or in a Super Pack of 15 of Alicia's 2016 tubes which you can find here. 
The scrap kit is also by Alicia Mujica, called FairyTale and it's available here.

Sunday, April 8, 2018

Simply Spring


For this tutorial you will need the following:

Paint Shop Pro, I am using PSP X7, you should be able to use any version.

Tube of choice, I am using the artwork of Alehandra Vanheck, Fiona tube
which you need a license to use.  

Scrap kit of choice. I am using Simply Spring by Scrappin' With Lil Ole Me 
available at the following stores:
Designer Scraps
Mystical Scraps
Scraps N Company

Font of choice, I am using Beautiful ES


Just remember that my choices of papers and elements is just a suggestion, change it up and make it yours! You don't have to follow mine exactly.
Add a drop shadow of your choosing to tubes & elements throughout. I usually use 1, 1, 50, 5 unless otherwise noted.
Let's get started!
Open a new canvas 900 x 900 pixels with a white background
Open element 63 copy and paste as a new layer resize 115%
click inside with your magic wand, selections, modify, expand 2, selections, invert

open paper 2 copy and paste as a new layer below the frame, 
arrange in your frame, click delete on your keyboard, deselect
Copy and paste element 134 and arrange over the frame

Copy and paste your tube as a new layer, resize by 45%
arrange on the right side of your frame

Now add the following elements, resizing as necessary
element 54 arrange in front of tube on bottom
I then erased the bit of her dress that showed to the right of that element,
and also some of the green on the right of the grass.
I set my eraser tool on round, 70, hardness 25

element 51 resize 55% arrange between element 54 & tube on right
element 60 resize 35% mirror & arrange in front of element 51 to the right
element 69 resize 35% arrange in front of element 51 on the left

element 1 arrange between frame & tube at the bottom
element 150 resize 65% rotate right 45, arrange between frame & element 1 on left
duplicate, mirror, drag up so it shows above the wishing well behind your tube
erase any bits you have hanging beyond the tag edges that you don't want

element 94 resize 45% arrange behind flowers on left side
element 87 resize 35% arrange behind book tube on left

Crop and resize
add your text and save


Tuesday, April 3, 2018

Spring Treats

For this tutorial you will need the following:
Paint Shop Pro, I am using PSP X7, you should be able to use any version.
Tube of choice, I am using the artwork of Alicia Mujica, Special Edition April 2018 tube 1
which you need a license to use.
Scrap kit of choice. I am using Coffeeholic by Alicia Mujica
Font of choice, I am using Reisling
Just remember that my choices of papers and elements is just a suggestion, change it up and make it yours! You don't have to follow mine exactly.
Add a drop shadow of your choosing to tubes & elements throughout. I usually use 1, 1, 50, 5 unless otherwise noted.
Let's get started!
Open a new canvas 900 x 900 pixels with a white background

open frame 2 copy and paste as a new layer, resize 40%
open copy and paste as a new layer
click inside with your magic wand, selections, modify, expand 2, selections, invert
open paper 3a, resize 880x800 pixels copy and paste as a new layer below your frame
click delete on your keyboard,
Copy and paste your tube as a new layer, resize by 55%
arrange in your frame
erase the bits that hang out of your frame where you don't want them

element cluster 1 resize 25% arrange across bottom
element branch 4 resize 25% arrange on top behind tube,
duplicate, rotate right 90, arrange on right, erase extra bits that overlap
duplicate, mirror
element macarons resize 25% then 45% arrange on bottom left
crop and resize
add your text and save

Saturday, March 31, 2018

Easter Bunny

For this tutorial you will need the following:
Paint Shop Pro, I am using PSP X7, you should be able to use any version.
Tube of choice, I am using the artwork of Alicia Mujica, Easter 2018 Special Edition tube 4
which you need a license to use.
Scrap kit of choice. I am using Alicia's matching kit Easter 2018 Font of choice, I am using Mask: Vix Big Mask 1
Just remember that my choices of papers and elements is just a suggestion, change it up and make it yours! You don't have to follow mine exactly.
Plugins:
Add a drop shadow of your choosing to tubes & elements throughout. I usually use 1, 1, 50, 5 unless otherwise noted.
Let's get started! Open a new canvas 900 x 900 pixels with a white background

open frame 2 copy and paste as a new layer 
click inside with your magic wand, selections, modify, expand 2, selections, invert
open paper 1, resize 900 pixels copy and paste as a new layer under the frame
click delete on your keyboard
Copy and paste your tube as a new layer, resize by 35%
arrange in your frame
add the following elements
element birdhouse resize 35% then 45% arrange on bottom left
element cluster 1 resize 35% then 85% arrange on bottom left

open paper 1b, resize 900 pixels copy and paste as a new layer under the frame
Apply your mask by opening your mask in psp,
click layers, new mask layer, from image, find mask in drop down menu
click it, merge group, resize if necessary
I duplicated mine about 4 times and merged together to make it darker
crop and resize
add your text and save

Monday, March 26, 2018

Easter Time


For this tutorial you will need the following:

Paint Shop Pro, I am using PSP X7, you should be able to use any version.

Tube of choice, I am using the artwork of Maria Fidorova which you need a license to use.  

Scrap kit of choice. I am using Easter Time by Scrappin With Lil Ole Me
available at the following stores:
Designer Scraps
Mystical Scraps
Scraps N Company

Font of choice, I am using

Mask: WSL_Mask362

Plugins: No outside plugins used


Just remember that my choices of papers and elements is just a suggestion, change it up and make it yours! You don't have to follow mine exactly.

Add a drop shadow of your choosing to tubes & elements throughout. I usually use 1, 1, 50, 5 unless otherwise noted.
 

Let's get started!

Open a new canvas 900 x 900 pixels with a white background


open element 113 copy and paste as a new layer
click inside with your magic wand, selections, modify, expand 2, selections, invert
open paper 9 copy and paste as a new layer
click delete on your keyboard
Copy and paste your mirrored tube as a new layer, 
arrange in frame, click delete on your keyboard
Change the blend mode to Luminance(L)

Copy and paste your tube as a new layer, resize by 30%, then 90% arrange on right

Add the following elements
element 18 resize 30% arrange by tube on bottom right
element 13 resize 30% then 45% arrange to left of element 18
element 45 resize 65% arrange on top right of frame, duplicate, mirror, merge
element 92 resize 45% arrange below lights on right, duplicate, mirror

element 87 resize 40% arrange behind tube on left side
element 20 resize 30% arrange in front of tube, near bottom, center
element 14 resize 25% & 40% arrange by bunny
element 53 resize 40% arrange behind tube on right, duplicate, mirror
arrange behind tube on left

element 64 resize 55% arrange behind element on left side, just above the frame
element 115 resize 70% arrange between flowers and frame layers at top

Copy and paste paper 5 above the white background layer
Open your mask
Layers, new mask layer, from image
find your mask in the drop down box, apply
merge group
resize 85%


crop and resize
add your copyright and credits as needed
add your text and save
To make into a forum set:
Banner 600 x 250
Copy and paste merged tag
resize 125% crop
add frame
Avatar
250x 250
copy and paste merged tag, arrange, crop

Wednesday, March 21, 2018

Easter - Alicia Mujica

New tag using the artwork of Alicia Mujica,

The scrap kit is also by Alicia Mujica, called Just Be
This tag uses the same tube
the kit is Easter 2018 by Alicia Mujica

Monday, March 12, 2018

Easter Hop


For this tutorial you will need the following:
Paint Shop Pro, I am using PSP X7, you should be able to use any version.
Tube of choice, I am using the artwork of Alicia Mujica
Rabbit Special Edition tube which you need a license to use.
Scrap kit of choice. I am using Easter Hop by Scrappin With Lil Ole Me
available at the following stores:
Designer Scraps
Scraps & Company

Font of choice, I am using Digs My Hart
Just remember that my choices of papers and elements is just a suggestion, change it up and make it yours! You don't have to follow mine exactly.
Add a drop shadow of your choosing to tubes & elements throughout. I usually use 1, 1, 50, 5 unless otherwise noted. Let's get started!
Open a new canvas 900 x 900 pixels with a white background


open element 55 copy and paste as a new layer 
click inside with your magic wand, selections, modify, expand 3, selections, invert
open paper 3 copy and paste as a new layer, resize 65%
arrange in your frame, click delete on your keyboard
Copy and paste your tube as a new layer, resize by 45%, mirror
arrange in your frame, taker your eraser tool and erase
the bits you don't want showing outside of your frame, deselect
open element 2 copy and paste as a new layer,
resize 40%, arrange on the left, bottom, between the tube & frame

open element 23 copy and paste as a new layer, image, mirror, horizontal
resize 65%, rotate left 30, arrange on the left, bottom, between the tube & frame
duplicate, drag one below the tube, leave one above
on the top one, erase the bits that show over the nest
add drop shadow to the bottom one

open element 16 copy and paste as a new layer, resize 45%
rotate right 70

open element 5 copy and paste as a new layer, resize 55%
rotate left 90
arrange under the flower, erase what shows too far below, duplicate, mirror


open element 17 copy and paste as a new layer, resize 55%, mirror
arrange below & left of the nest layer at the to side, mirror
resize 85%, arrange to the right of that layer

open element 7 copy and paste as a new layer, arrange below tube layer on right side

open element 68 copy and paste as a new layer, resize 55%
arrange below element 17

open element 4 copy and paste as a new layer, resize 30%
arrange by nest

crop and resize
add your text and save

Saturday, March 3, 2018

Easter - Alicia Mujica


New tags using the artwork of Alicia Mujica, Easter Special Edition tube 1

Scrap kit also by Alicia Mujica, Easter 2018


The forum set above and tag below were made with the same scrap kit,
the tube was also from Alicia's 2018 Easter Special Edition set, tube 3


Saturday, February 24, 2018

Saturday, May 6, 2017

CT Alicia Mujica Spring Special Edition

This tag is made using the artwork of Alicia Mujica,

The scrap kit is a PTU kit from Tiny Turtle Designs
 called Powder Blue Fantasy

Sunday, April 9, 2017

Friday, March 17, 2017

Alicia Mujica Special Edition Sweet Easter tube 2


New tag using the artwork of Alicia Mujica, tube is tube 2 from the Special Edition Sweet Easter set:

Scrap kit is the Big kit B day Easter also by Alicia


The second tag is made using Alicia's scrap kit Sweet Honey Bee


**CT FOR ALICIA MUJICA** New tag using the artwork of Alicia Mujica, the tube is Special Edition Sweet Easter Tube 2: http://aliciamujicadesign.com/es/393-special-edition-sweet-easter-by-alicia-mujica-2017-2017.html The scrap kit is Sweet Honey Bee: http://aliciamujicadesign.com/es/392-kit-sweet-honey-bee-by-alicia-mujica-2017.html You can find my tags and tuts at: http://www.sinfullysweetcreations.blogspot.com


Sunday, May 3, 2015

Lovin Summer


Snaggable versions of this tag in my Fotki album

For this tutorial you will need the following:

Paint Shop Pro, I am using PSP X7, you should be able to use any version.

Tube of choice, I am using the artwork of Ellie Milk (Sunflower tube) 
which you need a license to use.  

Scrap kit of choice. I am using a PTU kit, Summer Lovin by Scrappin With Lil Ole Me 

Font of choice, I am using Al Kisah

Plugins: no outside plugins


Just remember that my choices of papers and elements is just a suggestion, change it up and make it yours! You don't have to follow mine exactly.

Add a drop shadow of your choosing to tubes & elements throughout. I usually use 1, 1, 50, 5 unless otherwise noted.


Let's get started!

Open a new canvas 850 x 850 pixels with a white background

Copy and paste your tube as a new layer, resize by 35%

add your elements:
element 3 arrange below tube, duplicate about 2 times, arrange around below or in front of tube so it looks like she's laying in the grass

element 26 resize 65% arrange behind tube and grass layers
element 59 resize 45% arrange in front of tube on right side
element 36 resize 35% arrange on right

element 28 resize 75% arrange between grass and fence on left
element 61 resize 25% arrange on fence on the right side
element 60 resize 35% arrange on bottom left
element 62 resize 15% arrange on grass on left side

crop and resize
add your copyright and credits as needed
add your text and save

Friday, April 24, 2015

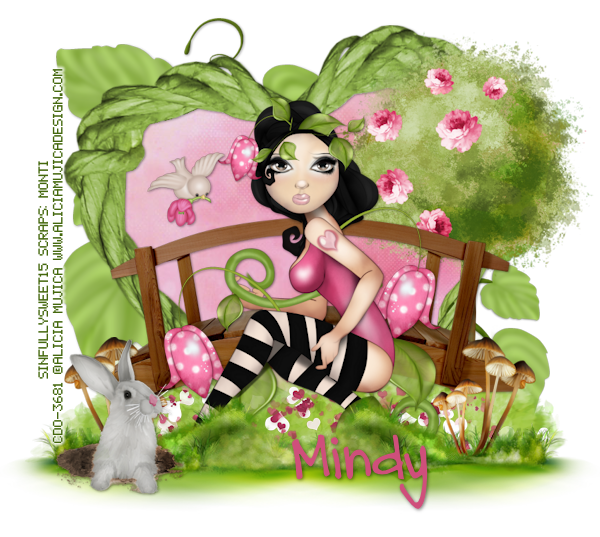
Bridges


For this tutorial you will need the following:

Paint Shop Pro, I am using PSP X7, you should be able to use any version.

Tube of choice, I am using the artwork of Alicia Mujica which you need a license to use.  

Scrap kit of choice. I am using the inspired by kit, by Monti 

Font of choice, I am using DJB Carly Sue Got Married

Plugins: no outside plugins


Just remember that my choices of papers and elements is just a suggestion, change it up and make it yours! You don't have to follow mine exactly.

Add a drop shadow of your choosing to tubes & elements throughout. I usually use 1, 1, 50, 5 unless otherwise noted.


Let's get started!

Open a new canvas 850 x 850 pixels with a white background

Copy and paste your tube as a new layer

Now add your elements:
element 17 arrange behind tube
element 15 arrange on bottom left below element 17, 
duplicate twice, mirror one, arrange across bottom so it fills space below element 17

element 13 resize 70% arrange on bottom right, duplicate & mirror
element 11 resize 40% mirror & arrange on bottom left
element 7 arrange behind bridge on right

frame arrange behind bridge and tree
click inside with your magic wand, selections, modify, expand 2, selections, invert
open paper 1 copy and paste as a new layer 
click delete on your keyboard, deselect

element 19 arrange on left behind frame, duplicate, mirror, resize 75%
element 21 arrange at bottom between grass layers
element 10 resize 20% arrange in heart frame


crop and resize
add your copyright and credits as needed
add your text and save

Spring Sweets


Snaggable versions of this tag in my Fotki album

For this tutorial you will need the following:

Paint Shop Pro, I am using PSP X7, you should be able to use any version.

Tube of choice, I am using the artwork of Alicia Mujica which you need a license to use.  

Scrap kit of choice. I am using the inspired by kit for this tube by Ladyhawwk Designs, LHD_IB-AliciaMujica-Exclusive-13A  

Font of choice, I am using Freestyle Script


Plugins: no outside plugins


Just remember that my choices of papers and elements is just a suggestion, change it up and make it yours! You don't have to follow mine exactly.

Add a drop shadow of your choosing to tubes & elements throughout. I usually use 1, 1, 50, 5 unless otherwise noted.


Let's get started!

Open a new canvas 950 x 950 pixels with a white background

Open frame 2 copy and paste as a new layer 
click inside with your magic wand, selections, modify, expand 2, selections, invert
open paper 1 copy and paste as a new layer 
click delete on your keyboard,

Copy and paste your tube as a new layer, 
arrange in your frame
erase the bits that hang out of your frame where you don't want them, deselect

Now add your elements:
element 4 resize 60% arrange on bottom left, duplicate & mirror
element 20 resize 85% arrange in center of two flower bunches
element 10 resize 45% arrange on left, behind other flowers, duplicate & mirror

element 6 resize 55% arrange on right side of teapot
element 17 resize 40% arrange on right side of cupcakes, duplicate, mirror, arrange to left & below teapot

element 16 esize 25% arrange on bottom left

add paper 2 above the white background,
apply your mask, merge group
I resized mine 100%

crop and resize
add your copyright and credits as needed
add your text and save