Pages

Showing posts with label Seasons: Summer. Show all posts

Tuesday, July 10, 2018

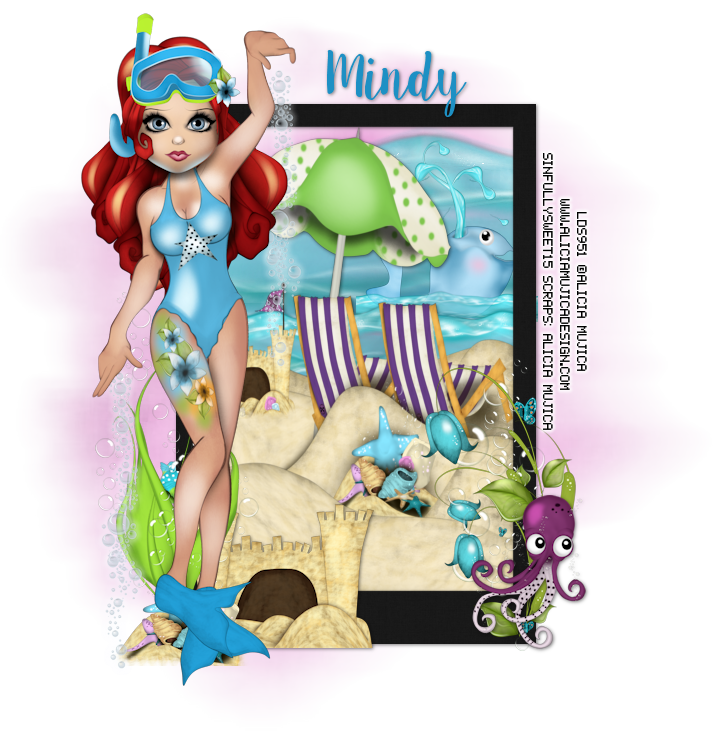
Paradise


For this tutorial you will need the following: Paint Shop Pro, I am using PSP X7, you should be able to use any version.
Tube by Alicia Mujica, called Kate

Scrap kit by Alicia Mujica, called Paradise

Font of choice, I am using Silver Charm

Mask: WSL362 by Weescotslass creations

Plugins: Xero Porcelain


Just remember that my choices of papers and elements is just a suggestion, change it up and make it yours! You don't have to follow mine exactly.

Add a drop shadow of your choosing to tubes & elements throughout. I usually use 1, 1, 50, 5 unless otherwise noted.
 

Let's get started!

Open a new canvas 900 x 900 pixels with a white background
I applied Xero Porcelain with the following settings top to bottom
 to each layer of the tag
50
128
128
0
0
255


Open tag 2b, copy and paste as a new layer, resize 23%

Copy and paste your tube as a new layer, resize by 45% arrange on right
Cluster 5, copy and paste as a new layer, resize 25% arrange across bottom

Octopus 1 copy and paste as a new layer, resize 21% arrange on top left
Bush 3 copy and paste as a new layer, resize 45% arrange on right, below tube layer,
duplicate, resize 45%, mirror, arrange on top of original, duplicate first one again, 
drag to the left


crop and resize
add your copyright and credits as needed
add your text and save

Tuesday, May 15, 2018

Passions


For this tutorial you will need the following:

Paint Shop Pro, I am using PSP X7, you should be able to use any version.

Tube of choice, I am using the artwork of Alex Prihodko which you need a license to use.  

Scrap kit of choice. I am using Passions by Scrappin With Lil Ole Me available at
Designer Scraps
Mystical Scraps
Scraps N Company

Font of choice, I am using Painter


Plugins: Xero Porcelain


Just remember that my choices of papers and elements is just a suggestion, change it up and make it yours! You don't have to follow mine exactly.

Add a drop shadow of your choosing to tubes & elements throughout. I usually use 1, 1, 50, 5 unless otherwise noted.
 

Let's get started!

Open a new canvas 900 x 900 pixels with a white background

Open element 24 copy and paste as a new layer, rotate left 25
click inside with your magic wand, selections, modify, expand 2, selections, invert
open paper 15 copy and paste as a new layer under the frame, click delete on your keyboard

Copy and paste your tube as a new layer, resize by 75%
arrange in your frame
erase the bits that hang out of your frame where you don't want them
apply xero porcelain with default settings on the tube

Now we'll add our elements
element 1 resize 55% arrange on bottom right of frame,
duplicate, mirror, rotate right 25, arrange on left side of frame

element 28 resize 55% mirror, arrange below and right of element 1 on the left, duplicate, mirror,
rotate right 90 arrange below flower on bottom right
element 149 resize 65% arrange on bottom left corner
element 51 resize 45% arrange on bottom right
element 13 resize 45% then 55% arrange between layers on bottom right
element 126 resize 75% arrange below the other layers on the left, 
duplicate, rotate right 90, arrange on bottom right
element 45 arrange on top right, below other layers, duplicate drag down to bottom, merge
together, duplicate, mirror, drag to left

crop and resize add your copyright and credits as needed add your text and save

Tuesday, August 1, 2017

Aloha - Alicia Mujica


**CT ALICIA MUJICA**

New tag using the artwork of Alicia Mujica, the tube is Tube 3 from the Aloha Special edition set.

The kit is also called Aloha available here


These two use just the kit Aloha


This tag is using the kit called Summer Time


Thursday, May 21, 2015

Sunday, May 3, 2015

Lovin Summer


Snaggable versions of this tag in my Fotki album

For this tutorial you will need the following:

Paint Shop Pro, I am using PSP X7, you should be able to use any version.

Tube of choice, I am using the artwork of Ellie Milk (Sunflower tube) 
which you need a license to use.  

Scrap kit of choice. I am using a PTU kit, Summer Lovin by Scrappin With Lil Ole Me 

Font of choice, I am using Al Kisah

Plugins: no outside plugins


Just remember that my choices of papers and elements is just a suggestion, change it up and make it yours! You don't have to follow mine exactly.

Add a drop shadow of your choosing to tubes & elements throughout. I usually use 1, 1, 50, 5 unless otherwise noted.


Let's get started!

Open a new canvas 850 x 850 pixels with a white background

Copy and paste your tube as a new layer, resize by 35%

add your elements:
element 3 arrange below tube, duplicate about 2 times, arrange around below or in front of tube so it looks like she's laying in the grass

element 26 resize 65% arrange behind tube and grass layers
element 59 resize 45% arrange in front of tube on right side
element 36 resize 35% arrange on right

element 28 resize 75% arrange between grass and fence on left
element 61 resize 25% arrange on fence on the right side
element 60 resize 35% arrange on bottom left
element 62 resize 15% arrange on grass on left side

crop and resize
add your copyright and credits as needed
add your text and save

Wednesday, January 28, 2015

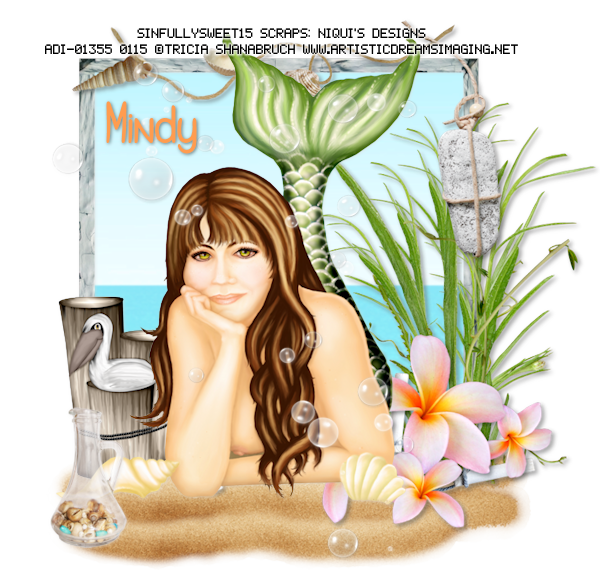
Seaside Daydream


Snaggable versions of this tag in my Fotki album

For this tutorial you will need the following:

Paint Shop Pro, I am using PSP X7, you should be able to use any version.

Tube of choice, I am using the artwork of Tricia Shanabruch (Seaside Daydreams tube)
 which you need a license to use.  

Scrap kit of choice. I am using a PTU kit Beach Time by Niqui's Designs 

Font of choice, I am using Gants De Soie

Plugins: No outside plugins


Just remember that my choices of papers and elements is just a suggestion, change it up and make it yours! You don't have to follow mine exactly.

Add a drop shadow of your choosing to tubes & elements throughout. I usually use 1, 1, 50, 5 unless otherwise noted.


Let's get started!

Open a new canvas 850 x 850 pixels with a white background

Open element 39 copy and paste as a new layer, resize 75%
take your freehand selection tool set on point to point and click on each of the 4 corners
then back to the first corner to double click, selections, invert
open paper 4 copy and paste as a new layer, arrange in the frame
click delete on your keyboard,

Copy and paste your tube as a new layer, resize by 60%
arrange in front of your frame

Now add your elements:
element 12 resize 80% duplicate arrange below the frame
element 59 arrange over your tube, erase the ones that cover her face
element 56 resize 40% arrange between the tube & frame on the left
element 18 resize 30% arrange on left


crop and resize
add your copyright and credits as needed
add your text and save

Tuesday, January 27, 2015

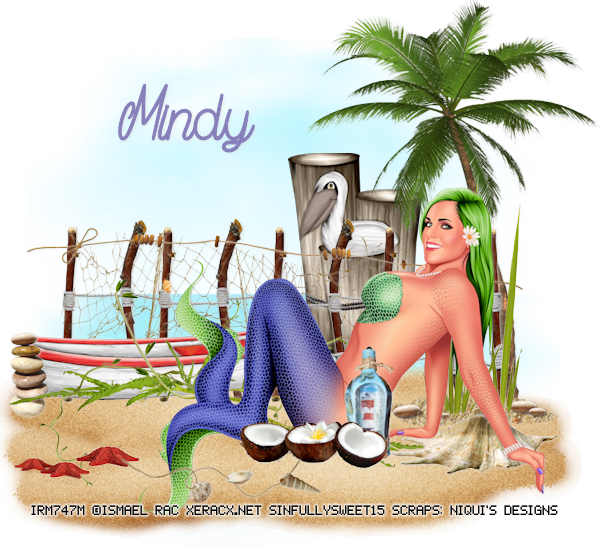
Beach Time


Snaggable versions of this tag in my Fotki album

For this tutorial you will need the following:

Paint Shop Pro, I am using PSP X7, you should be able to use any version.

Tube of choice, I am using the artwork of Ismael Rac (2015 Sea Beauty)
which you need a license to use. This tube was a special buy tube for making a purchase in the store 
and is not regularly available in the store.

Scrap kit of choice. I am using a PTU kit Beach Time by Niqui's Designs 

Font of choice, I am using Magic Bean Salade

Mask of your choice 
(the one I am using is no longer available online)

Plugins: No outside plugins


Just remember that my choices of papers and elements is just a suggestion, change it up and make it yours! You don't have to follow mine exactly.

Add a drop shadow of your choosing to tubes & elements throughout. I usually use 1, 1, 50, 5 unless otherwise noted.


Let's get started!

Open a new canvas 850 x 850 pixels with a white background

Copy and paste paper 4, apply mask, merge group

Now add the following:
element 6 resize 75% arrange at the bottom of the mask
Copy and paste your tube as a new layer, resize by 35% arrange by fence on right

element 12 duplicate twice, mirror one & arrange them around so they're covering the space around the fence

element 28 arrange along the fence near the top
element 5 resize 60% arrange on right side of fence
element 31 arrange along the bottom edge of the fence on the left

element 56 resize 50% arrange behind the fence in the middle area
element 49 mirror & arrange on right, behind tube & fence
element 60 resize 60% arrange between grass and fence on left side

element 40 resize 45% arrange below & right of the tube layer so it looks like it's between her hands
element 24 resize 20% arrange on the left side of the boat
element 23 resize 35% arrange by tube

element 34 resize 35% arrange by tube to the right of the blue bottle
element 33 resize 35% arrange in the sand on the left
element20  resize 35% arrange on the sand


crop and resize
add your copyright and credits as needed
add your text and save

Saturday, January 10, 2015

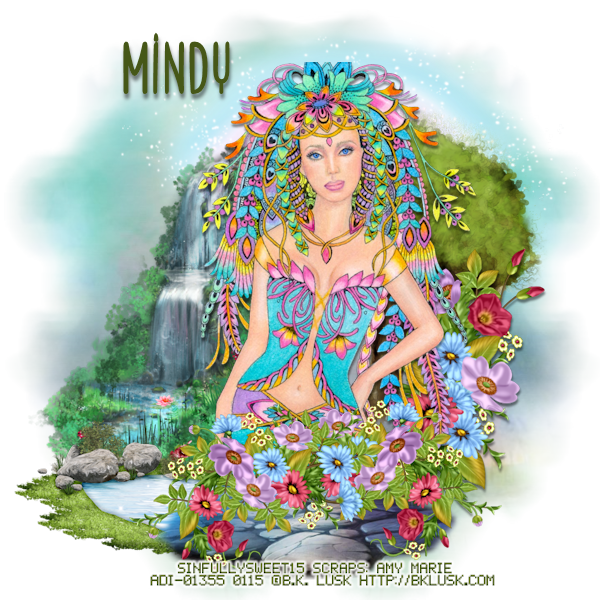
Summer


Snaggable versions of this tag in my Fotki album

For this tutorial you will need the following:

Paint Shop Pro, I am using PSP X7, you should be able to use any version.

Tube of choice, I am using the artwork of B.K. Lusk (Summer tube) which you need a license to use.  
Scrap kit of choice. I am using a PTU kit by Amy Marie called Easterland

Font of choice, I am using Speak Easy

Mask of your choice

Plugins: No outside plugins used


Just remember that my choices of papers and elements is just a suggestion, change it up and make it yours! You don't have to follow mine exactly.

Add a drop shadow of your choosing to tubes & elements throughout. I usually use 1, 1, 50, 5 unless otherwise noted.


Let's get started!

Open a new canvas 850 x 850 pixels with a white background

Copy and paste your tube as a new layer, resize by 55%

Now add the following elements
element 114 arrange behind the tube on the left
element 140 resize 75% mirror & arrange on bottom right, behind the tube
element 137 arrange on bottom right, duplicate & mirror
element 115 arrange below the flower cluster layers at the bottom
element 98 resize 60% arrange above the waterfall layer at the bottom
element 117 arrange behind the tube and flower layers at the top right
element 65 resize 130% arrange behind all the layers at the top

add paper 9above the white background, 
apply your mask, merge group, duplicate & merge together
duplicate again and mirror

crop and resize
add your copyright and credits as needed
add your text and save

Sunday, August 10, 2014

Beach Day


For this tutorial you will need the following:

Paint Shop Pro, I am using PSP X, you should be able to use any version.

Tube of choice, I am using the artwork of Ismael Rac (2014 Sexy Daisy tube) 
which you need a license to use. 

Scrap kit of choice. I am using a PTU kit by Black Widow Creations called Sand in Toes

Font of choice, I am using Acryle Script

Mask of your choice

Plugins: no outside plugins
I do use Eye Candy 4000 Gradient Glow on all my copyrights/credits layers
I do this because some forums will make a .png tag show up with a black background and then your
copyright doesn't show.


Just remember that my choices of papers and elements is just a suggestion, change it up and make it yours! You don't have to follow mine exactly.

Add a drop shadow of your choosing to tubes & elements throughout. I usually use 1, 1, 50, 5 unless otherwise noted.


Let's get started!

Open a new canvas 850 x 850 pixels with a white background

open  copy and paste as a new layer rotate right 90
take your freehand selection tool set on rectangle and draw a rectangle over the center third
of the rectangle, click delete on your keyboard.
selections, select none
now take the selection tool and select around the top section,
edit, cut, edit, paste as a new layer, deselect, now drag the two sections together
so it makes a rectangle, then merge them together
click inside with your magic wand, expand by 2
make a new layer under the frame
open paper 6 make sure you are on the blank layer under the frame, paste into selection
Copy and paste your tube as a new layer, resize by 60%
arrange in your frame
erase the bits that hang out of your frame where you don't want them

Now add your elements:
element 1 arrange on bottom of frame, erase anything outside the frame
element 39 resize  70% arrange on bottom right corner
element 24 resize  45% arrange on bottom right
element 20 resize  75% arrange to the right of the birdhouse
element 3 resize  15% arrange to the right of the birdhouse
element 30 resize  60% arrange on right
element 37 resize  40% arrange to the left of the birdhouse

add paper 9 above the white background, 
apply your mask, merge group

crop and resize
add your copyright and credits as needed
add your text and save

Saturday, August 9, 2014

Alicia Mujica CT Tag Show Off

Both tags were made using Alicia's beautiful Sandi tube available at here store here

This tag was made using Amy Marie's PTU kit Bloom available here


This tag was made using the Mon Cheri D'Amour PTU kit by Dees'Sign Depot available here


Friday, August 8, 2014

Sandi


For this tutorial you will need the following:

Paint Shop Pro, I am using PSP X, you should be able to use any version.

Tube of choice, I am using the artwork of Alicia Mujica (Sandi tube) which you need a license to use. 

Scrap kit of choice. I am using a PTU kit, Color Me Goth by Scrappin With Lil Ole Me

Font of choice, I am using Jon Snow

Plugins: No outside plugins
I do use Eye Candy 4000 Gradient Glow on all my copyrights/credits layers
I do this because some forums will make a .png tag show up with a black background and then your
copyright doesn't show.


Just remember that my choices of papers and elements is just a suggestion, change it up and make it yours! You don't have to follow mine exactly.

Add a drop shadow of your choosing to tubes & elements throughout. I usually use 1, 1, 50, 5 unless otherwise noted.


Let's get started!

Open a new canvas 850 x 850 pixels with a white background

open element 77 copy and paste as a new layer
click inside with your magic wand, selections, modify, expand 2, selections, invert
open paper 18 copy and paste as a new layer
click delete on your keyboard,
copy and paste your tube as a new layer, resize by 45%
arrange in your frame
erase the bits that hang out of your frame where you don't want them

 Now for your elements:
 element 35  mirror arrange on the right side
element 50 resize  75% mirror & arrange on left side of frame

element 53 resize  45% duplicate & mirror one of them, arrange on bottom left
on the other, rotate left 25, and arrange on the bottom right

element 73 resize  45% arrange on right, behind flower cluster on the bottom
element 23 resize  35% arrange on left, below flower cluster on the bottom
element 1 resize  25% arrange to the right of the book stack
element 69 arrange under everything on the left, duplicate & mirror


crop and resize
add your copyright and credits as needed
add your text and save

Thursday, August 7, 2014

Blue Jean Dreams


For this tutorial you will need the following:

Paint Shop Pro, I am using PSP X, you should be able to use any version.

Tube of choice, I am using the artwork of Ismael Rac (SweetNPretty tube) which you need a license to use. 

Scrap kit of choice. I am using a PTU kit by Graphics of Fantasy called Romantic Jeans

Font of choice, I am using One Chance

Plugins: Mura Meister Copies
I do use Eye Candy 4000 Gradient Glow on all my copyrights/credits layers
I do this because some forums will make a .png tag show up with a black background and then your
copyright doesn't show.


Just remember that my choices of papers and elements is just a suggestion, change it up and make it yours! You don't have to follow mine exactly.

Add a drop shadow of your choosing to tubes & elements throughout. I usually use 1, 1, 50, 5 unless otherwise noted.


Let's get started!

Open a new canvas 850 x 850 pixels with a white background

open frame 4 copy and paste as a new layer resize 80%
click inside with your magic wand, selections, modify, expand 2, selections, invert
open paper 6 copy and paste as a new layer
click delete on your keyboard,
Copy and paste your tube as a new layer, resize by 80%

 Now add the following elements:

element 100 resize  55% arrange on bottom right,  duplicate & mirror
element 85 resize  55% arrange behind & above blue flowers on right, duplicate & mirror
element 32 resize  40% arrange just above the frame & tube layer on the right, duplicate & mirror
element 49 resize  35% arrange above the hearts on the right, duplicate & mirror
element 84 resize  35% arrange behind blue flower clusters in the center

Duplicate the blue flower cluster at the bottom (element 100) rotate left 90, arrange just above the frame
on the left, duplicate & mirror

element 117, resize 90% then apply Mura Meister Copies set to encircle with default settings, drag down
so it it below your frame and background paper, then resize 104%
I did the smaller resizing because I noticed when I applied the Mura Copies to it, it cut off one side of the element, so I made it smaller to work with then enlarged it just a little bit after so it showed all the way around

 element 63 resize  45% arrange on bottom right just above the tube, duplicate & mirror, merge together
element 110 resize  21% arrange on right side in the flowers


crop and resize
add your copyright and credits as needed
add your text and save

Saturday, August 2, 2014

Sail 2 Your Dreams


For this tutorial you will need the following:

Paint Shop Pro, I am using PSP X, you should be able to use any version.

Tube of choice, I am using the artwork of Alicia Mujica (Julia tube) which you need a license to use. 

Scrap kit of choice. I am using a PTU kit, Sail Away by Amy Marie

Font of choice, I am using Break the Silence

Mask: Vix Big Mask 1

Plugins: No outside plugins
I do use Eye Candy 4000 Gradient Glow on all my copyrights/credits layers
I do this because some forums will make a .png tag show up with a black background and then your
copyright doesn't show.


Just remember that my choices of papers and elements is just a suggestion, change it up and make it yours! You don't have to follow mine exactly.

Add a drop shadow of your choosing to tubes & elements throughout. I usually use 1, 1, 50, 5 unless otherwise noted.


Let's get started!

Open a new canvas 950 x 850 pixels with a white background

open element 120 copy and paste as a new layer resize 120%
click inside with your magic wand, add a new layer below the frame, 
open paper 5, make sure you're on the new layer, paste into selection, deselect

Copy and paste your tube as a new layer, resize by 40%, arrange over on the right

 Add the following elements:
 element 21 arrange on left side below frame & paper, duplicate & mirror
element 87 mirror & arrange on the left side of the frame
element 44 resize  55% arrange on bottom right edge of frame
element 48 resize  55% arrange on right side
element 50 arrange behind clock on right side
element 52 arrange in front of the clock & other element on right
element 60 resize  45% arrange on the left side of the tube
element 73 resize  25% arrange on top of the rocks
element 62 resize  25% arrange by clock on the right
element 22 resize  35% arrange on right in front of the other elements
element 3 arrange on the top left


add paper 10 above the white background, resize 120%
apply your mask, merge group

crop and resize
add your copyright and credits as needed
add your text and save

Thursday, July 31, 2014

Beach Life


For this tutorial you will need the following:

Paint Shop Pro, I am using PSP X, you should be able to use any version.

Tube of choice, I am using the artwork of Alicia Mujica (Julia tube) which you need a license to use. 

Scrap kit of choice. I am using Island Adventures, a PTU kit by Scrappin With Lil Ole Me

Font of choice, I am using Peanut Butter Cookies

Plugins: No outside plugins used
I do use Eye Candy 4000 Gradient Glow on all my copyrights/credits layers
I do this because some forums will make a .png tag show up with a black background and then your
copyright doesn't show.


Just remember that my choices of papers and elements is just a suggestion, change it up and make it yours! You don't have to follow mine exactly.

Add a drop shadow of your choosing to tubes & elements throughout. I usually use 1, 1, 50, 5 unless otherwise noted.


Let's get started!

Open a new canvas 950 x 950 pixels with a white background

Copy and paste your tube as a new layer, resize by 50%

Add the following elements:
element 77 arrange below tube, duplicate & mirror, resize duplicate 110%
arrange a little bit higher than the original and drag below it. You might want to take your eraser tool with the hardness set around 10 and erase some of the sand so it blends together better, duplicate this layer and flip
drag it so it shows below the original layer

element 60 resize  90% arrange so it is going between the two sand layers
element 54 arrange on right side in front of fence
element 86 resize  40% arrange in front of tree on right
element 51 resize  55% arrange between & behind trees on the right
element 96 resize  45% arrange on left side
element 35 resize  30% arrange by your tube
element 72 arrange behind all the other layers on the left, duplicate & mirror
element 85 arrange in front of 72, duplicate & mirror
element 62 resize  40% arrange between the trees and the fence layer on the left
element 98 resize  20% arrange by tube on right side
element 115 resize  25% arrange on left
element 116 resize  35% arrange behind element 115
element 24 resize  35% arrange on bottom right
element 70 resize  20% arrange by tube in front of her drink
element 65 resize  20% arrange on bottom left
element 27 resize 20% arrange on bottom, duplicate & resize 65%, mirror, arrange on the right side of the original

crop and resize
add your copyright and credits as needed
add your text and save

Monday, July 28, 2014

Island Adventure


For this tutorial you will need the following:

Paint Shop Pro, I am using PSP X, you should be able to use any version.

Tube of choice, I am using the artwork of Alicia Mujica (CDO Exclusive 5A) 
which you need a license to use.
This tube is a CDO Exclusive tube, one of several she has there. You can ONLY find it at CDO.
Here is where you can find all her CDO exclusives.
You can find all her other tubes at her site here

Scrap kit of choice. I am using a PTU kit by Scrappin' With Lil Ole Me called Island Adventures

Font of choice, I am using Aligot de Mirabelle

Plugins: No outside plugins used
I do use Eye Candy 4000 Gradient Glow on all my copyrights/credits layers
I do this because some forums will make a .png tag show up with a black background and then your
copyright doesn't show.


Just remember that my choices of papers and elements is just a suggestion, change it up and make it yours! You don't have to follow mine exactly.

Add a drop shadow of your choosing to tubes & elements throughout. I usually use 1, 1, 50, 5 unless otherwise noted.


Let's get started!

Open a new canvas 850 x 850 pixels with a white background

Copy and paste your tube as a new layer
leave in the center

Add the following elements
element 68 resize  45% arrange on the right side of the tube
element 67 resize  40% & them by 75% arrange to the left of the sand castle

element 77 resize  90% arrange below the other sand layers
change the hue to 28 saturation to 75

element 91 arrange beneath sand

element 60 resize  90% arrange below the other layers, drag down to where the bottom of the posts is even with the bottom of the grass

element 18 resize  65% arrange behind the fence layer
element 72 arrange on top of the other water layer, duplicate & mirror
element 85 arrange behind the other water layers in the center
element 20 resize  35% arrange on the bottom right
element 49 resize  55% arrange on bottom left on top of other water layers, duplicate & mirror
element 96 resize  75% arrange on left by the end of the fence, duplicate & mirror, drag up
element 89 resize  50% arrange between the sand & fence layer on the left, duplicate & mirror
element 73 resize  25% arrange on bottom left
element 30 resize  25% arrange by fence on left side
element 65 resize  25% arrange in front of the sand/bottle element


crop and resize
add your copyright and credits as needed
add your text and save

Friday, July 25, 2014

Summer Beach 2


For this tutorial you will need the following:

Paint Shop Pro, I am using PSP X, you should be able to use any version.

Tube of choice, I am using the artwork of Creative Tubes by Crys (Summer) 
which you need a license to use. 

Scrap kit of choice. I am using a PTU kit by Graphics of Fantasy called The Little Mermaid
Here's a link to her blog to see where she sells her kits

Font of choice, I am using Rosewood

Mask DVBMask109 by Designs by Vaybs

Plugins: no outside plugins
I do use Eye Candy 4000 Gradient Glow on all my copyrights/credits layers
I do this because some forums will make a .png tag show up with a black background and then your
copyright doesn't show.


Just remember that my choices of papers and elements is just a suggestion, change it up and make it yours! You don't have to follow mine exactly.

Add a drop shadow of your choosing to tubes & elements throughout. I usually use 1, 1, 50, 5 unless otherwise noted.


Let's get started!

Open a new canvas 850 x 850 pixels with a white background

open frame 2 copy and paste as a new layer
click inside with your magic wand, selections, modify, expand 2 make a new layer below the frame layer
make sure you are on that layer, open paper 2 copy and past into selection
Copy and paste your tube as a new layer, resize by 45%
arrange in your frame
erase the bits that hang out of your frame where you don't want them

 add the following elements:
 element 60 arrange on the left, duplicate & mirror, merge together
element 5 resize  55% arrange on the right
element 44 resize  80% arrange behind chest
element 8 resize  65% mirror & arrange next to chest
element 27 resize  65% arrange between boat and chest on bottom right
element 8 resize  75% arrange on bottom left
element 6 arrange just above the sand layers, so it shows underneath the other layers

copy & paste paper 1 as a new layer above the white background
resize 125% and apply your mask
merge group

crop and resize
add your copyright and credits as needed
add your text and save

Thursday, July 24, 2014

Sandi's Garden


For this tutorial you will need the following:

Paint Shop Pro, I am using PSP X, you should be able to use any version.

Tube of choice, I am using the artwork of Alicia Mujica (Sandi tube) which you need a license to use. 

Scrap kit of choice. I am using a PTU kit by Graphics of Fantasy called Crystal Magic Forrest
available at Graphics of Fantasy Store and Pics For Design 

Font of choice, I am using Rosewood

Mask: DVB80  by Vabys

Plugins: No outside plugins
I do use Eye Candy 4000 Gradient Glow on all my copyrights/credits layers
I do this because some forums will make a .png tag show up with a black background and then your
copyright doesn't show.


Just remember that my choices of papers and elements is just a suggestion, change it up and make it yours! You don't have to follow mine exactly.

Add a drop shadow of your choosing to tubes & elements throughout. I usually use 1, 1, 50, 5 unless otherwise noted.


Let's get started!

Open a new canvas 850 x 850 pixels with a white background

open frame 4 copy and paste as a new layer
click inside with your magic wand, selections, modify, expand 2, selections, invert
open paper 3 copy and paste as a new layer
click delete on your keyboard,
Copy and paste your tube as a new layer, resize by 50%
arrange in your frame
erase the bits that hang out of your frame where you don't want them
deselect

 Now add your elements:
 element 85 resize  55% arrange on bottom right
element 95 resize  75% twice arrange across the top, duplicate & mirror, merget together, duplicate & flip
element 30 resize  60% arrange above 95 on the right side, duplicate, mirror
element 14 resize  25% arrange just left of the chest
element 119 resize  45% arrange on the right, behind the chest
 element 15 resize  20% arrange in front of the chest
element 93 resize  45% arrange behind cat on the left, duplicate, mirror, arrange behind the chest

add paper 4 above the white background
apply your mask, merge group, resize 110%

crop and resize
add your copyright and credits as needed
add your text and save

Tuesday, July 22, 2014

Sorbet Dreams


For this tutorial you will need the following:

Paint Shop Pro, I am using PSP X, you should be able to use any version.

Tube of choice, I am using the artwork of Alehandra Vanhek (Dolly tube) which you need a license to use. 

Scrap kit of choice. I am using a PTU kit, Sorbet Dreams by Scrappin With Lil Ole Me

Font of choice, I am using Aligot de Mirabelle

Mask: WSL84, masks on are the right sidebar part way down the page

Plugins: No outside plugins
I do use Eye Candy 4000 Gradient Glow on all my copyrights/credits layers
I do this because some forums will make a .png tag show up with a black background and then your
copyright doesn't show.


Just remember that my choices of papers and elements is just a suggestion, change it up and make it yours! You don't have to follow mine exactly.

Add a drop shadow of your choosing to tubes & elements throughout. I usually use 1, 1, 50, 5 unless otherwise noted.


Let's get started!

Open a new canvas 850 x 850 pixels with a white background

open element 107 copy and paste as a new layer
click inside with your magic wand, selections, modify, expand 2, selections, invert
open paper 16 copy and paste as a new layer
click delete on your keyboardCopy and paste your tube as a new layer, resize by 55%
arrange in your frame
erase the bits that hang out of your frame where you don't want them

 Add the following elements:
element 26 resize  45% duplicate & mirror arrange one on the bottom in the center, the other on the right side up a little way from the bottom

element 43 resize  40% arrange at the bottom of the set of flowers on the right side

element 72 resize  40% arrange above & behind flowers on the right side
duplicate, resize 85%, mirror, arrange between apples and flowers on the bottom center]

element 47 resize  40% arrange below apples

element 33 resize  55% mirror arrange between layers so it shows over the apples and out beyond the flowers in the center bottom

element 30 resize  65% arrange between flower layers on the right side, duplicate, mirror, flip, resize 75%
arrange between the flower and fruits on the bottom further to the left

element 87 resize  40% arrange on left side under the flowers & vine
element 88 resize  30% arrange in front of the flowers on the bottom center area
element 110 resize  20% arrange over the apple box
element 13 resize  25% arrange over the top of the flower on the right side at the top

click on one of the flower clusters on the right side, duplicate & mirror, arrange
so it's behind the apple basket

add paper 8 above the white background
apply your mask and merge group


crop and resize
add your copyright and credits as needed
add your text and save

Saturday, July 19, 2014

Garden Melody


For this tutorial you will need the following:

Paint Shop Pro, I am using PSP X, you should be able to use any version.

Tube of choice, I am using the artwork of Ninaste - Beehive Studio (Melody tube) which you need a license to use.  This tube has several layers with different color choices and matching assessories.

Scrap kit of choice. I am using a PTU kit by Tiny Turtle Designs called Melody 1 made to match this layer of the tube. This kit is really nice because it's got floral element and ocean elements so you can make your tag with either theme and have plenty of each type of element.

Font of choice, I am using Peanut Butter Cookies

Mask of your choice - a floral mask is nice for this one
(sorry, I couldn't find a name of who made this one or any TOU in this file to figure out where I got it, so I can't give you a link to get it)

Plugins: No outside plugins
I do use Eye Candy 4000 Gradient Glow on all my copyrights/credits layers
I do this because some forums will make a .png tag show up with a black background and then your
copyright doesn't show.


Just remember that my choices of papers and elements is just a suggestion, change it up and make it yours! You don't have to follow mine exactly.

Add a drop shadow of your choosing to tubes & elements throughout. I usually use 1, 1, 50, 5 unless otherwise noted.


Let's get started!

Open a new canvas 1000 x 1000 pixels with a white background

open element 2 copy and paste as a new layer 
click inside with your magic wand, selections, modify, expand 2, selections, invert
open paper 1 copy and paste as a new layer
click delete on your keyboard,
Open your close up tube, copy and paste as a new layer arrange in the frame, click delete on your keyboard
change the blend mode to Luminance(L) drop the opacity to around 45
deselect
 Copy and paste your tube as a new layer, resize by 60%

 Add the following elements
element 10 arrange behind tube on left
element 9 arrange behind element 10 on the right
element 21 resize  45% arrange by the tube on the bottom

element 24, mirror, rotate left 30 arrange on left side, erase the curly part at the bottom,
mirror, merge the 2 together

 element 4 arrange at top below the blue leaves layer
element 102 resize  60% arrange on top right, duplicate & mirror
element 66 resize  55% arrange on bottom right, below the leaves, rotate right 20
element 166 resize  60% arrange below element 66 and slightly to the right
element 28 resize  45% arrange by tube at the bottom
 element 142 resize  35% arrange by barrel
element 25 resize  35% mirror arrange on bottom right
element 29 resize  20% arrange over little bird cage
 element 7 resize  35% rotate right 20 arrange so it looks like they're coming out of the basket
element 57 resize  30% arrange at the top in the flowers

add paper 1 above the white background layer resize 140%
apply your mask

crop and resize
add your copyright and credits as needed
add your text and save