Pages

Friday, January 30, 2015

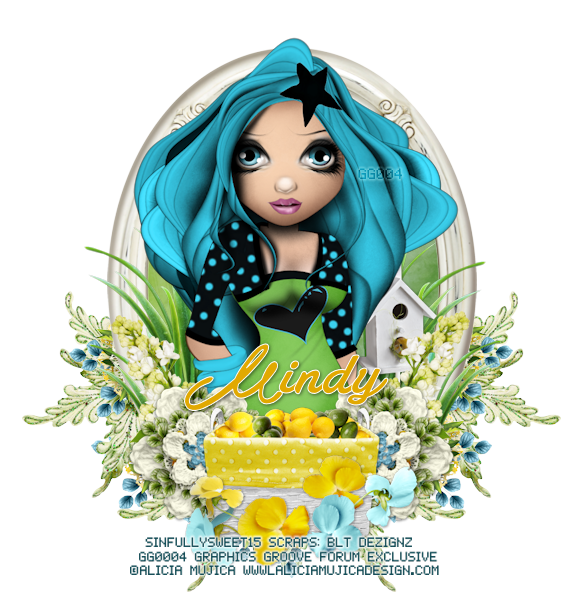
Citrus Bleu


Snaggable versions of this tag in my Fotki album

For this tutorial you will need the following:

Paint Shop Pro, I am using PSP X7, you should be able to use any version.

Tube of choice, I am using the artwork of Alicia Mujica which you need a license to use.  
This tube is a Graphics Groove Forum Exclusive commission by Alicia and not available in her store, 

Scrap kit of choice. I am using a PTU kit by BLT Dezignz called Citrus Bleu 

Font of choice, I am using Atelas


Plugins: No outside plugins


Just remember that my choices of papers and elements is just a suggestion, change it up and make it yours! You don't have to follow mine exactly.

Add a drop shadow of your choosing to tubes & elements throughout. I usually use 1, 1, 50, 5 unless otherwise noted.


Let's get started!

Open a new canvas 950 x 950 pixels with a white background

Open frame 2 copy and paste as a new layer, resize 35%
click inside with your magic wand, selections, modify, expand 2, selections, invert
open paper 2, resize to about 700 x 700 pixels copy and paste as a new layer 
click delete on your keyboard,

Copy and paste your tube as a new layer, resize by 75%
arrange in your frame
erase the bits that hang out of your frame where you don't want them


Now add your elements:
citrus basket  resize 18% arrange bottom center
flower 5 resize 12% arrange bottom to the right of the basket, duplicate & mirror
flower 2 resize 12% arrange in front of basket at the bottom

grass resize 20% arrange between tube and frame on right, duplicate & mirror
duplicate each one and resize 75%, drag the duplicates down and over slightly

branch 2 resize 9% arrange on the left just above the grass, duplicate & mirror
birdhouse resize 10% arrange below the brand layer on the right

flower 1 resize 15% duplicate 5 times arrange under the frame, around the outside just so it shows
beyond the other elements

flower 8 resize 25% arrange below flower 1 on left, duplicate, drag down, duplicate each of those
then mirror them


crop and resize
add your copyright and credits as needed
add your text and save

Thursday, January 29, 2015

Yours


Snaggable versions of this tag in my Fotki album

For this tutorial you will need the following:

Paint Shop Pro, I am using PSP X7, you should be able to use any version.

Tube of choice, I am using the artwork of Fedor (Sophia tube) which you need a license to use.  

Scrap kit of choice. I am using a PTU kit, Baby I'm Yours by Scrappin With Lil Ole Me 

Font of choice, I am using Scriptina

Plugins: No outside plugins used


Just remember that my choices of papers and elements is just a suggestion, change it up and make it yours! You don't have to follow mine exactly.

Add a drop shadow of your choosing to tubes & elements throughout. I usually use 1, 1, 50, 5 unless otherwise noted.


Let's get started!

Open a new canvas 950 x 950 pixels with a white background

Copy and paste your tube as a new layer, resize by 40% leave in the center of your canvas

Now add the following elements:
element 7 arrange to the top left side of the tube, behind it
element 13  resize 55% arrange to the right of the heart & behind it
element 20 resize 60% arrange below the heart, between it and the tube

element 16 resize 45% arrange behind tube on right side
element 23 resize 75% arrange behind all the other layers on the top left
element 28 resize 60% arrange behind tube on top right

element 43 resize 60% arrange at top behind other layers
element 52 arrange below the tube at the bottom
element 18 resize 55% mirror & arrange behind tube, just above the other heart

element 4 resize 40% arrange in front of tube by her legs
element 45 resize 50% arrange behind all the layers on the left middle area
element 105 arrange between the mauve colored heart and the blue hearts

element 24 resize 50% arrange between blue card and white flower on top left, 
duplicate twice, move one down on the left and one down on the right

element 26 resize 45% arrange between blue & mauve hearts, duplicate, drag down and right
element 11 resize 40% arrange by tube


crop and resize
add your copyright and credits as needed
add your text and save
KennyK CT Tag Show Off


New tutorial using the artwork of KennyK Individual Tube 33-3
Snag tags in my Fotki album

Wednesday, January 28, 2015

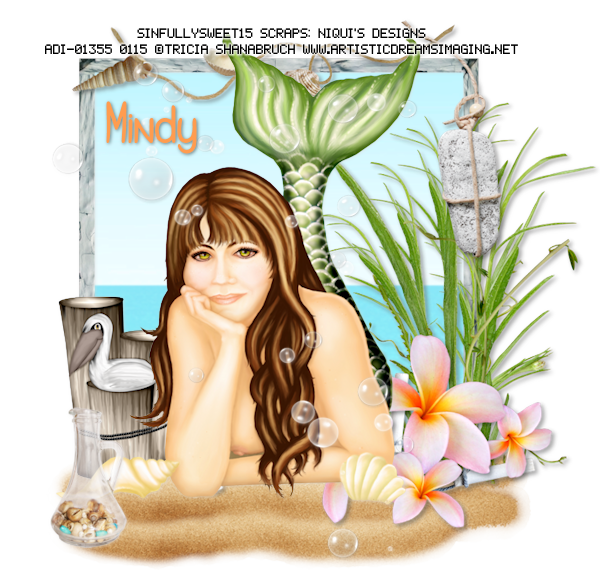
Seaside Daydream


Snaggable versions of this tag in my Fotki album

For this tutorial you will need the following:

Paint Shop Pro, I am using PSP X7, you should be able to use any version.

Tube of choice, I am using the artwork of Tricia Shanabruch (Seaside Daydreams tube)
 which you need a license to use.  

Scrap kit of choice. I am using a PTU kit Beach Time by Niqui's Designs 

Font of choice, I am using Gants De Soie

Plugins: No outside plugins


Just remember that my choices of papers and elements is just a suggestion, change it up and make it yours! You don't have to follow mine exactly.

Add a drop shadow of your choosing to tubes & elements throughout. I usually use 1, 1, 50, 5 unless otherwise noted.


Let's get started!

Open a new canvas 850 x 850 pixels with a white background

Open element 39 copy and paste as a new layer, resize 75%
take your freehand selection tool set on point to point and click on each of the 4 corners
then back to the first corner to double click, selections, invert
open paper 4 copy and paste as a new layer, arrange in the frame
click delete on your keyboard,

Copy and paste your tube as a new layer, resize by 60%
arrange in front of your frame

Now add your elements:
element 12 resize 80% duplicate arrange below the frame
element 59 arrange over your tube, erase the ones that cover her face
element 56 resize 40% arrange between the tube & frame on the left
element 18 resize 30% arrange on left


crop and resize
add your copyright and credits as needed
add your text and save

Tuesday, January 27, 2015

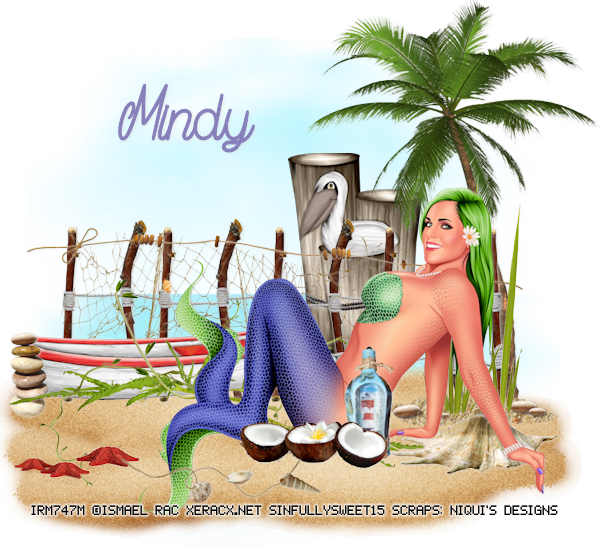
Beach Time


Snaggable versions of this tag in my Fotki album

For this tutorial you will need the following:

Paint Shop Pro, I am using PSP X7, you should be able to use any version.

Tube of choice, I am using the artwork of Ismael Rac (2015 Sea Beauty)
which you need a license to use. This tube was a special buy tube for making a purchase in the store 
and is not regularly available in the store.

Scrap kit of choice. I am using a PTU kit Beach Time by Niqui's Designs 

Font of choice, I am using Magic Bean Salade

Mask of your choice 
(the one I am using is no longer available online)

Plugins: No outside plugins


Just remember that my choices of papers and elements is just a suggestion, change it up and make it yours! You don't have to follow mine exactly.

Add a drop shadow of your choosing to tubes & elements throughout. I usually use 1, 1, 50, 5 unless otherwise noted.


Let's get started!

Open a new canvas 850 x 850 pixels with a white background

Copy and paste paper 4, apply mask, merge group

Now add the following:
element 6 resize 75% arrange at the bottom of the mask
Copy and paste your tube as a new layer, resize by 35% arrange by fence on right

element 12 duplicate twice, mirror one & arrange them around so they're covering the space around the fence

element 28 arrange along the fence near the top
element 5 resize 60% arrange on right side of fence
element 31 arrange along the bottom edge of the fence on the left

element 56 resize 50% arrange behind the fence in the middle area
element 49 mirror & arrange on right, behind tube & fence
element 60 resize 60% arrange between grass and fence on left side

element 40 resize 45% arrange below & right of the tube layer so it looks like it's between her hands
element 24 resize 20% arrange on the left side of the boat
element 23 resize 35% arrange by tube

element 34 resize 35% arrange by tube to the right of the blue bottle
element 33 resize 35% arrange in the sand on the left
element20  resize 35% arrange on the sand


crop and resize
add your copyright and credits as needed
add your text and save

Monday, January 26, 2015

At The Movies


Snaggable versions of this tag in my Fotki album

For this tutorial you will need the following:

Paint Shop Pro, I am using PSP X7, you should be able to use any version.

Tube of choice, I am using the artwork of Cuddly Rigor Mortis-Individual Tube 66-3
which you need a license to use.  

Scrap kit of choice. I am using a PTU kit by Ladyhawwk Designs LHD_IB-CuddlyRigorMortis-IndividualTube-66-3 

Font of choice, I am using Playbill

Mask: DVB109

Plugins: No outside plugins


Just remember that my choices of papers and elements is just a suggestion, change it up and make it yours! You don't have to follow mine exactly.

Add a drop shadow of your choosing to tubes & elements throughout. I usually use 1, 1, 50, 5 unless otherwise noted.


Let's get started!

Open a new canvas 850 x 850 pixels with a white background

Copy and paste your tube as a new layer

add paper 2 above the white background
apply your mask, merge group

add the following:
element 13 arrange on the top to the right of & behind your tube
element 11 resize 85%  mirror & arrange on the right
element 24 resize 40% mirror & arrange
element resize % arrange behind the tube layer to the left of it
element 2 resize 40% arrange on the right side of your tube
element 7 resize 60% arrange
element 3 resize 60% rotate left 20 arrange between tube and movie camera
element 4 resize 55% arrange over the elements on the right
element 12 resize 45% arrange on the top left
word art resize 30% arrange on top of the tube
element 1 resize 55% arrange just above the mask in the center

crop and resize
add your copyright and credits as needed
add your text and save
Socialite


For this tutorial you will need the following:

Paint Shop Pro, I am using PSP X7, you should be able to use any version.

Tube of choice, I am using the artwork of KennyK-Individual Tube 33-3
which you need a license to use.  

Scrap kit of choice. I am using a PTU kit, Boudoir, by Mellie Beans 

Font of choice, I am using Scriptina

Mask of your choice

Plugins: no outside plugins used


Just remember that my choices of papers and elements is just a suggestion, change it up and make it yours! You don't have to follow mine exactly.

Add a drop shadow of your choosing to tubes & elements throughout. I usually use 1, 1, 50, 5 unless otherwise noted.


Let's get started!

Open a new canvas 650 x 650 pixels with a white background

Open element 26 copy and paste as a new layer, resize 45%
click inside with your magic wand, selections, modify, expand 2, selections, invert
open paper 6 copy and paste as a new layer 
click delete on your keyboard

Copy and paste your tube as a new layer
arrange in your frame
erase the bits that hang out of your frame where you don't want them

add the following elements:
element 29 resize 39% rotate left 26 arrange on bottom left
element 36 resize 40% arrange on the right side of the fan
element 16 resize 25% arrange on the right side of the bottle
element 14 resize 20% arrange on the right side of element 16
element 8 resize 20% arrange to the right of the bottle in front of the fan
element 22 resize 20% arrange between the elements
element 21 resize 45% arrange at the bottom

add a paper above the white background
apply your mask & merge group

crop and resize
add your copyright and credits as needed
add your text and save
Sunday, January 25, 2015

Diamonds


Snaggable versions of this tag in my Fotki album

For this tutorial you will need the following:

Paint Shop Pro, I am using PSP X7, you should be able to use any version.

Tube of choice, I am using the artwork of Ismael Rac which you need a license to use.  
This tube was a special buy and is not in the store

Scrap kit of choice. I am using a PTU kit, Diamonds Are Forever by BLT Dezigns 

Font of choice, I am using DJB Carly Sue Got Married

Plugins: No outside plugins


Just remember that my choices of papers and elements is just a suggestion, change it up and make it yours! You don't have to follow mine exactly.

Add a drop shadow of your choosing to tubes & elements throughout. I usually use 1, 1, 50, 5 unless otherwise noted.


Let's get started!

Open a new canvas 850 x 850 pixels with a white background

Open frame 2 copy and paste as a new layer
Take your freehand selections tool and click around the edge of the frame selections, invert
open paper 11 copy and paste as a new layer 
click delete on your keyboard,

Copy and paste your tube as a new layer, resize by 55%
arrange in your frame on the right side so she's sitting on the frame

Copy and paste your tube as a new layer again
arrange in your frame on the left side, click delete on your keyboard
change the blend mode to Luminance(L), drop the opacity to about 50

Now add your elements:
flower 6 resize 55% arrange on bottom right corner, duplicate 3 times
arrange across bottom of frame, mirror 1 and put it on bottom left corner

brad, duplicate 2x arrange below flowers, one on each side and on near the center
deco arrange below the frame & background layers


crop and resize
add your copyright and credits as needed
add your text and save

Saturday, January 24, 2015

Alicia Mujica CT Tag Show Off


Snag tags  can be found in my Fotki album


Both tags were made using Tiny Turtle Designs kit Valentine's Sweets

Izzy


Snaggable versions of this tag in my Fotki album

For this tutorial you will need the following:

Paint Shop Pro, I am using PSP X7, you should be able to use any version.

Tube of choice, I am using the artwork of Heather Valentin (Izzybella tube)
which you need a license to use.  

Scrap kit of choice. I am using a PTU kit Lucky in Love by Hania's Design 

Font of choice, I am using Speak Easy


Plugins: No outside plugins used


Just remember that my choices of papers and elements is just a suggestion, change it up and make it yours! You don't have to follow mine exactly.

Add a drop shadow of your choosing to tubes & elements throughout. I usually use 1, 1, 50, 5 unless otherwise noted.


Let's get started!

Open a new canvas 850 x 850 pixels with a white background

Copy and paste paper 10 above the white background
apply your mask, merge group

add the following:
element 15 arrange on bottom right, duplicate & drag to the left

Copy and paste your tube as a new layer, resize by 15% arrange near the bottom center

element 39 resize 70% arrange between the grass and background layers
element 30 resize 80% arrange on the right behind the fence, erase part of the fence on this layer that sticks out too far

element 77 resize 40% arrange across the fence on the right
element 40  resize 75% arrange behind tower to the left
element 2 resize 50%  mirror & arrange on the left side
element 54 resize 30% arrange to the left of the tube
element 60 resize 30% arrange by harp, duplicate & drag to the far right

crop and resize
add your copyright and credits as needed
add your text and save

Friday, January 23, 2015

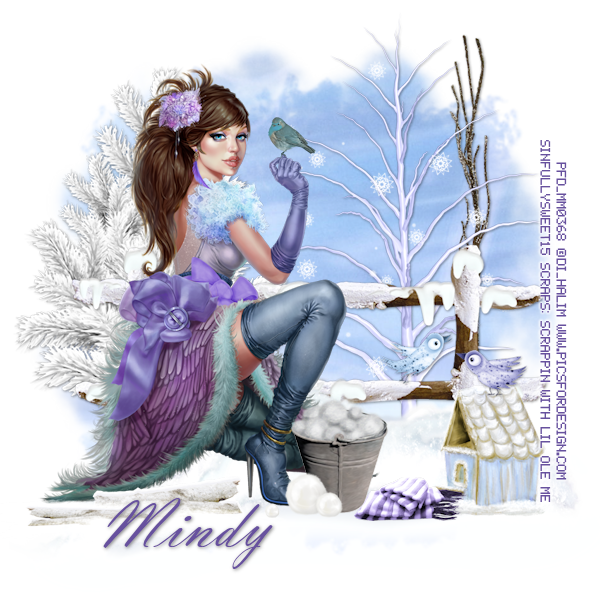
Winter Song


Snaggable versions of this tag in my Fotki album

For this tutorial you will need the following:

Paint Shop Pro, I am using PSP X7, you should be able to use any version.

Tube of choice, I am using the artwork of Di_Halim (Winter Bird tube, a PFD exclusive club tube) which you need a license to use.  

Scrap kit of choice. I am using a PTU kit, Winter's Storm by Scrappin With Lil Ole Me

Font of choice, I am using Vladimir Script


Plugins: No outside plugins


Just remember that my choices of papers and elements is just a suggestion, change it up and make it yours! You don't have to follow mine exactly.

Add a drop shadow of your choosing to tubes & elements throughout. I usually use 1, 1, 50, 5 unless otherwise noted.


Let's get started!

Open a new canvas 850 x 850 pixels with a white background

Open paper 11, copy and paste as a new layer
apply your mask, merge group, duplicate, merge together, resize 85%

add the following:
element 14 resize 85% arrange just below the center of the canvas

copy and paste your tube, resize 45% arrange on the left side of the fence

element 50 resize 75% arrange between mask layer and fence
element 33 arrange between the tube and fence layer
element 35 resize 45% arrange in front of the tube

element 120 arrange behind the fence on the right
element 21 use your freehand selection tool and go around the sticks on the right side, copy and paste as a new layer resize 65% arrange behind element 120

element 48 arrange on the left behind the tube and fence
element 49 resize 35% arrange on the right side of your tube
element 94 resize 25% arrange on the right side of the pail
element 29 resize 35% arrange on the bottom right
element 10 resize 35% arrange on the fence and birdhouse
element 37 resize 20% arrange between birdhouse and pail

crop and resize
add your copyright and credits as needed
add your text and save

Wednesday, January 21, 2015

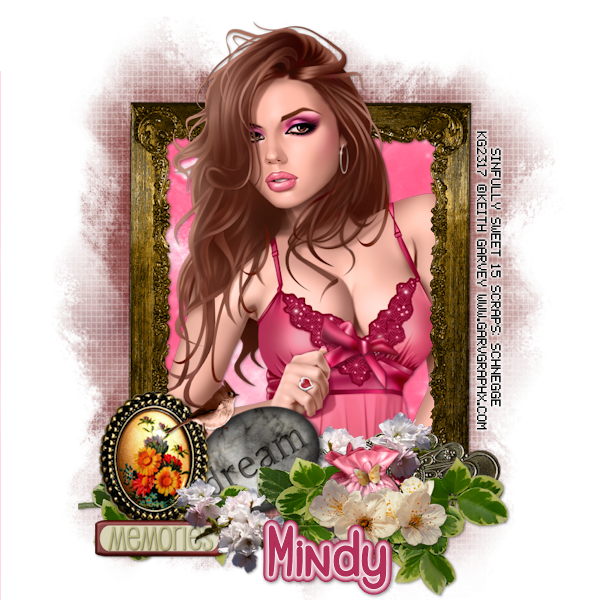
Dreaming


Snaggable versions of this tag in my Fotki album

For this tutorial you will need the following:

Paint Shop Pro, I am using PSP X7, you should be able to use any version.

Tube of choice, I am using the artwork of Keith Garvey (Mila tube) which you need a license to use.  

Scrap kit of choice. I am using a PTU kit Ginny by Schnegge Scraps  

Font of choice, I am using Gants de Soie


Plugins: No outside plugins used


Just remember that my choices of papers and elements is just a suggestion, change it up and make it yours! You don't have to follow mine exactly.

Add a drop shadow of your choosing to tubes & elements throughout. I usually use 1, 1, 50, 5 unless otherwise noted.


Let's get started!

Open a new canvas 850 x 850 pixels with a white background

Open element 28 copy and paste as a new layer, resize 75%, rotate right 90 
click inside with your magic wand, selections, modify, expand 2, selections, invert
open paper 4 copy and paste as a new layer 
click delete on your keyboard,

Copy and paste your tube as a new layer,
arrange in your frame
erase the bits that hang out of your frame where you don't want them

Now add your elements:
element 9 resize 65% arrange on the bottom left corner
element 18 resize 75% arrange across the bottom of the frame
element 59 resize 60% rotate left 30 arrange between the other two elements 

element 12 arrange below the brooch layer and above the other two at the bottom
element 4 resize 75% duplicate & arrange the duplicate on the right, below the other layers
resize the original 75% again and erase the stem, arrange below the brooch

element 10 resize 45% arrange on the leaves on the bottom right
element 46 resize 35% arrange on top of the two elements on the left
element 30 resize 35% arrange between the flowers on the bottom
element 45 resize 35% arrange on the bottom left


crop and resize
add your copyright and credits as needed
add your text and save

Tuesday, January 20, 2015

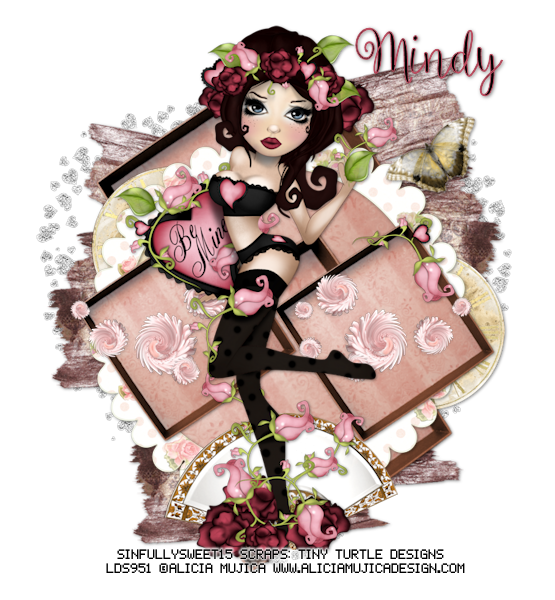
Divine Valentine


Snaggable versions of this tag in my Fotki album

For this tutorial you will need the following:

Paint Shop Pro, I am using PSP X7, you should be able to use any version.

Tube of choice, I am using the artwork of Alicia Mujica (Eva tube) which you need a license to use.  

Scrap kit of choice. I am using a PTU kit by Tiny Turtle Designs called Delicate Valentine 

Font of choice, I am using Ballerina Script


Plugins: No outside plugins


Just remember that my choices of papers and elements is just a suggestion, change it up and make it yours! You don't have to follow mine exactly.

Add a drop shadow of your choosing to tubes & elements throughout. I usually use 1, 1, 50, 5 unless otherwise noted.


Let's get started!

Open a new canvas 850 x 850 pixels with a white background

Copy and paste your tube as a new layer, resize by 35%
arrange in the center of the frame

Now add your scrap elements:
element 9 resize 65% rotate left 35 arrange behind tube near the top
duplicate, resize 65%, drag down, duplicate and drag to the left
duplicate the large one, drag down the the bottom

element 63 resize 80% arrange on top right, duplicate & mirror, drag down a little on the left
duplicate that one and drag to the bottom right

element 25 arrange between the small squares and  the large ones
element 21 arrange just above the white background
element 36 resize 35% arrange below the square elements on the right side, duplicate, drag up to the top left side

element 79 resize 25% rotate left 35 arrange on the top right
element 81 resize 50% arrange behind tube at the bottom
element 80 resize 40% arrange behind tube in center, duplicate & mirror

crop and resize
add your copyright and credits as needed
add your text and save

Monday, January 19, 2015

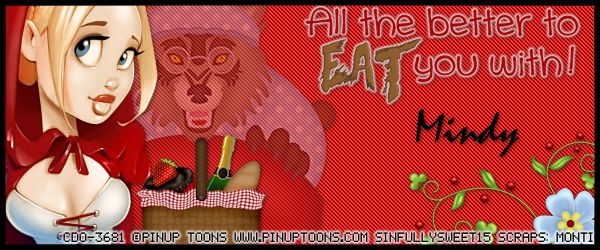
Little Red


For this tutorial you will need the following:

Paint Shop Pro, I am using PSP X7, you should be able to use any version.

Tube of choice, I am using the artwork of PinUp Toons (Individual tube 194-2)
which you need a license to use.  

Scrap kit of choice. I am using  a PTU kit by Monti called ScrapMonti_IB-PinUpToons-194-2

Font of choice, I am using Mistral

Plugins: 
Penta Jeans
Alien Skin Eye Candy 4000 Gradient Glow


Just remember that my choices of papers and elements is just a suggestion, change it up and make it yours! You don't have to follow mine exactly.

Add a drop shadow of your choosing to tubes & elements throughout. I usually use 1, 1, 50, 5 unless otherwise noted.


Let's get started!

Banner

Open a new canvas 600 x 250 pixels with a white background (or whatever size your forum allows)
add a new raster layer, fill with #ab0301
apply Penta Jeans with the default settings

Copy and paste your tube as a new layer, arrange on the left side of your frame

add the following elements:
element 19 resize 60% arrange behind and to the right of your tube, drop opacity to about 35
word art resize 40% arrange at the top right, add gradient glow of 2 white
element 8 resize 50% arrange in bottom right corner
element 23 resize 30% arrange in bottom right hand corner on top of the vine layer
element 15 resize 25% arrange in front of the wolf element

Make sure you are on the white background layer
Make your crop tool active, click on the crop to layer opaque, it should be on the top right side of your workspace toolbar

Still on the white background layer, selections, select all, modify, set selection borders, set it at 5 and click ok
add a new rater layer above all the other layers, flood fill with black

add your copyright and credits as needed
add your text and save

Avatar

Open a new canvas 200 x 200 or whatever size you need for your forum

copy and paste the red background from your tag
copy and paste your tube
copy and paste the picnic basket

crop the avatar the same way you did the banner
add the border the same way you did on the banner, but make the width at 3 pixels instead of 5

add your copyright and credits as needed
add your text and save
Hugs & Kisses


Snaggable versions of this tag in my Fotki album

For this tutorial you will need the following:

Paint Shop Pro, I am using PSP X7, you should be able to use any version.

Tube of choice, I am using the artwork of Alicia Mujica CDO Exclusive tube 10C 
which you need a license to use.  
This tube is a CDO Exclusive tube and is only available at CDO not at Alicia's Store

Scrap kit of choice. I am using a PTU kit by Ladyhawwk Designs, 

Font of choice, I am using Pristina


Plugins: No outside plugins used


Just remember that my choices of papers and elements is just a suggestion, change it up and make it yours! You don't have to follow mine exactly.

Add a drop shadow of your choosing to tubes & elements throughout. I usually use 1, 1, 50, 5 unless otherwise noted.


Let's get started!

Open a new canvas 850 x 850 pixels with a white background

Open frame 1 copy and paste as a new layer resize 80%
click inside with your magic wand, selections, modify, expand 2, selections, invert
open paper 2 copy and paste as a new layer 
click delete on your keyboard,

Copy and paste your tube as a new layer
arrange in your frame
erase the bits that hang out of your frame where you don't want them
deselect

Now add your elements:

element 8 resize 50% arrange on the bottom center of frame
element 31 resize 35% arrange behind element 8 on right, duplicate & mirror
element 20 resize 35% arrange between elements 8 & 31 on right, duplicate, mirror

element 16 resize 60% rotate right 45 arrange below the black flower layer on the right
element 3 resize 90%  rotate left 35 arrange below the black flower layer on the left
element 19 resize 40% arrange between hearts in the bottom center area

element 17 resize 55% flip , duplicate and arrange both under the other layers along the side
element 29 resize 45% arrange at the bottom
element 28 resize 50% duplicate, rotate one 35 left arrange on top left
rotate the other right 35 arrange on top right

Copy and paste paper 6 above the white background
apply your mask and merge group
duplicate and merge together

crop and resize
add your copyright and credits as needed
add your text and save
Saturday, January 17, 2015

Alicia Mujica CT Tag Show Off & Snaggable FB Timeline

The two tags below are made with the cute All You Need Is Love scrap kit
and tube of the same name by Alicia Mujica
You can get the tube here
the scrap kit here
or you can get them in a bundle with other tubes here

These first two are tags and you can find snag tags for them here in my Fotki
The last one is a snaggable timeline cover for Facebook, just click on it to get the full size cover


Click this banner to get the full size one for your facebook


Beach Life


Snaggable versions of this tag in my Fotki album

For this tutorial you will need the following:

Paint Shop Pro, I am using PSP X7, you should be able to use any version.

Tube of choice, I am using the artwork of Elias Chatzoudis (Sirena tube)
which you need a license to use.  

Scrap kit of choice. I am using a PTU kit by BLT Dezignz called Nautical Stuffies 

Font of choice, I am using Sweet Memories

Plugins: No outside plugins used


Just remember that my choices of papers and elements is just a suggestion, change it up and make it yours! You don't have to follow mine exactly.

Add a drop shadow of your choosing to tubes & elements throughout. I usually use 1, 1, 50, 5 unless otherwise noted.


Let's get started!

Open a new canvas 850 x 850 pixels with a white background

Open frame 1 copy and paste as a new layer resize 17%
click inside with your magic wand, selections, modify, expand 2 
add a new raster layer below the frame
Resize the paper to about 600 x 600 pixels, make sure you are on the new raster layer
copy and paste the paper into selection then deselect

Copy and paste your tube as a new layer
arrange on the left side of the frame

now add your elements:
sign resize 10% arrange on the top center part of the frame
fish resize 10% arrange inside the frame 
seaweed resize 14% arrange on left side of  frame, duplicate, resize 75%, mirror

coral resize 14% arrange in bottom right side of the frame, duplicate & mirror
sand resize 20% arrange in front of tube, duplicate twice, mirror one, arrange around tube
deco resize 13% arrange between sand and frame on bottom right

sea urchins resize 15% mirror & arrange in front of your tube
flower 7 resize 8% arrange between sea urchins and tube duplicate, mirror, resize 75% arrange by other flower to the left
flower 8 resize 7% arrange below and left of the purple flower, duplicate, drag to the left


crop and resize
add your copyright and credits as needed
add your text and save
Friday, January 16, 2015

Love Is Timeline Cover


Snaggable Facebook timeline cover, click on image to get full size

Absolutely NO changes may be made to this timeline cover.

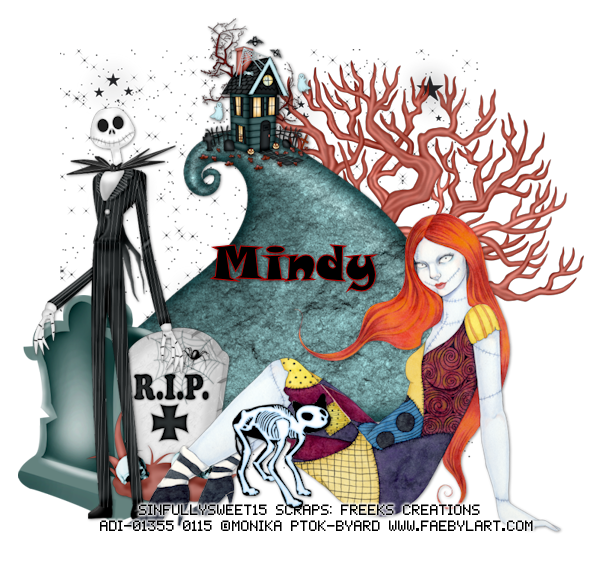
Sally


For this tutorial you will need the following:

Paint Shop Pro, I am using PSP X7, you should be able to use any version.

Tube of choice, I am using the artwork of Monika Ptok-Byard (Sally tube)
which you need a license to use.  

Scrap kit of choice. I am using a PTU kit, Jack's Back by Freek's Creations  

Font of choice, I am using Snap ITC


Plugins: No outside plugins


Just remember that my choices of papers and elements is just a suggestion, change it up and make it yours! You don't have to follow mine exactly.

Add a drop shadow of your choosing to tubes & elements throughout. I usually use 1, 1, 50, 5 unless otherwise noted.


Let's get started!

Open a new canvas 850 x 850 pixels with a white background

Copy and paste your tube as a new layer, resize by 45% arrange at the bottom

add your elements:

hill, arrange behind your tube on the left
house resize 45% arrange on top of the hill
tombstone resize 50% arrange between tube and hill
tombstone 2 resize 75% arrange to the left of and behind first tombstone
tree arrange behind hill on the right
stars arrange behind all the other layers at the top
Jack arrange on left in front of tombstones
cat resize 40% arrange by Sally


crop and resize
add your copyright and credits as needed
add your text and save
Wednesday, January 14, 2015

In Love


Snaggable versions of this tag in my Fotki album

For this tutorial you will need the following:

Paint Shop Pro, I am using PSP X7, you should be able to use any version.

Tube of choice, I am using the artwork of Alicia Mujica (In Love 2015 tube)
which you need a license to use.  

Scrap kit of choice. I am using a PTU kit by Scrappin With Lil Ole Me called Red Velvet Kisses  

Font of choice, I am using Sucker Font

Mask: WSL84

Plugins: No outside plugins used


Just remember that my choices of papers and elements is just a suggestion, change it up and make it yours! You don't have to follow mine exactly.

Add a drop shadow of your choosing to tubes & elements throughout. I usually use 1, 1, 50, 5 unless otherwise noted.


Let's get started!

Open a new canvas 850 x 850 pixels with a white background

Open element 61 copy and paste as a new layer
click inside with your magic wand, selections, modify, expand 2, selections, invert
open paper 20 copy and paste as a new layer 
click delete on your keyboard, deselect

Copy and paste your tube as a new layer, resize by 35%
arrange in the center area of your frame

Add your elements:
element 11 resize 65% arrange on top left side of frame, duplicate, mirror 
arrange on the bottom right side of the frame

element 74 resize 25% arrange on the bottom right
element 12 resize 25% arrange to the left of the cup
element 43 resize 35% arrange on the left side of the tube
element 16 resize 35% arrange behind tube layer on the left
element 60 resize 35% arrange above the roses on the right

Add paper 1 above the white background
apply your mask and merge group

crop and resize
add your copyright and credits as needed
add your text and save
Tuesday, January 13, 2015

I Love You


Snaggable versions of this tag in my Fotki album

For this tutorial you will need the following:

Paint Shop Pro, I am using PSP X7, you should be able to use any version.

Tube of choice, I am using the artwork of Alicia Mujica (In Love tube 2015) which you need a license to use.  

Scrap kit of choice. I am using a PTU kit I Love You by Niqui's Designs 

Font of choice, I am using Sucker Font


Plugins: No outside plugins used


Just remember that my choices of papers and elements is just a suggestion, change it up and make it yours! You don't have to follow mine exactly.

Add a drop shadow of your choosing to tubes & elements throughout. I usually use 1, 1, 50, 5 unless otherwise noted.


Let's get started!

Open a new canvas 950 x 950 pixels with a white background

Open element 9 copy and paste as a new layer, resize 85%
click inside with your magic wand, selections, modify, expand 2, selections, invert
open paper 6 copy and paste as a new layer 
click delete on your keyboard, deselect

Copy and paste your tube as a new layer, resize by 35%
arrange in between the two frames

Add your elements:
element 1 arrange across the top of the frames, behind the tube layer
element 56 resize 45% arrange on the bottom left side of the frame
element 20 resize 80% arrange behind roses and tube on bottom left
element 12 resize 50% rotate left 20 arrange on bottom right corner
element 25 resize 50% arrange between heart & tube on bottom right

element 28 arrange just below the tube layer
make your background white and your foreground #b10000 
now take your color replacer tool and go over element 28 to change the white letters to the red

add paper 13 above the white background
apply your mask, merge group
duplicate & merge together


crop and resize
add your copyright and credits as needed
add your text and save
Saturday, January 10, 2015

Summer


Snaggable versions of this tag in my Fotki album

For this tutorial you will need the following:

Paint Shop Pro, I am using PSP X7, you should be able to use any version.

Tube of choice, I am using the artwork of B.K. Lusk (Summer tube) which you need a license to use.  
Scrap kit of choice. I am using a PTU kit by Amy Marie called Easterland

Font of choice, I am using Speak Easy

Mask of your choice

Plugins: No outside plugins used


Just remember that my choices of papers and elements is just a suggestion, change it up and make it yours! You don't have to follow mine exactly.

Add a drop shadow of your choosing to tubes & elements throughout. I usually use 1, 1, 50, 5 unless otherwise noted.


Let's get started!

Open a new canvas 850 x 850 pixels with a white background

Copy and paste your tube as a new layer, resize by 55%

Now add the following elements
element 114 arrange behind the tube on the left
element 140 resize 75% mirror & arrange on bottom right, behind the tube
element 137 arrange on bottom right, duplicate & mirror
element 115 arrange below the flower cluster layers at the bottom
element 98 resize 60% arrange above the waterfall layer at the bottom
element 117 arrange behind the tube and flower layers at the top right
element 65 resize 130% arrange behind all the layers at the top

add paper 9above the white background, 
apply your mask, merge group, duplicate & merge together
duplicate again and mirror

crop and resize
add your copyright and credits as needed
add your text and save

Thursday, January 8, 2015

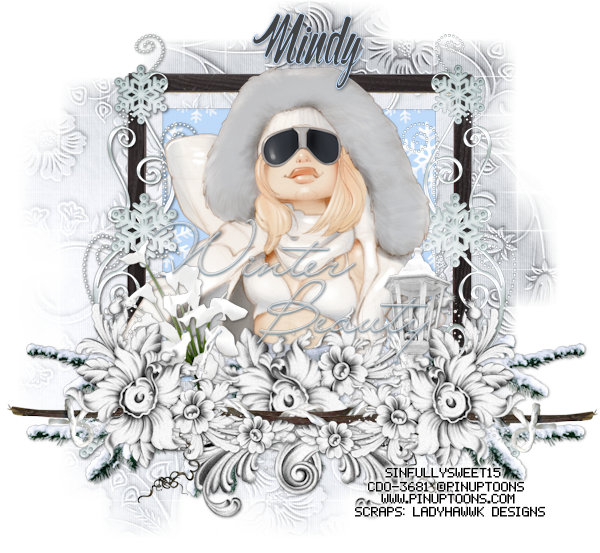
Winter Beauty


Snaggable versions of this tag in my Fotki album

For this tutorial you will need the following:

Paint Shop Pro, I am using PSP X7, you should be able to use any version.

Tube of choice, I am using the artwork of Pinup Toons tube 210-1 which you need a license to use.  

Scrap kit of choice. I am using the PinUp Toons Package 210 scrapkit by Ladyhawwk Designs 

Font of choice, I am using The Cinthia Edito

Mask: WSL Mask 84 Links for masks are on the right sidebar

Plugins: No outside plugins


Just remember that my choices of papers and elements is just a suggestion, change it up and make it yours! You don't have to follow mine exactly.

Add a drop shadow of your choosing to tubes & elements throughout. I usually use 1, 1, 50, 5 unless otherwise noted.


Let's get started!

Open a new canvas 950 x 950 pixels with a white background

Open frame 5 copy and paste as a new layer, resize 85% 
Take your magic wand with the tolerance set at 3, feather at 0
click on the lighter colored part of the frame, selections, modify, expand 1
selections, invert, copy and paste paper 4 as a new layer, click delete on your keyboard
deselect and merge the two layers together

click inside the frame with your magic wand, selections, modify, expand 2, selections, invert
open paper 2 copy and paste as a new layer 
click delete on your keyboard, leave selected

Copy and paste your close up tube as a new layer, resize by 90%
arrange in your frame
erase the bits that hang out of your frame where you don't want them


Now you can add your elements:
element 9 resize 50% duplicate twice,arrange one on the bottom left, mirror one, arrange it on the bottom right, rotate the 3rd left 45, arrange it below the other two layers in the center
resize the two on the outside corners 90%

element 8 resize 70% arrange below the flowers in the center
element 39 resize 75% arrange below the flowers on the left, duplicate & mirror, erase
what shows in the bottom center

element 40 rotate left 90 arrange on the right side, duplicate & mirror, arrange between the frame and the tube layers

element 47 resize 75% arrange below the two outside flower clusters, but above the middle one
on the left side, duplicate and mirror

element 37 resize 45% arrange below the flower cluster layer on the bottom right corner
element 38 resize 55% arrange on the bottom left corner under the flower cluster layer
word art resize 85% make sure to add your drop shadow or it does show well, arrange across the tube and just above the flowers in the center area

add paper 4 above the white background, resize 115% so it fits the canvas better,
apply your mask, merge group
duplicate about 5 times and merge together so it's darker
flip it

crop and resize
add your copyright and credits as needed
add your text and save