Pages

Showing posts with label Holiday: New Year. Show all posts

Friday, December 26, 2014

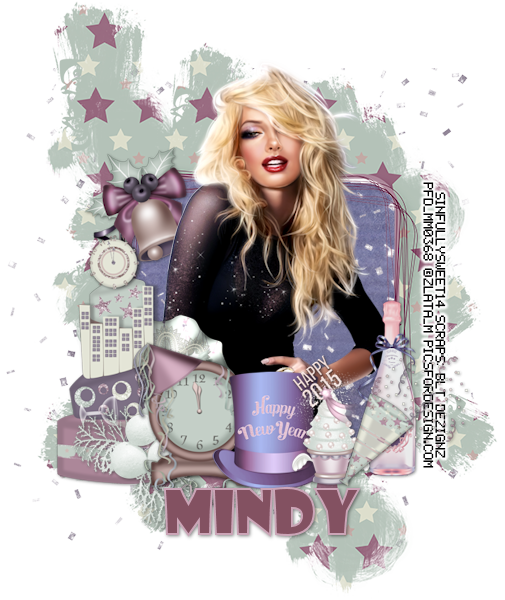
2015


Snaggable versions of this tag in my Fotki album

For this tutorial you will need the following:

Paint Shop Pro, I am using PSP X7, you should be able to use any version.

Tube of choice, I am using the artwork of Zlata M (New Year Night tube)
which you need a license to use.  

Scrap kit of choice. I am using a PTU kit, 2015, by BLT Dezignz 

Font of choice, I am using Showcard Gothic

Plugins: No outside plugins used


Just remember that my choices of papers and elements is just a suggestion, change it up and make it yours! You don't have to follow mine exactly.

Add a drop shadow of your choosing to tubes & elements throughout. I usually use 1, 1, 50, 5 unless otherwise noted.


Let's get started!

Open a new canvas 850 x 850 pixels with a white background

Open frame 2 copy and paste as a new layer resize 85%
click inside with your magic wand, selections, modify, expand 2, selections, invert
open paper 11 copy and paste as a new layer 
click delete on your keyboard

Copy and paste your tube as a new layer, resize by 75%
arrange in your frame
erase the bits that hang out of your frame where you don't want them

add your elements:
cake resize 50% arrange on bottom left corner
clock 2 resize 40% arrange to the right of the cake
bow 1 resize 35% arrange above & behind the other 2 elements
hat resize 30% arrange to the right of the clock
cupcake resize 30% arrange to the right of the hat
noise blower resize30 % arrange to the right of cupcake
branch 2 resize 40% arrange between cake and clock
bell resize 30% arrange between tube and frame layer on the top left
champagne resize 30% arrange behind noise blower on bottom right corner
confetti resize 75% arrange between frame and background paper

crop and resize
add your copyright and credits as needed
add your text and save

Wednesday, December 24, 2014

Let's Celebrate


Snaggable versions of this tag in my Fotki album

For this tutorial you will need the following:

Paint Shop Pro, I am using PSP X7, you should be able to use any version.

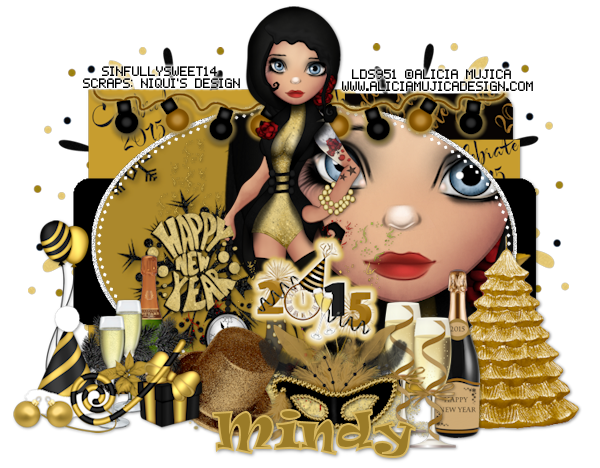
Tube of choice, I am using the artwork of  Alicia Mujica which you need a license to use.  
This tube is from the December 2014 Sweet Pack.

Scrap kit of choice. I am using a PTU kit by Niqui's Designs called Celebrate 2015 


Font of choice, I am using Ravie


Plugins: Alien Skin Eye Candy 4000 Gradient Glow (optional for lights)


Just remember that my choices of papers and elements is just a suggestion, change it up and make it yours! You don't have to follow mine exactly.

Add a drop shadow of your choosing to tubes & elements throughout. I usually use 1, 1, 50, 5 unless otherwise noted.


Let's get started!

Open your template, shift D to duplicate and close the original
Delete the following layers: CR, 1, 11, 12, 13
Change your canvas size to 850 x 700 so you have room to work

Fill the layers with papers, to do this make sure the layer you want to fill has been clicked on in your layer palette. 
Click outside the shape with your magic wand,  open your paper, copy and paste as a new layer, 
click delete on your keyboard.
Delete the original template layer

Some layers, like the frames, you may just want to flood fill with a color from your kit. To do this, click on the layer in your layer palette, add another raster layer above it,
click outside the shape with your magic wand, and flood fill it with your color
Delete the original template layer

I used the following papers for each layer
layer 2 use paper 6
layer 3 use paper 6
layer 4 use paper 7
layer 5 use paper 7
layer 6 use paper 11
layer 7 leave as is
layer 8 use paper 15
layer 9  leave as is
layer 10 leave as is


Make the big oval layer in the center active, click outside it with your magic wand
copy and paste your tube, arrange it in the oval on the left side, click delete on your keyboard

Paste your tube again, resize 28% arrange in the middle of the template

Now add your elements:
element 28 resize 45% arrange on bottom left side
element 25 resize 45% arrange on bottom right side
element 46 resize 30% arrange to the left of the tree

element 45 resize 33% arrange to the left of the champagne bottle
element 53 resize 25% arrange to the right of the element cluster on the left side
element 6 resize 35% arrange bottom center

element 9 resize 45% arrange across top
apply gradient glow 5 fat, color #d5b55f

element 21 resize 40% arrange on top left,below the template layers,
duplicate & mirror

element 2 resize 25% arrange at the bottom
apply gradient glow width 10 fat, white and #d5b55f


crop and resize
add your copyright and credits as needed
add your text and save
Sunday, December 21, 2014

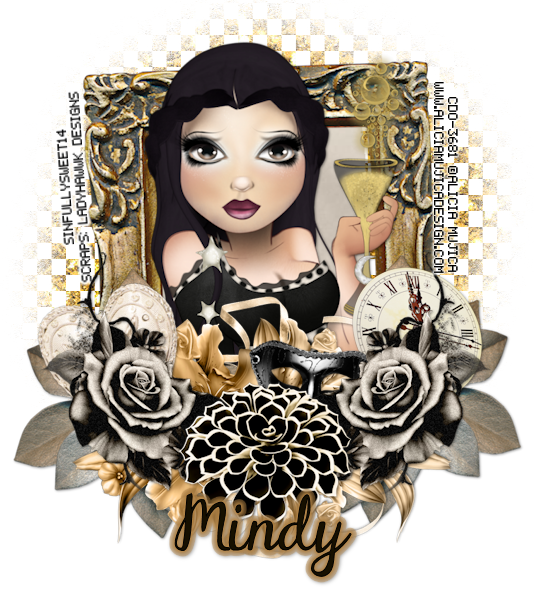
Celebrate 2015


Snaggable versions of this tag in my Fotki album

For this tutorial you will need the following:

Paint Shop Pro, I am using PSP X7, you should be able to use any version.

Tube of choice, I am using the artwork of Alicia Mujica CDO Exclusive Tube 9A which you need a license to use.  This tube is not available at her store here, only at CDO where it is linked above.

Scrap kit of choice. I am using a PTU scrap kit by Ladyhawwk Designs, IB-AliciaMujica Exclusive Tube 9A

Font of choice, I am using DJB Dear St. Nick

Mask DBV109

Plugins:  Alien Skin Eye Candy 4000 Gradient Glow (optional for text)


Just remember that my choices of papers and elements is just a suggestion, change it up and make it yours! You don't have to follow mine exactly.

Add a drop shadow of your choosing to tubes & elements throughout. I usually use 1, 1, 50, 5 unless otherwise noted.


Let's get started!

Open a new canvas 950 x 950 pixels with a white background

open frame 1 copy and paste as a new layer resize 95%
click inside with your magic wand, selections, modify, expand 2, selections, invert
open paper 7 copy and paste as a new layer 
click delete on your keyboard,

Copy and paste your close up tube as a new layer, arrange in the frame

add your elements:
element 21 resize 85% then 90% arrange on bottom right, duplicate & mirror
element 31 resize 50% arrange on bottom right, duplicate & mirror
element 32 resize 50% arrange across the bottom below the black flower layers

element 14 resize 50% arrange on the right, behind the black flower
element 18 resize 65% rotate left 30 arrange below black flower layer on left
duplicate the gold colored flower cluster, then flip it and drag down so it shows below element 18
element 1 resize 45% arrange below black flowers on bottom right

add paper 5 above the white background
apply mask and merge group

crop and resize
add your copyright and credits as needed
add your text and save
Friday, December 27, 2013

2014


For this tutorial you will need the following:

Paint Shop Pro, I am using PSP X, you should be able to use any version.

Tube of choice, I am using the artwork of Ismael Rac (2013 Sexy Tuxedo) which you need a license to use.  

Scrap kit of choice. I am using a PTU kit, 2014, by Amy Marie 

Font of choice, I am using Whisper


Plugins: Eye Candy 4000 Gradient Glow
I do use Eye Candy 4000 Gradient Glow on all my copyrights/credits layers
I do this because some forums will make a .png tag show up with a black background and then your
copyright doesn't show. 


Just remember that my choices of papers and elements is just a suggestion, change it up and make it yours! You don't have to follow mine exactly.

Add a drop shadow of your choosing to tubes & elements throughout. I usually use 1, 1, 50, 5 unless otherwise noted.


Let's get started!

Open a new canvas 850 x 850 pixels with a white background

Add the following:
104, place to the right, duplicate, mirror, drag the copies over each other so the 
buildings somewhat line up over each other

105, arrange behind 104 layer on the right, duplicate & mirror

Copy and paste your tube, resize 45% arrange on the left

115 arrange on bottom left
76 resize 55%  arrange on bottom right
122 resize 55% arrange behind city on left
18 resize 35% arrange on bottom right
109 arrange across buildings, add gradient glow of 3, white
126 resize 45% arrange on bottom left
125 resize 80%  arrange above cityscape
124  arrange on top right behind the city, duplicate & mirror

crop and resize
add your copyright and credits as needed
add your text and save
I added a gradient glow of #705524 with a width of 5 to my name text

Thursday, December 26, 2013

Happy 2014


For this tutorial you will need the following:

Paint Shop Pro, I am using PSP X, you should be able to use any version.

Tube of choice, I am using the artwork of Ismael Rac (New Year Girl) which you need a license to use.  

Scrap kit of choice. I am using a PTU kit, Happy New Years 2 by Amy Marie  

Font of choice, I am using Pea Mel's In Between

Plugins: No outside plugins
I do use Eye Candy 4000 Gradient Glow on all my copyrights/credits layers
I do this because some forums will make a .png tag show up with a black background and then your
copyright doesn't show. 


Just remember that my choices of papers and elements is just a suggestion, change it up and make it yours! You don't have to follow mine exactly.

Add a drop shadow of your choosing to tubes & elements throughout. I usually use 1, 1, 50, 5 unless otherwise noted.


Let's get started!

Open a new canvas 850 x 850 pixels with a white background

open 72 copy and paste as a new layer resize 90%
click inside with your magic wand, selections, modify, expand 2, selections, invert
open paper 4 copy and paste as a new layer click delete on your keyboard
Copy & paste your tube, arrange in frame, erase the parts you don't want sticking out over the frame

Add the following elements 
element 27 resize 75%  arrange across center of circle frame & tube
element 87 resize 55% arrange on bottom left
element 18 resize 50% arrange on bottom left
element 77 resize 60% arrange on left
element 89 resize 60% arrange on right
element 79 resize 60% arrange on bottom right
element 84 rotate left 90 arrange on bottom
element 78 arrange on top left, duplicate & mirror


crop and resize
add your copyright and credits as needed
add your text and save

Ring It In


For this tutorial you will need the following:

Paint Shop Pro, I am using PSP X, you should be able to use any version.

Tube of choice, I am using the artwork of Alicia Mujica (Happy New Year) which you need a licence to use

Scrap kit of choice, I am using a PTU kit by Alicia Mujica (My Best Wishes) 

Font of choice, I am using Segoe Script

Plugins: No outside plugins
I do use Eye Candy 4000 Gradient Glow on all my copyrights/credits layers
I do this because some forums will make a .png tag show up with a black background and then your
copyright doesn't show. 


Just remember that my choices of papers and elements is just a suggestion, change it up and make it yours! You don't have to follow mine exactly.

Add a drop shadow of your choosing to tubes & elements throughout. I usually use 1, 1, 50, 5 unless otherwise noted.


Let's get started!

Open a new canvas 850 x 850 pixels with a white background

Copy and paste Reloj, resize  60%
Copy and paste your tube, resize 50% arrange to the left of the clock
Copy and paste Estrellas deco, resize 50% arrange behind clock layer
Copy and paste 2 of the balloons, resize one 30% and the other 25% arrange on right 
Copy and paste brindis, resize 35% arrange by tube
Copy and paste one of the banners, resize 45% arrange across bottom of clock


crop and resize
add your copyright and credits as needed
add your text and save

Wednesday, December 25, 2013

Happy New Year


For this tutorial you will need the following:

Paint Shop Pro, I am using PSP X, you should be able to use any version.

Tube of choice, I am using the artwork of Alicia Mujica (Happy New Year) which you need a license to use.  
Scrap kit of choice. I am using  a PTU kit, My Best Wishes also by Alicia Mujica 

Font of choice, I am using Pea Shelby Raye


Plugins: No outside plugins used
I do use Eye Candy 4000 Gradient Glow on all my copyrights/credits layers
I do this because some forums will make a .png tag show up with a black background and then your
copyright doesn't show. 


Just remember that my choices of papers and elements is just a suggestion, change it up and make it yours! You don't have to follow mine exactly.

Add a drop shadow of your choosing to tubes & elements throughout. I usually use 1, 1, 50, 5 unless otherwise noted.


Let's get started!

Open a new canvas 850 x 850 pixels with a white background

Copy & paste your tube on your canvas, resize 50%
Copy and paste Corazon Negro (the black heart) resize 45% place behind the tube and to the right
Copy and paste Reloj (the clock) resize 35% place on bottom right, behind tube
Copy & paste Oso (bear), resize 35% place on bottom left
Copy & paste  Pointsetia Oro (yellow flower) resize 35% place behind bear
Copy & paste bolamarron resize 25% place behind & between bear and tube
Copy & paste Muerdago Oro, resize 235% place below tube on right, duplicate, mirror drag over to right
and slightly overlap them. Merge the two together, duplicate & mirror
Copy & paste Brindis, resize 25% arrange to the right of the clock

Open paper 3b, paste as a new layer above the white background
apply your mask

crop and resize
add your copyright and credits as needed
add your text and save