Pages

Showing posts with label BLT Dezignz CT. Show all posts

Saturday, February 7, 2015

Fleurs


Snaggable versions of this tag in my Fotki album

For this tutorial you will need the following:

Paint Shop Pro, I am using PSP X7, you should be able to use any version.

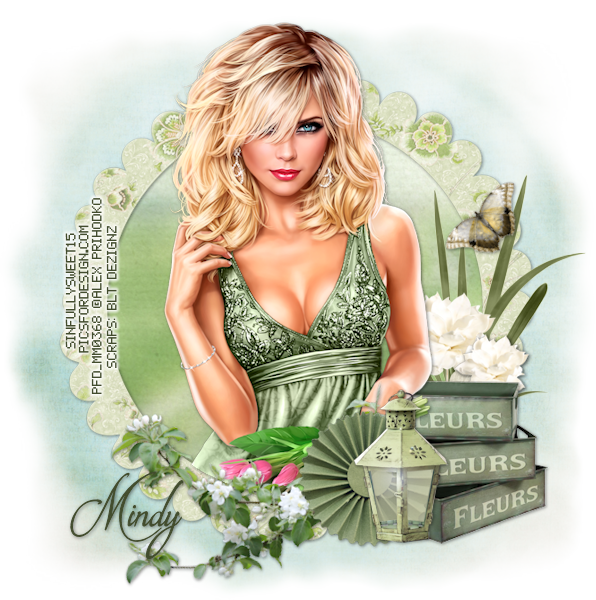
Tube of choice, I am using the artwork of Alex Prihodko (Springtime tube)
which you need a license to use.  

Scrap kit of choice. I am using a PTU kit by BLT Dezignz called Julep Garden 

Font of choice, I am using Brotherhood Script

Mask of your choice, I don't know who made mine or who made it sorry

Plugins: no outside plugins used


Just remember that my choices of papers and elements is just a suggestion, change it up and make it yours! You don't have to follow mine exactly.

Add a drop shadow of your choosing to tubes & elements throughout. I usually use 1, 1, 50, 5 unless otherwise noted.


Let's get started!

Open a new canvas 850 x 850 pixels with a white background

Open frame 1 copy and paste as a new layer resize 23%
click inside with your magic wand, selections, modify, expand 2, selections, invert
open paper 2 resize 830 x 830 pixels copy and paste as a new layer 
click delete on your keyboard,
leave selected
Copy and paste your tube as a new layer, resize by 50%
arrange in your frame
erase the bits that hang out of your frame where you don't want them

now add your elements:
crates resize 16% arrange on bottom right between tube & frame
lmap resize 16% arrange to the left of the cratess resize % arrange
grass 2 resize 11% arrange behind tube on right side
rosette resize 16% arrange behind lantern on left
flower 9 resize 13% rotate left 90 arrange behind crates, duplicate, resize 75% drag to the right
branch resize 15% rotate right 20 arrange on bottom behind the other layers
butterfly resize 4% rotate left 45 arrange in the grass on the right

add paper 6 above your white background
apply your mask, merge group

crop and resize
add your copyright and credits as needed
add your text and save

Friday, January 30, 2015

Citrus Bleu


Snaggable versions of this tag in my Fotki album

For this tutorial you will need the following:

Paint Shop Pro, I am using PSP X7, you should be able to use any version.

Tube of choice, I am using the artwork of Alicia Mujica which you need a license to use.  
This tube is a Graphics Groove Forum Exclusive commission by Alicia and not available in her store, 

Scrap kit of choice. I am using a PTU kit by BLT Dezignz called Citrus Bleu 

Font of choice, I am using Atelas


Plugins: No outside plugins


Just remember that my choices of papers and elements is just a suggestion, change it up and make it yours! You don't have to follow mine exactly.

Add a drop shadow of your choosing to tubes & elements throughout. I usually use 1, 1, 50, 5 unless otherwise noted.


Let's get started!

Open a new canvas 950 x 950 pixels with a white background

Open frame 2 copy and paste as a new layer, resize 35%
click inside with your magic wand, selections, modify, expand 2, selections, invert
open paper 2, resize to about 700 x 700 pixels copy and paste as a new layer 
click delete on your keyboard,

Copy and paste your tube as a new layer, resize by 75%
arrange in your frame
erase the bits that hang out of your frame where you don't want them


Now add your elements:
citrus basket  resize 18% arrange bottom center
flower 5 resize 12% arrange bottom to the right of the basket, duplicate & mirror
flower 2 resize 12% arrange in front of basket at the bottom

grass resize 20% arrange between tube and frame on right, duplicate & mirror
duplicate each one and resize 75%, drag the duplicates down and over slightly

branch 2 resize 9% arrange on the left just above the grass, duplicate & mirror
birdhouse resize 10% arrange below the brand layer on the right

flower 1 resize 15% duplicate 5 times arrange under the frame, around the outside just so it shows
beyond the other elements

flower 8 resize 25% arrange below flower 1 on left, duplicate, drag down, duplicate each of those
then mirror them


crop and resize
add your copyright and credits as needed
add your text and save

Sunday, January 25, 2015

Diamonds


Snaggable versions of this tag in my Fotki album

For this tutorial you will need the following:

Paint Shop Pro, I am using PSP X7, you should be able to use any version.

Tube of choice, I am using the artwork of Ismael Rac which you need a license to use.  
This tube was a special buy and is not in the store

Scrap kit of choice. I am using a PTU kit, Diamonds Are Forever by BLT Dezigns 

Font of choice, I am using DJB Carly Sue Got Married

Plugins: No outside plugins


Just remember that my choices of papers and elements is just a suggestion, change it up and make it yours! You don't have to follow mine exactly.

Add a drop shadow of your choosing to tubes & elements throughout. I usually use 1, 1, 50, 5 unless otherwise noted.


Let's get started!

Open a new canvas 850 x 850 pixels with a white background

Open frame 2 copy and paste as a new layer
Take your freehand selections tool and click around the edge of the frame selections, invert
open paper 11 copy and paste as a new layer 
click delete on your keyboard,

Copy and paste your tube as a new layer, resize by 55%
arrange in your frame on the right side so she's sitting on the frame

Copy and paste your tube as a new layer again
arrange in your frame on the left side, click delete on your keyboard
change the blend mode to Luminance(L), drop the opacity to about 50

Now add your elements:
flower 6 resize 55% arrange on bottom right corner, duplicate 3 times
arrange across bottom of frame, mirror 1 and put it on bottom left corner

brad, duplicate 2x arrange below flowers, one on each side and on near the center
deco arrange below the frame & background layers


crop and resize
add your copyright and credits as needed
add your text and save

Saturday, January 17, 2015

Beach Life


Snaggable versions of this tag in my Fotki album

For this tutorial you will need the following:

Paint Shop Pro, I am using PSP X7, you should be able to use any version.

Tube of choice, I am using the artwork of Elias Chatzoudis (Sirena tube)
which you need a license to use.  

Scrap kit of choice. I am using a PTU kit by BLT Dezignz called Nautical Stuffies 

Font of choice, I am using Sweet Memories

Plugins: No outside plugins used


Just remember that my choices of papers and elements is just a suggestion, change it up and make it yours! You don't have to follow mine exactly.

Add a drop shadow of your choosing to tubes & elements throughout. I usually use 1, 1, 50, 5 unless otherwise noted.


Let's get started!

Open a new canvas 850 x 850 pixels with a white background

Open frame 1 copy and paste as a new layer resize 17%
click inside with your magic wand, selections, modify, expand 2 
add a new raster layer below the frame
Resize the paper to about 600 x 600 pixels, make sure you are on the new raster layer
copy and paste the paper into selection then deselect

Copy and paste your tube as a new layer
arrange on the left side of the frame

now add your elements:
sign resize 10% arrange on the top center part of the frame
fish resize 10% arrange inside the frame 
seaweed resize 14% arrange on left side of  frame, duplicate, resize 75%, mirror

coral resize 14% arrange in bottom right side of the frame, duplicate & mirror
sand resize 20% arrange in front of tube, duplicate twice, mirror one, arrange around tube
deco resize 13% arrange between sand and frame on bottom right

sea urchins resize 15% mirror & arrange in front of your tube
flower 7 resize 8% arrange between sea urchins and tube duplicate, mirror, resize 75% arrange by other flower to the left
flower 8 resize 7% arrange below and left of the purple flower, duplicate, drag to the left


crop and resize
add your copyright and credits as needed
add your text and save

Thursday, January 8, 2015

Yesterdays


Snaggable versions of this tag in my Fotki album

For this tutorial you will need the following:

Paint Shop Pro, I am using PSP X7, you should be able to use any version.

Tube of choice, I am using the artwork of  Di_Halim (Winter Bird PFD Exclusive tube) which you need a license to use.  

Scrap kit of choice. I am using a PTU kit, Yesterday's Wardrobe by BLT Dezignz  

Font of choice, I am using Segoe Script


Plugins: Xero Porcelain


Just remember that my choices of papers and elements is just a suggestion, change it up and make it yours! You don't have to follow mine exactly.

Add a drop shadow of your choosing to tubes & elements throughout. I usually use 1, 1, 50, 5 unless otherwise noted.


Let's get started!

Open a new canvas 950 x 950 pixels with a white background

Open frame 3 copy and paste as a new layer, resize 35%, erase the little leaf at the bottom 
click inside with your magic wand, making sure it's set on add/shift or you hold the shift key down so you can also get into all the little sections around the edges,
selections, modify, expand 2, selections, invert
open paper 12, resize to 800 x 800 pixels,  copy and paste as a new layer 
click delete on your keyboard, leave selected

copy your mirrored tube, paste as a new layer, arrange in the frame, click delete on your keyboard
then deselect and duplicate your tube.
On the top tube layer, adjust blur, gaussian 3, change blend mode to soft light
on the bottom layer, apply Xero Porcelain with default settings, except change the blue to zero

Hide the white background, merge visible

Copy and paste your tube as a new layer, resize by 45% on the left side of the frame,
drag the frame a little to the right so it will all fit on your canvas

now add your elements
purse resize 10% arrange to the right of the tube
shoe dangle resize 25% arrange to the right of the purse
 swirl resize 25% rotate left 65 arrange on the right side of the frame
flower 12 resize 15% rotate right 45 arrange above leaf swirl, erase the bottom part of the flower stem
brad resize 25% arrange between the shoes and flowers layers

Resize paper 12 to 950 x 950 pixels, copy and paste above the white background
apply your mask, merge group, duplicate, merge together, duplicate again and merge together

crop and resize
add your copyright and credits as needed
add your text and save

Monday, December 29, 2014

Fall In Love


Snaggable versions of this tag in my Fotki album

For this tutorial you will need the following:

Paint Shop Pro, I am using PSP X7, you should be able to use any version.

Tube of choice, I am using the artwork of Alehandra Vanheck (Champagne tube - a PFD Exclusive) which you need a license to use.  

Scrap kit of choice. I am using Fall In Love, a PTU kit by BLT Dezignz 

Font of choice, I am using Scriptina

Mask: Becky Mask 23 - 
her masks are no longer available for download
if you don't have it, just use another that you like

Plugins: Optional Eye Candy 4000 Gradient Glow for text


Just remember that my choices of papers and elements is just a suggestion, change it up and make it yours! You don't have to follow mine exactly.

Add a drop shadow of your choosing to tubes & elements throughout. I usually use 1, 1, 50, 5 unless otherwise noted.


Let's get started!

Open a new canvas 850 x 850 pixels with a white background

Open frame 2 copy and paste as a new layer resize 80%
click inside with your magic wand, selections, modify, expand 2
add a new raster layer below the frame
open paper 5 make sure you are on the new layer, 
copy and paste into selection
leave selected, selections, invert

Copy and paste your tube as a new layer, resize by 35%
arrange in your frame
erase the bits that hang out of your frame where you don't want them

Now add your elements:
flower 1 resize 55% arrange on bottom left, duplicate & mirror
flower 5 resize 60% arrange between the two flower 1 layers
flower 1 resize 40% arrange on top of flower 5

foliage resize 75% rotate right 90 arrange on bottom right, under flowers, duplicate, mirror
duplicate each one one time, drag the one on the left over to the right, 
drag the one on the right to the left

branch resize 55% rotate right 45 arrange between flower and leaves on bottom right
duplicate & mirror

buckle arrange under roses on left, duplicate & mirror
duplicate the one on the right, drag under silvery flower in center to the right side of it, 
duplicate & mirror

heart 1 resize 20% arrange between the two red rose layers in center and on left
bird resize 28% arrange on bottom right

add paper 6 above the white background
apply your mask, merge group

crop and resize
add your copyright and credits as needed
add your text and save

I used #a2001a for the text and a gradient glow of 4 #ffadbb 

Friday, December 26, 2014

2015


Snaggable versions of this tag in my Fotki album

For this tutorial you will need the following:

Paint Shop Pro, I am using PSP X7, you should be able to use any version.

Tube of choice, I am using the artwork of Zlata M (New Year Night tube)
which you need a license to use.  

Scrap kit of choice. I am using a PTU kit, 2015, by BLT Dezignz 

Font of choice, I am using Showcard Gothic

Plugins: No outside plugins used


Just remember that my choices of papers and elements is just a suggestion, change it up and make it yours! You don't have to follow mine exactly.

Add a drop shadow of your choosing to tubes & elements throughout. I usually use 1, 1, 50, 5 unless otherwise noted.


Let's get started!

Open a new canvas 850 x 850 pixels with a white background

Open frame 2 copy and paste as a new layer resize 85%
click inside with your magic wand, selections, modify, expand 2, selections, invert
open paper 11 copy and paste as a new layer 
click delete on your keyboard

Copy and paste your tube as a new layer, resize by 75%
arrange in your frame
erase the bits that hang out of your frame where you don't want them

add your elements:
cake resize 50% arrange on bottom left corner
clock 2 resize 40% arrange to the right of the cake
bow 1 resize 35% arrange above & behind the other 2 elements
hat resize 30% arrange to the right of the clock
cupcake resize 30% arrange to the right of the hat
noise blower resize30 % arrange to the right of cupcake
branch 2 resize 40% arrange between cake and clock
bell resize 30% arrange between tube and frame layer on the top left
champagne resize 30% arrange behind noise blower on bottom right corner
confetti resize 75% arrange between frame and background paper

crop and resize
add your copyright and credits as needed
add your text and save

Thursday, December 18, 2014

Santa Baby


Snaggable versions of this tag in my Fotki album

For this tutorial you will need the following:

Paint Shop Pro, I am using PSP X7, you should be able to use any version.

Tube of choice, I am using the artwork of Misticheskaya Christine tube which you need a license to use.  

Scrap kit of choice. I am using Santa Baby a PTU kit by BLT Dezignz  

Font of choice, I am using Ravie

Plugins: no outside plugins used


Just remember that my choices of papers and elements is just a suggestion, change it up and make it yours! You don't have to follow mine exactly.

Add a drop shadow of your choosing to tubes & elements throughout. I usually use 1, 1, 50, 5 unless otherwise noted.


Let's get started!

Open a new canvas 850 x 850 pixels with a white background

open frame 2 copy and paste as a new layer
click inside with your magic wand, selections, modify, expand 2, selections, invert
open paper 2 copy and paste as a new layer 
click delete on your keyboard,

Copy and paste your tube as a new layer, resize by 70%
arrange in your frame
erase the bits that hang out of your frame where you don't want them

add your elements:
cake resize 45% arrange on bottom left
gift resize 35% arrange to the right of cake
shoes resize 35% arrange in front of cake and gift
flower resize 45% arrange behind and to the right of the gift
bling 2 resize 65% arrange on top of the flower
tag resize 55% arrange behind and to the right of the flower


crop and resize
add your copyright and credits as needed
add your text and save

Thursday, December 11, 2014

Noel Angel


For this tutorial you will need the following:

Paint Shop Pro, I am using PSP X7, you should be able to use any version.

Tube of choice, I am using the artwork of Alicia Mujica (tube is a free gift for December 2014 when you purchase 4 euros or more in her store) which you need a license to use.  

Scrap kit of choice. I am using a PTU kit, Noel, by BLT Dezignz 

Font of choice, I am using Scriptina


Plugins: No outside plugins


Just remember that my choices of papers and elements is just a suggestion, change it up and make it yours! You don't have to follow mine exactly.

Add a drop shadow of your choosing to tubes & elements throughout. I usually use 1, 1, 50, 5 unless otherwise noted.


Let's get started!

Open a new canvas 850 x 850 pixels with a white background

open frame 4 copy and paste as a new layer
click inside with your magic wand, selections, modify, expand 2, selections, invert
open paper 11 copy and paste as a new layer 
click delete on your keyboard

Copy and paste your tube as a new layer, resize by 50%
arrange in your frame
erase the bits that hang out of your frame where you don't want them

Now add your elements:
foliage 1 resize 45% arrange on bottom right
cluster  resize 45% arrange to the left of the other element
 birdhouse resize 45% arrange between the cluster & foilage
angel  resize 45% arrange on right side
flower resize 40% rotate left 35 arrange behind birdhouse
christmas tree resize 45% arrange on left side
snowflake 1 resize 45% arrange on left side below other elements
ornaments 2 resize 35% arrange on bottom left
 birds resize 35% arrange in front of birdhouse

add paper 5 above the white background
apply your mask, merge group
duplicate several times and merge all the mask layers together
so it will be darker and show up better
resize it 105%

crop and resize
add your copyright and credits as needed
add your text and save

Saturday, December 6, 2014

Waiting For Santa


Snaggable versions of this tag in my Fotki album

For this tutorial you will need the following:

Paint Shop Pro, I am using PSP X7, you should be able to use any version.

Tube of choice, I am using the artwork of Alicia Mujica which you need a license to use.  
This tube is Mama Noel from Alicia's Black Friday pack

Scrap kit of choice. I am using a PTU kit, Santa Claus by BLT Dezignz  
I have the tagger sized kit, if you have the full size your resizing percentages will be different

Font of choice, I am using Showcard Gothic

Mask: WSL84

Plugins: no outside plugins


Just remember that my choices of papers and elements is just a suggestion, change it up and make it yours! You don't have to follow mine exactly.

Add a drop shadow of your choosing to tubes & elements throughout. I usually use 1, 1, 50, 5 unless otherwise noted.


Let's get started!

Open a new canvas 850 x 850 pixels with a white background

Copy and paste your tube as a new layer, resize by 35%

add the following 

wreath, arrange behind tube
click inside with your magic wand, selections, modify, expand 10, selections, invert
open paper 5 copy and paste as a new layer resize 45%
click delete on your keyboard, deselect
merge the paper and wreath together, resize 100%

boot resize 35% arrange on bottom right
gift 3 resize 35% arrange to the left of and behind boot layer
gift 2 resize 45% arrange in front of and to the left of gift 3
star resize 40% rotate right 25 arrange below tube layer on the right

bird resize30 % arrange on gift at the bottom
flower 2 resize 50% arrange arrange on left side below tube layer
foliage resize 45% rotate left 25 arrange below flower 2 on left
wordart resize 35 arrange on left

copy and paste paper 11 above the white background
apply mask, merge group, resize by 105%

crop and resize
add your copyright and credits as needed
add your text and save

Saturday, November 29, 2014

Christmas Cider


Snaggable versions of this tag in my Fotki album

For this tutorial you will need the following:

Paint Shop Pro, I am using PSP X7, you should be able to use any version.

Tube of choice, I am using the artwork of Alicia Mujica which you need a license to use.  
This tube is called Green Star and she was in the Black Friday 2014 pack. 

Scrap kit of choice. I am using a PTU kit, Christmas Cider by BLT Dezignz 

Font of choice, I am using Vtks Rash


Plugins: no outside plugins used


Just remember that my choices of papers and elements is just a suggestion, change it up and make it yours! You don't have to follow mine exactly.

Add a drop shadow of your choosing to tubes & elements throughout. I usually use 1, 1, 50, 5 unless otherwise noted.


Let's get started!

Open a new canvas 850 x 850 pixels with a white background

Open frame  copy and paste as a new layer, resize 25% then 65%
click inside with your magic wand, selections, modify, expand 2, selections, invert
open paper 2 resize 800 x 800 pixels
 copy and paste as a new layer 
click delete on your keyboard. leave selected

Mirror horizontal (this is just mirror on earlier versions of PSP) your tube, copy and paste as a new layer under the frame, 
resize 75%
arrange in the frame, click delete on your keyboard
change the blend mode to Luminance(L) drop opacity to about 55
deselect, add a drop shadow of 10, 10, 50, 5 to your frame

Go back to your tube, mirror back to how it was, then copy and paste as a new layer above the frame
resize 40% arrange on the left side of the frame

now add your elements:
deco resize 20% arrange on left below tube layer
 limes resize 20%  then 40% arrange in front of tube, I erased the two darker ones on the bottom
birdhouse resize 15% arrange on bottom right, below tube layer
apples resize 15% & 35% arrange in front of birdhouse
bird resize 25% arrange on top of birdhouse
scarf resize 15% then 50% arrange on top left

open paper 4, resize to 850 x 850 pixels
copy and paste as a new layer above the white background
apply your mask, merge group
resize 90%

add your copyright and credits as needed
add your text and save

Monday, November 17, 2014

Down Home Xmas


Snaggable versions of this tag in my Fotki album

For this tutorial you will need the following:

Paint Shop Pro, I am using PSP X7, you should be able to use any version.

Tube of choice, I am using the artwork of Alicia Mujica Exclusive Tube 9c which you need a license to use.  This tube is a CDO exclusive and not available anywhere else.

Scrap kit of choice. I am using a PTU kit called Down Home Holiday by BLT Dezignz  

Font of choice, I am using Freestyle Script

Mask: WSLMask84 links to masks are on the right sidebar part way down page

Plugins: no outside plugins used
I do use Eye Candy 4000 Gradient Glow on all my copyrights/credits layers
I do this because some forums will make a .png tag show up with a black background and then your
copyright doesn't show. 


Just remember that my choices of papers and elements is just a suggestion, change it up and make it yours! You don't have to follow mine exactly.

Add a drop shadow of your choosing to tubes & elements throughout. I usually use 1, 1, 50, 5 unless otherwise noted.


Let's get started!

Open a new canvas 850 x 850 pixels with a white background

Open frame 3 copy and paste as a new layer, resize 115%
click inside with your magic wand, selections, modify, expand 2, selections, invert
open paper 5 copy and paste as a new layer below the frame
click delete on your keyboard
leave selected
Copy and paste your close up tube as a new layer
arrange in your frame
erase the bits that hang out of your frame where you don't want them

add your elements
bell resize70 % arrange on top left corner, below the tube layer
box resize 25% arrange on bottom right corner
candle resize 25% arrange on bottom right corner
tree resize 40% arrange below the tube layer on the right side
ephemera resize 25% arrange behind the candle
star resize35 % arrange between ephemera and candle
reindeer clip resize 45% arrange on bottom left corner

copy and paste paper 6 as a new layer above the white background
apply your mask and merge group, resize 90%


crop and resize
add your copyright and credits as needed
add your text and save

Friday, November 14, 2014

Winter Glisten


Snaggable versions of this tag in my Fotki album

For this tutorial you will need the following:

Paint Shop Pro, I am using PSP X, you should be able to use any version.

Tube of choice, I am using the artwork of Trinita (Hot Tea 2) which you need a license to use.  

Scrap kit of choice. I am using  a PTU kit called Glisten by BLT Dezignz
I am using a tagger sized kit instead of full sized so if you get the full size kit, the amounts you 
have to resize will be different.

Font of choice, I am using  SF Jacques Cartier


Plugins: No outside plugins used
I do use Eye Candy 4000 Gradient Glow on all my copyrights/credits layers
I do this because some forums will make a .png tag show up with a black background and then your
copyright doesn't show. 


Just remember that my choices of papers and elements is just a suggestion, change it up and make it yours! You don't have to follow mine exactly.

Add a drop shadow of your choosing to tubes & elements throughout. I usually use 1, 1, 50, 5 unless otherwise noted.


Let's get started!

Open a new canvas 850 x 850 pixels with a white background

add paper 1 above the white background
apply your mask, merge group

Copy and paste your tube as a new layer, resize by 35%

Add the following:
tree 2 arrange to the left of your tube & behind it
deco resize 80% arrange on the left side of the tube, above the tube layer
duplicate it and mirror it, drag this layer below the tube layer

reindeer resize 90% mirror arrange below tube layer, on the right side of tube
frame accent resize 145% arrange above mask layer, change Hue to 252, saturation to 253
duplicate twice, merge together, duplicate, merge together (this just makes it show up better)

lantern resize 55% arrange in front of tube in the snowy layer near her feet
baubles 2 resize 55% arrange in snow in front of tree
frame 3 arrange just above the frame accent layer, arrange it so the tree and reindeer cover the top corners to somewhat hide them

crop and resize
add your copyright and credits as needed
add your text and save

Wednesday, November 5, 2014

Joyeux Noel


For this tutorial you will need the following:

Paint Shop Pro, I am using PSP X, you should be able to use any version.

Tube of choice, I am using the artwork of Anna Marine (Christmas 1 tube) which you need a license to use.  Her artwork is available at CDO.

Scrap kit of choice. I am using a PTU kit, Joyeux by BLT Dezignz
I have the tagger sized kit, so you will have to resize different percentages than I have if you have the full size kit.

Font of choice, I am using PW Joyeux Noel

Mask: Vix Mask 3 Christmas 2010
Plugins: No outside plugins
I do use Eye Candy 4000 Gradient Glow on all my copyrights/credits layers
I do this because some forums will make a .png tag show up with a black background and then your
copyright doesn't show.


Just remember that my choices of papers and elements is just a suggestion, change it up and make it yours! You don't have to follow mine exactly.

Add a drop shadow of your choosing to tubes & elements throughout. I usually use 1, 1, 50, 5 unless otherwise noted.


Let's get started!

Open a new canvas 850 x 850 pixels with a white background

open frame 1 copy and paste as a new layer, resize 80%
click inside with your magic wand, selections, modify, expand 2, selections, invert
open paper 10 copy and paste as a new layer
click delete on your keyboard

Copy and paste your tube as a new layer arrange on bottom center of frame

 Now we'll add our elements

 tree resize 55% arrange behind tube on bottom right
adjust, colorize, hue 60, saturation 153
then adjust brightness 60 and contrast 0

stocking resize 30% arrange on bottom right side of tube
flower 2 resize 35% arrange on top left corner of frame

flower resize 25% arrange behind & left of flower 2
branch resize 40% arrange rotate left 90, mirror, flip arrange between flowers
duplicate, rotate left 30

flower 1 resize 20% arrange in between other flowers, duplicate arrange in flowers
bells resize 35% arrange below flowers
bow 1 resize 20% arrange at the top of the bells

copy and paste your word art between frame and background paper layers, resize 30, drag to the top,
duplicate a few time and arrange around in the frame
You may want to resize some of them a little larger

add paper 14 above the white background
apply your mask, merge group, resize 90%

crop and resize
add your copyright and credits as needed
add your text and save

Wednesday, October 22, 2014

September Romance


Snaggable tag set for this tag is available in my Fotki album

For this tutorial you will need the following:

Paint Shop Pro, I am using PSP X, you should be able to use any version.

Tube of choice, I am using the artwork of Nocturne (Statice tube) which you need a license to use. 


Scrap kit of choice. I am using a PTU kit, September Romance by BLT Dezignz
I am using the tagger size kit, if you use the full size kit, you will need to resize your elements a bit differently  

Font of choice, I am using Geordie Girl

Mask: DVB Mask 80
Plugins: No outside plugins used
I do use Eye Candy 4000 Gradient Glow on all my copyrights/credits layers
I do this because some forums will make a .png tag show up with a black background and then your
copyright doesn't show.


Just remember that my choices of papers and elements is just a suggestion, change it up and make it yours! You don't have to follow mine exactly.

Add a drop shadow of your choosing to tubes & elements throughout. I usually use 1, 1, 50, 5 unless otherwise noted.


Let's get started!

Open a new canvas 850 x 850 pixels with a white background

open frame 2 copy and paste as a new layer resize 85%
click inside with your magic wand, selections, modify, expand 2, selections, invert
open paper 4 copy and paste as a new layer
click delete on your keyboard, leave selected
copy and paste your tube as a new layer, resize by 60%
arrange in your frame
erase the bits that hang out of your frame where you don't want them
 Now add your elements:
branch 3 resize 45% arrange on bottom left, duplicate, mirror, 
duplicate again, rotate left 30, drag down so it's below the original, duplicate, mirror

wreath resize 35% arrange between 2 leaves on left, duplicate, mirror, 
arrange between the other two leaf layers

heart 1 resize 35% arrange on bottom center
branch 4 resize 45% arrange below wreath on left, duplicate, mirror arrange below other wreath

flower 5 resize 35% arrange behind heart on left, duplicate & mirror
flower 4 resize 35% arrange behind flower 5, duplicate & mirror
 flower 7 resize 30% arrange between branch and leaves, duplicate & mirror

ribbon 1 resize 45% arrange behind heart

 apply paper 5 above the white background
apply your mask, merge group, resize 110%

crop and resize
add your copyright and credits as needed
add your text and save

Monday, October 20, 2014

Sultana


Snaggable tags for this tag can be found in my fotki album here

For this tutorial you will need the following:

Paint Shop Pro, I am using PSP X, you should be able to use any version.

Tube of choice, I am using the artwork of Keith Garvey (Bollywood tube) which you need a license to use. 

Scrap kit of choice. I am using Sultan's Treasure a PTU scrap kit by BLT Dezigns
which is only available with Fan Club Membership (Facebook group you must join to get further info)

Font of choice, I am using Authentic Hilton

Mask of your choice

Plugins: no outside plugins
I do use Eye Candy 4000 Gradient Glow on all my copyrights/credits layers
I do this because some forums will make a .png tag show up with a black background and then your
copyright doesn't show.


Just remember that my choices of papers and elements is just a suggestion, change it up and make it yours! You don't have to follow mine exactly.

Add a drop shadow of your choosing to tubes & elements throughout. I usually use 1, 1, 50, 5 unless otherwise noted.


Let's get started!

Open a new canvas 850 x 850 pixels with a white background

open frame 2 copy and paste as a new layer resize 25%
click inside with your magic wand, selections, modify, expand 2, selections, invert
open paper 3 copy and paste as a new layer resize 800 X 800 pixels
click delete on your keyboard,

opy and paste your close up tube as a new layer, resize by 80%
arrange in your frame
erase the bits that hang out of your frame where you don't want them

add your elements:
brooch resize 55% arrange bottom center
flower 10 resize 8% rotate right 60 arrange on right, behind red brooch, duplicate & mirror
jewel 2 resize 20% arrange behind the purple flower on right, duplicate & mirror
flower 1 resize 12% rotate right 45 arrange under brooch on right, duplicate & mirror
sword resize 8% rotate right 60 arrange on bottom below red brooch, mirror
mask resize 12% arrange on left below green jewel
ladybug resize 12% arrange on right, below green jewel
berries resize 11% arrange above green jewel, duplicate, mirror


resize paper 12 to 850 x 850 copy and paste as a new layer above the white background
apply your mask, merge group, resize 80%


crop and resize
add your copyright and credits as needed
add your text and save

Tuesday, October 14, 2014

Plush Romance Tutorial and Snaggable Tags


For this tutorial you will need the following:

Paint Shop Pro, I am using PSP X, you should be able to use any version.

Tube of choice, I am using the artwork of Nocturne (Statice tube) which you need a license to use. 

Scrap kit of choice. I am using a PTU kit, Royal Plush by BLT Dezignz 

Font of choice, I am using Impact and Authentic Hilton

Plugins: Xero Porcelain, Eye Candy 4000 Shadow Lab
I do use Eye Candy 4000 Gradient Glow on all my copyrights/credits layers
I do this because some forums will make a .png tag show up with a black background and then your
copyright doesn't show.


Just remember that my choices of papers and elements is just a suggestion, change it up and make it yours! You don't have to follow mine exactly.

Add a drop shadow of your choosing to tubes & elements throughout. I usually use 1, 1, 50, 5 unless otherwise noted.


Let's get started!

Open a new canvas 1000 x 750 pixels with a white background
 
With your width set on 3 and foreground color on #5e3634 use a thick font, I used Impact
and write out the word "ROMANCE" in all caps (or whatever word you want to use)
convert to raster layer

click inside each letter with your magic wand, selections, modify, expand 1, invert
copy and paste paper 8 as a new layer below the word, arrange it, click delete on your keyboard

Copy and paste your tube, arrange in the wordart, click delete on your keyboard. If you want to erase part of the tube from letters, just invert selection again, then erase what you want, then invert again,

keep pasting the tube into the wordart until you have what you want, you can resize the tube, mirror the tube, whatever you want until you have something you're happy with.
 
 Hide all the layers except the tubes, merge visible, unhide the other layers

Duplicate the merged tube layer, on the top layer, adjust blur, gaussian 3, 
change the blend mode to soft light
on the bottom layer, apply Xero Porcelain default settings except change blue to zero
change the blend mode to Luminance(L)

Hide the white background layer, merge visible

Using Eye Candy 4000 Shadow Lab, apply it with the following settings:
Center Offset Direction: 331
Center Offset Distance: 14.21
Overall Opacity: 42
Overall Blur: 20.16
Perspective Blur: 0
Color: black
Draw Only Outside Selection checked

 doves resize 15% arrange on top of letters A & M
feather resize 15% twice arrange below the birds
fan resize 15% then 85% rotate left 30 mirror & arrange on bottom left
boot resize 15% then 45% arrange on bottom left
ribbon 2 resize 25% then 55% rotate left 15 arrange on top of fan
flower 8 resize 10% then 45% arrange on top right
flower 5 resize 10% arrange behind other flower
leaves resize 25% arrange behind flowers, duplicate, mirror, flip arrange behind flowers on other side
 

crop and resize
add your copyright and credits as needed
add your text and save


And here are some snaggable tags for you


Saturday, October 11, 2014

Harvest Festival Tutorial & Snaggable Tags


For this tutorial you will need the following:

Paint Shop Pro, I am using PSP X, you should be able to use any version.

Tube of choice, I am using the artwork of Ellie Milk (Jessica tube) which you need a license to use. 

Scrap kit of choice. I am using a PTU kit, Harvest Festival by BLT Dezignz

Font of choice, I am using DJB Danielle

Mask of your choice

Plugins: No outside plugins used
I do use Eye Candy 4000 Gradient Glow on all my copyrights/credits layers
I do this because some forums will make a .png tag show up with a black background and then your
copyright doesn't show.


Just remember that my choices of papers and elements is just a suggestion, change it up and make it yours! You don't have to follow mine exactly.

Add a drop shadow of your choosing to tubes & elements throughout. I usually use 1, 1, 50, 5 unless otherwise noted.


Let's get started!

Open a new canvas 850 x 850 pixels with a white background

Open frame 1 copy and paste as a new layer, resize 30%
click inside with your magic wand, selections, modify, expand 2, selections, invert
open paper 11, resize 850 x 850 pixels copy and paste as a new layer below the frame
click delete on your keyboard,
copy and paste your tube as a new layer, resize by 50%
arrange in your frame
erase the bits that hang out of your frame where you don't want them & then deselect

 add the elements:
bags resize 13% arrange on bottom left
bowls resize 13% arrange behind and to the left of the bags
flower pots resize 13% arrange to the right of and in front of the bags

milk can resize 9% arrange on bottom right
tea pot resize 9% arrange to the left of milk can
pumpkin resize 13% arrange behind tea pot and flower pots
rabbit resize 25% arrange to the left of cups

branch resize 25% arrange behind the other elements at the bottom, erase the bits that stick out
duplicate & mirror

flower 2 resize 15% arrange over leaves on right, duplicate & mirror
branch 2 resize 15%, flip, arrange behind other branches on the bottom
feather resize 9% arrange in front of milk can
birdhouse resize 15% arrange on left, below the tube layer
bird resize 6% arrange on birdhouse

copy and paste paper 8 as a new layer
apply your mask, merge group, resize 90%, duplicate & merge 

crop and resize
add your copyright and credits as needed
add your text and save


Here are some snag tags for you.


Sunday, September 28, 2014

Fall Y'all


For this tutorial you will need the following:

Paint Shop Pro, I am using PSP X, you should be able to use any version.

Tube of choice, I am using the artwork of Katharine (Milla tube) which you need a license to use. 

Scrap kit of choice. I am using a PTU kit, Fall Y'all by BLT Dezignz

Font of choice, I am using Les Sensations de Cerise

Mask: DBV Mask 80 by Designs by Vaybs

Plugins: No outside plugins used
I do use Eye Candy 4000 Gradient Glow on all my copyrights/credits layers
I do this because some forums will make a .png tag show up with a black background and then your
copyright doesn't show.


Just remember that my choices of papers and elements is just a suggestion, change it up and make it yours! You don't have to follow mine exactly.

Add a drop shadow of your choosing to tubes & elements throughout. I usually use 1, 1, 50, 5 unless otherwise noted.


Let's get started!

Open a new canvas 850 x 850 pixels with a white background

Open frame 1 copy and paste as a new layer
click inside with your magic wand, selections, modify, expand 2, selections, invert
open paper 3, resize to 850 x 850 pixels copy and paste as a new layer
click delete on your keyboard, leave selected

copy and paste your tube as a new layer, resize by 40%
 erase the bits that hang out of your frame where you don't want them
 deselect

 Now we'll add our elements. I used the following:
cornucopia resize 11% mirror &arrange on bottom right, duplicate & mirror
Take your eraser tool and erase the darker part that curls up, so you just see the front and the veggies

flower 9 resize 13% arrange behind and left of cornucopia, duplicate, arrange above cornucopia, duplicate & mirror

barrel  resize 12% arrange on right, behind cornicopia
owl resize 12% arrange in the center on the bottom
bird cage resize 12% rotate left 12 arrange between barrel and cornicopia on the left
flower 6 resize 5% arrange on the far right side, duplicate & mirror

flower 1 resize 11% arrange on right, between the flowers there and duplicate, mirror
flower 5 resize 11% arrange on left, between the other flowers, duplicate & mirror
rosette resize 15% arrange behind flowers on left, duplicate & mirror
feather resize 15% rotate left 30 arrange over rosette on right, duplicate & mirror

open paper 9, resize 850 x 850 pixels, copy and paste as a new layer
apply your mask & merge group


crop and resize
add your copyright and credits as needed
add your text and save