Tuesday, October 27, 2009
More Rac Stalkers templates
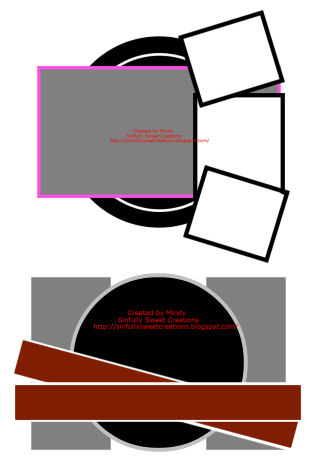
Over at the Xeracx Stalkers forum, we had another template creation challenge. This time the theme was Rac Stalkers. We have several great templates and I'm posting mine here for you. If you'd like to see the others and get a chance to download, go on over and join the forum HERE.
You can get my templates HERE. As usual, you can use them in tutorials, with a link back here, but I also want you to state that I made them for the Rac Forum. Thanks!


Thursday, October 22, 2009
Templates 5 & 6
I have two new templates for you today. They were both made when I was making tags, and I decided to make templates out of the for you. You can get them HERE.


Sunday, October 18, 2009
Fall/Halloween Kits
Tuesday, October 13, 2009
Xeracx Forum Templates
Over at the Official Xeracx Stalkers forum we had a template challenge and this is my part of it. You can check out other great templates by joining the forum.
You can download my templates HERE. As usual, you may use them in tutorials, just link back here and mention that they came from me, and the Xeracx Stalkers forum!


Friday, October 9, 2009
Juicy Award
I got a cute little award from Patty at Sunspotpp's Place. I met her over on the Xeracx Stalker's forum, and she is such a sweet person. Her blog is really nice, you should go check it out! It says I have to pass it on to three other blogs so I will send it to the following members of the Xeracx Stalkers:
Manda of Double Vision Tutorials
JackieBeth of Cupquakezcreationz
Sharon of Dolly's Tag World


BCA Mini Tag Sized Scrap Kit
I've made my first kit for sharing here on my blog. This is actually my 3rd kit, my first two being for a challenge on the Xeracx Stalkers site, which I will be posting here in a little over a week. This kit has 6 papers, 2 ribbons and 7 word arts for you to use. I made the colors to match an Exclusive Commission BCA tube by Ismael Rac.
You can get the kit HERE.


Friday, October 2, 2009
BCA Angel
 Supplies:
Scrapkit by Wanda at BlueDream Designs called BCA-2009.
Tube of choice. I used the wonderful work of the very talented Ismael Rac, which you have to have a license to use. You can purchase his work at AMI.
Font of choice. I used Sweetheart Script.
Ok, lets get started.
Open a new image 800 x 800. This will give us room to work and you can crop it down at the end.
Open Frame 1, resize by 80% and place it in the center of your canvas and add a drop shadow. I used 1 1 60 4 throughout the tut. Click inside it with your magic wand, and selections, modify, expand by 5.
Open paper #2 and place over it, and click on that layer, selections, invert, delete and select none.
Open your tube, and add your drop shadow. Click on your layer paper and selections, select all, float, defloat, selections, invert. Paste your tube as a new layer arrange it where you want it, and then duplicate it, drag the duplicate layer above the frame layer. Now grab your eraser tool and on the tube layer that is below the frame layer, erase the bits that are hanging below the frame and deselect.
Now on your top tube layer erase whatever bits are hanging below, and you don't have to be real careful here, because you have the bottom tube layer showing under it.
Open the element called Courage. Copy and paste it as a new layer and resize by 50%. Rotate it by 15 to the left and arrange it on the left side of your frame. Duplicate it and image mirror, arrange it where you want on the right side if it doesn't go right into the right spot.
Open the cloud element. Copy and paste as a new layer and arrange it at the bottom of your frame, dragging the layer below your flowers.
Open label 2 and copy and paste it as a new layer. Arrange it under the cloud, and drag that layer below the flower layers but above the cloud layer.
Open the pearls layer and copy and paste it as a new layer. Arrange it on the left side, and then drag that layer down below the paper layer (that you used to fill the frame). Duplicate it and image, mirror.
Add your © info, your name, crop and resize it, then click on file, export, PNG optimizer, click ok, and choose where to save it at, and you'll have your tag saved as a transparent tag. No more white background!
Subscribe to:
Posts (Atom)


