 For this tut you will need the following:
Any version of Paint Shop Pro. I am using PSP X for this tut.
Tube of choice. I am using the tube that came with the kit.
Missy's tag template #312 at Divine Intentionz.
PTU scrap kit Whispered Pixie by Wicked Princess Scraps. Go to her site, and on the right hand side, about a quarter of the way down are blinkies to take you to the stores where you can get the kit.
Font of choice, I am using Sweetheart Script.
Optional plugin for name: Alien Skin Eye Candy 3.1
Let's get started!
Open your tag template and resize it by 85%, then change the canvas size by going to image, canvas size and change it to 650 x 650. Delete the layer called "by Missy" and then unhide the background layer if you like to have that there to see things better while you're working.
On the circle one layer, take your magic wand and click inside it. Open paper 12, copy and paste as a new layer, selections, invert, and make sure you are on the paper layer, hit the delete button on your keyboard. Deselect and delete the original circle one layer. Add a drop shadow. I used 1, 1, 60, 5. I then deleted the dotted circle layer because it didn't show with the paper I used. If you use a different paper, you might choose to keep that layer.
Make circle 2 layer active and click on it with your magic wand. Open paper 8, copy and paste as a new layer, resize by 60%, selections, invert, and make sure you are on the paper layer, hit delete on your keyboard, deselect, add a drop shadow, then delete the original circle 2 layer.
Make the Brush by Starwalk layer active. Click on adjust, hue and saturation, colorize, change the Hue to 238, and the Saturation to 149.
Make the frame layer active and click on it with the magic wand. Open paper 7, copy and paste as a new layer, selections, invert, on the paper layer, click delete on your keyboard. Deselect, add your drop shadow, and delete the original frame layer.
Make the background frame layer active and click on it with the magic wand, open paper 9, copy and paste as a new layer, resize by 60%, selections invert, and click delete on your keyboard. Leave selected.
Open your tube, copy and paste as a new layer, resize if necessary, arrange your tube so you have whatever part you want showing in the frame, click delete on your keyboard, deselect, delete the original background frame layer.
Now go to adjust, Hue & Saturation, Colorize, and change the Hue & Saturation settings both to 0 to make the tube grey.
You can colorize the word art and the stars if you want, or fill them in with a paper like we did the other layers. I chose to leave mine as they were.
Copy and paste your tube as a new layer. Arrange it to the right side of your tag. If you use the same one that came in the kit, you'll need to resize it around 60 or 70%.
Open the bubble string element, resize by 60% and arrange near the bottom of your tag, drag that layer just below your tube.
Open ribbon 2, resize by 40% arrange it under the word art, and so that the staples are on the bottom left corner of the frame.
Open the mat element, resize by 60% then resize by 90%. Drag it just below the bottom circle layer, and just above the Brush by Starwalt layer, duplicate, image, free rotate to the left by 30, duplicate that layer and rotate again to the left by 30.
Open the Doily element, resize by 105% drag that layer down just above the mat layer you just did.
Open the Rose Clusters element, resize by 40% rotate to the left by 90, arrange to the bottom left of your tag. See mine for reference.
Add your name and any © info that is needed. For my name, I typed it in white then added a glow with the Eye Candy 3.1 set at 3, fat using #ffd2d1 as the color.
If you want to save as a transparent tag, delete the white background layer and save as a .png file.
For this tut you will need the following:
Any version of Paint Shop Pro. I am using PSP X for this tut.
Tube of choice. I am using the tube that came with the kit.
Missy's tag template #312 at Divine Intentionz.
PTU scrap kit Whispered Pixie by Wicked Princess Scraps. Go to her site, and on the right hand side, about a quarter of the way down are blinkies to take you to the stores where you can get the kit.
Font of choice, I am using Sweetheart Script.
Optional plugin for name: Alien Skin Eye Candy 3.1
Let's get started!
Open your tag template and resize it by 85%, then change the canvas size by going to image, canvas size and change it to 650 x 650. Delete the layer called "by Missy" and then unhide the background layer if you like to have that there to see things better while you're working.
On the circle one layer, take your magic wand and click inside it. Open paper 12, copy and paste as a new layer, selections, invert, and make sure you are on the paper layer, hit the delete button on your keyboard. Deselect and delete the original circle one layer. Add a drop shadow. I used 1, 1, 60, 5. I then deleted the dotted circle layer because it didn't show with the paper I used. If you use a different paper, you might choose to keep that layer.
Make circle 2 layer active and click on it with your magic wand. Open paper 8, copy and paste as a new layer, resize by 60%, selections, invert, and make sure you are on the paper layer, hit delete on your keyboard, deselect, add a drop shadow, then delete the original circle 2 layer.
Make the Brush by Starwalk layer active. Click on adjust, hue and saturation, colorize, change the Hue to 238, and the Saturation to 149.
Make the frame layer active and click on it with the magic wand. Open paper 7, copy and paste as a new layer, selections, invert, on the paper layer, click delete on your keyboard. Deselect, add your drop shadow, and delete the original frame layer.
Make the background frame layer active and click on it with the magic wand, open paper 9, copy and paste as a new layer, resize by 60%, selections invert, and click delete on your keyboard. Leave selected.
Open your tube, copy and paste as a new layer, resize if necessary, arrange your tube so you have whatever part you want showing in the frame, click delete on your keyboard, deselect, delete the original background frame layer.
Now go to adjust, Hue & Saturation, Colorize, and change the Hue & Saturation settings both to 0 to make the tube grey.
You can colorize the word art and the stars if you want, or fill them in with a paper like we did the other layers. I chose to leave mine as they were.
Copy and paste your tube as a new layer. Arrange it to the right side of your tag. If you use the same one that came in the kit, you'll need to resize it around 60 or 70%.
Open the bubble string element, resize by 60% and arrange near the bottom of your tag, drag that layer just below your tube.
Open ribbon 2, resize by 40% arrange it under the word art, and so that the staples are on the bottom left corner of the frame.
Open the mat element, resize by 60% then resize by 90%. Drag it just below the bottom circle layer, and just above the Brush by Starwalt layer, duplicate, image, free rotate to the left by 30, duplicate that layer and rotate again to the left by 30.
Open the Doily element, resize by 105% drag that layer down just above the mat layer you just did.
Open the Rose Clusters element, resize by 40% rotate to the left by 90, arrange to the bottom left of your tag. See mine for reference.
Add your name and any © info that is needed. For my name, I typed it in white then added a glow with the Eye Candy 3.1 set at 3, fat using #ffd2d1 as the color.
If you want to save as a transparent tag, delete the white background layer and save as a .png file.

Thursday, December 31, 2009
Fairy Princess
For this tut you will need the following:
Any version of Paint Shop Pro. I am using PSP X for this tut.
Tube of choice. I am using the tube that came with the kit.
Missy's tag template #312 at Divine Intentionz.
PTU scrap kit Whispered Pixie by Wicked Princess Scraps. Go to her site, and on the right hand side, about a quarter of the way down are blinkies to take you to the stores where you can get the kit.
Font of choice, I am using Sweetheart Script.
Optional plugin for name: Alien Skin Eye Candy 3.1
Let's get started!
Open your tag template and resize it by 85%, then change the canvas size by going to image, canvas size and change it to 650 x 650. Delete the layer called "by Missy" and then unhide the background layer if you like to have that there to see things better while you're working.
On the circle one layer, take your magic wand and click inside it. Open paper 12, copy and paste as a new layer, selections, invert, and make sure you are on the paper layer, hit the delete button on your keyboard. Deselect and delete the original circle one layer. Add a drop shadow. I used 1, 1, 60, 5. I then deleted the dotted circle layer because it didn't show with the paper I used. If you use a different paper, you might choose to keep that layer.
Make circle 2 layer active and click on it with your magic wand. Open paper 8, copy and paste as a new layer, resize by 60%, selections, invert, and make sure you are on the paper layer, hit delete on your keyboard, deselect, add a drop shadow, then delete the original circle 2 layer.
Make the Brush by Starwalk layer active. Click on adjust, hue and saturation, colorize, change the Hue to 238, and the Saturation to 149.
Make the frame layer active and click on it with the magic wand. Open paper 7, copy and paste as a new layer, selections, invert, on the paper layer, click delete on your keyboard. Deselect, add your drop shadow, and delete the original frame layer.
Make the background frame layer active and click on it with the magic wand, open paper 9, copy and paste as a new layer, resize by 60%, selections invert, and click delete on your keyboard. Leave selected.
Open your tube, copy and paste as a new layer, resize if necessary, arrange your tube so you have whatever part you want showing in the frame, click delete on your keyboard, deselect, delete the original background frame layer.
Now go to adjust, Hue & Saturation, Colorize, and change the Hue & Saturation settings both to 0 to make the tube grey.
You can colorize the word art and the stars if you want, or fill them in with a paper like we did the other layers. I chose to leave mine as they were.
Copy and paste your tube as a new layer. Arrange it to the right side of your tag. If you use the same one that came in the kit, you'll need to resize it around 60 or 70%.
Open the bubble string element, resize by 60% and arrange near the bottom of your tag, drag that layer just below your tube.
Open ribbon 2, resize by 40% arrange it under the word art, and so that the staples are on the bottom left corner of the frame.
Open the mat element, resize by 60% then resize by 90%. Drag it just below the bottom circle layer, and just above the Brush by Starwalt layer, duplicate, image, free rotate to the left by 30, duplicate that layer and rotate again to the left by 30.
Open the Doily element, resize by 105% drag that layer down just above the mat layer you just did.
Open the Rose Clusters element, resize by 40% rotate to the left by 90, arrange to the bottom left of your tag. See mine for reference.
Add your name and any © info that is needed. For my name, I typed it in white then added a glow with the Eye Candy 3.1 set at 3, fat using #ffd2d1 as the color.
If you want to save as a transparent tag, delete the white background layer and save as a .png file.
Wednesday, December 30, 2009
Sweet Serenity
 For this tut you will need the following:
Any version of Paint Shop Pro. I am using PSP X.
Scrap kit Sweet Serenity by Wicked Princess Scraps. Click on the name of the kit and go to her blog. Then go on the right hand side to the blinkies for the stores she sells at, and it is on sale at Twilight Scraps.
Tube of choice. For this tut I am using the tube that came with the kit.
Font of choice, I used Sweetheart Script.
Ok, let's get started!
Open a new canvas, size 700 x 700, white.
Open element WP_SS_BracketFrame, copy and paste as a new layer, rotate to the left by 35. Click inside the bracket frame with your magic wand tool, selections, modify, expand by 3.
Open paper 8, copy and paste as a new layer, and resize by 80%. Selections invert, and on your paper layer, click delete on your keyboard and leave selected.
Open your tube, mirror it, copy and paste as a new layer, resize by 150%, on the tube layer, hit delete on your keyboard. Deselect, drop the opacity down to around 28 or 30%. Add a drop shadow to your frame. I used 1, 1, 60, 5 throughout the tutorial.
Open the featherstar element, copy and paste as a new layer, resize by 70% and arrange it at the bottom of the yellow bracket frame.
Open the purple doodle, copy and paste as a new layer, drag it down below the paper background layer (that you filled inside the frame with).
Open the moon star dangle element. Take your selection tool set on rectangle and draw around the right half of the element. I drew as far as the white star that was after the 5th purple star to the left of the moon. Copy and paste as a new layer, and move it over to the right of your tag, so that the moon and purple stars are mostly outside your frame. You will have some white stars dangling inside your frame.
Copy and paste your tube as a new layer, resize if necessary. I resized mine by 80%, and add a drop shadow.
Add your © info and name, crop and resize as necessary and if you want to save it as a transparent tag, delete the white background layer and save as a .png file.
For this tut you will need the following:
Any version of Paint Shop Pro. I am using PSP X.
Scrap kit Sweet Serenity by Wicked Princess Scraps. Click on the name of the kit and go to her blog. Then go on the right hand side to the blinkies for the stores she sells at, and it is on sale at Twilight Scraps.
Tube of choice. For this tut I am using the tube that came with the kit.
Font of choice, I used Sweetheart Script.
Ok, let's get started!
Open a new canvas, size 700 x 700, white.
Open element WP_SS_BracketFrame, copy and paste as a new layer, rotate to the left by 35. Click inside the bracket frame with your magic wand tool, selections, modify, expand by 3.
Open paper 8, copy and paste as a new layer, and resize by 80%. Selections invert, and on your paper layer, click delete on your keyboard and leave selected.
Open your tube, mirror it, copy and paste as a new layer, resize by 150%, on the tube layer, hit delete on your keyboard. Deselect, drop the opacity down to around 28 or 30%. Add a drop shadow to your frame. I used 1, 1, 60, 5 throughout the tutorial.
Open the featherstar element, copy and paste as a new layer, resize by 70% and arrange it at the bottom of the yellow bracket frame.
Open the purple doodle, copy and paste as a new layer, drag it down below the paper background layer (that you filled inside the frame with).
Open the moon star dangle element. Take your selection tool set on rectangle and draw around the right half of the element. I drew as far as the white star that was after the 5th purple star to the left of the moon. Copy and paste as a new layer, and move it over to the right of your tag, so that the moon and purple stars are mostly outside your frame. You will have some white stars dangling inside your frame.
Copy and paste your tube as a new layer, resize if necessary. I resized mine by 80%, and add a drop shadow.
Add your © info and name, crop and resize as necessary and if you want to save it as a transparent tag, delete the white background layer and save as a .png file.
Another CT team
I have joined another Creative Team, this time it's Wicked Princess Scraps. She's got some great kits, go check out her site HERE.
Bad Girls
 For this tutorial you will need the following:
Any version of Paint Shop Pro (I am using PSP X)
2 tubes of choice. I am using the awesome work of Ismael Rac which you can purchase at AMI.
A scrap kit. I am using Whips and Pain Excite me by Monti which you can also purchase at AMI.
Mask of choice. I used a Mask 12 by Babe's Designz
Font of choice, I used Angelic War.
Plugins: I used Alien Skin Eye Candy 3.1 Glow for my name, which is optional.
Let's get started.
Open a new canvas about 700 x 700 and flood fill with white. If it's too big you can crop it down at the end. Having it this size gives us lots of room to work.
Open 2 frames, Black wrapped frame and red wrapped frame. Copy and paste each frame as a new layer, resize each frame by 60% then by 90% and mirror one frame so that you have the bows on each frame facing outwards. Use your mover tool to bring one a little higher than the other. (See my finished tag for reference).
Take your magic wand and select inside your frame with the red ribbon, make sure to hold down the shift key and get the little parts at the bottom of the frame between it and the ribbon. Selections, modify, expand by 5.
Add a new raster layer below the red ribbon frame, and flood fill with #a20003. Leave selected and open one of your tubes. Copy and paste it as a new layer, drag it below the frame layer, and above the paper layer. Duplicate your tube layer, and bring the duplicate above the frame layer, and hide it for now. Selections invert and on the original (bottom) tube layer, take your eraser tool and erase all the bits that hang over the frame at the bottom. Select none, add a drop shadow to that bottom tube. I used 1, 1, 60, 5
Unhide your top tube layer and erase the parts that cover the ribbon and hang below the frame. You don't have to be very careful that you don't go outside the ribbon because you have the bottom tube showing through. Doing it this way lets you kind of be a sloppy eraser, lol. Add a drop shadow to the frame layer also.
Now on your other frame (with the black ribbon) grab your magic wand tool and click inside all the parts of the frame and between the frame and ribbon like you did previously. Selections, modify, expand by 5, open the Red Fur paper, copy and paste as a new layer, selections, invert, and on the paper layer, hit the delete key on your keyboard. Drag that layer below your frame layer, and leave selected.
Copy your second tube and paste as a new layer. Do the same as you did with the other tube above.
Open the Red, black, brown paper and paste as a new layer, and drag it just above your white background layer. Open your mask, and click on layers, new mask layer, from image, on the drop down menu, choose the mask, and make sure invert mask data is checked, click ok. Delete the mask layer, and merge the group together. Drop the opacity to around 40% and resize by about 75%. I noticed when I resized it left a border of the paper around the edges that I had to erase with my eraser tool, so if it does that to you, just erase it.
Drag your two top tubes (the ones in each frame that are the top tubes) up so that they are the two very top layers in your tag.
Open the red eyelet ribbon element, copy and paste as a new layer, and resize it by about 50% and then again by about 77%. Drag it below the two top tube layers and position it so that the eyelets are on each frame, add a drop shadow, and erase the parts that show over the tops of the ribbons and hang too far below the frames.
Copy and paste the Black Ribbon Pain element. Resize by 77%. Drag that layer below the two tube layers but above the eyelet ribbon layer. Leave it positioned on the tag where PSP put it when you copy and pasted it. After resizing it lays nicely in the center of your tag. You may have some of the ribbon that shows through the tube because of how you erased the tube, if so just take your eraser tool and erase it. Add your drop shadow.
Open the ball gag element, resize by about 25%, add a drop shadow, rotate to the left by 20. Drag it to the bottom left corner of your tag, and erase the parts that go over the frame, so it looks like it is hanging off the bottom of the frame. See my tag for reference.
Open the element Black Collar Slave, copy and paste as a new layer, resize by 25%, rotate to the right by 35%, add a drop shadow. Position it above the top rectangle on the right side of it, and erase the bits that hang over it the frame so it looks like it's dangling from the frame. See my tag for reference.
Open the Black Whip Heart element, resize by about 35%, add a drop shadow, mirror and arrange to the bottom left side of your tag over the ball gag.
Using your text tool, add your copyright and license info to your tag. Then add your name. I used Angelic war for my name, black as my background color, #a20003 as the foreground, the stroke width set at 2, then converted to a raster layer, and added Eye Candy 3.1 Glow in white with the width set to 5 and opacity drop off set to fat and added the same drop shadow I used throughout the tag.
Crop down and resize your tag. If you want it transparent, delete the white background layer and save as a .png file and you're all done!
For this tutorial you will need the following:
Any version of Paint Shop Pro (I am using PSP X)
2 tubes of choice. I am using the awesome work of Ismael Rac which you can purchase at AMI.
A scrap kit. I am using Whips and Pain Excite me by Monti which you can also purchase at AMI.
Mask of choice. I used a Mask 12 by Babe's Designz
Font of choice, I used Angelic War.
Plugins: I used Alien Skin Eye Candy 3.1 Glow for my name, which is optional.
Let's get started.
Open a new canvas about 700 x 700 and flood fill with white. If it's too big you can crop it down at the end. Having it this size gives us lots of room to work.
Open 2 frames, Black wrapped frame and red wrapped frame. Copy and paste each frame as a new layer, resize each frame by 60% then by 90% and mirror one frame so that you have the bows on each frame facing outwards. Use your mover tool to bring one a little higher than the other. (See my finished tag for reference).
Take your magic wand and select inside your frame with the red ribbon, make sure to hold down the shift key and get the little parts at the bottom of the frame between it and the ribbon. Selections, modify, expand by 5.
Add a new raster layer below the red ribbon frame, and flood fill with #a20003. Leave selected and open one of your tubes. Copy and paste it as a new layer, drag it below the frame layer, and above the paper layer. Duplicate your tube layer, and bring the duplicate above the frame layer, and hide it for now. Selections invert and on the original (bottom) tube layer, take your eraser tool and erase all the bits that hang over the frame at the bottom. Select none, add a drop shadow to that bottom tube. I used 1, 1, 60, 5
Unhide your top tube layer and erase the parts that cover the ribbon and hang below the frame. You don't have to be very careful that you don't go outside the ribbon because you have the bottom tube showing through. Doing it this way lets you kind of be a sloppy eraser, lol. Add a drop shadow to the frame layer also.
Now on your other frame (with the black ribbon) grab your magic wand tool and click inside all the parts of the frame and between the frame and ribbon like you did previously. Selections, modify, expand by 5, open the Red Fur paper, copy and paste as a new layer, selections, invert, and on the paper layer, hit the delete key on your keyboard. Drag that layer below your frame layer, and leave selected.
Copy your second tube and paste as a new layer. Do the same as you did with the other tube above.
Open the Red, black, brown paper and paste as a new layer, and drag it just above your white background layer. Open your mask, and click on layers, new mask layer, from image, on the drop down menu, choose the mask, and make sure invert mask data is checked, click ok. Delete the mask layer, and merge the group together. Drop the opacity to around 40% and resize by about 75%. I noticed when I resized it left a border of the paper around the edges that I had to erase with my eraser tool, so if it does that to you, just erase it.
Drag your two top tubes (the ones in each frame that are the top tubes) up so that they are the two very top layers in your tag.
Open the red eyelet ribbon element, copy and paste as a new layer, and resize it by about 50% and then again by about 77%. Drag it below the two top tube layers and position it so that the eyelets are on each frame, add a drop shadow, and erase the parts that show over the tops of the ribbons and hang too far below the frames.
Copy and paste the Black Ribbon Pain element. Resize by 77%. Drag that layer below the two tube layers but above the eyelet ribbon layer. Leave it positioned on the tag where PSP put it when you copy and pasted it. After resizing it lays nicely in the center of your tag. You may have some of the ribbon that shows through the tube because of how you erased the tube, if so just take your eraser tool and erase it. Add your drop shadow.
Open the ball gag element, resize by about 25%, add a drop shadow, rotate to the left by 20. Drag it to the bottom left corner of your tag, and erase the parts that go over the frame, so it looks like it is hanging off the bottom of the frame. See my tag for reference.
Open the element Black Collar Slave, copy and paste as a new layer, resize by 25%, rotate to the right by 35%, add a drop shadow. Position it above the top rectangle on the right side of it, and erase the bits that hang over it the frame so it looks like it's dangling from the frame. See my tag for reference.
Open the Black Whip Heart element, resize by about 35%, add a drop shadow, mirror and arrange to the bottom left side of your tag over the ball gag.
Using your text tool, add your copyright and license info to your tag. Then add your name. I used Angelic war for my name, black as my background color, #a20003 as the foreground, the stroke width set at 2, then converted to a raster layer, and added Eye Candy 3.1 Glow in white with the width set to 5 and opacity drop off set to fat and added the same drop shadow I used throughout the tag.
Crop down and resize your tag. If you want it transparent, delete the white background layer and save as a .png file and you're all done!
Pleasure is pain
 For this tutorial you will need:
Paint Shop Pro: I am using PSP X but any version should work.
Tube of choice. I am using the wonderful artwork of Ismael Rac, which you can purchase at AMI. This particular tube was made just for me by Ismael when I was the "Stalker of the Month" at his AMI forum "The Offical Rac Stalkers."
Scrap kit by Monti also available at AMI, called "Whips and Pain Excite Me."
Tag template 294 by Missy at Divine Intentionz
Mask of choice. I got mine from Becky at Secrets of the Imagination, but the site is closed. Any mask you like will do though.
Font of choice. I used Nightmare Hero
Plugins: Alien Eye Candy 3.1 Glow (optional, for the name)
Let's begin:
Open your tag template, and delete the following layers: Credit, By Missy, Word art by Missy, Suckers, Raster 1, glittered hearts, small hearts, heart and pixel words.
Image, resize, all layers by 85%. Then resize your canvas to 650 x 650 to give you room to work.
On your oval layer, selections, select all, float, defloat. Open the paper Red Fur, copy and paste as a new layer. Selections, invert, make sure you are on the paper layer and hit delete on your keyboard. Leave selected. Delete the original oval layer.
Open your tube, and copy and paste it as a new layer. Arrange it over he red fur paper layer and then hit delete on your keyboard. Duplicate the tube layer and drag the bottom layer over slightly to the left. click delete on your keyboard. Change the blend mode on the bottom tube to soft light.
Selections, invert, modify, expand 5, add a new raster layer, drag it below the red oval, flood fill with white. Expand by 2 and add a new raster layer, drag it below your white layer and flood fill with black. Deselect and add a drop shadow to your black oval. I used 1, 1, 60, 5
click on the circle 2 layer, selections, select all, float, defloat. Open the Red, brown, black striped paper and copy and paste as a new layer. Resize by 70%, selections, invert, and hit delete on your keyboard. Leave selected.
Open the close up of your tube (or if you don't have one, then you can just resize it and make it larger) paste it as a new layer, arrange it over the striped paper layer and hit delete on your keyboard, deselect.
On the white shape layer, click inside it with your magic wand, add a new raster layer and flood fill with black, apply filter Penta, color dot with the default settings. Selections, modify, expand by 2, add a new raster layer and bring it below the black layer, flood fill with white, add a drop shadow and merge the black and white layers together.
Open the element Black Ribbon Pain and resize about 77%, then rotate it to the left by 8. Drag it below the oval layer and arrange it how you'd like.
Open the black cuffs copy and paste as a new layer, and resize it by 30%, add drop shadow, arrange to the bottom of your tag.
Open the black spanker element and copy and paste as a new layer. Resize by 30%, add a drop shadow and arrange it to the right side of your tag.
Open the Red, black, brown Striped Paper, copy and paste as a new layer, drag to the bottom. Open the mask in PSP and apply mask by going to Layers>new mask layer> from image, browsing to find the mask. Delete the mask layer, and merge the group together. Resize if needed.
Add your name, I used Nightmare Hero with the background set to #d3202b, foreground set to black, and stroke at 2. Then I added Alien Eye Candy Glow at a width of 3 and a drop shadow.
Add your license and © info, save as a .png file so it's transparent and you're done.
For this tutorial you will need:
Paint Shop Pro: I am using PSP X but any version should work.
Tube of choice. I am using the wonderful artwork of Ismael Rac, which you can purchase at AMI. This particular tube was made just for me by Ismael when I was the "Stalker of the Month" at his AMI forum "The Offical Rac Stalkers."
Scrap kit by Monti also available at AMI, called "Whips and Pain Excite Me."
Tag template 294 by Missy at Divine Intentionz
Mask of choice. I got mine from Becky at Secrets of the Imagination, but the site is closed. Any mask you like will do though.
Font of choice. I used Nightmare Hero
Plugins: Alien Eye Candy 3.1 Glow (optional, for the name)
Let's begin:
Open your tag template, and delete the following layers: Credit, By Missy, Word art by Missy, Suckers, Raster 1, glittered hearts, small hearts, heart and pixel words.
Image, resize, all layers by 85%. Then resize your canvas to 650 x 650 to give you room to work.
On your oval layer, selections, select all, float, defloat. Open the paper Red Fur, copy and paste as a new layer. Selections, invert, make sure you are on the paper layer and hit delete on your keyboard. Leave selected. Delete the original oval layer.
Open your tube, and copy and paste it as a new layer. Arrange it over he red fur paper layer and then hit delete on your keyboard. Duplicate the tube layer and drag the bottom layer over slightly to the left. click delete on your keyboard. Change the blend mode on the bottom tube to soft light.
Selections, invert, modify, expand 5, add a new raster layer, drag it below the red oval, flood fill with white. Expand by 2 and add a new raster layer, drag it below your white layer and flood fill with black. Deselect and add a drop shadow to your black oval. I used 1, 1, 60, 5
click on the circle 2 layer, selections, select all, float, defloat. Open the Red, brown, black striped paper and copy and paste as a new layer. Resize by 70%, selections, invert, and hit delete on your keyboard. Leave selected.
Open the close up of your tube (or if you don't have one, then you can just resize it and make it larger) paste it as a new layer, arrange it over the striped paper layer and hit delete on your keyboard, deselect.
On the white shape layer, click inside it with your magic wand, add a new raster layer and flood fill with black, apply filter Penta, color dot with the default settings. Selections, modify, expand by 2, add a new raster layer and bring it below the black layer, flood fill with white, add a drop shadow and merge the black and white layers together.
Open the element Black Ribbon Pain and resize about 77%, then rotate it to the left by 8. Drag it below the oval layer and arrange it how you'd like.
Open the black cuffs copy and paste as a new layer, and resize it by 30%, add drop shadow, arrange to the bottom of your tag.
Open the black spanker element and copy and paste as a new layer. Resize by 30%, add a drop shadow and arrange it to the right side of your tag.
Open the Red, black, brown Striped Paper, copy and paste as a new layer, drag to the bottom. Open the mask in PSP and apply mask by going to Layers>new mask layer> from image, browsing to find the mask. Delete the mask layer, and merge the group together. Resize if needed.
Add your name, I used Nightmare Hero with the background set to #d3202b, foreground set to black, and stroke at 2. Then I added Alien Eye Candy Glow at a width of 3 and a drop shadow.
Add your license and © info, save as a .png file so it's transparent and you're done.
Wednesday, December 23, 2009
Skulls & Bows
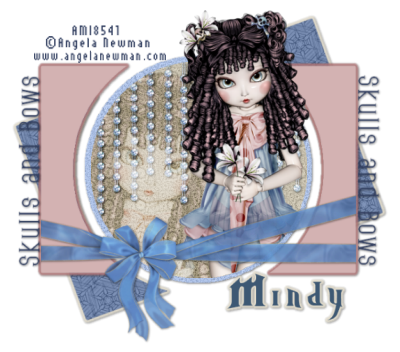 For this tutorial you will need the following:
Tube of choice. I am using the awesome artwork of Angela Newman, which you have to have a license to use, and you can purchase at AMI.
Scrap kit of choice. I am using a freebie called Frosty Days by Sylvie at Fantasy Moments. You can use this one or any other of your choice that matches the tube you are using.
My template HERE.
Font of choice. I am using Nightmare Hero
Plugins: Alien Skin Eye Candy 3.1 Glow (or another version of Alien Skin's gradient glow, etc will work just as well)
Let's start!
Open your template, delete the Raster 6 layer. Change the canvas size to about 700 x 700 so you have room to work. You can crop it down and resize it at the end if you want.
Open paper 9. On your raster 3 layer, click inside it with your magic wand, copy your paper 9 layer and paste as a new layer. Selections, invert, make sure you are on your paper layer, and hit the delete key on your keyboard. Deselect and using your Eye Candy Glow filter using #ede6d4 as the color, set to width of 5 and fat. Add a drop shadow of your choosing. I use 1, 1, 60, 5. Delete the original raster 3 layer.
Click on your raster 1 layer, click inside it with your magic wand, add a new raster layer, and flood flood fill with #d4b3b3, deselect and delete the original raster 1 layer. Apply the Eye Candy glow filter using the same settings, except change the color to #b87a7b, and add your drop shadow.
Click on your raster 5 layer, click inside it with your magic wand, add a new raster layer and flood fill with #344162. Deselect, add a drop shadow and delete the original layer. Do the same thing for the Copy of Raster 5 layer.
Open paper 17. On your raster 2 layer, click inside it with your magic wand, copy paper 17 and paste as a new layer, selections, invert, make sure you are on the paper layer, and hit delete on your keyboard, add a drop shadow and delete the original raster layer.
Click on raster 4 layer with your magic wand, open paper 18, copy and paste it as a new layer, selections, invert, on your paper layer, hit delete on your keyboard, delete the original raster 4 layer and leave selected.
Open your tube, copy and paste as a new layer, move it to the right side of your circle layer and take your eraser tool and erase the bits that hang over the bottom edge, keep selected.
On the original tube, image, mirror, then copy and paste as a new layer. Resize your tube, I resized about 145%, but the amount you resize will depend on the tube you are using. Make sure you are on the resized tube layer, and hit delete on your keyboard. Drag that layer below your first tube layer, deselect, change the blend mode to Soft Light.
Open a ribbon, I used Element 13 and resized it by 40%, add a drop shadow, arrange it near the bottom of the tag, and erase the bits that hang over the top rectangle.
Take your lighten/darken tool, and with the size set to about 25, hardness at 50, step 5, density 100, thickness 100, rotation 0, opacity 50, right click and hold the button down and drag it across the ends of your ribbon, from the inside edge to the outside edge, making it darken a bit on the edges.
On the smaller circle layer, selections, select all, float, defloat, open Element 17, copy and paste as a new layer, resize by 60%, selections, invert, on your element layer, hit delete on your keyboard and then deselect and add a drop shadow.
With your text tool, background set to #3d5873 write out your name. Using your Glow plugin, add a glow with the width of about 5 fat using color #ede6d4, and then add a drop shadow.
Add your license and ©info.
Delete the white background layer, crop your image, resize as necessary, and save as a transparent .png file and you're done!
For this tutorial you will need the following:
Tube of choice. I am using the awesome artwork of Angela Newman, which you have to have a license to use, and you can purchase at AMI.
Scrap kit of choice. I am using a freebie called Frosty Days by Sylvie at Fantasy Moments. You can use this one or any other of your choice that matches the tube you are using.
My template HERE.
Font of choice. I am using Nightmare Hero
Plugins: Alien Skin Eye Candy 3.1 Glow (or another version of Alien Skin's gradient glow, etc will work just as well)
Let's start!
Open your template, delete the Raster 6 layer. Change the canvas size to about 700 x 700 so you have room to work. You can crop it down and resize it at the end if you want.
Open paper 9. On your raster 3 layer, click inside it with your magic wand, copy your paper 9 layer and paste as a new layer. Selections, invert, make sure you are on your paper layer, and hit the delete key on your keyboard. Deselect and using your Eye Candy Glow filter using #ede6d4 as the color, set to width of 5 and fat. Add a drop shadow of your choosing. I use 1, 1, 60, 5. Delete the original raster 3 layer.
Click on your raster 1 layer, click inside it with your magic wand, add a new raster layer, and flood flood fill with #d4b3b3, deselect and delete the original raster 1 layer. Apply the Eye Candy glow filter using the same settings, except change the color to #b87a7b, and add your drop shadow.
Click on your raster 5 layer, click inside it with your magic wand, add a new raster layer and flood fill with #344162. Deselect, add a drop shadow and delete the original layer. Do the same thing for the Copy of Raster 5 layer.
Open paper 17. On your raster 2 layer, click inside it with your magic wand, copy paper 17 and paste as a new layer, selections, invert, make sure you are on the paper layer, and hit delete on your keyboard, add a drop shadow and delete the original raster layer.
Click on raster 4 layer with your magic wand, open paper 18, copy and paste it as a new layer, selections, invert, on your paper layer, hit delete on your keyboard, delete the original raster 4 layer and leave selected.
Open your tube, copy and paste as a new layer, move it to the right side of your circle layer and take your eraser tool and erase the bits that hang over the bottom edge, keep selected.
On the original tube, image, mirror, then copy and paste as a new layer. Resize your tube, I resized about 145%, but the amount you resize will depend on the tube you are using. Make sure you are on the resized tube layer, and hit delete on your keyboard. Drag that layer below your first tube layer, deselect, change the blend mode to Soft Light.
Open a ribbon, I used Element 13 and resized it by 40%, add a drop shadow, arrange it near the bottom of the tag, and erase the bits that hang over the top rectangle.
Take your lighten/darken tool, and with the size set to about 25, hardness at 50, step 5, density 100, thickness 100, rotation 0, opacity 50, right click and hold the button down and drag it across the ends of your ribbon, from the inside edge to the outside edge, making it darken a bit on the edges.
On the smaller circle layer, selections, select all, float, defloat, open Element 17, copy and paste as a new layer, resize by 60%, selections, invert, on your element layer, hit delete on your keyboard and then deselect and add a drop shadow.
With your text tool, background set to #3d5873 write out your name. Using your Glow plugin, add a glow with the width of about 5 fat using color #ede6d4, and then add a drop shadow.
Add your license and ©info.
Delete the white background layer, crop your image, resize as necessary, and save as a transparent .png file and you're done!
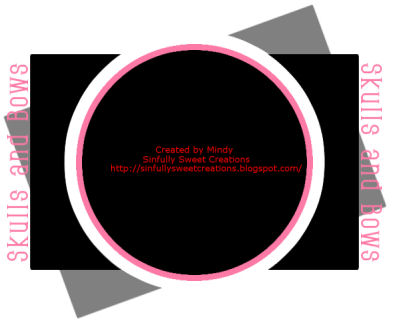
Template 7 Skulls & Bows
Here's a new template for you to play with. I made it specifically to use with a cute little tube by Angela Newman called LilyMae. You can get it HERE.
Thursday, December 17, 2009
2010 New Year
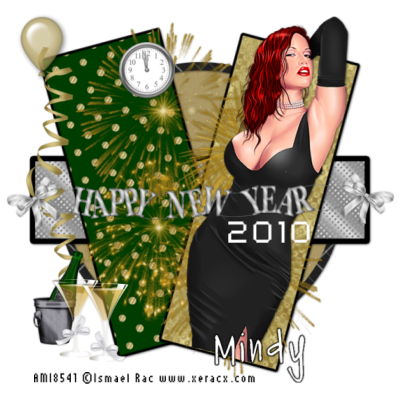 For this tut you will need the following:
Tube of choice. I am using the beautiful artwork of Ismael Rac, which you have to purchase at AMI to use.
Scrap kit of choice. I am using a FTU kit from Fantasy moments called Happy New Year.
Font of choice. I used PF Tempesta Seven Extended and Pea Miss Stalker
Plugin: Alien Skin Eye Candy 3.1 glow (optional for name)
Ok, let's get started!
Open a new transparent (or white) canvas of 650 x 650.
Open Happy New Year paper 21 and click on your foreground in the materials palette, go to patterns and browse to find your paper and set it as your foreground, set your background to null.
Click on your preset shape, set it to elipse, and with the width set at 15, draw out a large circle on your canvas. Objects, align, center in canvas and convert to a raster layer. Add a drop shadow of choice. I used 1, 1, 60, 5
With your magic wand, click inside your circle, selections, modify, expand by 5, add a new raster layer below the circle, and open Happy New Year paper 6, and on your foreground in the materials palette, go to patterns and browse to find paper 6 and set it as your foreground. Make sure you are on the new layer and flood fill with the paper 6 pattern. Deselect
Open paper 9 and set it as your background as you did above, and set your foreground to black. With your preset shape tool set on rectangle with the stroke set to 10, draw out a long thinnish rectangle across the circle. (see my tag for reference)Objects, align, center in canvas and convert to raster layer. Add your drop shadow.
Open paper 2 and set it as your background pattern, leaving your foreground set to black and stroke changed to 5. Draw out a long, slightly wide rectangle going from the top to the bottom of your tag, going a bit over the circle layer at both the top and the bottom. Convert to raster layer and rotate to the left by 15. Add drop shadow.
Open paper 12 and set it as your background pattern, leave the foreground set to black, stroke still set at 5 and draw out another long, wide rectangle as you did in the step above. Convert to raster layer and rotate to the right by 15. Add drop shadow.
Open your tube, copy and paste as a new layer. Position it over one of the vertical rectangles you just made, resize as necessary (I resized mine by 120%) add a drop shadow, and erase the bits that hang over the rectangle.
Open element 39, resize by about 80%, copy and paste as a new layer, and move to the left of the tag, add drop shadow.
Open element 28, resize by about 85%, copy and paste as a new layer, and drag down so it's just below your tube layer, and above all the rectangles. Add a very light drop shadow, I used 0, 0, 40, 5
Open element 52, resize by 20% copy and paste as a new layer, and arrange it to the left of the tag, just above the top of the ribbon.
Open element 2, resize by 20%, copy and paste as a new layer, select inside with your magic wand, being sure to hold down the shift key and get inside the hands of the clock and inside the numbers that are closed off (the 0, 8, etc). Selections, modify, expand by 5, add a new layer under the clock layer and flood fill with white. Merge the white layer and the clock layer together.
Open element 16, copy and paste as a new layer, resize by 25% add the light drop shadow that you used for your fireworks and move down to the lower left side.
Open element 36, copy and paste as a new layer, resize by 25%, add the darker drop shadow you used on the rectangles, move to the lower left side, and drag the layer below the champagne glasses.
Open element 20, copy and paste as a new layer, resize by 50%, add the darker drop shadow, make sure that layer is on the top of all your elements, etc, and arrange it so that the bows are on each edge of the vertical rectangle (see my tag for reference).
Add the text 2010 in white, I used PF Tempesta Seven Extended font, add your drop shadow.
Add your name, I used Pea Miss Stalker in white and added Eye Candy Gradient glow size 3 fat in black, then the dark drop shadow.
Add your copyright and license info and you're done!
For this tut you will need the following:
Tube of choice. I am using the beautiful artwork of Ismael Rac, which you have to purchase at AMI to use.
Scrap kit of choice. I am using a FTU kit from Fantasy moments called Happy New Year.
Font of choice. I used PF Tempesta Seven Extended and Pea Miss Stalker
Plugin: Alien Skin Eye Candy 3.1 glow (optional for name)
Ok, let's get started!
Open a new transparent (or white) canvas of 650 x 650.
Open Happy New Year paper 21 and click on your foreground in the materials palette, go to patterns and browse to find your paper and set it as your foreground, set your background to null.
Click on your preset shape, set it to elipse, and with the width set at 15, draw out a large circle on your canvas. Objects, align, center in canvas and convert to a raster layer. Add a drop shadow of choice. I used 1, 1, 60, 5
With your magic wand, click inside your circle, selections, modify, expand by 5, add a new raster layer below the circle, and open Happy New Year paper 6, and on your foreground in the materials palette, go to patterns and browse to find paper 6 and set it as your foreground. Make sure you are on the new layer and flood fill with the paper 6 pattern. Deselect
Open paper 9 and set it as your background as you did above, and set your foreground to black. With your preset shape tool set on rectangle with the stroke set to 10, draw out a long thinnish rectangle across the circle. (see my tag for reference)Objects, align, center in canvas and convert to raster layer. Add your drop shadow.
Open paper 2 and set it as your background pattern, leaving your foreground set to black and stroke changed to 5. Draw out a long, slightly wide rectangle going from the top to the bottom of your tag, going a bit over the circle layer at both the top and the bottom. Convert to raster layer and rotate to the left by 15. Add drop shadow.
Open paper 12 and set it as your background pattern, leave the foreground set to black, stroke still set at 5 and draw out another long, wide rectangle as you did in the step above. Convert to raster layer and rotate to the right by 15. Add drop shadow.
Open your tube, copy and paste as a new layer. Position it over one of the vertical rectangles you just made, resize as necessary (I resized mine by 120%) add a drop shadow, and erase the bits that hang over the rectangle.
Open element 39, resize by about 80%, copy and paste as a new layer, and move to the left of the tag, add drop shadow.
Open element 28, resize by about 85%, copy and paste as a new layer, and drag down so it's just below your tube layer, and above all the rectangles. Add a very light drop shadow, I used 0, 0, 40, 5
Open element 52, resize by 20% copy and paste as a new layer, and arrange it to the left of the tag, just above the top of the ribbon.
Open element 2, resize by 20%, copy and paste as a new layer, select inside with your magic wand, being sure to hold down the shift key and get inside the hands of the clock and inside the numbers that are closed off (the 0, 8, etc). Selections, modify, expand by 5, add a new layer under the clock layer and flood fill with white. Merge the white layer and the clock layer together.
Open element 16, copy and paste as a new layer, resize by 25% add the light drop shadow that you used for your fireworks and move down to the lower left side.
Open element 36, copy and paste as a new layer, resize by 25%, add the darker drop shadow you used on the rectangles, move to the lower left side, and drag the layer below the champagne glasses.
Open element 20, copy and paste as a new layer, resize by 50%, add the darker drop shadow, make sure that layer is on the top of all your elements, etc, and arrange it so that the bows are on each edge of the vertical rectangle (see my tag for reference).
Add the text 2010 in white, I used PF Tempesta Seven Extended font, add your drop shadow.
Add your name, I used Pea Miss Stalker in white and added Eye Candy Gradient glow size 3 fat in black, then the dark drop shadow.
Add your copyright and license info and you're done!
Wednesday, December 9, 2009
Happy New Year
 For this tutorial you will need the following:
Paint Shop Pro: I am using PSP X, but any version should work.
Animation Shop
Tube of choice, I am using the beautiful artwork of Ismael Rac which you have to purchase at AMI to use.
Scrap kit: Happy New Year by Sylvie at Fantasy Moments. This is a FTU kit.
Fireworks animation from VerveGrafx. I used #18, but feel free to use another that you may like and change it up. You may have to change the animation instructions to fit the number of frames your animation has if you use another.
Font of choice. I used Pea Lovey Dovey
Plugin Alien Eye Candy 3.1 Glow
Let's begin!
Open a new canvas 650 x 650, flood fill white.
Open element 47, copy and paste as a new layer, resize 70%, add drop shadow.
Open frame element 63, copy and paste as a new layer, resize 60%, add a drop shadow. Click inside the frame with your selection tool, modify, expand by 5.
Open paper 5, paste as a new layer, resize by 80%, invert, and on the paper layer, hit delete on your keyboard, drag layer below your frame, keep selected.
Copy your tube and paste as a new layer. Arrange it how you like it and then erase the bits that hang over your frame. Deselect, add drop shadow.
Open element 19, resize by 55%, take your eraser tool and erase the bows and the string connecting the banner to the bows on each side. Apply the Eye Candy Glow effect with a width of 5. Position across the bottom of the frame.
Open element 3, the clock. Take your selection tool and click inside, hold down the shift key and click inside all the numbers that are round (0,6, etc) and inside the hands of the clock. Add a new raster layer and flood fill with white. Deselect. Copy merged and paste on your tag as a new layer. Resize by 20%, rotate to the left by 13, add a drop shadow, arrange to the top left of your frame.
Open the champagne glasses, element 12, copy and paste as a new layer, resize by 20%, add your drop shadow, and move to the bottom right of your frame.
Add any other elements you might like.
Add your name and your copyright/license info. Crop it down and delete the white background layer. I added a glow around my name with a width of 5 and then added my drop shadow.
If you are not going to animate, you can save it now as a .png file so it will be transparent.
To animate:
Click on your paper layer that you used to fill your frame with. Selections, select all, float, defloat.
Go to your Animation Shop and open your fireworks animation. Click on layer one and copy.
Go back to PSP and just above your background layer that you have selected, but below the frame layer, add a new raster layer, and name it 1. Paste your animation as a new image. Go to your materials pallette and set the foreground as a pattern and browse until you find your firework, chose that, and go back and fill the new layer you opened with your firework pattern.
Delete the firework image, and go back to AS and click on the second frame of the animation, copy it and go back into PSP. Paste as a new image. Add a new raster layer and name it 2,above layer 1 that you made for your firework. Set your foreground to pattern and browse to find the firework image you just pasted, flood fill that layer with the firework pattern.
Keep repeating the above directions until you have a layer for each layer of your firework animation.
After you get all the layers into your tag, deselect.
Hide all firework layers except layer 1. Copy merged and take the tag over to animation shop, paste as a new animation.
Back in PSP, hide layer 1 and unhide layer 2, copy merged and take into animation shop, paste after current frame.
Go back into PSP, hide layer 2 and unhide layer 3. Copy merged and take into animation shop, paste after current frame.
Continue as above until you have all your layers moved into animation shop.
Make sure you save the tag you have in PSP as a psp image and then the next time you want to make one for someone, you'll only have to change the name on it, and then copy each of the layers over into AS. You won't have to fill each layer again!
In Animation Shop, crop and resize your tag as needed and save.
You're all done!
For this tutorial you will need the following:
Paint Shop Pro: I am using PSP X, but any version should work.
Animation Shop
Tube of choice, I am using the beautiful artwork of Ismael Rac which you have to purchase at AMI to use.
Scrap kit: Happy New Year by Sylvie at Fantasy Moments. This is a FTU kit.
Fireworks animation from VerveGrafx. I used #18, but feel free to use another that you may like and change it up. You may have to change the animation instructions to fit the number of frames your animation has if you use another.
Font of choice. I used Pea Lovey Dovey
Plugin Alien Eye Candy 3.1 Glow
Let's begin!
Open a new canvas 650 x 650, flood fill white.
Open element 47, copy and paste as a new layer, resize 70%, add drop shadow.
Open frame element 63, copy and paste as a new layer, resize 60%, add a drop shadow. Click inside the frame with your selection tool, modify, expand by 5.
Open paper 5, paste as a new layer, resize by 80%, invert, and on the paper layer, hit delete on your keyboard, drag layer below your frame, keep selected.
Copy your tube and paste as a new layer. Arrange it how you like it and then erase the bits that hang over your frame. Deselect, add drop shadow.
Open element 19, resize by 55%, take your eraser tool and erase the bows and the string connecting the banner to the bows on each side. Apply the Eye Candy Glow effect with a width of 5. Position across the bottom of the frame.
Open element 3, the clock. Take your selection tool and click inside, hold down the shift key and click inside all the numbers that are round (0,6, etc) and inside the hands of the clock. Add a new raster layer and flood fill with white. Deselect. Copy merged and paste on your tag as a new layer. Resize by 20%, rotate to the left by 13, add a drop shadow, arrange to the top left of your frame.
Open the champagne glasses, element 12, copy and paste as a new layer, resize by 20%, add your drop shadow, and move to the bottom right of your frame.
Add any other elements you might like.
Add your name and your copyright/license info. Crop it down and delete the white background layer. I added a glow around my name with a width of 5 and then added my drop shadow.
If you are not going to animate, you can save it now as a .png file so it will be transparent.
To animate:
Click on your paper layer that you used to fill your frame with. Selections, select all, float, defloat.
Go to your Animation Shop and open your fireworks animation. Click on layer one and copy.
Go back to PSP and just above your background layer that you have selected, but below the frame layer, add a new raster layer, and name it 1. Paste your animation as a new image. Go to your materials pallette and set the foreground as a pattern and browse until you find your firework, chose that, and go back and fill the new layer you opened with your firework pattern.
Delete the firework image, and go back to AS and click on the second frame of the animation, copy it and go back into PSP. Paste as a new image. Add a new raster layer and name it 2,above layer 1 that you made for your firework. Set your foreground to pattern and browse to find the firework image you just pasted, flood fill that layer with the firework pattern.
Keep repeating the above directions until you have a layer for each layer of your firework animation.
After you get all the layers into your tag, deselect.
Hide all firework layers except layer 1. Copy merged and take the tag over to animation shop, paste as a new animation.
Back in PSP, hide layer 1 and unhide layer 2, copy merged and take into animation shop, paste after current frame.
Go back into PSP, hide layer 2 and unhide layer 3. Copy merged and take into animation shop, paste after current frame.
Continue as above until you have all your layers moved into animation shop.
Make sure you save the tag you have in PSP as a psp image and then the next time you want to make one for someone, you'll only have to change the name on it, and then copy each of the layers over into AS. You won't have to fill each layer again!
In Animation Shop, crop and resize your tag as needed and save.
You're all done!
Gradient
I have learned how to make gradients, and decided that I will be putting them in here for you to download and use. After you download it, unzip it to your PSP Gradients folder.
Please follow the TOU which are included in the zip. If you want to use it in a tut, you may, so long as you sent them back here to download.
You can get it HERE.

Sunday, December 6, 2009
New templates
Our fourth Stalker template creation challenge was a success with several Stalkers participating over at the Offical Xeracx Stalkers forum. The theme was Winter/Christmas. These are my templates for the challenge, and if you are interested in the others, head on over to the forum to check them out.
As usual, they may be used in tuts, but please link back here. It would also be nice if you let me know you're using them so I could pop over and check out your site and maybe give you a link to your tut!
You can get them HERE.

Naughty List
 For this tutorial you will need the following:
Paint Shop Pro, I am using PSP X but you should be able to use any version.
Tube of choice. I am using the artwork of Amy Matthews, which you have to purchase at AMI.
Scrap kit of choice. I am using Monti's It's Snow Time, which is a PTU kit that must be purchased at AMI.
Mask of choice. I am using a mask by EssexGirl called SnowflakeStar. Scroll to the bottom of the page, it's the last one.
Font of choice. I used FFF Urban on the sign and CAC Pinafore for my name.
Plugins: Eye Candy 3.1 Glow (optional)
Please remember that a tutorial is just a guide. You can use a different tube, scrap kit, or just use the same, and change the elements and papers used and have it come out looking completely different. Feel free to experiment and make it your own.
Let's begin.
Open a new 700 x 700 blank canvas and flood fill with white. This gives us a white background to be able to see what we're doing and room to work. We'll delete the white at the end and crop the image down.
In your kit, open Frame Square 9, copy and paste as a new layer, resize about 75%, image, flip.
Take your selection tool and click inside the frame, make sure you get all the little sections in between the ribbon and the frame, selections modify, expand by 5, selections invert.
Open paper 5, rotate by 90 in either direction, copy and paste as a new layer, image resize about 55% making sure resize all layers is unchecked. Click delete on your keyboard. Drag below your frame layer. Leave selected and open your tube, copy and paste as a new layer.
Duplicate your tube, and hide the top tube layer. Take your eraser tool and erase the bits that hang over your frame. Deselect and drag the original tube layer below your frame, add a drop shadow. Add a drop shadow to your frame also.
Unhide your duplicated tube layer. Make sure it is above your frame layer. Erase the bits that hang over the frame and ribbon. You don't have to be super careful, because you've already erased the bits on the bottom tube and that one will show through below your top tube. Basically you have the top tube to show the parts that are above the frame layer so you don't have to be super careful using one tube and erasing all the bits pixel by pixel.
Open the It's Snowtime Sign 5 element, resize by 60% and add a drop shadow. Use your text tool and type out on the boards "I'm on Santa's Naughty List" You'll have to put a few words on each board and rotate them slightly to make them fit right. Merge all 3 text layers together after converting them to raster layers.
Open a few other elements, place them on your tag, resizing and adding a drop shadow as necessary. When I added the tree, I also put a glow of about 5 around the tree before adding the drop shadow.
Open paper 2, copy and paste as a new layer, bring down to the bottom just above the white background layer. Open your mask in psp, and go to layers, new mask layer, from image, find your mask in the drop down box, and for this mask, you need to be sure that invert mask data is ticked. Apply the mask, then delete that layer and merge the 2 layers into one group. You may want to resize it and/or change the opacity of the mask layer.
Add your name. I used CAC Pinafore with my background set to #7f3738. Then I converted to a raster layer, selections, select all, float, defloat, modify, expand 2 and added a new raster layer below my name layer. Flood fill with white, deselect add a drop shadow to the white layer and merge the two layers together.
Add your Copyright and license info and then crop your image, delete the white background layer and save as a .png so it's transparent.
For this tutorial you will need the following:
Paint Shop Pro, I am using PSP X but you should be able to use any version.
Tube of choice. I am using the artwork of Amy Matthews, which you have to purchase at AMI.
Scrap kit of choice. I am using Monti's It's Snow Time, which is a PTU kit that must be purchased at AMI.
Mask of choice. I am using a mask by EssexGirl called SnowflakeStar. Scroll to the bottom of the page, it's the last one.
Font of choice. I used FFF Urban on the sign and CAC Pinafore for my name.
Plugins: Eye Candy 3.1 Glow (optional)
Please remember that a tutorial is just a guide. You can use a different tube, scrap kit, or just use the same, and change the elements and papers used and have it come out looking completely different. Feel free to experiment and make it your own.
Let's begin.
Open a new 700 x 700 blank canvas and flood fill with white. This gives us a white background to be able to see what we're doing and room to work. We'll delete the white at the end and crop the image down.
In your kit, open Frame Square 9, copy and paste as a new layer, resize about 75%, image, flip.
Take your selection tool and click inside the frame, make sure you get all the little sections in between the ribbon and the frame, selections modify, expand by 5, selections invert.
Open paper 5, rotate by 90 in either direction, copy and paste as a new layer, image resize about 55% making sure resize all layers is unchecked. Click delete on your keyboard. Drag below your frame layer. Leave selected and open your tube, copy and paste as a new layer.
Duplicate your tube, and hide the top tube layer. Take your eraser tool and erase the bits that hang over your frame. Deselect and drag the original tube layer below your frame, add a drop shadow. Add a drop shadow to your frame also.
Unhide your duplicated tube layer. Make sure it is above your frame layer. Erase the bits that hang over the frame and ribbon. You don't have to be super careful, because you've already erased the bits on the bottom tube and that one will show through below your top tube. Basically you have the top tube to show the parts that are above the frame layer so you don't have to be super careful using one tube and erasing all the bits pixel by pixel.
Open the It's Snowtime Sign 5 element, resize by 60% and add a drop shadow. Use your text tool and type out on the boards "I'm on Santa's Naughty List" You'll have to put a few words on each board and rotate them slightly to make them fit right. Merge all 3 text layers together after converting them to raster layers.
Open a few other elements, place them on your tag, resizing and adding a drop shadow as necessary. When I added the tree, I also put a glow of about 5 around the tree before adding the drop shadow.
Open paper 2, copy and paste as a new layer, bring down to the bottom just above the white background layer. Open your mask in psp, and go to layers, new mask layer, from image, find your mask in the drop down box, and for this mask, you need to be sure that invert mask data is ticked. Apply the mask, then delete that layer and merge the 2 layers into one group. You may want to resize it and/or change the opacity of the mask layer.
Add your name. I used CAC Pinafore with my background set to #7f3738. Then I converted to a raster layer, selections, select all, float, defloat, modify, expand 2 and added a new raster layer below my name layer. Flood fill with white, deselect add a drop shadow to the white layer and merge the two layers together.
Add your Copyright and license info and then crop your image, delete the white background layer and save as a .png so it's transparent.
Saturday, December 5, 2009
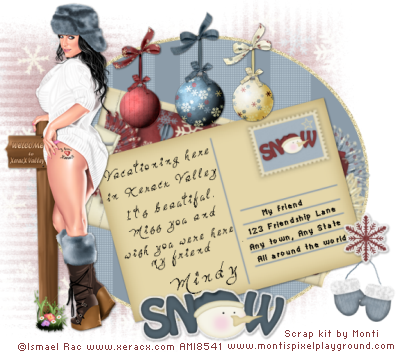
Vacation in Xeracx Valley
 For this tutorial you will need the following:
Tube of choice: I am using the wonderful artwork of Ismael Rac which you must purchase at AMI to use.
Scrap kit of choice. I am using Monti's PTU kit called It's Snow Time which you can also find at AMI.
Mask WSL Mask 81 which you can get at Weescotslass Creations. You can find the links to all her masks just a little way down on the right side.
Fonts of choice. I used FFF Urban, LD Warm Heart
Plugins: Penta.com Color Dot, Eye Candy 3.1 Glow (or another version of Eye Candy graident glow if you have that instead)
Keep in mind, tube selection, scrap kit element choices, etc are all subject to your likes and dislikes. You don't have to use the same ones I use, mix it up and make it how you want, be creative!
Open a new canvas sized 700 x 700 so you have plenty of room to work, and you can crop it at the end to get rid of any excess edges. Flood fill it with white so you can see what you're doing as you're working.
With your foreground set to #8c9ca9 and your background set to blocked off (click the last circle under the colored square) draw out a large elipse with your preset shape tool. Objects, align, center in canvas, convert to raster layer.
Take your selection tool set to rectangle and draw out a rectangle on the left side of the oval you just drew out. Apply Penta.com Color dot with the following settings going from top to bottom, 90, 2, 255, 255, 255. Deselect.
Do the same thing as above in two or three more spots on your oval shape until you get the dottted areas how you like them on your oval.
Make sure you are still on your oval layer, selections, select all, float, defloat, modify, expand by 5. add a new raster layer and flood fill with #e5d7aa. Deselect.
Adjust, add/remove noise, and add noice with the following settings: Gaussian, monochrome checked, amount set to 50. Add drop shadow of 1, 1, 60, 5 or a drop shadow of your choice.
Open one of the post cards elements. I'm using postcard #2. Copy and paste it as a new layer on your canvas. Resize it by 85% and rotate it to the left by 15. Add drop shadow. Move it to the bottom right area of your oval.
With your text too, use a nice pixel font, with the anti-alias set to off, (which helps keep pixel fonts from looking raggedy) type in the address area a name, or just my friend, or something like that, and a fake address. I used on the top line, on the next line: 123 Friendship Lane, on the next line: Any Town, Any State, on the last line: All Around the world. Rotate each line by 15 to the left as you place it on your card and align it how you'd like. When you get done, merge all the address lines together.
Take a nice hand writing font and write a little note on the left side of the postcard, make sure you put your anti-alias back to sharp. I chose to write "Vacationing here in Xeracx Valley. It's beautiful. Miss you and wish you were here my friend," because my tube had "Welcome to Xeracx Valley" on the sign post, so I thought it was a good place to say she was vacationing. And below that, your name. Rotate all the lines to the left 15 and merge the text lines all together, except your name if you want to make the tag for others, so leave that on a separate layer.
Open paper 1, copy and paste it as a new layer, and move it down so it is just above your white background layer. Open your mask in PSP and then click layers, new mask layer, from image, scroll down in the box and find the mask, click on it, click ok. Delete the mask layer and merge the groups together. Lower the opacity to around 70.
Open three of the Baubble elements and a bow element. Copy and paste the first baubble as a new layer. Resize it about 30% and move it to the top so that the little eyelet is touching on the cream colored band around the blue oval, add a drop shadow. Do the same for the next two baubbles but resize them at about 25%.
Copy and paste your bow and resize it by 25%. I used a different color bow for each baubble, depending on the color ribbon it was hanging by. Add a drop shadow to each ribbon as you go.
Open a mitten element (I used Mittens9) copy and paste as a new layer, and resize by about 25% add a drop shadow and move them down near the bottom right corner of the postcard.
Open a snowflake element, resize by 25% and then add a white glow, with the width set at 5. Add your drop shadow. Bring it down to the bottom right corner, and place it over the top of the little string on the mittens.
Open the Snow word art 3, resize by 40%, add the same glow and drop shadow you used on the snowflake. Move to the bottom of your tag.
Open your journal 1 element. Copy and paste it as a new layer and then move it below your postcard layer. Rotate it to the right by 15.
Add your copyright and license info, delete your white background layer, crop and resize as necessary. Save as a .png file so it will be transparent and you're done!
For this tutorial you will need the following:
Tube of choice: I am using the wonderful artwork of Ismael Rac which you must purchase at AMI to use.
Scrap kit of choice. I am using Monti's PTU kit called It's Snow Time which you can also find at AMI.
Mask WSL Mask 81 which you can get at Weescotslass Creations. You can find the links to all her masks just a little way down on the right side.
Fonts of choice. I used FFF Urban, LD Warm Heart
Plugins: Penta.com Color Dot, Eye Candy 3.1 Glow (or another version of Eye Candy graident glow if you have that instead)
Keep in mind, tube selection, scrap kit element choices, etc are all subject to your likes and dislikes. You don't have to use the same ones I use, mix it up and make it how you want, be creative!
Open a new canvas sized 700 x 700 so you have plenty of room to work, and you can crop it at the end to get rid of any excess edges. Flood fill it with white so you can see what you're doing as you're working.
With your foreground set to #8c9ca9 and your background set to blocked off (click the last circle under the colored square) draw out a large elipse with your preset shape tool. Objects, align, center in canvas, convert to raster layer.
Take your selection tool set to rectangle and draw out a rectangle on the left side of the oval you just drew out. Apply Penta.com Color dot with the following settings going from top to bottom, 90, 2, 255, 255, 255. Deselect.
Do the same thing as above in two or three more spots on your oval shape until you get the dottted areas how you like them on your oval.
Make sure you are still on your oval layer, selections, select all, float, defloat, modify, expand by 5. add a new raster layer and flood fill with #e5d7aa. Deselect.
Adjust, add/remove noise, and add noice with the following settings: Gaussian, monochrome checked, amount set to 50. Add drop shadow of 1, 1, 60, 5 or a drop shadow of your choice.
Open one of the post cards elements. I'm using postcard #2. Copy and paste it as a new layer on your canvas. Resize it by 85% and rotate it to the left by 15. Add drop shadow. Move it to the bottom right area of your oval.
With your text too, use a nice pixel font, with the anti-alias set to off, (which helps keep pixel fonts from looking raggedy) type in the address area a name, or just my friend, or something like that, and a fake address. I used on the top line, on the next line: 123 Friendship Lane, on the next line: Any Town, Any State, on the last line: All Around the world. Rotate each line by 15 to the left as you place it on your card and align it how you'd like. When you get done, merge all the address lines together.
Take a nice hand writing font and write a little note on the left side of the postcard, make sure you put your anti-alias back to sharp. I chose to write "Vacationing here in Xeracx Valley. It's beautiful. Miss you and wish you were here my friend," because my tube had "Welcome to Xeracx Valley" on the sign post, so I thought it was a good place to say she was vacationing. And below that, your name. Rotate all the lines to the left 15 and merge the text lines all together, except your name if you want to make the tag for others, so leave that on a separate layer.
Open paper 1, copy and paste it as a new layer, and move it down so it is just above your white background layer. Open your mask in PSP and then click layers, new mask layer, from image, scroll down in the box and find the mask, click on it, click ok. Delete the mask layer and merge the groups together. Lower the opacity to around 70.
Open three of the Baubble elements and a bow element. Copy and paste the first baubble as a new layer. Resize it about 30% and move it to the top so that the little eyelet is touching on the cream colored band around the blue oval, add a drop shadow. Do the same for the next two baubbles but resize them at about 25%.
Copy and paste your bow and resize it by 25%. I used a different color bow for each baubble, depending on the color ribbon it was hanging by. Add a drop shadow to each ribbon as you go.
Open a mitten element (I used Mittens9) copy and paste as a new layer, and resize by about 25% add a drop shadow and move them down near the bottom right corner of the postcard.
Open a snowflake element, resize by 25% and then add a white glow, with the width set at 5. Add your drop shadow. Bring it down to the bottom right corner, and place it over the top of the little string on the mittens.
Open the Snow word art 3, resize by 40%, add the same glow and drop shadow you used on the snowflake. Move to the bottom of your tag.
Open your journal 1 element. Copy and paste it as a new layer and then move it below your postcard layer. Rotate it to the right by 15.
Add your copyright and license info, delete your white background layer, crop and resize as necessary. Save as a .png file so it will be transparent and you're done!
Friday, December 4, 2009
Naughty Christmas
 For this tut you will need the following:
Paint Shop Pro, I used version PSP X, but any version should work.
Tubes of choice. I am using the awesome work of Ismael Rac (lol, big surprise right?) which you have to purchase at AMI to use.
Scrap kit of choice. I am using a kit called Santa's Friends by Monti, which is a PTU kit which you can also find at AMI. Link to kits is HERE.
Template by Ella at Creative Misfits Creations. It's the 3rd link down.
Plugins: Pena.com Color Dot, Xero Radiance, Penta.com Jeans, Eye Candy 3.1 Glow
Font of choice. I am using Clarisse.
Remember the tut is just a guide, and you can change it up to suit your tastes. Have fun and let your creativity flow!
Open your tubes and your template. Delete the copyright layer and the background layer off your template.
Image, resize, all layers by 75%. Image, canvas size 700 x 500. You can crop yours down at the end, this just gives us room to work.
Click on the layer "inner box" selections, select all, float, defloat. Copy and paste the Red Velvet paper as a new layer, selections, invert, make sure you are on the paper layer, and hit delete on your keyboard. Leave selected.
Copy and paste your close up of your tube as a new layer, just above the Naughty Naughty Naughty layer and move to the left side(if you have one, if you don't, then resize to your liking). After you get it where you want it, make sure you are on your tube layer and hit delete on your keyboard.
Do the same for 2 more tubes, one in the center and one on the right hand side. Deselect and delete the original inner box layer.
Merge the 3 tube layers together. I usually click on the top tube layer and then merge down and then click on that layer and merge down into the next layer. Duplicate the merged tube layer.
On the top tube layer (the duplicate) adjust, blur, gaussian blur set at 3. Then go to your plugins and use Penta.com color dot set at the default settings. Change the blend mode to soft light.
On the bottom (original) tube layer apply the Xero Radiance plugin with the default settings.
Click on the Naughty Naughty Naughty layer. Adjust, brightness and contrast, using the following settings: Brightness -255, Contrast 0. Click ok. Add drop shadow of choice. I used 1, 1, 60, 5.
Click on the Frame layer. Selections, select all, float, defloat, modify, expand 2 pixels. Add a new raster layer and flood fill with black. Deselect and delete the original frame layer.
On your black frame layer, apply Penta.com Jeans with the following settings: Amount 94, width and distance both 2. Add drop shadow of choice, then selections float, selections defloat, modify, expand 3 and add a new layer below it and flood fill with #89282b. Deselect and merge it together with the black layer.
Click on the Long Box layer, selections, select all, float, defloat, modify, expand 2. Open the Blue Velvet paper and paste as a new layer. Selections, invert, and on the paper layer, click delete on your keyboard, selections, modify, expand 3, add a new raster layer below the blue layer and flood fill with #89282b. Deselect. Delete the original Long Box layer.
Click on the Naughty Layer. Selections, select all, float, defloat, add a new raster layer and flood fill with #89282b. Modify, expand 1, add a new raster layer below the layer you just filled with red, and flood fill with white. Deslect and delete the original layer. Merge the red and white layers together, and then add your drop shadow. You can do the same thing with a glow if you'd like but this leaves a cleaner edge.
Do the same you did for the Naughty layer for each of your snowflake layers, except when you expand, expand by 2 instead of 1. I used red and white for mine, you can use whatever colors match your tube/scrap choice.
Add your tube and bring it up to the top, add a drop shadow.
For the ribbon layer, I added it below my Naughty layer and resized it. Then I duplicated it twice, moved one to the left and one to the right, then erased extra bits that showed and then merged it all together so it looked like one long ribbon with a bow in the middle, then added a drop shadow.
Open the Folded Star Blue Snow element, resize by 20% and copy and paste as a new layer moving it down to the bottom right of your tag. Apply Eye Candy glow, changing the width to 3, image, free rotate, right 10. Apply drop shadow.
Open 4 of the stamp elements, I chose the Santa, North Pole, and Reindeer. Resize each one by 35%. Place the first one on your tag so that it's just above the blue wavy layer, below the ribbon layer and the Naughty layer. Image, rotate, left 10, and then add your drop shadow.
Do the same for the second stamp, rotate it to the right 10, do the same for the next two stamps, and alternate rotation to the left or right so that each stamp is going the opposite direction of the one next to it.
Click on edit at the top of the PSP toolbar, and copy merged. Edit paste as a new layer, line it up so that it sits evenly with the tag layers below it, right click on that layer, arrange, move to bottom.
Adjust blur, gaussian blur 10.
Add your name using your font of choice. I used Clarisse, with background set to #89282b and foreground to white, and stroke set at 2, then added the same 1, 1, 60, 5 drop shadow.
Add your Copyright info, license info, scrap kit makers info as required in TOU. Crop it down, resize if necessary and save as a .png file so that it will be transparent and you're done.
I hope you enjoyed this tutorial. Please feel free to send me any finished tags to the email listed in my contact info so that I can get a showcase of finished tags on my site!
For this tut you will need the following:
Paint Shop Pro, I used version PSP X, but any version should work.
Tubes of choice. I am using the awesome work of Ismael Rac (lol, big surprise right?) which you have to purchase at AMI to use.
Scrap kit of choice. I am using a kit called Santa's Friends by Monti, which is a PTU kit which you can also find at AMI. Link to kits is HERE.
Template by Ella at Creative Misfits Creations. It's the 3rd link down.
Plugins: Pena.com Color Dot, Xero Radiance, Penta.com Jeans, Eye Candy 3.1 Glow
Font of choice. I am using Clarisse.
Remember the tut is just a guide, and you can change it up to suit your tastes. Have fun and let your creativity flow!
Open your tubes and your template. Delete the copyright layer and the background layer off your template.
Image, resize, all layers by 75%. Image, canvas size 700 x 500. You can crop yours down at the end, this just gives us room to work.
Click on the layer "inner box" selections, select all, float, defloat. Copy and paste the Red Velvet paper as a new layer, selections, invert, make sure you are on the paper layer, and hit delete on your keyboard. Leave selected.
Copy and paste your close up of your tube as a new layer, just above the Naughty Naughty Naughty layer and move to the left side(if you have one, if you don't, then resize to your liking). After you get it where you want it, make sure you are on your tube layer and hit delete on your keyboard.
Do the same for 2 more tubes, one in the center and one on the right hand side. Deselect and delete the original inner box layer.
Merge the 3 tube layers together. I usually click on the top tube layer and then merge down and then click on that layer and merge down into the next layer. Duplicate the merged tube layer.
On the top tube layer (the duplicate) adjust, blur, gaussian blur set at 3. Then go to your plugins and use Penta.com color dot set at the default settings. Change the blend mode to soft light.
On the bottom (original) tube layer apply the Xero Radiance plugin with the default settings.
Click on the Naughty Naughty Naughty layer. Adjust, brightness and contrast, using the following settings: Brightness -255, Contrast 0. Click ok. Add drop shadow of choice. I used 1, 1, 60, 5.
Click on the Frame layer. Selections, select all, float, defloat, modify, expand 2 pixels. Add a new raster layer and flood fill with black. Deselect and delete the original frame layer.
On your black frame layer, apply Penta.com Jeans with the following settings: Amount 94, width and distance both 2. Add drop shadow of choice, then selections float, selections defloat, modify, expand 3 and add a new layer below it and flood fill with #89282b. Deselect and merge it together with the black layer.
Click on the Long Box layer, selections, select all, float, defloat, modify, expand 2. Open the Blue Velvet paper and paste as a new layer. Selections, invert, and on the paper layer, click delete on your keyboard, selections, modify, expand 3, add a new raster layer below the blue layer and flood fill with #89282b. Deselect. Delete the original Long Box layer.
Click on the Naughty Layer. Selections, select all, float, defloat, add a new raster layer and flood fill with #89282b. Modify, expand 1, add a new raster layer below the layer you just filled with red, and flood fill with white. Deslect and delete the original layer. Merge the red and white layers together, and then add your drop shadow. You can do the same thing with a glow if you'd like but this leaves a cleaner edge.
Do the same you did for the Naughty layer for each of your snowflake layers, except when you expand, expand by 2 instead of 1. I used red and white for mine, you can use whatever colors match your tube/scrap choice.
Add your tube and bring it up to the top, add a drop shadow.
For the ribbon layer, I added it below my Naughty layer and resized it. Then I duplicated it twice, moved one to the left and one to the right, then erased extra bits that showed and then merged it all together so it looked like one long ribbon with a bow in the middle, then added a drop shadow.
Open the Folded Star Blue Snow element, resize by 20% and copy and paste as a new layer moving it down to the bottom right of your tag. Apply Eye Candy glow, changing the width to 3, image, free rotate, right 10. Apply drop shadow.
Open 4 of the stamp elements, I chose the Santa, North Pole, and Reindeer. Resize each one by 35%. Place the first one on your tag so that it's just above the blue wavy layer, below the ribbon layer and the Naughty layer. Image, rotate, left 10, and then add your drop shadow.
Do the same for the second stamp, rotate it to the right 10, do the same for the next two stamps, and alternate rotation to the left or right so that each stamp is going the opposite direction of the one next to it.
Click on edit at the top of the PSP toolbar, and copy merged. Edit paste as a new layer, line it up so that it sits evenly with the tag layers below it, right click on that layer, arrange, move to bottom.
Adjust blur, gaussian blur 10.
Add your name using your font of choice. I used Clarisse, with background set to #89282b and foreground to white, and stroke set at 2, then added the same 1, 1, 60, 5 drop shadow.
Add your Copyright info, license info, scrap kit makers info as required in TOU. Crop it down, resize if necessary and save as a .png file so that it will be transparent and you're done.
I hope you enjoyed this tutorial. Please feel free to send me any finished tags to the email listed in my contact info so that I can get a showcase of finished tags on my site!
Thursday, December 3, 2009
Another CT
As of today I am on another CT (creative team) besides Juicy Bits which I joined a few weeks ago. Today I got word that I was accepted to join the AMI CT. I will be posting more tutorials featuring their great artists and scrap kit makers work. Although, come to think of it, mostly I use Rac's work anyway, lol. You can find the AMI site HERE, and the CT site which has lots of great tutorial links HERE.

Tuesday, December 1, 2009
Purple Elegance
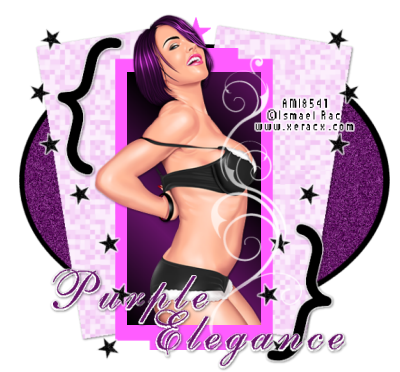 For this tut you will need:
Paint Shop Pro: I used PSP X you should be able to use any version.
Tube of choice. I am using the wonderful artwork, once again, of Ismael Rac which you have to purchase at AMI
Template 19 by Cinda at Elegantly Wasted. Please leave a comment for her!
Family Counts pattern at COLOURlovers. If you don't want to use the pattern, you can always choose another or use Xero Fritillary filter to get the same effect as the pattern I chose.
Font of choice. I used ALS script.
No scrap kits used, but you can always use one if you'd like. I just thought this template was pretty as it was and didn't need any scrap elements added.
Filter Eye Candy 3.1 glow or another Eye Candy glow filter like gradient glow.
Of course, my tutorial is just a starting point, feel free to add to it as you'd like or change it up any way you'd like. I'd love to see your results. Please feel free to send them in.
Let's begin.
Delete the copyright layer and the two text layers.
Click on layer 12. Selections, select all, float, defloat, and add a new raster layer. Flood fill with black or another dark color from your tube. Deselect and delete the original layer. Add a drop shadow of your choice.
Click on layer 11, and do the same, chosing a medium color from your tube. Do not add the drop shadow. Click on adjust, add/remove noise and add noise with the following settings: gaussian, 50% and uniform checked.
On layer 8, select with your magic wand. Add a new raster layer, flood fill with a light color from your tube. Deselect, and delete the original layer. Add a drop shadow.
Do the same with layer 6, which is the star at the top.
Open up your pattern and colorize it to match your tube. Select layer 10 and add a new raster layer, flood fill with your pattern by clicking on your foreground and then clicking on pattern and browsing to the pattern and clicking on it. Add a drop shadow. Repeat for layer 9.
If you want, instead of using the pattern, you can fill those two layers with a color of choice and then apply Xero Fritillary to those layers. That is basically what the pattern I chose was. That way you can play with the settings and get it how you want. But that is up to you. If you don't want to use the plugin or don't have it, you can use the pattern.
Click on layer 7 selections, select all, float, defloat, add a new raster layer. With your foreground set to a light color from your tube and your background set to a darker color from your tube, click on your foreground and chose gradient. Browse down until you find the foreground/background gradient. Make sure the first Style is clicked on in the Styles section, change the angle to 45 and repeats to 2. Flood fill that layer, leave selected, and invert your selection.
I like to add my drop shadow first so that when I erase the bits that hang over where I don't want them, I don't add the drop shadow and have to go back and erase where the shadow hangs over. So add the drop shadow to your tube, then copy and paste it as a new layer. Then take your eraser and erase where it hangs over the bottom. Deselect and delete the original layer 7.
Click on layer 4 selections, select all, float, defloat, add new raster layer and flood fill black or another dark color from your tube. Deselect and delete the original layer. Using Eye Candy, add a glow with a width of about 3 to your stars.
Do the same for layer 5.
Click on layer 1 and selections, select all, float, defloat, add a new raster layer and fill with black or another dark color from your tube that you used for your stars. Deselect and add the same glow you used for your stars.
Do the same for layer 2. Delete the original layers 1 and 2.
Bring the opacity for layer 3 back up to 100%
Add your copyright info and license info.
Add your name. I added it and then selections float, selections defloat, expand by 3 and then added a new layer below it and filled it with white, deselected and then added a drop shadow, because when I used the glow I didn't like the ragged edges it left when I added the drop shadow.
Save your tag and you're done!
For this tut you will need:
Paint Shop Pro: I used PSP X you should be able to use any version.
Tube of choice. I am using the wonderful artwork, once again, of Ismael Rac which you have to purchase at AMI
Template 19 by Cinda at Elegantly Wasted. Please leave a comment for her!
Family Counts pattern at COLOURlovers. If you don't want to use the pattern, you can always choose another or use Xero Fritillary filter to get the same effect as the pattern I chose.
Font of choice. I used ALS script.
No scrap kits used, but you can always use one if you'd like. I just thought this template was pretty as it was and didn't need any scrap elements added.
Filter Eye Candy 3.1 glow or another Eye Candy glow filter like gradient glow.
Of course, my tutorial is just a starting point, feel free to add to it as you'd like or change it up any way you'd like. I'd love to see your results. Please feel free to send them in.
Let's begin.
Delete the copyright layer and the two text layers.
Click on layer 12. Selections, select all, float, defloat, and add a new raster layer. Flood fill with black or another dark color from your tube. Deselect and delete the original layer. Add a drop shadow of your choice.
Click on layer 11, and do the same, chosing a medium color from your tube. Do not add the drop shadow. Click on adjust, add/remove noise and add noise with the following settings: gaussian, 50% and uniform checked.
On layer 8, select with your magic wand. Add a new raster layer, flood fill with a light color from your tube. Deselect, and delete the original layer. Add a drop shadow.
Do the same with layer 6, which is the star at the top.
Open up your pattern and colorize it to match your tube. Select layer 10 and add a new raster layer, flood fill with your pattern by clicking on your foreground and then clicking on pattern and browsing to the pattern and clicking on it. Add a drop shadow. Repeat for layer 9.
If you want, instead of using the pattern, you can fill those two layers with a color of choice and then apply Xero Fritillary to those layers. That is basically what the pattern I chose was. That way you can play with the settings and get it how you want. But that is up to you. If you don't want to use the plugin or don't have it, you can use the pattern.
Click on layer 7 selections, select all, float, defloat, add a new raster layer. With your foreground set to a light color from your tube and your background set to a darker color from your tube, click on your foreground and chose gradient. Browse down until you find the foreground/background gradient. Make sure the first Style is clicked on in the Styles section, change the angle to 45 and repeats to 2. Flood fill that layer, leave selected, and invert your selection.
I like to add my drop shadow first so that when I erase the bits that hang over where I don't want them, I don't add the drop shadow and have to go back and erase where the shadow hangs over. So add the drop shadow to your tube, then copy and paste it as a new layer. Then take your eraser and erase where it hangs over the bottom. Deselect and delete the original layer 7.
Click on layer 4 selections, select all, float, defloat, add new raster layer and flood fill black or another dark color from your tube. Deselect and delete the original layer. Using Eye Candy, add a glow with a width of about 3 to your stars.
Do the same for layer 5.
Click on layer 1 and selections, select all, float, defloat, add a new raster layer and fill with black or another dark color from your tube that you used for your stars. Deselect and add the same glow you used for your stars.
Do the same for layer 2. Delete the original layers 1 and 2.
Bring the opacity for layer 3 back up to 100%
Add your copyright info and license info.
Add your name. I added it and then selections float, selections defloat, expand by 3 and then added a new layer below it and filled it with white, deselected and then added a drop shadow, because when I used the glow I didn't like the ragged edges it left when I added the drop shadow.
Save your tag and you're done!
A new award
Aiya over at Juicy Bits gave me this award. As part of the terms, I have to tell a bit about myself and I have to pass it on to 10 people. I don't really know 10 bloggers to pass it on to, so I'll pass it on to a few that I do know.
 1. My favorite season is summer.
2. My favorite holiday is Thanksgiving. You get a big feast and no one expects presents!
3. My favorite colors are (in order) Green, Blue, Pink
4. Color I hate: Orange
5. I've always wanted to get to wear a wedding dress. The problem is, I don't EVER want to get married.
6. Chicago is my favorite place I've lived, except I hate the cold.
7. My favorite artists are (not necessarily in order) Ismael Rac, Keith Garvey, Elias Chatzoudis, Rion Vernon, Barbara Jenson, Suzanne Woolcott. There are many more I love, but those are my all time favorites.
8. My worst fear is fire.
9. I have panic attacks swimming.
I'm passing this award on to:
Jess, Stu, Leigh, Tracy & Stef,
1. My favorite season is summer.
2. My favorite holiday is Thanksgiving. You get a big feast and no one expects presents!
3. My favorite colors are (in order) Green, Blue, Pink
4. Color I hate: Orange
5. I've always wanted to get to wear a wedding dress. The problem is, I don't EVER want to get married.
6. Chicago is my favorite place I've lived, except I hate the cold.
7. My favorite artists are (not necessarily in order) Ismael Rac, Keith Garvey, Elias Chatzoudis, Rion Vernon, Barbara Jenson, Suzanne Woolcott. There are many more I love, but those are my all time favorites.
8. My worst fear is fire.
9. I have panic attacks swimming.
I'm passing this award on to:
Jess, Stu, Leigh, Tracy & Stef,
Thursday, November 26, 2009
Let it Snow
 For this tut you will need the following:
Paint shop pro (I used PSP X but you should be able to use any version to do this), and Animation Shop.
The "New Xmas Mask" by Chas at Chas ScrapnBitz
Scrapkit (PTU) Listen by Aiya of Juicy Bits
I am using the artwork of Elias Chatzoudis which you must purchase at MPT to use.
Tag template 79 by Missy at Divine Intentions. Scroll about half way down the page, and a link to her templates is on the right hand side.
Plugins: Xero Radiance, Vanderlee Snowflakes
Font of choice, I used Peas Miss Stalker.
Open the template, delete the copyright layer and resize the canvas to 600x600. It will give you room to work and you can always crop down later. If you like to keep the white background layer while you work, you can click on that layer and flood fill it back in with white to cover the bare edges that resizing left.
Click on the circle layer, selections, select all, float, defloat, invert, copy paper 4 and paste as a new layer, and on that paper layer, hit delete on your keyboard. Deselect. Delete the original circle layer.
Add a drop shadow. I used 0, 0, 60, 5
Click on your snowflakes layer. Selections, select all, float, defloat, add new raster layer and flood fill with white. Delete the original snowflakes layer.
On the scalloped circle layer, click inside with your magic wand, selections invert. Open paper 12, copy and paste it as a new layer. Make sure you are on that layer, and hit delete on your keyboard. Deselect, and apply the same drop shadow you used above. Delete the original scalloped circle layer.
Click on your background frame layer, click inside it with your magic wand, selections invert, open paper 13, copy and paste as a new layer, hit delete on your keyboard. Leave selected.
Open your tube, and paste the closeup as a new layer. Arrange it how you like and then on the tube layer, hit delete on your keyboard. Deselect.
Duplicate your tube and on the top (duplicate) layer, go to adjust, blur, gaussian blur, and change it to 3. Change the blend mode to overlay.
On the bottom (original) tube layer, apply Xero Radiance with the following settings top to bottom: 128, 50, 128, 255 and then drop the opacity to about 45
Now on the wordart template layer, take your magic wand and hold down the shift key and click on each letter. Add a new raster layer and flood fill white. Deselect and delete the original wordart layer.
On your white wordart layer, click adjust, add remove noise, and use the following settings: Gaussian, monochrome, and noise set to 50%.
On that same layer, selections, select all, float, defloat, modify, expand by 3. Make a new raster layer below your white wordart layer and flood fill with #638a89. Merge those two layers together and if you'd like, add the same drop shadow you've been using.
Add your tube and add the same drop shadow.
Open the heart01 element and add it just below your circle layer. Add a very small drop shadow. I used 0, 0, 30, 1. Duplicate it, image mirror, image, flip and move it into place.
Open paper 14, copy and paste it just above your white background layer, and then open your mask. Layers, new mask layer, from image. In the drop down menu, search for your mask, and then click ok. Delete the mask layer and merge the group. Arrange the mask layer to where you'd like it.
Add any other elements you'd like. I added a ribbon and tag and put the words "Let it snow" on the tag.
Add your name and copyright info. If you are not going to animate, then you can crop your image down, and save. If you want to save as transparent, then delete the white background layer and save as a .png file
If you want to animate, then let's go on.
To animate:
Click on your scalloped layer, which should be right above your white snowflakes. Selections, select all, float, defloat. Duplicate it twice for a total of 3 layers. Do not deselect.
Click on the bottom layer. Apply the Vanderlee snowflakes, change the amount to 90 and the random seed to 1255 (or you can choose another number). Leave the other numbers as is and click ok.
Do the same thing for the second layer just changing the random seed to 3081 (or any other number, but not the same as the first layer).
Do the same for the top layer, but change the random seed to 4530 (or any other number, but not the same as the first two layers). Deselect.
Open animation shop.
Back in PSP, hide the top two scalloped circle layers and your white background layer, copy merged and take it to your animation shop. Paste as a new animation.
Back in PSP, hide the bottom layer and unhide the middle layer. Copy merged and take to animation shop. Paste after current frame.
Back in PSP, hide the middle layer and unhide the top layer. Copy merged and take to animation shop. Paste after current frame.
Now you have an animation with 3 frames. Click on the first frame, and go to animation, frame properties and change it to 15.
Move the slider at the bottom over until it shows frame 2, click on it and go to animation, frame properties and change it to 25.
Do the same thing to go to frame 3 and change that one to 30.
Crop and resize your animation as necessary and save.
You're all done!
I hope you enjoyed this tutorial. Comments are appreciated, and if you want to send in any completed tags, I'd love to get a slide show started of tags made from my tuts!
Here's an example using the same colors and kit, just changed the tube so I could use it in the Rac Stalkers group.
For this tut you will need the following:
Paint shop pro (I used PSP X but you should be able to use any version to do this), and Animation Shop.
The "New Xmas Mask" by Chas at Chas ScrapnBitz
Scrapkit (PTU) Listen by Aiya of Juicy Bits
I am using the artwork of Elias Chatzoudis which you must purchase at MPT to use.
Tag template 79 by Missy at Divine Intentions. Scroll about half way down the page, and a link to her templates is on the right hand side.
Plugins: Xero Radiance, Vanderlee Snowflakes
Font of choice, I used Peas Miss Stalker.
Open the template, delete the copyright layer and resize the canvas to 600x600. It will give you room to work and you can always crop down later. If you like to keep the white background layer while you work, you can click on that layer and flood fill it back in with white to cover the bare edges that resizing left.
Click on the circle layer, selections, select all, float, defloat, invert, copy paper 4 and paste as a new layer, and on that paper layer, hit delete on your keyboard. Deselect. Delete the original circle layer.
Add a drop shadow. I used 0, 0, 60, 5
Click on your snowflakes layer. Selections, select all, float, defloat, add new raster layer and flood fill with white. Delete the original snowflakes layer.
On the scalloped circle layer, click inside with your magic wand, selections invert. Open paper 12, copy and paste it as a new layer. Make sure you are on that layer, and hit delete on your keyboard. Deselect, and apply the same drop shadow you used above. Delete the original scalloped circle layer.
Click on your background frame layer, click inside it with your magic wand, selections invert, open paper 13, copy and paste as a new layer, hit delete on your keyboard. Leave selected.
Open your tube, and paste the closeup as a new layer. Arrange it how you like and then on the tube layer, hit delete on your keyboard. Deselect.
Duplicate your tube and on the top (duplicate) layer, go to adjust, blur, gaussian blur, and change it to 3. Change the blend mode to overlay.
On the bottom (original) tube layer, apply Xero Radiance with the following settings top to bottom: 128, 50, 128, 255 and then drop the opacity to about 45
Now on the wordart template layer, take your magic wand and hold down the shift key and click on each letter. Add a new raster layer and flood fill white. Deselect and delete the original wordart layer.
On your white wordart layer, click adjust, add remove noise, and use the following settings: Gaussian, monochrome, and noise set to 50%.
On that same layer, selections, select all, float, defloat, modify, expand by 3. Make a new raster layer below your white wordart layer and flood fill with #638a89. Merge those two layers together and if you'd like, add the same drop shadow you've been using.
Add your tube and add the same drop shadow.
Open the heart01 element and add it just below your circle layer. Add a very small drop shadow. I used 0, 0, 30, 1. Duplicate it, image mirror, image, flip and move it into place.
Open paper 14, copy and paste it just above your white background layer, and then open your mask. Layers, new mask layer, from image. In the drop down menu, search for your mask, and then click ok. Delete the mask layer and merge the group. Arrange the mask layer to where you'd like it.
Add any other elements you'd like. I added a ribbon and tag and put the words "Let it snow" on the tag.
Add your name and copyright info. If you are not going to animate, then you can crop your image down, and save. If you want to save as transparent, then delete the white background layer and save as a .png file
If you want to animate, then let's go on.
To animate:
Click on your scalloped layer, which should be right above your white snowflakes. Selections, select all, float, defloat. Duplicate it twice for a total of 3 layers. Do not deselect.
Click on the bottom layer. Apply the Vanderlee snowflakes, change the amount to 90 and the random seed to 1255 (or you can choose another number). Leave the other numbers as is and click ok.
Do the same thing for the second layer just changing the random seed to 3081 (or any other number, but not the same as the first layer).
Do the same for the top layer, but change the random seed to 4530 (or any other number, but not the same as the first two layers). Deselect.
Open animation shop.
Back in PSP, hide the top two scalloped circle layers and your white background layer, copy merged and take it to your animation shop. Paste as a new animation.
Back in PSP, hide the bottom layer and unhide the middle layer. Copy merged and take to animation shop. Paste after current frame.
Back in PSP, hide the middle layer and unhide the top layer. Copy merged and take to animation shop. Paste after current frame.
Now you have an animation with 3 frames. Click on the first frame, and go to animation, frame properties and change it to 15.
Move the slider at the bottom over until it shows frame 2, click on it and go to animation, frame properties and change it to 25.
Do the same thing to go to frame 3 and change that one to 30.
Crop and resize your animation as necessary and save.
You're all done!
I hope you enjoyed this tutorial. Comments are appreciated, and if you want to send in any completed tags, I'd love to get a slide show started of tags made from my tuts!
Here's an example using the same colors and kit, just changed the tube so I could use it in the Rac Stalkers group.
Wednesday, November 25, 2009
Fallen Angel
 You will need the following:
Tube of choice. I used the wonderful artwork of Ismael Rac which you have to purchase to use. You can get it at AMI.
PTU scrap kit Alyce from Aiya at Juicy Bits
Plugins: Xero Radiance, Penta.com Color Dot
My word art HERE.
Mask of choice. I used one called Omask011_LT, I don't know who made it, so I am not providing it, but if you happen to have it you can use that one, otherwise, just choose one you like.
Open a new 650x650 canvas, flood fill white.
Open paper 5 of the add on and set it as your background, by clicking on background and then clicking on the patterns tab and selecting that paper. Make sure the scale is at 100%
Click on your preset shapes and choose ellipse. Draw out an ellipse that covers most of your canvas. Objects, align, center in canvas and convert to a raster layer. Add drop shadow of choice. I used 1, 1, 60, 5
Change your foreground to black. On your ellipse layer that you just drew out, selections, select all, float, defloat, modify, contract by 15, add a new raster layer and flood fill with black. Add drop shadow.
Open paper 9.
Selections, modify, contract by 5. Click on your foreground and click the pattern tab, browse to paper 9 and select it. Add a new raster layer and flood fill with that pattern. Add drop shadow.
Open paper O2A0.
Selections, modify, contract by 10. Change your foreground to the 02A0 paper and add a new raster layer, flood fill with that pattern. Add drop shadow.
Selections, modify, contract by 10 again. Add a new raster layer, change your foreground to #b90f3e and flood fill. Leave selected.
Copy and paste close up of your tube or if you don't have a close up, paste your tube, and resize to get it larger, selections, invert, click on your tube layer, and hit delete on your keyboard. Deselect. Add drop shadow to the last ellipse that you just pasted your tube into.
Duplicate tube layer. On top layer, adjust blur, gaussian blur, 3. Change blend mode to soft light.
On bottom tube layer, apply xero radiance plugin with default settings.
Lower the opacity of both tube layers to around 60%.
Now with your selection tool set to rectangle, click on your top ellipse layer, and draw out a rectangle covering a portion to the left hand side.
Now go to your Tramages Tow the line plugin, and apply with the following settings, top to bottom, 80, 54, 48, 9. Deselect.
With your selection tool again, and on the same ellipse, go somewhere in the middle of the ellipse and draw out another largish rectangle.
Go to your Penta.com color dot plugin and apply it with the following settings, top to bottom, 90, 2, 255, 255, 255. Deselect.
Add your tube and give it the same drop shadow you added to your ellipse layers.
Open paper 6 and paste it above your white background layer. Apply the mask, by going to layers, new mask layer, from image, on the drop down box, pick the mask and click ok. Click on the mask layer and delete it, and then merge the group.
Change your foreground to white and your background to #b90f3e. Click on your text tool and using the font Impact with your stroke set to 2, size 20, type out the word angel in all caps. Stretch out to how you want it. Add drop shadow.
Change font to a script font, stroke set to 0 and then change your background to black and type out your name over the word angel, and apply your drop shadow.
Add any elements if you want.
Add your license info and © info.
Delete your white background layer, crop excess off, resize if needed.
To save as a transparent .png file, click on file, export, PNG optimizer, click ok, then browse to the location you want to save it, and name it and click ok.
You're all done!
You will need the following:
Tube of choice. I used the wonderful artwork of Ismael Rac which you have to purchase to use. You can get it at AMI.
PTU scrap kit Alyce from Aiya at Juicy Bits
Plugins: Xero Radiance, Penta.com Color Dot
My word art HERE.
Mask of choice. I used one called Omask011_LT, I don't know who made it, so I am not providing it, but if you happen to have it you can use that one, otherwise, just choose one you like.
Open a new 650x650 canvas, flood fill white.
Open paper 5 of the add on and set it as your background, by clicking on background and then clicking on the patterns tab and selecting that paper. Make sure the scale is at 100%
Click on your preset shapes and choose ellipse. Draw out an ellipse that covers most of your canvas. Objects, align, center in canvas and convert to a raster layer. Add drop shadow of choice. I used 1, 1, 60, 5
Change your foreground to black. On your ellipse layer that you just drew out, selections, select all, float, defloat, modify, contract by 15, add a new raster layer and flood fill with black. Add drop shadow.
Open paper 9.
Selections, modify, contract by 5. Click on your foreground and click the pattern tab, browse to paper 9 and select it. Add a new raster layer and flood fill with that pattern. Add drop shadow.
Open paper O2A0.
Selections, modify, contract by 10. Change your foreground to the 02A0 paper and add a new raster layer, flood fill with that pattern. Add drop shadow.
Selections, modify, contract by 10 again. Add a new raster layer, change your foreground to #b90f3e and flood fill. Leave selected.
Copy and paste close up of your tube or if you don't have a close up, paste your tube, and resize to get it larger, selections, invert, click on your tube layer, and hit delete on your keyboard. Deselect. Add drop shadow to the last ellipse that you just pasted your tube into.
Duplicate tube layer. On top layer, adjust blur, gaussian blur, 3. Change blend mode to soft light.
On bottom tube layer, apply xero radiance plugin with default settings.
Lower the opacity of both tube layers to around 60%.
Now with your selection tool set to rectangle, click on your top ellipse layer, and draw out a rectangle covering a portion to the left hand side.
Now go to your Tramages Tow the line plugin, and apply with the following settings, top to bottom, 80, 54, 48, 9. Deselect.
With your selection tool again, and on the same ellipse, go somewhere in the middle of the ellipse and draw out another largish rectangle.
Go to your Penta.com color dot plugin and apply it with the following settings, top to bottom, 90, 2, 255, 255, 255. Deselect.
Add your tube and give it the same drop shadow you added to your ellipse layers.
Open paper 6 and paste it above your white background layer. Apply the mask, by going to layers, new mask layer, from image, on the drop down box, pick the mask and click ok. Click on the mask layer and delete it, and then merge the group.
Change your foreground to white and your background to #b90f3e. Click on your text tool and using the font Impact with your stroke set to 2, size 20, type out the word angel in all caps. Stretch out to how you want it. Add drop shadow.
Change font to a script font, stroke set to 0 and then change your background to black and type out your name over the word angel, and apply your drop shadow.
Add any elements if you want.
Add your license info and © info.
Delete your white background layer, crop excess off, resize if needed.
To save as a transparent .png file, click on file, export, PNG optimizer, click ok, then browse to the location you want to save it, and name it and click ok.
You're all done!
Tuesday, November 24, 2009
Joined Juicy Bits CT team
I am pleased to announce that I have joined the creative team of Juicy Bits by Aiya. I will be posting tuts using her PTU scrap kits, so be on the lookout for those. I will still post tuts using no scrap kits of FTU scrap kits along with her kits too, so don't worry they won't be all PTU kit tuts.
You can find her blog HERE and you can find her store with tons of wonderful kits HERE
The tut in my previous post is using one of her wonderful Christmas kits.
Saturday, November 21, 2009
Cuddly Christmas
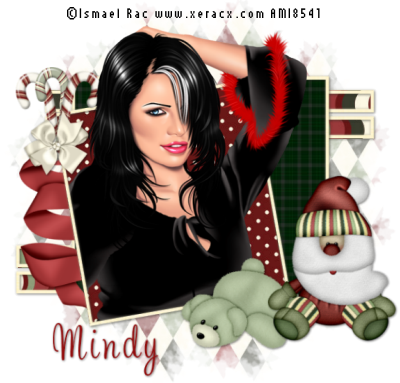 I am using the awesome Artwork of Ismael Rac which you must purchase at AMI to use.
Supplies:
Cuddly Christmas scrap kit from Aiya at Juicy Bits. It is a PTU kit.
Tag Template 6 from Harley at Dreamgirl Productionz.
WSL mask 78 from weescotslass creations
Font: Sweetheart Script-limited
No filters used
Open your template, click window, duplicate, and then close out your original. Delete the copyright layer.
Image, canvas size, and change to 650x650 to give you plenty of extra room to work, and you can crop it down at the end.
Click on your white background layer and flood fill with white to fill the area left open when you resized, or you can delete the white background layer right now if you'd like. I usually leave it there while I'm working and delete it at the end.
Click on the front square layer with your magic wand, open paper 17 and paste as a new layer, selections invert, make sure you are on the paper layer, and hit delete on your keyboard. Deselect.
Delete the original front square layer.
Open your tube, and paste as a new layer above your frame, resize as needed. If you are using the same tube as I am, I resized 80%. Erase the bits of tube that hang over the frame where you don't want them.
Add drop shadow of choice. I used 1, 1, 60, 5
Click on back rectangle left layer with your magic wand and copy and paste paper 13, selections, invert, make sure you are on the paper layer, and hit delete on your keyboard. Deselect. Delete the original rectangle layer.
Do the same for back rectangle right layer.
Click on the front square frame layer that is right below your front rectangle layer (the first one we did. Selections, select all, float, defloat, copy paper 3 and paste as a new layer, selections invert, make sure you are on the paper layer, and hit delete on your keyboard. Add the same drop shadow you used on your tube. Delete the original frame layer.
Do as above for both of the back rectangle layer frames.
Click on rectangle one with your magic wand, selections invert, open paper 12, copy and paste as a new layer, hit delete on your keyboard. Delete the original rectangle layer.
Make rectangle frame 1 layer active, selections, select all, float, defloat, invert and paste paper 3 as a new layer, then hit delete on your keyboard. Deselect and add your drop shadow, delete the original frame layer.j
Do this for the last 3 rectangle layers.
Copy paper 8 and paste it just above your white background layer. Open your mask. Click on layers, new mask layer, from image, and scroll down to find your mask layer, make sure invert mask data is NOT checked, and click ok. Delete the mask layer and then merge the group together. Change the opacity to about 60%.
Add any other elements you like, resizing as needed.
Add your name and copyright info.
Crop tag, delete white background layer.
To save as a transparent tag, click on File, export, PNG optimizer, and click ok, then just browse to where you want to save your tag, and it will be transparent!
I am using the awesome Artwork of Ismael Rac which you must purchase at AMI to use.
Supplies:
Cuddly Christmas scrap kit from Aiya at Juicy Bits. It is a PTU kit.
Tag Template 6 from Harley at Dreamgirl Productionz.
WSL mask 78 from weescotslass creations
Font: Sweetheart Script-limited
No filters used
Open your template, click window, duplicate, and then close out your original. Delete the copyright layer.
Image, canvas size, and change to 650x650 to give you plenty of extra room to work, and you can crop it down at the end.
Click on your white background layer and flood fill with white to fill the area left open when you resized, or you can delete the white background layer right now if you'd like. I usually leave it there while I'm working and delete it at the end.
Click on the front square layer with your magic wand, open paper 17 and paste as a new layer, selections invert, make sure you are on the paper layer, and hit delete on your keyboard. Deselect.
Delete the original front square layer.
Open your tube, and paste as a new layer above your frame, resize as needed. If you are using the same tube as I am, I resized 80%. Erase the bits of tube that hang over the frame where you don't want them.
Add drop shadow of choice. I used 1, 1, 60, 5
Click on back rectangle left layer with your magic wand and copy and paste paper 13, selections, invert, make sure you are on the paper layer, and hit delete on your keyboard. Deselect. Delete the original rectangle layer.
Do the same for back rectangle right layer.
Click on the front square frame layer that is right below your front rectangle layer (the first one we did. Selections, select all, float, defloat, copy paper 3 and paste as a new layer, selections invert, make sure you are on the paper layer, and hit delete on your keyboard. Add the same drop shadow you used on your tube. Delete the original frame layer.
Do as above for both of the back rectangle layer frames.
Click on rectangle one with your magic wand, selections invert, open paper 12, copy and paste as a new layer, hit delete on your keyboard. Delete the original rectangle layer.
Make rectangle frame 1 layer active, selections, select all, float, defloat, invert and paste paper 3 as a new layer, then hit delete on your keyboard. Deselect and add your drop shadow, delete the original frame layer.j
Do this for the last 3 rectangle layers.
Copy paper 8 and paste it just above your white background layer. Open your mask. Click on layers, new mask layer, from image, and scroll down to find your mask layer, make sure invert mask data is NOT checked, and click ok. Delete the mask layer and then merge the group together. Change the opacity to about 60%.
Add any other elements you like, resizing as needed.
Add your name and copyright info.
Crop tag, delete white background layer.
To save as a transparent tag, click on File, export, PNG optimizer, and click ok, then just browse to where you want to save your tag, and it will be transparent!
Tuesday, October 27, 2009
More Rac Stalkers templates
Over at the Xeracx Stalkers forum, we had another template creation challenge. This time the theme was Rac Stalkers. We have several great templates and I'm posting mine here for you. If you'd like to see the others and get a chance to download, go on over and join the forum HERE.
You can get my templates HERE. As usual, you can use them in tutorials, with a link back here, but I also want you to state that I made them for the Rac Forum. Thanks!

Thursday, October 22, 2009
Templates 5 & 6
I have two new templates for you today. They were both made when I was making tags, and I decided to make templates out of the for you. You can get them HERE.
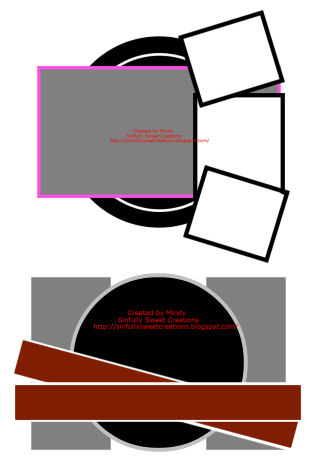
Sunday, October 18, 2009
Fall/Halloween Kits


Tuesday, October 13, 2009
Xeracx Forum Templates
Over at the Official Xeracx Stalkers forum we had a template challenge and this is my part of it. You can check out other great templates by joining the forum.
You can download my templates HERE. As usual, you may use them in tutorials, just link back here and mention that they came from me, and the Xeracx Stalkers forum!

Friday, October 9, 2009
Juicy Award
I got a cute little award from Patty at Sunspotpp's Place. I met her over on the Xeracx Stalker's forum, and she is such a sweet person. Her blog is really nice, you should go check it out! It says I have to pass it on to three other blogs so I will send it to the following members of the Xeracx Stalkers:
Manda of Double Vision Tutorials
JackieBeth of Cupquakezcreationz
Sharon of Dolly's Tag World

BCA Mini Tag Sized Scrap Kit
I've made my first kit for sharing here on my blog. This is actually my 3rd kit, my first two being for a challenge on the Xeracx Stalkers site, which I will be posting here in a little over a week. This kit has 6 papers, 2 ribbons and 7 word arts for you to use. I made the colors to match an Exclusive Commission BCA tube by Ismael Rac.
You can get the kit HERE.


Friday, October 2, 2009
BCA Angel
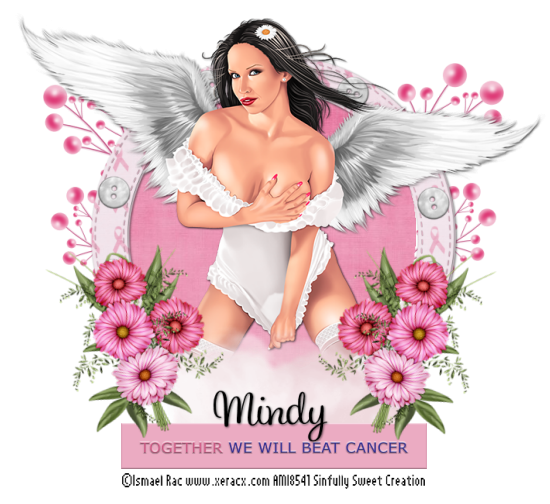 Supplies:
Scrapkit by Wanda at BlueDream Designs called BCA-2009.
Tube of choice. I used the wonderful work of the very talented Ismael Rac, which you have to have a license to use. You can purchase his work at AMI.
Font of choice. I used Sweetheart Script.
Ok, lets get started.
Open a new image 800 x 800. This will give us room to work and you can crop it down at the end.
Open Frame 1, resize by 80% and place it in the center of your canvas and add a drop shadow. I used 1 1 60 4 throughout the tut. Click inside it with your magic wand, and selections, modify, expand by 5.
Open paper #2 and place over it, and click on that layer, selections, invert, delete and select none.
Open your tube, and add your drop shadow. Click on your layer paper and selections, select all, float, defloat, selections, invert. Paste your tube as a new layer arrange it where you want it, and then duplicate it, drag the duplicate layer above the frame layer. Now grab your eraser tool and on the tube layer that is below the frame layer, erase the bits that are hanging below the frame and deselect.
Now on your top tube layer erase whatever bits are hanging below, and you don't have to be real careful here, because you have the bottom tube layer showing under it.
Open the element called Courage. Copy and paste it as a new layer and resize by 50%. Rotate it by 15 to the left and arrange it on the left side of your frame. Duplicate it and image mirror, arrange it where you want on the right side if it doesn't go right into the right spot.
Open the cloud element. Copy and paste as a new layer and arrange it at the bottom of your frame, dragging the layer below your flowers.
Open label 2 and copy and paste it as a new layer. Arrange it under the cloud, and drag that layer below the flower layers but above the cloud layer.
Open the pearls layer and copy and paste it as a new layer. Arrange it on the left side, and then drag that layer down below the paper layer (that you used to fill the frame). Duplicate it and image, mirror.
Add your © info, your name, crop and resize it, then click on file, export, PNG optimizer, click ok, and choose where to save it at, and you'll have your tag saved as a transparent tag. No more white background!
Supplies:
Scrapkit by Wanda at BlueDream Designs called BCA-2009.
Tube of choice. I used the wonderful work of the very talented Ismael Rac, which you have to have a license to use. You can purchase his work at AMI.
Font of choice. I used Sweetheart Script.
Ok, lets get started.
Open a new image 800 x 800. This will give us room to work and you can crop it down at the end.
Open Frame 1, resize by 80% and place it in the center of your canvas and add a drop shadow. I used 1 1 60 4 throughout the tut. Click inside it with your magic wand, and selections, modify, expand by 5.
Open paper #2 and place over it, and click on that layer, selections, invert, delete and select none.
Open your tube, and add your drop shadow. Click on your layer paper and selections, select all, float, defloat, selections, invert. Paste your tube as a new layer arrange it where you want it, and then duplicate it, drag the duplicate layer above the frame layer. Now grab your eraser tool and on the tube layer that is below the frame layer, erase the bits that are hanging below the frame and deselect.
Now on your top tube layer erase whatever bits are hanging below, and you don't have to be real careful here, because you have the bottom tube layer showing under it.
Open the element called Courage. Copy and paste it as a new layer and resize by 50%. Rotate it by 15 to the left and arrange it on the left side of your frame. Duplicate it and image mirror, arrange it where you want on the right side if it doesn't go right into the right spot.
Open the cloud element. Copy and paste as a new layer and arrange it at the bottom of your frame, dragging the layer below your flowers.
Open label 2 and copy and paste it as a new layer. Arrange it under the cloud, and drag that layer below the flower layers but above the cloud layer.
Open the pearls layer and copy and paste it as a new layer. Arrange it on the left side, and then drag that layer down below the paper layer (that you used to fill the frame). Duplicate it and image, mirror.
Add your © info, your name, crop and resize it, then click on file, export, PNG optimizer, click ok, and choose where to save it at, and you'll have your tag saved as a transparent tag. No more white background!
Tuesday, September 29, 2009
Good Girls Go Avatar
Sharon over at Dolly's Tag World wrote a tut for an avatar to match my Good Girls Go tag. She did a great job! Lookie:
 If you'd like to do the tut to make an avatar to go along with your tag, check it out HERE.
Thanks Sharon for writing it out and posting it up!
If you'd like to do the tut to make an avatar to go along with your tag, check it out HERE.
Thanks Sharon for writing it out and posting it up!
If you'd like to do the tut to make an avatar to go along with your tag, check it out HERE.
Thanks Sharon for writing it out and posting it up!
Sunday, September 20, 2009
Good Girls Go
 For this tutorial you will need the folowing:
2 tubes: I used the beautiful artwork of Ismael Rac which you have to have a license to use. You can purchase it at AMI.
Brushes: I used zig001 and Arrow right by Brushes by Pang on Magitek Designs. On the right, click on "brushes," click on "download by set," and the sets are there. I truthfully don't know what set each of them were in because I downloaded them all and installed them! ;-)
3 Fonts of choice: I used Bitch Cakes for the good girls part, Cajun Boogie for the bad girls part, and Freebooter Script for my name.
Filters:
Tramages ~ Tow the Line
Penta.com ~ Color Dot
Eye Candy 3.1 ~ Glow
Ok, let's get started!
Open a new canvas about 700x700, and if it's too big, you can resize later.
Grab your preset shapes tool, rectangle with the foreground set to black, background null, line width set at 8. Draw out a longish rectangle, convert to raster layer, then duplicate it. Situate them so they look like mine in my example above.
Click inside the left rectangle with your magic wand, selections>expand 2.
Change your foreground to #a70000 and your background to #ec0303 then click on your foreground and change it to gradient, Style>linear>angle 43> repeats 3
Add a new raster layer and fill with this gradient, drag below the black rectangle frame, selections>deselect.
Now click inside your right rectangle and do the same, but open your gradient and click the "invert" box. Leave selected and copy your angel tube and arrange her in there how you'd like her, selections invert> and erase the bits that you don't want hanging over, deselect and add a drop shadow to the tube, pull her down below the rectangle layer.
Click on the right gradient layer that is under your angel tube. Go to your effects and apply penta.com color dot using the following settings from top to bottom in your pop up box 90, 2, 255, 255, 255.
Add a drop shadow to your rectangle. I then merged my rectangle, tube layer and right side gradient layer.
Click on your left gradient layer. Go to your effects and choose Tramages Tow The line, apply that using the following settings top to bottom in your pop up box 80, 54, 48, 9.
Click on selections, select all, float, defloat, invert and open your devil tube and paste her as a new layer, arranging her where you'd like her. Take your eraser tool and erase the bits that hang over. Deselect and then add a drop shadow to your frame and tube. Then, merge the left rectangle, tube and left gradient together.
Now, if the rectangles are not quite where you'd want them, you can arrange them around a little bit.
I applied a new raster layer and dragged it below my rectangle layers and then applied the right arrow brush. Arrange it where you'd like it then duplicate the layer and image> mirror> image> flip, then arrange that arrow where you want, and merge those two brush layers.
Then, add a new raster layer on the very top. Add whatever squiggle or grungy brushes you'd like, I used the Zig001.
Add your text. I wrote Good girls go to HEAVEN in Bitch Cakes font. Convert to raster layer, then add Alien Eye Candy 3.1 Glow, and I changed the width to 3 and left everything the same. Then add your drop shadow.
I used Cajun Boogie to write Bad girls go everywhere. Use the same glow settings and drop shadow.
Add your name, I used Freebooter Script for mine and no glow, just a drop shadow.
Add your © info, crop and resize.
To save as transparent, go to File> Export> PNG Optimizer> click Ok and save wherever you'd like.
Hope you liked it, and please feel free to leave any comments. You can email me copies of your tags if you'd like! I'd love to see them.
For this tutorial you will need the folowing:
2 tubes: I used the beautiful artwork of Ismael Rac which you have to have a license to use. You can purchase it at AMI.
Brushes: I used zig001 and Arrow right by Brushes by Pang on Magitek Designs. On the right, click on "brushes," click on "download by set," and the sets are there. I truthfully don't know what set each of them were in because I downloaded them all and installed them! ;-)
3 Fonts of choice: I used Bitch Cakes for the good girls part, Cajun Boogie for the bad girls part, and Freebooter Script for my name.
Filters:
Tramages ~ Tow the Line
Penta.com ~ Color Dot
Eye Candy 3.1 ~ Glow
Ok, let's get started!
Open a new canvas about 700x700, and if it's too big, you can resize later.
Grab your preset shapes tool, rectangle with the foreground set to black, background null, line width set at 8. Draw out a longish rectangle, convert to raster layer, then duplicate it. Situate them so they look like mine in my example above.
Click inside the left rectangle with your magic wand, selections>expand 2.
Change your foreground to #a70000 and your background to #ec0303 then click on your foreground and change it to gradient, Style>linear>angle 43> repeats 3
Add a new raster layer and fill with this gradient, drag below the black rectangle frame, selections>deselect.
Now click inside your right rectangle and do the same, but open your gradient and click the "invert" box. Leave selected and copy your angel tube and arrange her in there how you'd like her, selections invert> and erase the bits that you don't want hanging over, deselect and add a drop shadow to the tube, pull her down below the rectangle layer.
Click on the right gradient layer that is under your angel tube. Go to your effects and apply penta.com color dot using the following settings from top to bottom in your pop up box 90, 2, 255, 255, 255.
Add a drop shadow to your rectangle. I then merged my rectangle, tube layer and right side gradient layer.
Click on your left gradient layer. Go to your effects and choose Tramages Tow The line, apply that using the following settings top to bottom in your pop up box 80, 54, 48, 9.
Click on selections, select all, float, defloat, invert and open your devil tube and paste her as a new layer, arranging her where you'd like her. Take your eraser tool and erase the bits that hang over. Deselect and then add a drop shadow to your frame and tube. Then, merge the left rectangle, tube and left gradient together.
Now, if the rectangles are not quite where you'd want them, you can arrange them around a little bit.
I applied a new raster layer and dragged it below my rectangle layers and then applied the right arrow brush. Arrange it where you'd like it then duplicate the layer and image> mirror> image> flip, then arrange that arrow where you want, and merge those two brush layers.
Then, add a new raster layer on the very top. Add whatever squiggle or grungy brushes you'd like, I used the Zig001.
Add your text. I wrote Good girls go to HEAVEN in Bitch Cakes font. Convert to raster layer, then add Alien Eye Candy 3.1 Glow, and I changed the width to 3 and left everything the same. Then add your drop shadow.
I used Cajun Boogie to write Bad girls go everywhere. Use the same glow settings and drop shadow.
Add your name, I used Freebooter Script for mine and no glow, just a drop shadow.
Add your © info, crop and resize.
To save as transparent, go to File> Export> PNG Optimizer> click Ok and save wherever you'd like.
Hope you liked it, and please feel free to leave any comments. You can email me copies of your tags if you'd like! I'd love to see them.
Rac SOTM and new tubes!
Wow, so far it's been an amazing month. Over at the Official Xeracx Stalkers forum, they made me the FIRST SOTM (Stalker of the Month). I've gotten lots of beautiful tags from everyone! Thank you so much to those who have gifted me with tags.
Let's see, the new Halloween tubes came out today and since I'm officially without an income until I find another job, I was sure I wasn't going to get them. Well, some very sweet person (who shall remain nameless unless she tells) gifted me with the pack! Whoot! I made a couple new tags today, though they weren't Halloween themed, they are most likely going to be tuts here as soon as I write them up.
Sometime, probably next month I'm told, because Rac is pretty swamped, look for the "Mindy" tube by Rac over at AMI which is the tube inspired by me!
Have a spook-tac-u-lar weekend, and happy stalking!
Wednesday, September 16, 2009
Tut using my template
Patty over at Sunspotppspplace has an awesome tut using one of my zodiac templates on her blog called Rac Zodiac. Go on over to her blog and check it out! Click HERE Thanks so much Patty for sending it to me to post here!
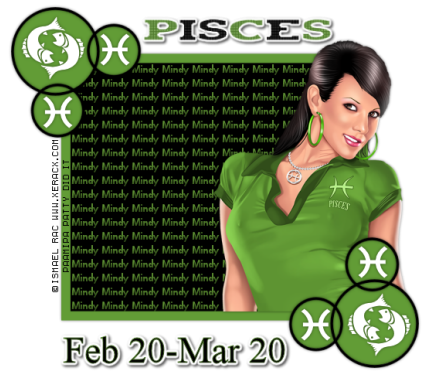
Tuesday, September 8, 2009
Oldies word art
I was listening to a bunch of oldies the other day and I thought what a great bunch of lyrics. So these word art are inspired by song lyrics from back in the 60's and 70's. You can get them by clicking HERE
Please feel free to leave a comment. It would be nice to see some feedback on my work!

Monday, September 7, 2009
Runaround
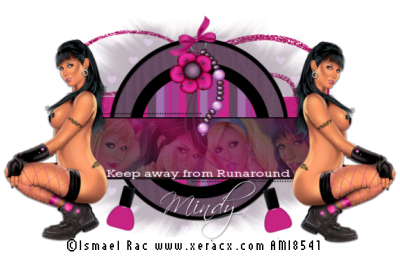 For this tut you will need the following:
5 tubes of choice. I am using the artwork of Ismael Rac which you have to purchase from AMI to use.
Template from Mirella which I got off the Creative Misfits blog.
Scrap kit from Bea's Creations called You Rock, which is FTU.
Mask: WSL Mask 241 from WeeScotsLass creations.
Plugins: Penta color dot
2 fonts of choice, I used Rockwell and Scriptina
Let's get started!
Delete the Raster 1, Glamorous, two small rectangles, and Babe layers.
Image>canvas size, change to 750 x 600 to give you room to work. You can crop it down after you're finished.
Please remember you don't have to use the same papers or even the same kit if you don't want, these are just suggestions.
Click on rectangle one layer, select all, selections float, defloat, copy and paste paper 9 (p9) as a new layer. Selections invert, and on your paper layer, delete, select none. Delete the original rectangle layer. Add drop shadow of 1, 1, 60, 3 or another of your choice.
Click on the circle layer and do the same thing as you did on the rectangle layer using paper 2 (p2).
Click on your border circle layer and selections, select all, float, modify, expand 3. Add a new raster layer and flood fill with black, deselect and add the same drop shadow you used on the rectangle layer. Delete the original border layer.
Select your small circle layer and follow the directions used on the rectangle and circle layer using paper 1 (p1) resizing the paper 65%, and delete the original small circle layer.
Click on the small circle border layer, selections, select all, selections float, modify, expand 2, add a new raster layer and flood fill with black. Select none, add your drop shadow, and delete the original border layer.
Click on the big rectangle layer, selections, select all, float, defloat and add a new raster layer. Make your foreground #c72483 and your background #63485e. Click on your foreground and choose gradient foreground background with rotation set at 36 repeats set at 3 and flood fill your new layer with that gradient. Deselect.
Select your big rectangle border, selections, select all, float, defloat, add a new raster layer and flood fill black, then add your drop shadow. Delete the original rectangle border.
Add a drop shadow to the dotted lines layer.
Click on your background layer and open paper 14 (p14) and copy and paste right above the background layer. Layers, new mask layer, from image, and find in the drop down box your mask layer, click ok. Delete the mask and merge the group, drop the opacity to about 40%. Delete your background layer.
Click on raster 6 and selections float, selections defloat, and copy and paste your first tube into the rectangle as you like it, then selections, invert, and on your tube layer, delete. Do this with each of your tubes, resizing as needed. On each tube layer, change the blend mode to soft light. Once you do this, depending on how your tubes are positioned, you may need to erase some parts of the tubes that show through each other.
If you have deselected your raster 6 layer to erase parts of your tubes, select it again, float, and defloat, add a new raster layer above the tubes and flood fill with black, deselect.
Use the Penta color dot plugin with the following settings top to bottom: 90, 2, 255, 255, 255. Click ok, then change the opacity of that layer to around 35.
Image resize 75%, then change the canvas size back to 750x 600. When you do this, you may have to erase some bits of your tube along the edges.
Add a tube of choice and add your drop shadow, image mirror and position on the other side.
Add any elements you'd like, bows, doodles, etc. I added the following
Pendant2 resized at 60% and deleted the part that covered the black border on one side so it looked like it was hooked through.
Nailpolish resized at 30% rotated 15 degrees, then duplicated and mirrored.
Doodle 1 which I left full sized and placed just below my mask layer.
Bow 2 which I also resized at 30# and placed on the top of the Pendant layer.
Use your text tool and add the words "Keep away from Runaround" in the rectangle. I used Rockwell set at 5, then I pulled it out so it was longer, and kind of smooshed it a little to make it a little shorter in height.
Add your name and copyright info. I used Scriptina for my name and added a drop shadow.
Crop your image to get rid of the excess and resize it.
Save as a .png image so that you have a transparent background by going to Image, export, png optimizer, and leave the settings as they are, click ok, and save to whatever folder you'd like.
For this tut you will need the following:
5 tubes of choice. I am using the artwork of Ismael Rac which you have to purchase from AMI to use.
Template from Mirella which I got off the Creative Misfits blog.
Scrap kit from Bea's Creations called You Rock, which is FTU.
Mask: WSL Mask 241 from WeeScotsLass creations.
Plugins: Penta color dot
2 fonts of choice, I used Rockwell and Scriptina
Let's get started!
Delete the Raster 1, Glamorous, two small rectangles, and Babe layers.
Image>canvas size, change to 750 x 600 to give you room to work. You can crop it down after you're finished.
Please remember you don't have to use the same papers or even the same kit if you don't want, these are just suggestions.
Click on rectangle one layer, select all, selections float, defloat, copy and paste paper 9 (p9) as a new layer. Selections invert, and on your paper layer, delete, select none. Delete the original rectangle layer. Add drop shadow of 1, 1, 60, 3 or another of your choice.
Click on the circle layer and do the same thing as you did on the rectangle layer using paper 2 (p2).
Click on your border circle layer and selections, select all, float, modify, expand 3. Add a new raster layer and flood fill with black, deselect and add the same drop shadow you used on the rectangle layer. Delete the original border layer.
Select your small circle layer and follow the directions used on the rectangle and circle layer using paper 1 (p1) resizing the paper 65%, and delete the original small circle layer.
Click on the small circle border layer, selections, select all, selections float, modify, expand 2, add a new raster layer and flood fill with black. Select none, add your drop shadow, and delete the original border layer.
Click on the big rectangle layer, selections, select all, float, defloat and add a new raster layer. Make your foreground #c72483 and your background #63485e. Click on your foreground and choose gradient foreground background with rotation set at 36 repeats set at 3 and flood fill your new layer with that gradient. Deselect.
Select your big rectangle border, selections, select all, float, defloat, add a new raster layer and flood fill black, then add your drop shadow. Delete the original rectangle border.
Add a drop shadow to the dotted lines layer.
Click on your background layer and open paper 14 (p14) and copy and paste right above the background layer. Layers, new mask layer, from image, and find in the drop down box your mask layer, click ok. Delete the mask and merge the group, drop the opacity to about 40%. Delete your background layer.
Click on raster 6 and selections float, selections defloat, and copy and paste your first tube into the rectangle as you like it, then selections, invert, and on your tube layer, delete. Do this with each of your tubes, resizing as needed. On each tube layer, change the blend mode to soft light. Once you do this, depending on how your tubes are positioned, you may need to erase some parts of the tubes that show through each other.
If you have deselected your raster 6 layer to erase parts of your tubes, select it again, float, and defloat, add a new raster layer above the tubes and flood fill with black, deselect.
Use the Penta color dot plugin with the following settings top to bottom: 90, 2, 255, 255, 255. Click ok, then change the opacity of that layer to around 35.
Image resize 75%, then change the canvas size back to 750x 600. When you do this, you may have to erase some bits of your tube along the edges.
Add a tube of choice and add your drop shadow, image mirror and position on the other side.
Add any elements you'd like, bows, doodles, etc. I added the following
Pendant2 resized at 60% and deleted the part that covered the black border on one side so it looked like it was hooked through.
Nailpolish resized at 30% rotated 15 degrees, then duplicated and mirrored.
Doodle 1 which I left full sized and placed just below my mask layer.
Bow 2 which I also resized at 30# and placed on the top of the Pendant layer.
Use your text tool and add the words "Keep away from Runaround" in the rectangle. I used Rockwell set at 5, then I pulled it out so it was longer, and kind of smooshed it a little to make it a little shorter in height.
Add your name and copyright info. I used Scriptina for my name and added a drop shadow.
Crop your image to get rid of the excess and resize it.
Save as a .png image so that you have a transparent background by going to Image, export, png optimizer, and leave the settings as they are, click ok, and save to whatever folder you'd like.
Wednesday, September 2, 2009
My first award
I have always tried to do my best to stay © compliant and at times I get so disgusted with those who feel it's their right to use an artists work just because it's posted on the internet and they hide behind "fair use." Truthfully, I think it's just their way of trying to get out of paying an artist for his hard work. You wouldn't take an artists painting out of a museum and place it on your wall then claim it's "fair use" would you? No, you'd call it theft. Well there are some who do that very thing in the PSP world. Ok, enough of my little rant, even though there was a reason leading up to it.
Over the years I've had to learn a few things about © and I am still learning. For instance, when my blog was being looked at by The Zone Groups to make sure I was following all the rules, I had links to fonts. I didn't realize that sites like dafont actually are sharing fonts that are PTU. hmmm!
Anyway, after they reviewed my site and I removed some font links and changed my tag previews to make the © more legible after the resizing to fit my blog, I was all set to go. I knew I was doing pretty good at being © compliant, but didn't realize I was doing that well that I only had a couple minor changes to make. whooo hooo! Anyway, here is my award and it will always be at the bottom of the first page on my blog.

Tuesday, September 1, 2009
Frame
This is my first frame, so be nice, lol.. I created the frame itself and then added the ribbon and flowers from Bel Vidotti's My Peach Love scrapkit. Enjoy!
Click HERE for the download.
Monday, August 31, 2009
Blog Contest Winner
The winner of the blog contest is Sharon of Eclectic Bits.
Thank you to everyone who entered, it was a hard choice. Please take a moment to check out her awesome site!
Friday, August 28, 2009
Zodiac Templates
I wanted templates to go with the new zodiac theme pack of Ismael Rac and couldn't find quite what I was looking for, so I decided to come up with something of my own. Hope you like these zodiac themed templates. There are two sets, each one in it's own zip file. Set 1 is HERE and set 2 is HERE.
Set One:
 Set 2
Set 2


Set 2
Sunday, August 16, 2009
Template 5
Created a new template today for you to play with. Hope you enjoy it! Just click on the template to go to the download!

Tuesday, August 11, 2009
Calling all Minx
 For this tut you will need:
Template 87 by Melissa at Melissaz Creations.
Scrap kit Minx Attitude by Tami at Addictive Pleasures. Unfortunately the kit is no longer available but there are several free PTU or FTU kits out there that you could easily replace it with.
WSL Mask 6 by Chelle at Weescotslass Creations
Please leave these ladies some nice comments to let them know you're downloading their stuff, and show appreciation for their work!
A tube of choice. I am using the wonderful artwork of Ismael Rac which you need a license to use, and can be purchased at AMI.
Plugins: Xero Radiance
Font of Choice: I used Scriptina
Ok, let's make our tag!
Open your template and go to Image, canvas size, and change to 700 x 700. This just gives you room to work, and you will crop it down at the end.
Delete the following layers: Raster 1, Raster 5, and merged.
You can use any papers or elements of your choice, mine are just guidelines, so feel free to change it up a bit!
Open the wire element, resize it by about 80%. Copy and paste it onto your template and drag it to the bottom.
Open your mask in your workspace and then go to Layers, new mask layer, from image. Find the mask in the drop down box, source luminance checked, invert mask data unchecked, click ok. Delete the mask layer, and merge the group.
Click on Raster 4, selections, select all, float, defloat, resize paper 7 by 80%, copy and paste as a new layer, selections invert, and on the paper layer, hit delete. Deselect.
I like to put a drop shadow on my tube before I paste it onto my canvas so that after I get done erasing the bits that hang over, I don't have to erase the drop shadow that hangs over, so apply whatever drop shadow you'd like to your tube. I used 1 1 60 4. Resize if necessary, and paste as a new layer. Erase the bits that hang over the two rectangles (see my tag for reference). I always find it easier to lower the opacity of my tube so I can see the layer below it and it helps me decide where I have to erase!
Go to adjust, hue and saturation, and change them both to zero to make your tube black and white.
Duplicate your tube. On the top layer, go to adjust blur, gaussian blur, change it to 3. On your layer pallete change it from Normal to soft light. On the original layer which should be on the bottom, go to your plugin Xero Radiance and apply the default settings. If you don't know if it's on default, just click reset, then it will be on the default. Click ok. Delelte the original Raster layer 4.
On Raster 3 click selections, select all, float, defloat, copy and paste paper 3 as a new layer, selections invert, hit delete on your paper layer, deselect.
On Raster 7 click selections, select all, float, defloat, copy and paste paper 1 as a new layer, selections invert, hit delelte on your paper layer, and then paste your tube as a new layer, position how you want it, hit delete on your tube layer, deselect. Delete the original Raster 7 layer.
On Raster 6, click selections, select all, float, defloat, selections invert, and paste paper 3 as a new layer, on that layer hit delete on your keyboard and deselect.
On Raster 11, take your magic wand and holding your shift key, click inside all the large dark colored lines, open paper 10, copy and paste as a new layer, selections invert, delete, deselect. Now go back to Raster 11 and holding your shift key, click on all the lighter colored lines. Open paper 11, copy and paste as a new layer, selections invert, and delete, deselect. Delete the Raster 11 layer. Merge both the layers you just made down together, add your drop shadow you used on your tube. Mine was 1 1 60 4.
Click on your Copy of Raster 2 layer. Click inside all the larger dark colored lines while holding down your shift key. Copy and paste paper 9 as a new layer, selections invert, and hit delete, deselect. Now hold down your shift key and click on all the smaller grey colored lines. Copy and paste paper 8 as a new layer, selections invert, hit delete, deselect. Merge those two layers down together, and add your drop shadow.
Add whatever elements you'd like. I just added bow 5 which I resized and rotated to fit on the little rectangle, and the laceup element which I also resized and placed to the left of my tube. You may have to erase some of your tube layer.
Add your name and © info and you are done!
For this tut you will need:
Template 87 by Melissa at Melissaz Creations.
Scrap kit Minx Attitude by Tami at Addictive Pleasures. Unfortunately the kit is no longer available but there are several free PTU or FTU kits out there that you could easily replace it with.
WSL Mask 6 by Chelle at Weescotslass Creations
Please leave these ladies some nice comments to let them know you're downloading their stuff, and show appreciation for their work!
A tube of choice. I am using the wonderful artwork of Ismael Rac which you need a license to use, and can be purchased at AMI.
Plugins: Xero Radiance
Font of Choice: I used Scriptina
Ok, let's make our tag!
Open your template and go to Image, canvas size, and change to 700 x 700. This just gives you room to work, and you will crop it down at the end.
Delete the following layers: Raster 1, Raster 5, and merged.
You can use any papers or elements of your choice, mine are just guidelines, so feel free to change it up a bit!
Open the wire element, resize it by about 80%. Copy and paste it onto your template and drag it to the bottom.
Open your mask in your workspace and then go to Layers, new mask layer, from image. Find the mask in the drop down box, source luminance checked, invert mask data unchecked, click ok. Delete the mask layer, and merge the group.
Click on Raster 4, selections, select all, float, defloat, resize paper 7 by 80%, copy and paste as a new layer, selections invert, and on the paper layer, hit delete. Deselect.
I like to put a drop shadow on my tube before I paste it onto my canvas so that after I get done erasing the bits that hang over, I don't have to erase the drop shadow that hangs over, so apply whatever drop shadow you'd like to your tube. I used 1 1 60 4. Resize if necessary, and paste as a new layer. Erase the bits that hang over the two rectangles (see my tag for reference). I always find it easier to lower the opacity of my tube so I can see the layer below it and it helps me decide where I have to erase!
Go to adjust, hue and saturation, and change them both to zero to make your tube black and white.
Duplicate your tube. On the top layer, go to adjust blur, gaussian blur, change it to 3. On your layer pallete change it from Normal to soft light. On the original layer which should be on the bottom, go to your plugin Xero Radiance and apply the default settings. If you don't know if it's on default, just click reset, then it will be on the default. Click ok. Delelte the original Raster layer 4.
On Raster 3 click selections, select all, float, defloat, copy and paste paper 3 as a new layer, selections invert, hit delete on your paper layer, deselect.
On Raster 7 click selections, select all, float, defloat, copy and paste paper 1 as a new layer, selections invert, hit delelte on your paper layer, and then paste your tube as a new layer, position how you want it, hit delete on your tube layer, deselect. Delete the original Raster 7 layer.
On Raster 6, click selections, select all, float, defloat, selections invert, and paste paper 3 as a new layer, on that layer hit delete on your keyboard and deselect.
On Raster 11, take your magic wand and holding your shift key, click inside all the large dark colored lines, open paper 10, copy and paste as a new layer, selections invert, delete, deselect. Now go back to Raster 11 and holding your shift key, click on all the lighter colored lines. Open paper 11, copy and paste as a new layer, selections invert, and delete, deselect. Delete the Raster 11 layer. Merge both the layers you just made down together, add your drop shadow you used on your tube. Mine was 1 1 60 4.
Click on your Copy of Raster 2 layer. Click inside all the larger dark colored lines while holding down your shift key. Copy and paste paper 9 as a new layer, selections invert, and hit delete, deselect. Now hold down your shift key and click on all the smaller grey colored lines. Copy and paste paper 8 as a new layer, selections invert, hit delete, deselect. Merge those two layers down together, and add your drop shadow.
Add whatever elements you'd like. I just added bow 5 which I resized and rotated to fit on the little rectangle, and the laceup element which I also resized and placed to the left of my tube. You may have to erase some of your tube layer.
Add your name and © info and you are done!
Subscribe to:
Posts (Atom)