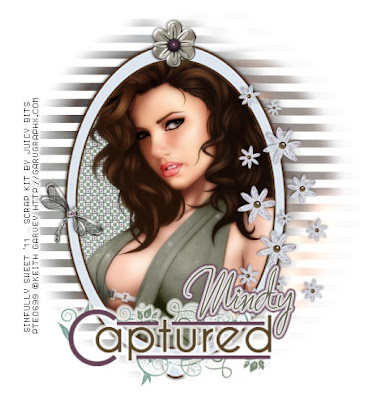
For this tutorial you will need the following:
Paint Shop Pro, I am using PSP X, you should be able to use any version.
Tube of choice, I am using the artwork of Keith Garvey which you need a license to use. You can purchase his work at PSP Tubes Emporium.
Scrap kit of choice. I am using Evantide by Juicy Bits. It is a PTU kit that you can find here.
Font of choice, I am using More Enchanted Prairie Dog
Plugins: Xero Porcelain, Visman Extravaganza Transmission
Just remember that my choices of papers and elements is just a suggestion, change it up and make it yours! You don't have to follow mine exactly.
Let's get started!
Open a new canvas 650 x 650, white.
Open element 4, copy and paste as a new layer and resize by 145%.
Click inside your frame with the magic wand, selections, modify, expand by 3, selections, modify, invert.
Open paper 15, copy and paste as a new layer, drag it below the frame. Click delete on your keyboard and leave selected.
Copy and paste your tube, preferably a close up, or if you are using the same tube as me, or one that has 3 different sizes, use the mid sized tube. Position it how you want it, and click delete on your keyboard. Deselect.
Duplicate your tube, on the top (duplicated) layer, adjust, blur, gaussian blur of 3. Change the blend mode to soft light.
On the bottom tube apply Xero Porcelain at the default settings, except change the bottom slider all the way to zero. Add a drop shadow to this bottom tube.
Close off your white background layer and merge visible the other layers, add a drop shadow to the merged image. I used 1, 1, 50, 5 then -1, -1, 50, 5, then duplicate the merged image.
On the bottom layer, adjust blur, gaussian blur 15. Apply VM Extravaganza Transmissions with the following settings top to bottom: 9, 15, 60.
Use your mover tool to pull the layer you just applied transmission filter to, and pull it over to the left so you have a good portion of it showing. Duplicate it and pull this top duplicated layer over the the right so you have a good portion showing on that side. Lower the opacity of these two layers to around 70.
Now go ahead and add any elements you like to decorate it up.
Add your name, copyright and any credits you need to add. Crop the excess off and save.
