Pages

Tuesday, December 31, 2013

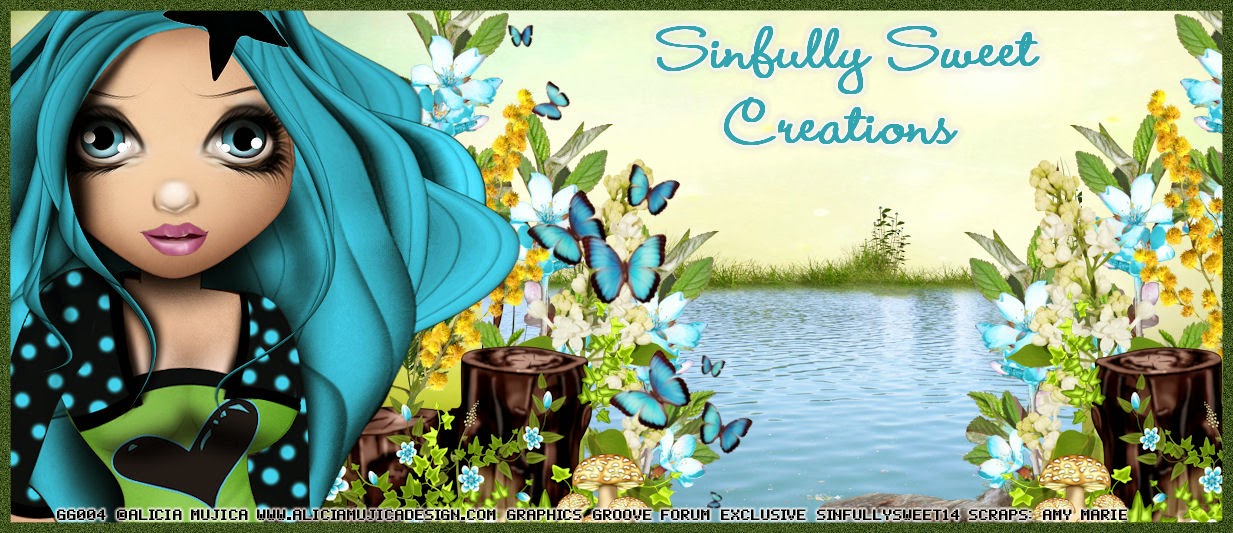
Little Love


For this tutorial you will need the following:

Paint Shop Pro, I am using PSP X, you should be able to use any version.

Tube of choice, I am using the artwork of Alicia Mujica (Pecas) which you need a license to use.  

Scrap kit of choice. I am using  a PTU kit, Love N Fairyland by Amy Marie

Font of choice, I am using Ribbon In the Sky


Plugins: No outside plugins used
I do use Eye Candy 4000 Gradient Glow on all my copyrights/credits layers
I do this because some forums will make a .png tag show up with a black background and then your
copyright doesn't show. 


Just remember that my choices of papers and elements is just a suggestion, change it up and make it yours! You don't have to follow mine exactly.

Add a drop shadow of your choosing to tubes & elements throughout. I usually use 1, 1, 50, 5 unless otherwise noted.


Let's get started!

Open a new canvas 850 x 850 pixels with a white background

Copy & paste your tube as a new layer in the canvas

Add the following elements: 
element 12 arrange behind & to the right of the tube
element 11 resize 40%  arrange on bottom right
element 9 resize 35% arrange on bottom right against the house on the little stones
element 41 arrange on the top of the house on right side
element 47 resize 40% arrange below element 41
element 79 resize 40%  arrange on right
element 78 esize 40%  arrange on top right
element 54 resize 40% & mirror arrange on left side of house
element 49 resize 40%  arrange below element 54 layer on left
element 45 resize 45% arrange behind mushroom on bottom right

Copy & paste paper 4 as a new layer
add your mask

crop and resize
add your copyright and credits as needed
add your text and save
Monday, December 30, 2013

Waiting 4 Love


For this tutorial you will need the following:

Paint Shop Pro, I am using PSP X, you should be able to use any version.

Tube of choice, I am using the artwork of Misticheskaya (Lada) which you need a license to use.  

Scrap kit of choice. I am using a PTU kit, Love N Fairyland by Amy Marie 

Font of choice, I am using Cupid de Locke

Plugins: No outside plugins used
I do use Eye Candy 4000 Gradient Glow on all my copyrights/credits layers
I do this because some forums will make a .png tag show up with a black background and then your
copyright doesn't show. 


Just remember that my choices of papers and elements is just a suggestion, change it up and make it yours! You don't have to follow mine exactly.

Add a drop shadow of your choosing to tubes & elements throughout. I usually use 1, 1, 50, 5 unless otherwise noted.


Let's get started!

Open a new canvas 850 x 850 pixels with a white background

open 61 copy and paste as a new layer resize 90%
click inside with your magic wand, selections, modify, expand 2, selections, invert
open paper 21 copy and paste as a new layer click delete on your keyboard

Copy & paste your tube, resize 60% arrange on left of frame

Add the following:
element 20 resize 60% arrange on bottom right of frame
element 19 resize 60% arrange above element 20
element 100 resize 65% & mirror arrange on top right
element 49 resize 65% arrange on right, below the element 100 layer
element 54 resize 65% arrange on left, behind the tube
element 27  arrange on top left, duplicate & drag down on bottom left
element 77 resize 55% arrange on bottom left, over tube
element 42 resize 60% arrange on left by tube
element 25 resize 24% arrange on top right, in the roses
element 23 resize 20%  arrange on top left on one of the branches

crop and resize
add your copyright and credits as needed
add your text and save

Friday, December 27, 2013

2014


For this tutorial you will need the following:

Paint Shop Pro, I am using PSP X, you should be able to use any version.

Tube of choice, I am using the artwork of Ismael Rac (2013 Sexy Tuxedo) which you need a license to use.  

Scrap kit of choice. I am using a PTU kit, 2014, by Amy Marie 

Font of choice, I am using Whisper


Plugins: Eye Candy 4000 Gradient Glow
I do use Eye Candy 4000 Gradient Glow on all my copyrights/credits layers
I do this because some forums will make a .png tag show up with a black background and then your
copyright doesn't show. 


Just remember that my choices of papers and elements is just a suggestion, change it up and make it yours! You don't have to follow mine exactly.

Add a drop shadow of your choosing to tubes & elements throughout. I usually use 1, 1, 50, 5 unless otherwise noted.


Let's get started!

Open a new canvas 850 x 850 pixels with a white background

Add the following:
104, place to the right, duplicate, mirror, drag the copies over each other so the 
buildings somewhat line up over each other

105, arrange behind 104 layer on the right, duplicate & mirror

Copy and paste your tube, resize 45% arrange on the left

115 arrange on bottom left
76 resize 55%  arrange on bottom right
122 resize 55% arrange behind city on left
18 resize 35% arrange on bottom right
109 arrange across buildings, add gradient glow of 3, white
126 resize 45% arrange on bottom left
125 resize 80%  arrange above cityscape
124  arrange on top right behind the city, duplicate & mirror

crop and resize
add your copyright and credits as needed
add your text and save

I added a gradient glow of #705524 with a width of 5 to my name text

Thursday, December 26, 2013

Happy 2014


For this tutorial you will need the following:

Paint Shop Pro, I am using PSP X, you should be able to use any version.

Tube of choice, I am using the artwork of Ismael Rac (New Year Girl) which you need a license to use.  

Scrap kit of choice. I am using a PTU kit, Happy New Years 2 by Amy Marie  

Font of choice, I am using Pea Mel's In Between

Plugins: No outside plugins
I do use Eye Candy 4000 Gradient Glow on all my copyrights/credits layers
I do this because some forums will make a .png tag show up with a black background and then your
copyright doesn't show. 


Just remember that my choices of papers and elements is just a suggestion, change it up and make it yours! You don't have to follow mine exactly.

Add a drop shadow of your choosing to tubes & elements throughout. I usually use 1, 1, 50, 5 unless otherwise noted.


Let's get started!

Open a new canvas 850 x 850 pixels with a white background

open 72 copy and paste as a new layer resize 90%
click inside with your magic wand, selections, modify, expand 2, selections, invert
open paper 4 copy and paste as a new layer click delete on your keyboard
Copy & paste your tube, arrange in frame, erase the parts you don't want sticking out over the frame

Add the following elements 
element 27 resize 75%  arrange across center of circle frame & tube
element 87 resize 55% arrange on bottom left
element 18 resize 50% arrange on bottom left
element 77 resize 60% arrange on left
element 89 resize 60% arrange on right
element 79 resize 60% arrange on bottom right
element 84 rotate left 90 arrange on bottom
element 78 arrange on top left, duplicate & mirror


crop and resize
add your copyright and credits as needed
add your text and save

Ring It In


For this tutorial you will need the following:

Paint Shop Pro, I am using PSP X, you should be able to use any version.

Tube of choice, I am using the artwork of Alicia Mujica (Happy New Year) which you need a licence to use

Scrap kit of choice, I am using a PTU kit by Alicia Mujica (My Best Wishes) 

Font of choice, I am using Segoe Script

Plugins: No outside plugins
I do use Eye Candy 4000 Gradient Glow on all my copyrights/credits layers
I do this because some forums will make a .png tag show up with a black background and then your
copyright doesn't show. 


Just remember that my choices of papers and elements is just a suggestion, change it up and make it yours! You don't have to follow mine exactly.

Add a drop shadow of your choosing to tubes & elements throughout. I usually use 1, 1, 50, 5 unless otherwise noted.


Let's get started!

Open a new canvas 850 x 850 pixels with a white background

Copy and paste Reloj, resize  60%
Copy and paste your tube, resize 50% arrange to the left of the clock
Copy and paste Estrellas deco, resize 50% arrange behind clock layer
Copy and paste 2 of the balloons, resize one 30% and the other 25% arrange on right 
Copy and paste brindis, resize 35% arrange by tube
Copy and paste one of the banners, resize 45% arrange across bottom of clock


crop and resize
add your copyright and credits as needed
add your text and save

Wednesday, December 25, 2013

Happy New Year


For this tutorial you will need the following:

Paint Shop Pro, I am using PSP X, you should be able to use any version.

Tube of choice, I am using the artwork of Alicia Mujica (Happy New Year) which you need a license to use.  
Scrap kit of choice. I am using  a PTU kit, My Best Wishes also by Alicia Mujica 

Font of choice, I am using Pea Shelby Raye


Plugins: No outside plugins used
I do use Eye Candy 4000 Gradient Glow on all my copyrights/credits layers
I do this because some forums will make a .png tag show up with a black background and then your
copyright doesn't show. 


Just remember that my choices of papers and elements is just a suggestion, change it up and make it yours! You don't have to follow mine exactly.

Add a drop shadow of your choosing to tubes & elements throughout. I usually use 1, 1, 50, 5 unless otherwise noted.


Let's get started!

Open a new canvas 850 x 850 pixels with a white background

Copy & paste your tube on your canvas, resize 50%
Copy and paste Corazon Negro (the black heart) resize 45% place behind the tube and to the right
Copy and paste Reloj (the clock) resize 35% place on bottom right, behind tube
Copy & paste Oso (bear), resize 35% place on bottom left
Copy & paste  Pointsetia Oro (yellow flower) resize 35% place behind bear
Copy & paste bolamarron resize 25% place behind & between bear and tube
Copy & paste Muerdago Oro, resize 235% place below tube on right, duplicate, mirror drag over to right
and slightly overlap them. Merge the two together, duplicate & mirror
Copy & paste Brindis, resize 25% arrange to the right of the clock

Open paper 3b, paste as a new layer above the white background
apply your mask

crop and resize
add your copyright and credits as needed
add your text and save

Monday, December 23, 2013

Alicia Mujica CT Tag Show Off

These tags are made using Alicia Mujica (Luna Designs) scrap kit Santa is Coming, available here, which is just too cute! 


This one was made using the tube Imagine from the 2013 Special Edition Christmas set available here
as well as one of the two Santa Is Coming tubes available here


This one was made with one of the Santa Is Coming tubes


Saturday, December 21, 2013

Alicia Mujica CT Tag Show Off

Two new tags using the artwork of Alicia Mujica and using her scrap kit, Frosted Illusions available here

This one uses the Marie Antoinette tube available here


This one uses her Farfallina tube available here


Friday, December 20, 2013

Christmas Ball


For this tutorial you will need the following:

Paint Shop Pro, I am using PSP X, you should be able to use any version.

Tube of choice, I am using the artwork of Ismael Rac (X Stockings & Sexy Surprise) which you need a license to use.  

Scrap kit of choice. I am using a PTU kit, Christmas Ball by Amy Marie 

Font of choice, I am using High In Love


Plugins: No outside plugins
I do use Eye Candy 4000 Gradient Glow on all my copyrights/credits layers
I do this because some forums will make a .png tag show up with a black background and then your
copyright doesn't show. 


Just remember that my choices of papers and elements is just a suggestion, change it up and make it yours! You don't have to follow mine exactly.

Add a drop shadow of your choosing to tubes & elements throughout. I usually use 1, 1, 50, 5 unless otherwise noted.


Let's get started!

Open a new canvas 850 x 850 pixels with a white background

open 9 copy and paste as a new layer resize 90%
click inside with your magic wand, selections, modify, expand 2, selections, invert
open paper 12 copy and paste as a new layer click delete on your keyboard

Open one of your tubes, copy and paste as a new layer, arrange in frame, click delete on your keyboard
click delete on your keyboard, deselect, change the blend mode to Luminance(L)

Copy & paste your other tube, resize 40% arrange on right

Now for the elements:
element 80 resize 40% arrange on bottom right
element 84 resize 40% arrange on bottom left
element 88 resize 50% arrange on bottom in center
element 90 resize 40% arrange on top left
element 82 resize 45% arrange on right, above gift
element 81 resize 40% arrange on bottom right, below gift, duplicate & mirror
element 109 resize 45% arrange on left
element 30 resize 45% rotate left 12 arrange to the left of and 
below the lamp layer in the center on the bottom, duplicate & mirror
element 118 resize 30% arrange on bottom right, in the foilage
element 95 resize 75% arrange on bottom left
element 25 arrange across top


crop and resize
add your copyright and credits as needed
add your text and save

Monday, December 16, 2013

Winter Song


For this tutorial you will need the following:

Paint Shop Pro, I am using PSP X, you should be able to use any version.

Tube of choice, I am using the artwork of Disco Science (Marie) which you need a license to use.  

Scrap kit of choice. I am using  a PTU kit, Winter Song by Amy Marie

Font of choice, I am using Ribbon In the Sky

Plugins: Optik Verve Labs Virtual Photographer - Halo
I do use Eye Candy 4000 Gradient Glow on all my copyrights/credits layers
I do this because some forums will make a .png tag show up with a black background and then your
copyright doesn't show. 


Just remember that my choices of papers and elements is just a suggestion, change it up and make it yours! You don't have to follow mine exactly.

Add a drop shadow of your choosing to tubes & elements throughout. I usually use 1, 1, 50, 5 unless otherwise noted.


Let's get started!

Open a new canvas 850 x 850 pixels with a white background

open 31 copy and paste as a new layer  resize 90%
click inside with your magic wand, selections, modify, expand 2, selections, invert
open paper 6 copy and paste as a new layer click delete on your keyboard 
copy and paste your tube as a new layer, click delete on your keyboard and deselect
duplicate your tube, on the top layer, blur, gaussian 3, change blend mode to soft light
On the bottom tube, make sure your foreground & background are set at white, apply the Halo effect to it, then take your eraser tool and erase outside the frame, because sometimes the effect goes outwards from the tube and leaves some color that you don't want

Copy & paste your tube again, mirror it, resize 35% arrange by frame

Add the following elements:

element 4 resize 60% arrange in front of tube
element 14 resize 60%  arrange on bottom left
element 35 arrange between bird house & tube
element 64 resize 30% arrange behind pinecones
element 7 resize 30% arrange in front of bird house
element 63 arrange across bottom
element 58 resize 75% arrange on bottom right between tube & frame
duplicate & drag duplicate to left
element 50 arrange on right, duplicate & mirror
erase some of the ones that stick way out on the left

crop and resize
add your copyright and credits as needed
add your text and save

Sunday, December 15, 2013

Waiting 4 Santa


For this tutorial you will need the following:

Paint Shop Pro, I am using PSP X, you should be able to use any version.

Tube of choice, I am using the artwork of Alicia Mujica, which you need a license to use.  
This tube is called Waiting For My Santa, and it is only available when you make a purchase from Alicia's store in the month of December 2013. 

Scrap kit of choice. I am using scrap DD-IB-Alicia Mujica - Exclusive1C which is available 
at CDO to match one of Alicia's Exclusive tubes only available at CDO 

Font of choice, I am using Cane Letter Script

Plugins: Alien Skin Eye Candy 4000 Gradient Glow
I do use Eye Candy 4000 Gradient Glow on all my copyrights/credits layers
I do this because some forums will make a .png tag show up with a black background and then your
copyright doesn't show. 


Just remember that my choices of papers and elements is just a suggestion, change it up and make it yours! You don't have to follow mine exactly.

Add a drop shadow of your choosing to tubes & elements throughout. I usually use 1, 1, 50, 5 unless otherwise noted.


Let's get started!

Open a new canvas 850 x 850 pixels with a white background

open frame 1b copy and paste as a new layer resize 85%
click inside with your magic wand, selections, modify, expand 2, selections, invert
open paper 1 copy and paste as a new layer click delete on your keyboard & deselect

Copy and paste your tube as a new layer, resize 45% arrange to the left of the frame

add the following elements
element 1 arrange on bottom, behind the box, mouse, star, etc but above the tube layer
element 13b resize 90% arrange on right side of frame
word art 3 resize 85% arrange across top
add a gradient glow of 7 using white & pink
element 2 resize 45% arrange on bottom right
element 15 resize 55% arrange by box
element 14c resize 40% arrange by box
element 8 arrange behind mouse & box
element spray 3 arrange on left, duplicate & mirror


crop and resize
add your copyright and credits as needed
add your text and save

Coffee Love


For this tutorial you will need the following:

Paint Shop Pro, I am using PSP X, you should be able to use any version.

Tube of choice, I am using the artwork of Wendy Gerber (Cappuccino Dreams) 
which you need a license to use.  

Scrap kit of choice. I am using a PTU kit,  Cappuccino Dreams by Amy Marie

Font of choice, I am using Better Heather


Plugins: Eye Candy 4000 gradient glow
I do use Eye Candy 4000 Gradient Glow on all my copyrights/credits layers
I do this because some forums will make a .png tag show up with a black background and then your
copyright doesn't show. 


Just remember that my choices of papers and elements is just a suggestion, change it up and make it yours! You don't have to follow mine exactly.

Add a drop shadow of your choosing to tubes & elements throughout. I usually use 1, 1, 50, 5 unless otherwise noted.


Let's get started!

Open a new canvas 850 x 850 pixels with a white background

open element 92 copy and paste as a new layer rotate right 90
click inside with your magic wand, selections, modify, expand 2, selections, invert
open  paper 5 copy and paste as a new layer click delete on your keyboard
copy & paste your close up tube, resize 75%  arrange in frame, click delete on your keyboard & deselect
Copy & paste the main tube, resize 85% mirror arrange on right

add the following elements
element 38 resize 55% arrange on top left
element 91 resize 55% arrange on top of the sign post
element 22 resize 55% arrange on bottom left
element 33 resize 30% arrange on table
element 20 resize 25% arrange on table

element 5, add a gradient glow width 8 colors white & #6d9b9b, then resize 75%

add paper 1 above the white background
apply your mask
resize it 105%  duplicate it and merge the two layers together to make it a little darker


crop and resize
add your copyright and credits as needed
add your text and save

Saturday, December 14, 2013

Love Christmas Snow


For this tutorial you will need the following:

Paint Shop Pro, I am using PSP X, you should be able to use any version.

Tube of choice, I am using the artwork of Alicia Mujica (I Love Christmas) which you need a license to use.  

Scrap kit of choice. I am using Snow Queen by Bibi's Collection

Font of choice, I am using Pea Lovey Dovey


Plugins: No outside plugins
I do use Eye Candy 4000 Gradient Glow on all my copyrights/credits layers
I do this because some forums will make a .png tag show up with a black background and then your
copyright doesn't show. 


Just remember that my choices of papers and elements is just a suggestion, change it up and make it yours! You don't have to follow mine exactly.

Add a drop shadow of your choosing to tubes & elements throughout. I usually use 1, 1, 50, 5 unless otherwise noted.


Let's get started!

Open a new canvas 850 x 850 pixels with a white background

open 59 copy and paste as a new layer resize 85%
click inside with your magic wand, selections, modify, expand 2, selections, invert
open paper 4 copy and paste as a new layer click delete on your keyboard
leave selected
open your tube, copy and paste as a new layer, resize 50% erase the bits that hang out of the frame where you don't want them, then deselect

add the following elements
element 36 resize 60% arrange on left, between tube & frame layer
element 63 resize 50% arrange on bottom left
element 75 resize 40% arrange on bottom left in front of log
element 8 arrange in center of the frame on the bottom
element 40 resize 60% arrange in front of snow in the center
element 62 resize 40% arrange on bottom right
element 1 resize 50% arrange on right
element 13 resize 50% arrange on right side of frame, erase the flowers that stick way out
element 31 resize 50% arrange on bottom in center below the other layers, but above the frame & tube
element 53 resize 20% arrange on branches

add paper 10 above the white background layer and apply your mask

crop and resize
add your copyright and credits as needed
add your text and save

Believe in Christmas


For this tutorial you will need the following:

Paint Shop Pro, I am using PSP X, you should be able to use any version.

Tube of choice, I am using the artwork of Verymany (Birthday Cake) which you need a license to use.  

Scrap kit of choice. I am using a PTU kit, Christmas Play by Amy Marie 

Font of choice, I am using Kenan & Kel

Mask of your choice

Plugins: no outside plugins
I do use Eye Candy 4000 Gradient Glow on all my copyrights/credits layers
I do this because some forums will make a .png tag show up with a black background and then your
copyright doesn't show. 


Just remember that my choices of papers and elements is just a suggestion, change it up and make it yours! You don't have to follow mine exactly.

Add a drop shadow of your choosing to tubes & elements throughout. I usually use 1, 1, 50, 5 unless otherwise noted.


Let's get started!

Open a new canvas 850 x 850 pixels with a white background

open 72 copy and paste as a new layer 
click inside with your magic wand, selections, modify, expand 2, selections, invert
open paper 2 copy and paste as a new layer click delete on your keyboard
copy & paste your tube, resize 70% arrange in the frame, erase where the legs hang over the bottom & deselect

add the following elements, you can check my tag to see exactly where I put things
element 57 resize 50%  arrange on bottom left
element 9 resize 50% arrange on bottom left
element 4 resize 75% arrange on left
element 18 resize 45% arrange on top left
element 40 resize 45% arrange on bottom

paste paper 3 above the white background
apply your mask


crop and resize
add your copyright and credits as needed
add your text and save

Thursday, December 12, 2013

Heart of Christmas


For this tutorial you will need the following:

Paint Shop Pro, I am using PSP X, you should be able to use any version.

Tube of choice, I am using the artwork of Alicia Mujica (I Love Christmas) which you need a license to use.  
Scrap kit of choice. I am using a collab kit, Heart of Winter by Bee Creation & Kamilla Designs 

Font of choice, I am using Impervious


Plugins: No outside plugins used
I do use Eye Candy 4000 Gradient Glow on all my copyrights/credits layers
I do this because some forums will make a .png tag show up with a black background and then your
copyright doesn't show. 


Just remember that my choices of papers and elements is just a suggestion, change it up and make it yours! You don't have to follow mine exactly.

Add a drop shadow of your choosing to tubes & elements throughout. I usually use 1, 1, 50, 5 unless otherwise noted.


Let's get started!

Open a new canvas 850 x 850 pixels with a white background

open Bee element 30 copy and paste as a new layer resize 30%
click inside with your magic wand, selections, modify, expand 2, selections, invert
open Bee paper 4 copy and paste as a new layer resize 30% click delete on your keyboard
copy and paste your tube, resize 45% arrange in frame, take your eraser tool and erase what you don't want hanging out of the frame

Add the following elements, you can check my tag for a better idea of placement
Bee element 2 resize 35% arrange across bottom of frame
 Kamilla element 28 resize 35% arrange beneath the other branches on the bottom
Bee element 23 resize 35% arrange on left, erase the base part of it
Bee element 19 resize 20% then 55% arrange on left
 Kamilla element 27 resize 15% arrange on bottom left by the penguin
Kamilla element 12 resize 10% rotate left 90 arrange in front of penguin, to the left of 
and below the flower layer
Kamilla element 5 resize 20% rotate right 90 flip arrange between branches layers
Kamilla element 22 resize 20% arrange on top right, duplicate flip, merge the two together, 
duplicate & mirror
Kamilla element7  resize 40% arrange just above the white background


crop and resize
add your copyright and credits as needed
add your text and save

Pink Winter


For this tutorial you will need the following:

Paint Shop Pro, I am using PSP X, you should be able to use any version.

Tube of choice, I am using the artwork of Alfadesire (Snow Babe) which you need a license to use.  

Scrap kit of choice. I am using a PTU kit, Winnie's Pink Winter by Amy Marie 

Font of choice, I am using Ribbon in the Sky

Mask of your choice

Plugins: No outside plugins
I do use Eye Candy 4000 Gradient Glow on all my copyrights/credits layers
I do this because some forums will make a .png tag show up with a black background and then your
copyright doesn't show. 


Just remember that my choices of papers and elements is just a suggestion, change it up and make it yours! You don't have to follow mine exactly.

Add a drop shadow of your choosing to tubes &elements throughout. I usually use 1, 1, 50, 5 unless otherwise noted.


Let's get started!

Open a new canvas 850 x 850 pixels with a white background
Copy and paste your tube as a new layer, resize 50%

Add the following elements, you can check my tag for a better idea of placement

element 19 arrange on the left behind tube
element 101  arrange across the bottom
element 94  resize 50% arrange on top of snow
element 90 resize 35% arrange behind tube on right
element 71 resize 45% arrange on right side of gift
element 17 resize 65% arrange on left by tree
element 72 resize 45$% arrange by pinecones
element 30 resize 555 arrange in front of tree on left
element 103 resize 65% arrange on right, behind all the layers

add paper 2 above the white background
apply your mask

crop and resize
add your copyright and credits as needed
add your text and save

Wednesday, December 11, 2013

Alicia Mujica Tag Show Off


The  tag above was made using the artwork of Alicia Mujica "Lola's Love" available here

Under the Tree


For this tutorial you will need the following:

Paint Shop Pro, I am using PSP X, you should be able to use any version.

Tube of choice, I am using the artwork of Verymany (Christy) which you need a license to use.  

Scrap kit of choice. I am using a PTU kit, Carolane, by Amy Marie 

Font of choice, I am using Pea Jenny Script

Mask: DVB 80

Plugins: No outside plugins
I do use Eye Candy 4000 Gradient Glow on all my copyrights/credits layers
I do this because some forums will make a .png tag show up with a black background and then your
copyright doesn't show. 


Just remember that my choices of papers and elements is just a suggestion, change it up and make it yours! You don't have to follow mine exactly.

Add a drop shadow of your choosing to tubes & elements throughout. I usually use 1, 1, 50, 5 unless otherwise noted.


Let's get started!

Open a new canvas 850 x 850 pixels with a white background

add the following, you can check my tag for exact placement

element 54 arrange slightly to the left of center
add your tube, resize 45% arrange in front of tree
element 25 resize 55% arrange on left side of tree
element 59 resize 55% arrange to the right of the green present
element 68  arrange between gifts & tree on left
element 22 arrange in front of gifts
element 51 arrange behind tube on right
element 69 resize 45% arrange on left of sign
element 19 resize 55% arrange to the right of the tree

add paper 13 above the white background
apply your mask

crop and resize
add your copyright and credits as needed
add your text and save

Tuesday, December 10, 2013

Alicia Mujica CT Tag Show Off

Tag using Alicia Mujica's tube "Feel" available here


Tag using Alicia Mujica's tube "Cowgirl" available here


Snow Girl


For this tutorial you will need the following:

Paint Shop Pro, I am using PSP X, you should be able to use any version.

Tube of choice, I am using the artwork of Danny Lee, (Snow Girl) which you need a license to use.  

Scrap kit of choice. I am using a PTU kit Snow Girl by Designs by Joan, made to match the tube. 

Font of choice I am using scriptina

Mask: of choice

Plugins: n outside plugins
I do use Eye Candy 4000 Gradient Glow on all my copyrights/credits layers
I do this because some forums will make a .png tag show up with a black background and then your
copyright doesn't show. 


Just remember that my choices of papers and elements is just a suggestion, change it up and make it yours! You don't have to follow mine exactly.

Add a drop shadow of your choosing to tubes & elements throughout. I usually use 1, 1, 50, 5 unless otherwise noted.


Let's get started!

Open a new canvas 850 x 850 pixels with a white background

Open the black frame, copy and paste as a new layer, resize 90%
click inside with your magic wand, selections, modify, expand 2, selections, invert
open paper 8 copy and paste as a new layer click delete on your keyboard
open your tube, copy and paste as a new layer, arrange in frame, erase where her legs hang out of the frame

add the following
element 8 resize 65% arrange on left
element 4 resize 55% arrange on left
element 31 resize 55% arrange on the left side
element 3 resize 65% arrange behind everything on the left
element 43 resize 65% arrange on bottom in center
element 32  resize 55% arrange on bottom
element 42 resize 65% arrange on bottom center
element 40 resize 65% arrange on bottom right

add your paper above the white background
apply your mask

crop and resize
add your copyright and credits as needed
add your text and save

Monday, December 9, 2013

Snow Queen


For this tutorial you will need the following:

Paint Shop Pro, I am using PSP X, you should be able to use any version.

Tube of choice, I am using the artwork of The Hunter (Snow Queen) which you need a license to use.  

Scrap kit of choice. I am using a PTU kit by Bibi's Collection, Snow Queen, which is a match to the tube 

Font of choice, I am using Dreamer


Plugins: No outside plugins
I do use Eye Candy 4000 Gradient Glow on all my copyrights/credits layers
I do this because some forums will make a .png tag show up with a black background and then your
copyright doesn't show. 


Just remember that my choices of papers and elements is just a suggestion, change it up and make it yours! You don't have to follow mine exactly.

Add a drop shadow of your choosing to tubes & elements throughout. I usually use 1, 1, 50, 5 unless otherwise noted.


Let's get started!

Open a new canvas 1000 x 800 pixels with a white background

Add the following, you may have to check my tag for a good idea of placement


element 62 resize 45% arrange below the frame
element 36 resize 45% arrange to the right of and behind 62 so it runs along the side of the frame
element 32  arrange between 36 & 62
element 22 resize 35% arrange at the bottom, just above the tower element layer
element 63 resize 35% arrange on left
element 15 arrange on right, duplicate mirror and drag back to the right
element 64 resize 35% arrange along the bottom in the center
element 1 resize 45% arrange between logs on bottom left
element 66 resize 45% arrange on bottom right
element 68 resize 45% arrange by tube
element 53 resize 20% arrange on pine tree in center

add your main tube, resize 65% place on right

copy & paste paper 3 above white background
apply your mask

crop and resize
add your copyright and credits as needed
add your text and save

Dark Angel


For this tutorial you will need the following:

Paint Shop Pro, I am using PSP X, you should be able to use any version.

Tube of choice, I am using the artwork of  Di Halim, (Gothic Angel) which you need a license to use.  

Scrap kit of choice. I am using a PTU kit, Dark Princess by Made by Justine 

Font of choice, I am using Angelic War

Plugins: No outside plugins
I do use Eye Candy 4000 Gradient Glow on all my copyrights/credits layers
I do this because some forums will make a .png tag show up with a black background and then your
copyright doesn't show. 


Just remember that my choices of papers and elements is just a suggestion, change it up and make it yours! You don't have to follow mine exactly.

Add a drop shadow of your choosing to tubes & elements throughout. I usually use 1, 1, 50, 5 unless otherwise noted.


Let's get started!

Open a new canvas 850 x 850 pixels with a white background

open Photo frame 1 copy and paste as a new layer 
click inside with your magic wand, selections, modify, expand 2, selections, invert
open paper 5 copy and paste as a new layer click delete on the keyboard
copy & paste the tube, resize 55% click delete on the keyboard, deselect 
hide the white background layer, merge visible, unhide white background
rotate right 25

Copy & paste tube, mirror, resize 75% arrange on the right of the photo

Add the following elements: 
corset 1 resize 75% arrange on left behind photo and tube
candles resize 75% arrange on bottom behind tube
Skull books resize 60% arrange on bottom right
boot 1  resize 60% arrange on right

crop and resize
add your copyright and credits as needed
add your text and save

Sweet Holiday Surprise


For this tutorial you will need the following:

Paint Shop Pro, I am using PSP X, you should be able to use any version.

Tube of choice, I am using the artwork of  Ismael Rac (2013 Sexy Surprise) which you need a license to use.  

Scrap kit of choice. I am using a PTU kit, Holiday Memories by Amy Marie 

Font of choice, I am using Scriptina

Mask of your choice

Plugins: Xero Porcelain
I do use Eye Candy 4000 Gradient Glow on all my copyrights/credits layers
I do this because some forums will make a .png tag show up with a black background and then your
copyright doesn't show. 


Just remember that my choices of papers and elements is just a suggestion, change it up and make it yours! You don't have to follow mine exactly.

Add a drop shadow of your choosing to tubes & elements throughout. I usually use 1, 1, 50, 5 unless otherwise noted.


Let's get started!

Open a new canvas 850 x 850 pixels with a white background

open 46 copy and paste as a new layer  resize 85%
take your freehand selection tool, set on point to point, starting at the top left corner, click in the center of the pink dots that make the frame, keep going around the frame and clicking in the dots all the way around. When you get back to the beginning double click right where you started.  Selections, invert
open paper 11 copy and paste as a new layer click delete on your keyboard
leave selected, copy and paste your tube arrange in the frame, click delete on your keyboard

duplicate the tube, on the top layer adjust blur, gaussian 3, change the blend mode to soft light
on the bottom layer apply Xero Porcelain with default settings except set the blue to zero

Copy and paste your main tube, resize 30% mirror, arrange on the left

Do the same steps on all the elements, frame & main tube like you did with the tube (duplicate, blur, Xero Porcelain)


Add the following elements: 
element 70  resize 55% arrange on left, duplicate & mirror
element 86 resize 55% flip arrange on bottom left, duplicate & mirror
element 94 resize 55% arrange on the bottom in the middle
element 93 resize 45% arrange on bottom
element 77  arrange across the bottom erase ends that stick out

copy & paste paper 6 above the white background
apply your mask

crop and resize
add your copyright and credits as needed
add your text and save