
Monday, August 31, 2009
Blog Contest Winner
The winner of the blog contest is Sharon of Eclectic Bits.
Thank you to everyone who entered, it was a hard choice. Please take a moment to check out her awesome site!
Friday, August 28, 2009
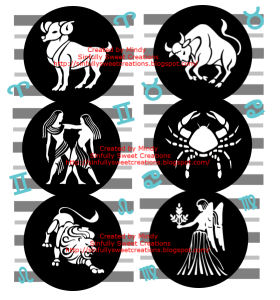
Zodiac Templates
I wanted templates to go with the new zodiac theme pack of Ismael Rac and couldn't find quite what I was looking for, so I decided to come up with something of my own. Hope you like these zodiac themed templates. There are two sets, each one in it's own zip file. Set 1 is HERE and set 2 is HERE.
Set One:
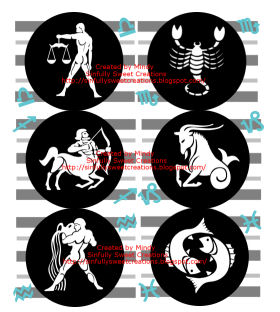 Set 2
Set 2


Set 2
Sunday, August 16, 2009
Template 5
Created a new template today for you to play with. Hope you enjoy it! Just click on the template to go to the download!

Tuesday, August 11, 2009
Calling all Minx
 For this tut you will need:
Template 87 by Melissa at Melissaz Creations.
Scrap kit Minx Attitude by Tami at Addictive Pleasures. Unfortunately the kit is no longer available but there are several free PTU or FTU kits out there that you could easily replace it with.
WSL Mask 6 by Chelle at Weescotslass Creations
Please leave these ladies some nice comments to let them know you're downloading their stuff, and show appreciation for their work!
A tube of choice. I am using the wonderful artwork of Ismael Rac which you need a license to use, and can be purchased at AMI.
Plugins: Xero Radiance
Font of Choice: I used Scriptina
Ok, let's make our tag!
Open your template and go to Image, canvas size, and change to 700 x 700. This just gives you room to work, and you will crop it down at the end.
Delete the following layers: Raster 1, Raster 5, and merged.
You can use any papers or elements of your choice, mine are just guidelines, so feel free to change it up a bit!
Open the wire element, resize it by about 80%. Copy and paste it onto your template and drag it to the bottom.
Open your mask in your workspace and then go to Layers, new mask layer, from image. Find the mask in the drop down box, source luminance checked, invert mask data unchecked, click ok. Delete the mask layer, and merge the group.
Click on Raster 4, selections, select all, float, defloat, resize paper 7 by 80%, copy and paste as a new layer, selections invert, and on the paper layer, hit delete. Deselect.
I like to put a drop shadow on my tube before I paste it onto my canvas so that after I get done erasing the bits that hang over, I don't have to erase the drop shadow that hangs over, so apply whatever drop shadow you'd like to your tube. I used 1 1 60 4. Resize if necessary, and paste as a new layer. Erase the bits that hang over the two rectangles (see my tag for reference). I always find it easier to lower the opacity of my tube so I can see the layer below it and it helps me decide where I have to erase!
Go to adjust, hue and saturation, and change them both to zero to make your tube black and white.
Duplicate your tube. On the top layer, go to adjust blur, gaussian blur, change it to 3. On your layer pallete change it from Normal to soft light. On the original layer which should be on the bottom, go to your plugin Xero Radiance and apply the default settings. If you don't know if it's on default, just click reset, then it will be on the default. Click ok. Delelte the original Raster layer 4.
On Raster 3 click selections, select all, float, defloat, copy and paste paper 3 as a new layer, selections invert, hit delete on your paper layer, deselect.
On Raster 7 click selections, select all, float, defloat, copy and paste paper 1 as a new layer, selections invert, hit delelte on your paper layer, and then paste your tube as a new layer, position how you want it, hit delete on your tube layer, deselect. Delete the original Raster 7 layer.
On Raster 6, click selections, select all, float, defloat, selections invert, and paste paper 3 as a new layer, on that layer hit delete on your keyboard and deselect.
On Raster 11, take your magic wand and holding your shift key, click inside all the large dark colored lines, open paper 10, copy and paste as a new layer, selections invert, delete, deselect. Now go back to Raster 11 and holding your shift key, click on all the lighter colored lines. Open paper 11, copy and paste as a new layer, selections invert, and delete, deselect. Delete the Raster 11 layer. Merge both the layers you just made down together, add your drop shadow you used on your tube. Mine was 1 1 60 4.
Click on your Copy of Raster 2 layer. Click inside all the larger dark colored lines while holding down your shift key. Copy and paste paper 9 as a new layer, selections invert, and hit delete, deselect. Now hold down your shift key and click on all the smaller grey colored lines. Copy and paste paper 8 as a new layer, selections invert, hit delete, deselect. Merge those two layers down together, and add your drop shadow.
Add whatever elements you'd like. I just added bow 5 which I resized and rotated to fit on the little rectangle, and the laceup element which I also resized and placed to the left of my tube. You may have to erase some of your tube layer.
Add your name and © info and you are done!
For this tut you will need:
Template 87 by Melissa at Melissaz Creations.
Scrap kit Minx Attitude by Tami at Addictive Pleasures. Unfortunately the kit is no longer available but there are several free PTU or FTU kits out there that you could easily replace it with.
WSL Mask 6 by Chelle at Weescotslass Creations
Please leave these ladies some nice comments to let them know you're downloading their stuff, and show appreciation for their work!
A tube of choice. I am using the wonderful artwork of Ismael Rac which you need a license to use, and can be purchased at AMI.
Plugins: Xero Radiance
Font of Choice: I used Scriptina
Ok, let's make our tag!
Open your template and go to Image, canvas size, and change to 700 x 700. This just gives you room to work, and you will crop it down at the end.
Delete the following layers: Raster 1, Raster 5, and merged.
You can use any papers or elements of your choice, mine are just guidelines, so feel free to change it up a bit!
Open the wire element, resize it by about 80%. Copy and paste it onto your template and drag it to the bottom.
Open your mask in your workspace and then go to Layers, new mask layer, from image. Find the mask in the drop down box, source luminance checked, invert mask data unchecked, click ok. Delete the mask layer, and merge the group.
Click on Raster 4, selections, select all, float, defloat, resize paper 7 by 80%, copy and paste as a new layer, selections invert, and on the paper layer, hit delete. Deselect.
I like to put a drop shadow on my tube before I paste it onto my canvas so that after I get done erasing the bits that hang over, I don't have to erase the drop shadow that hangs over, so apply whatever drop shadow you'd like to your tube. I used 1 1 60 4. Resize if necessary, and paste as a new layer. Erase the bits that hang over the two rectangles (see my tag for reference). I always find it easier to lower the opacity of my tube so I can see the layer below it and it helps me decide where I have to erase!
Go to adjust, hue and saturation, and change them both to zero to make your tube black and white.
Duplicate your tube. On the top layer, go to adjust blur, gaussian blur, change it to 3. On your layer pallete change it from Normal to soft light. On the original layer which should be on the bottom, go to your plugin Xero Radiance and apply the default settings. If you don't know if it's on default, just click reset, then it will be on the default. Click ok. Delelte the original Raster layer 4.
On Raster 3 click selections, select all, float, defloat, copy and paste paper 3 as a new layer, selections invert, hit delete on your paper layer, deselect.
On Raster 7 click selections, select all, float, defloat, copy and paste paper 1 as a new layer, selections invert, hit delelte on your paper layer, and then paste your tube as a new layer, position how you want it, hit delete on your tube layer, deselect. Delete the original Raster 7 layer.
On Raster 6, click selections, select all, float, defloat, selections invert, and paste paper 3 as a new layer, on that layer hit delete on your keyboard and deselect.
On Raster 11, take your magic wand and holding your shift key, click inside all the large dark colored lines, open paper 10, copy and paste as a new layer, selections invert, delete, deselect. Now go back to Raster 11 and holding your shift key, click on all the lighter colored lines. Open paper 11, copy and paste as a new layer, selections invert, and delete, deselect. Delete the Raster 11 layer. Merge both the layers you just made down together, add your drop shadow you used on your tube. Mine was 1 1 60 4.
Click on your Copy of Raster 2 layer. Click inside all the larger dark colored lines while holding down your shift key. Copy and paste paper 9 as a new layer, selections invert, and hit delete, deselect. Now hold down your shift key and click on all the smaller grey colored lines. Copy and paste paper 8 as a new layer, selections invert, hit delete, deselect. Merge those two layers down together, and add your drop shadow.
Add whatever elements you'd like. I just added bow 5 which I resized and rotated to fit on the little rectangle, and the laceup element which I also resized and placed to the left of my tube. You may have to erase some of your tube layer.
Add your name and © info and you are done!
Thursday, August 6, 2009
I have 5 new templates up for grabs located in the Creative Misfits blog, from their Template Challenge 3. Click on my preview to go there, and once you get there, scroll down and it's the last template in the set. It just shows one preview of the Rac Stalker template and it says "by Mindy" underneath it. Enjoy!

Sunday, August 2, 2009
Rac Templates
I got to working in PSP today and just couldn't stop. These are my first Rac templates, hope you like them. You can get them HERE
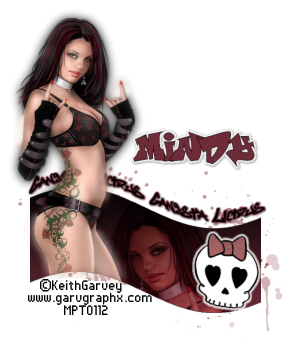
Gangstalicious
 You will need:
Kristen Template 42
Tube of Choice~ I am using the artwork of Keith Garvey which you must have a license to use. You can buy his work and get your license at MPT
Font of Choice ~ I used ReskaGraf
Plugin Xero - Radiance
Eye Candy 3.1 - Glow
Open your template, and delete the layer "credits"
Change your canvas size to 700x700. You can crop it down at the end, this just gives you room to work.
Click on layer wave rectangle, selections float, defloat, layer, new raster layer.
Make your foreground color #6e2c38 background color black. On your materials palette, click on foreground and choose gradient. Under styles, click on the first choice, rotation 0, repeats 0. Flood fill your new layer. Keep selected.
Copy your tube and paste it as a new layer. Have it facing the left. If your tube came facing right, mirror it before copy and pasting. Resize if necessary so that the face fills a good portion of the wave layer. Hit delete on the tube layer. Change the layer opacity to about 65 and soft light.
Add a drop shadow of choice to your tube. I like to do this first if I am not going to delete all the tube that is outside whatever shape it's going to be in. That way after I delete or erase, I don't have to deal with the shadow hanging over the edge. Now copy your tube so it is facing the opposite way of the one in the wave layer, and paste as a new layer. Erase the parts that hang over the bottom, drag that layer to the top. Selections none.
Duplicate your tube layer and on the original layer adjust blur, gaussian blur, 10. Apply Xero Radiance using the following settings:
Strangeness 128
Charm 50
Truth 128
Beauty 255
Change the opacity of your top tube layer to about 75%.
Delete the original wave rectangle layer.
Click on your splats layer. Adjust hue and saturation to 255 and 71.
Click on your skull bow layer, adjust hue and saturation as you did on the splats layer. Merge all the skull layers. Apply plugin Eye Candy 3.1 glow, changing the width to 6.
Click on the words layer. Selection, select all, float, defloat, modify, expand 2. Add a new raster layer under the words layer and flood fill with #6e2c38, deselect. Add drop shadow to bottom layer. I used 1, 1, 60, 5, black. Merge your two words layers.
You will need:
Kristen Template 42
Tube of Choice~ I am using the artwork of Keith Garvey which you must have a license to use. You can buy his work and get your license at MPT
Font of Choice ~ I used ReskaGraf
Plugin Xero - Radiance
Eye Candy 3.1 - Glow
Open your template, and delete the layer "credits"
Change your canvas size to 700x700. You can crop it down at the end, this just gives you room to work.
Click on layer wave rectangle, selections float, defloat, layer, new raster layer.
Make your foreground color #6e2c38 background color black. On your materials palette, click on foreground and choose gradient. Under styles, click on the first choice, rotation 0, repeats 0. Flood fill your new layer. Keep selected.
Copy your tube and paste it as a new layer. Have it facing the left. If your tube came facing right, mirror it before copy and pasting. Resize if necessary so that the face fills a good portion of the wave layer. Hit delete on the tube layer. Change the layer opacity to about 65 and soft light.
Add a drop shadow of choice to your tube. I like to do this first if I am not going to delete all the tube that is outside whatever shape it's going to be in. That way after I delete or erase, I don't have to deal with the shadow hanging over the edge. Now copy your tube so it is facing the opposite way of the one in the wave layer, and paste as a new layer. Erase the parts that hang over the bottom, drag that layer to the top. Selections none.
Duplicate your tube layer and on the original layer adjust blur, gaussian blur, 10. Apply Xero Radiance using the following settings:
Strangeness 128
Charm 50
Truth 128
Beauty 255
Change the opacity of your top tube layer to about 75%.
Delete the original wave rectangle layer.
Click on your splats layer. Adjust hue and saturation to 255 and 71.
Click on your skull bow layer, adjust hue and saturation as you did on the splats layer. Merge all the skull layers. Apply plugin Eye Candy 3.1 glow, changing the width to 6.
Click on the words layer. Selection, select all, float, defloat, modify, expand 2. Add a new raster layer under the words layer and flood fill with #6e2c38, deselect. Add drop shadow to bottom layer. I used 1, 1, 60, 5, black. Merge your two words layers.
Saturday, August 1, 2009
Pretty in Punk
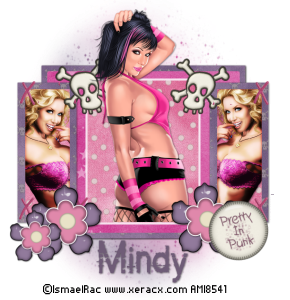 You will need:
Template 6 by Lorna @ Simply Sensational Scraps
Scrapkit Just Gorguss by Monti at Monti's Pixel Playground
Becky Mask 009 which I supply HERE
Font of Choice. I used 814yzx
2 tubes of choice, I used the incredible artwork of Ismael Rac which you can purchase at AMI, or you can use 2 tubes of your choosing.
Plugins: Eye Candy 3.1 and Xero-Radiance
Ready? Let's go!
Open your template and delete the layer called "Lorna"
Change the canvas size to 700x700. I know it's huge, but you will crop it down in the end. This just gives us room to work.
Open paper 5. If you are using different tubes, you'll have to colorize them according to the colors in your tubes. If you are using the same tubes as I am, then go to Image, Adjust brightness and contrast. Change brightness to 35, contrast to -8.
Image, adjust Hue and Saturation, change hue to 230, saturation to 157
On the layer large grey rectangle, float, defloat, paste paper 5 as a new layer, hit invert and then delete on the paper layer. Select none, add drop shadow of choice, then delete the Grey rectangle layer.
On large black rectangle fill, select all, float, defloat, and open paper 19, paste as a new layer, selections invert, and delete on your paper layer, keep selected. Add your tube. I resized mine by 90% and added a drop shadow. Position it to your liking, and erase the bits that hang over a the bottom.
Back on your rectangle layer, add Eye Candy 3.1 gradient glow with the width set to 6.
On the left grey rectangle, selections, select all, float, defloat, copy paper 19 as a new layer, selections invert, delete on the paper layer. Add another tube, hit delete on the tube layer. Deselect. Apply Xero radiance with the default settings.
On left black rectangle, selections, select all, float, defloat, and add paper 3 as a new raster layer, selections invert, delete on the paper layer, add your drop shadow, and delete the original black rectangle layer.
On the right grey and black rectangle layers follow the directions above that you just did for the left side, only mirror your tube.
Open the element stitches Pink Dark and resize by 74%. Place where you like them, and erase the parts that cover your tubes. duplicate and move to the top. I merged these two layers down so they were one layer.
Open whatever other elements you'd like to add, resize as necessary, add drop shadows and place where you'd like.
Click on your white background layer, and add a new raster layer. Make your foreground #7a6488 and your background #d75fa6. Go to gradient and chose the first box under style, and then your angle should be 36 and your repeats 6. Flood fill the raster layer and apply Becky Mask 009. Delete the mask layer and merge group.
Add your name and your © info, crop the excess off, and you're done!
You will need:
Template 6 by Lorna @ Simply Sensational Scraps
Scrapkit Just Gorguss by Monti at Monti's Pixel Playground
Becky Mask 009 which I supply HERE
Font of Choice. I used 814yzx
2 tubes of choice, I used the incredible artwork of Ismael Rac which you can purchase at AMI, or you can use 2 tubes of your choosing.
Plugins: Eye Candy 3.1 and Xero-Radiance
Ready? Let's go!
Open your template and delete the layer called "Lorna"
Change the canvas size to 700x700. I know it's huge, but you will crop it down in the end. This just gives us room to work.
Open paper 5. If you are using different tubes, you'll have to colorize them according to the colors in your tubes. If you are using the same tubes as I am, then go to Image, Adjust brightness and contrast. Change brightness to 35, contrast to -8.
Image, adjust Hue and Saturation, change hue to 230, saturation to 157
On the layer large grey rectangle, float, defloat, paste paper 5 as a new layer, hit invert and then delete on the paper layer. Select none, add drop shadow of choice, then delete the Grey rectangle layer.
On large black rectangle fill, select all, float, defloat, and open paper 19, paste as a new layer, selections invert, and delete on your paper layer, keep selected. Add your tube. I resized mine by 90% and added a drop shadow. Position it to your liking, and erase the bits that hang over a the bottom.
Back on your rectangle layer, add Eye Candy 3.1 gradient glow with the width set to 6.
On the left grey rectangle, selections, select all, float, defloat, copy paper 19 as a new layer, selections invert, delete on the paper layer. Add another tube, hit delete on the tube layer. Deselect. Apply Xero radiance with the default settings.
On left black rectangle, selections, select all, float, defloat, and add paper 3 as a new raster layer, selections invert, delete on the paper layer, add your drop shadow, and delete the original black rectangle layer.
On the right grey and black rectangle layers follow the directions above that you just did for the left side, only mirror your tube.
Open the element stitches Pink Dark and resize by 74%. Place where you like them, and erase the parts that cover your tubes. duplicate and move to the top. I merged these two layers down so they were one layer.
Open whatever other elements you'd like to add, resize as necessary, add drop shadows and place where you'd like.
Click on your white background layer, and add a new raster layer. Make your foreground #7a6488 and your background #d75fa6. Go to gradient and chose the first box under style, and then your angle should be 36 and your repeats 6. Flood fill the raster layer and apply Becky Mask 009. Delete the mask layer and merge group.
Add your name and your © info, crop the excess off, and you're done!
Subscribe to:
Posts (Atom)