Pages

Showing posts with label keith garvey. Show all posts

Friday, November 15, 2013

Chrissy's Christmas Friends


For this tutorial you will need the following:

Paint Shop Pro, I am using PSP X, you should be able to use any version.

Tube of choice, I am using the artwork of Keith Garvey (Chrissy Cat) which you need a license to use.  

Scrap kit of choice. I am using a PTU kit Christmas Darling by Amy Marie 

Font of choice, I am using Skyblue Clues


Plugins: No outside plugins
I do use Eye Candy 4000 Gradient Glow on all my copyrights/credits layers
I do this because some forums will make a .png tag show up with a black background and then your
copyright doesn't show. 


Just remember that my choices of papers and elements is just a suggestion, change it up and make it yours! You don't have to follow mine exactly.

Add a drop shadow of your choosing to tubes & elements throughout. I usually use 1, 1, 50, 5 unless otherwise noted.


Let's get started!

Open a new canvas 850 x 850 pixels with a white background

open your tube copy and paste as a new layer resize 85%

add the following elements
 tree arrange behind tube, to the right
Santa bag arrange in front of tree to the right
prezzie arrange behind the tube on the left
Moose 2 resize 65% arrange in front of prezzie & tube
lantern 1 resize 65% arrange in front of tube 
Moose 1  arrange behind tree on right
Cat in box resize 50% arrange to the right of lantern
bunny 1 resize 80% arrange behind prezzie

Copy and paste paper 3 just above the white background, add your mask

crop and resize
add your copyright and credits as needed
add your text and save

Saturday, November 9, 2013

Season's Greetings


For this tutorial you will need the following:

Paint Shop Pro, I am using PSP X, you should be able to use any version.

Tube of choice, I am using the artwork of Keith Garvey,which you need a license to use.  


Scrap kit of choice. I am using  a PTU kit, Chocolate Cane by Amy Marie

Font of choice, I am using Santa's Sleigh


Plugins: Optikk Verve Labs - Virtual Photographer
I do use Eye Candy 4000 Gradient Glow on all my copyrights/credits layers
I do this because some forums will make a .png tag show up with a black background and then your
copyright doesn't show. 


Just remember that my choices of papers and elements is just a suggestion, change it up and make it yours! You don't have to follow mine exactly.

Add a drop shadow of your choosing to tubes & elements throughout. I usually use 1, 1, 50, 5 unless otherwise noted.


Let's get started!

Open a new canvas 850 x 850 pixels with a white background

open frame 3 copy and paste as a new layer 
Take your freehand selection tool set on point to point and go around the edge of the frame and click
once you get back to where you started double click, modify, expand 2, selections, invert
open paper 2 copy and paste as a new layer, click delete on your keyboard

Copy and paste your close up tube in the frame, arrange her how you want, click delete on your keyboard and deselect, duplicate, hide the top layer. 
On the bottom layer, selections, select all, float, defloat, apply Virtual Photographer using the Halo setting
unhide the duplicate layer, gaussian blur 3 applied to that layer, change the blend mode to soft light
drop the opacity to 75

add the following drop shadow to your frame
1,1, 50, 5 black
then -1,  -1, 50, 5 black

Now for the elements

Tree 2 arrange on right
lights arrange across the top of the frame, erase along the edges where it's too long and sticks out
ball 3 resize 55% arrange on top left side
candles resize 50% arrange on bottom left
ball 2  resize 45% arrange to the right of candles
gifts resize 50% arrange in front of tree

Copy & paste paper 1 just above the white background layer and add your mask
Lower the opacity of the mask layer to 60


crop and resize
add your copyright and credits as needed
add your text and save

Wednesday, October 23, 2013

Dead or Alive


For this tutorial you will need the following:

Paint Shop Pro, I am using PSP X, you should be able to use any version.

Tube of choice, I am using the artwork of Keith Garvey, (All American Girl) 
which you need a license to use.  

Scrap kit of choice. I am using a PTU kit by Amy Marie called Cowboy Sweetheart 

Font of choice, I am using Pilar Typeface


Plugins: No outside plugins
I do use Eye Candy 4000 Gradient Glow on all my copyrights/credits layers
I do this because some forums will make a .png tag show up with a black background and then your
copyright doesn't show. 


Just remember that my choices of papers and elements is just a suggestion, change it up and make it yours! You don't have to follow mine exactly.

Add a drop shadow of your choosing to tubes & elements throughout. I usually use 1, 1, 50, 5 unless otherwise noted.


Let's get started!

Open a new canvas 850 x 850 pixels with a white background
open element 48 copy and paste as a new layer
lick inside with your magic wand, selections, modify, expand 2, selections
add a new raster layer below the frame
open paper 6 copy and paste into selection, selections, invert 
Open your tube, copy and paste as a new layer, arrange in frame, click delete on your keyboard

Open element 33, take your selection tool set on rectangle, and select the large open space in the 
wanted poster, copy and paste your tube, arrange in the selected area, invert selection, and click delete
copy merged & paste onto tag, resize 35%, rotate left by 30 arrange on the bottom left


add the following:
element 26 arrange on right
element 76 resize 45% arrange on far right
element 73 resize 50% arrange to the left of the boot
element 71 resize 40% arrange behind hat & boot
element 21 resize 70% rotate right 25, duplicate, mirror, arrange them so they are crossed over each other

Open paper 4, copy and paste as a new layer just above the white background
apply your mask

crop and resize
add your copyright and credits as needed
add your text and save

Monday, October 21, 2013

Russian Winter


For this tutorial you will need the following:

Paint Shop Pro, I am using PSP X, you should be able to use any version.

Tube of choice, I am using the artwork of Keith Garvey (Wintery & From Russia With Love) which you need a license to use.  

Scrap kit of choice. I am using a PTU kit, Blue Winter by Amy Marie

Font of choice, I am using Intrique Script

Plugins: No outside plugins
I do use Eye Candy 4000 Gradient Glow on all my copyrights/credits layers
I do this because some forums will make a .png tag show up with a black background and then your
copyright doesn't show. 


Just remember that my choices of papers and elements is just a suggestion, change it up and make it yours! You don't have to follow mine exactly.

Add a drop shadow of your choosing to tubes & elements throughout. I usually use 1, 1, 50, 5 unless otherwise noted.


Let's get started!

Open a new canvas 850 x 850 pixels with a white background

open 30 copy and paste as a new layer resize 75%
click inside with your magic wand, selections, modify, expand 2, selections, invert
open paper 15 copy and paste as a new layer arrange in the frame, click delete on your keyboard
copy and paste your tube, arrange in the top part of the frame, click delete
paste again, arrange in bottom part of frame, click delete
There will be bits of the tube you posted in the top showing in the bottom part, erase those bits
and the tube you posted in the bottom will have bits showing in the top part, erase those bits

Open your main tube, copy and paste as a new layer, arrange on the left

Now for our elements, you can check my tag for a better idea of exactly where I placed them

element 52 resize 50% arrange where the two parts of the frame come together on the right
element 61 arrange to the right of the tube
element 34 resize 50% arrange to the right of the snowman
element 39 resize 35% arrange along frame below white snowflake, 
duplicate, arrange above white snowflake
element 42 resize 35% arrange above the top blue snowflake, erase the bottom 2 stars, duplicate
and arrange the duplicate below the bottom blue snowflake
element 46 resize 20% arrange by snowman, duplicate, mirror move back next to original
element 3 resize 110% arrange just above white background


crop and resize
add your copyright and credits as needed
add your text and save

Sunday, October 6, 2013

Roselyn


For this tutorial you will need the following:

Paint Shop Pro, I am using PSP X, you should be able to use any version.

Tube of choice, I am using the artwork of Keith Garvey which you need a license to use.

Scrap kit of choice. I am using a PTU kit by Amy Marie called Roselyn

Font of choice, I am using Blessing Son


Plugins:
I do use Eye Candy 4000 Gradient Glow on all my copyrights/credits layers
I do this because some forums will make a .png tag show up with a black background and then your
copyright doesn't show.


Just remember that my choices of papers and elements is just a suggestion, change it up and make it yours! You don't have to follow mine exactly.

Add a drop shadow of your choosing to tubes & elements throughout. I usually use 1, 1, 50, 5 unless otherwise noted.

Let's get started!

Open a new canvas 850 x 850 pixels with a white background

open 43 copy and paste as a new layer
click inside with your magic wand, selections, modify, expand 2, selections, invert
open paper 12 copy and paste as a new layer, leave selected
Open your close up tube, mirror, copy and paste as a new layer, arrange in the frame, click delete on your keyboard then deselect.
Change your blend mode to Luminance(L) and drop the opacity to 70

Open your main tube, copy and paste as a new layer, arrange on the left side of the frame

Now for the elements:

element 45 arrange on the bottom of the frame in the middle
element 46 resize 75% arrange on left, duplicate & mirror
element 78 resize 60% arrange on left, duplicate & mirror
element 18 resize 35% arrange on the right, in the center of the leaves, duplicate & mirror
element 99 resize 30% arrange on mushrooms on right
element 32 resize 65% arrange on bottom right, duplicate & mirror
Copy and paste paper 2 just above the white background layer, apply your mask and then mirror it

crop and resize
add your copyright and credits as needed
add your text and save

Monday, September 16, 2013

Sable's Autumn


For this tutorial you will need the following:

Paint Shop Pro, I am using PSP X, you should be able to use any version.

Tube of choice, I am using the artwork of Keith Garvey, which you need a license to use.  

Scrap kit of choice. I am using a PTU kit by Inzpired Creationz called A Country Autumn 
This kit is available at Pimp My Tags With Scraps

Font of choice, I am using Love Is A Many Complicated Thing


Plugins:No outside plugins used

I do use Eye Candy 4000 Gradient Glow on all my copyrights/credits layers
I do this because some forums will make a .png tag show up with a black background and then your
copyright doesn't show. 


Just remember that my choices of papers and elements is just a suggestion, change it up and make it yours! You don't have to follow mine exactly.

Add a drop shadow of your choosing to tubes & elements throughout. I usually use 1, 1, 50, 5 unless otherwise noted.


Let's get started!

Open a new canvas 850 x 850 pixels with a white background

open  copy and paste as a new layer Frame 4 resize 85% 
click inside with your magic wand, selections, modify, expand 2, selections, invert
open paper 6 copy and paste as a new layer click delete on your keyboard and deselect

Open your tube, arrange over the frame

Now we'll add our elements, you can check my tag for a better idea of placement
branch 3 resize 85% arrange on bottom left, duplicate, mirror
branches 1 resize 65% arrange on bottom left, slightly higher t
han the other branches (between tube & frame layers)
flower 2 resize 40% arrange on bottom left, duplicate a few times and arrange around tag
Flower 4 resize 35% arrange just above & behind flower 2 on left, duplicate & arrange around tag
Flower 3, resize 35% arrange on bottom left, duplicate & arrange around tag
Flower 9 resize 35% arrange on bottom in middle, duplicate & arrange around tag
Ribbon 1  resize 35% arrange on left, duplicate & mirror
Pincones resize 35% arrange on the bottom in the middle
Button 2  resize 40% arrange on the top left
Butterfly, resize 40% arrange on  left
Ladybug, resize 35% arrange on left

Copy and paste paper 12 as a new layer right above your white background
and apply your mask

crop and resize
add your copyright and credits as needed
add your text and save

Tuesday, June 4, 2013

Soft Sigh


For this tutorial you will need the following:

Paint Shop Pro, I am using PSP X, you should be able to use any version.

Tube of choice, I am using the artwork of Keith Garvey, which you need a license to use.  
He is now selling tubes independently, but at the time I got my tube he was with PTE, which is now closed.


Font of choice, I am using Scriptina. I set the stroke to 2 using the same #d28482 color on both foreground and background, then applied Gradient glow set on fat and white

Mask: of your choice. 
I am not listing mine because I have the mask on my computer but 
I can no longer find a site where her masks are located. 

Plugins: Alien Skin Eye Candy 4001 Gradient Glow


Just remember that my choices of papers and elements is just a suggestion, change it up and make it yours! You don't have to follow mine exactly.

Add a drop shadow of your choosing to tubes & elements throughout. I usually use 1, 1, 50, 5 unless otherwise noted.


Let's get started!

Open a new canvas 850 x 850 pixels with a white background.

Open element 2 (the frame) copy and paste as a new layer,
resize by 85%

Click inside it with your magic wand, selections, modify, expand 2
selections, invert
Open paper 4, copy and paste as a new layer,
arrange in the frame, click delete on your keyboard, leave selected.

Open your tube, arrange in the frame, click delete on your keyboard and deselect.
Change the blend mode on your tube to soft light, then duplicate it


Now we'll add some elements. Check my tag for placement.
I used the following:

Element 26, resize 60%, arrange on right, duplicate, mirror
Element 7, resize 70% arrange on left, duplicate, mirror
Element 37, resize 85%, raise it slightly higher toward the center
Element 14 -on right side
Element 39 - on right side
Element 29 - arrange on bottom, drag down slightly so it shows below other stuff,
drag the actual layer in the layer palette down below everything but the frame itself
Element 10, resize 80%, arrange on left side, drag the layer in the layer palette down below the 
other flowery stuff so it's just above the frame

Open your second tube, copy and paste as a new layer and arrange on the right side of the frame.

Add your mask if you are using one.

Crop and resize
Add your copyright and credits as needed
Add your text and save

Thursday, March 7, 2013

50 Shades of Garvey


For this tutorial you will need the following:

Paint Shop Pro, I am using PSP X, you should be able to use any version.

Tube of choice, I am using the artwork of  Keith Garvey which you need a license to use.

Scrap kit of choice. I am using 50 Shades PTU kit by Designs by Sarah  which you can find at Pimp My Tags with Scraps by clicking on the link.

Font of choice, I am using CAC Shishoni Brush

Mask: gemsmask187 from Gems Taggin Scraps

Plugins: Xero Porcelain


Just remember that my choices of papers and elements is just a suggestion, change it up and make it yours! You don't have to follow mine exactly.

Add a drop shadow of your choosing to tubes & elements throughout. I usually use 1, 1, 50, 5 unless otherwise noted.


Let's get started!

Open a new canvas 750 x 750 with a white background.

Open frame 2 copy and paste as a new layer, click inside with your magic wand, 
selections, modify, expand 2.
Open a paper of your choice, copy and paste as a new layer, between the white background and the
frame layer, selections, invert, click delete on your keyboard.
Open your close up tube, copy and paste as a new layer, arrange in the frame, click delete on your keyboard. Deselect.
Duplicate, on the top layer, adjust blur, gaussian by 3, change the blend mode to soft light.
On the bottom layer apply Xero Porcelain with the default settings, except change the blue to zero.

Add your elements. I used the following:
Birdcage
Feather
Branch 3
Button 1

Open your paper, copy and paste as a new layer, just above the white background layer.
Open your mask, apply it by going to Layers, New Mask Layer, From Image, find the mask in the drop down box, click ok.
Go to the layer palette, click on the mask layer, click delete, merge group.

Crop, resize, add credits and copyright info as needed.
Add your name and save.

Friday, October 5, 2012

Autumn


For this tutorial you will need the following:

Paint Shop Pro, I am using PSP X, you should be able to use any version.

Tube of choice, I am using the artwork of Keith Garvey, which you need a license to use. I got my tubes at PTE when he was there. He now has his own independent store.

Scrap kit of choice. I am using a PTU kit by Honored Scraps called Harvest Moon.

Font of choice, I am using House Sitter's club

Mask: VixMask260

Plugins: No outside plugins used


Just remember that my choices of papers and elements is just a suggestion, change it up and make it yours! You don't have to follow mine exactly.

Add a drop shadow of your choosing to tubes & elements throughout. I usually use 1, 1, 50, 5 unless otherwise noted.


Let's get started!

Open a new canvas 750 x 750 white background.

Open element 23, copy and paste as a new layer.

With your magic wand set to Add(Shift) click inside each of the squares.
Selections, invert.

Open paper 6, copy and paste as a new layer, click delete on your keyboard,
drag it below the frame layer, leave selected.

Open one of your tubes, copy and paste as a new layer, arrange in the frame,
click delete on your keyboard. Leave selected.

Open your other tube, do the same as above, arranging in the other side
of your frames. Deselect.

Hide the white background layer, merge visible.
Rotate to the left by 8.

Open element 3, copy and paste as a new layer, arrange along the bottom of the frame.

Open element 10, copy and paste as a new layer, arrange below the "autumn" element
along the bottom left. Duplicate, image mirror.

Open element 2, resize by 35%, copy and paste, move to the bottom right.

Do the same with elements 39 & 40, except resize by 30%, arrange on
bottom left.

Open element 50, copy and paste as a new layer, resize by 45%,
arrange behind the frame, in the middle.

Open paper 6, copy and paste as a new layer, just above the white background.
Apply your mask.
Open the mask in psp, go to Layers, new mask layer, from image,
find the mask in the drop down box, click on it
click ok, delete the mask,
click ok, then merge group.
drop the opacity of the mask layer to about 65%
Resize the mask layer to about 85%.

Crop, resize, add your copyright & name, then save!

Tuesday, July 31, 2012

Tiki Island Fun


For this tutorial you will need the following:

Paint Shop Pro, I am using PSP X, you should be able to use any version.

Tube of choice, I am using the artwork of Keith Garvey, which you need a license to use. At the time of this tut, he was still at PTE. The store is closing and he announced that he is going independent. 

Scrap kit of choice. I am using LK Designs kit Island Fun.

Font of choice, I am using KonTikiKona

Plugins: No outside filters used.


Just remember that my choices of papers and elements is just a suggestion, change it up and make it yours! You don't have to follow mine exactly.

Add a drop shadow of your choosing to tubes & elements throughout. I usually use 1, 1, 50, 5 unless otherwise noted.


Let's get started!

Open a new canvas 600 x 250, white background.

Open paper 3, copy and paste as a new layer, arrange it where you want in the canvas. Now make the white background layer active, grab your crop tool, up on the top of your toolbar, click snap selection to and then pick the middle icon (layer opaque) then double click on your canvas.

Open your tube, copy and paste as a new layer on the right. 

Add the following elements, amounts to resize are beside the element name
Torch
Palm Tree, 75%, duplicate, mirror
Cloud 1, 75%
Tiki Mask 2, 56%
Hammock, 54%

Set your background color to #64cae2 and foreground to #de5d9c
Click on the white background layer. 
Selections, select all, modify, set selection borders, set at 2
Add a new raster layer at the top, fill with the foreground color. Deselect.

Click the little arrows to switch the foreground and background color. 
Now do the above steps again, this time make the new layer below the pink layer we just did, and set the selection borders at 4, fill with the blue.

Switch your colors again, repeat the above steps, set selection borders at 7, fill with the pink.

Merge these three layers together, add your drop shadow if you like it there.

Pull the tube layer up so it's above the frame layer.

Delete the bottom white background layer.

Add your copyright and any text you'd like


Avatar:

Open a new canvas 150 x 150
Copy and paste your background layer from your tag into the avatar.
Do the same with the Tiki Mask and your tube.

Do the frame around the avatar the same way we did with the tag using the same settings we used for the tag.
Add your text and copyright info as needed.

Save the tag and avatar and you're done!

Tuesday, July 24, 2012

Time Heals


For this tutorial you will need the following:

Paint Shop Pro, I am using PSP X, you should be able to use any version.

Three tubes of choice, I am using the artwork of Keith Garvey which you need a license to use. At the time of writing this tut, he was at PTE, but they announced they will be closing as of the end of August 2012. You might check his site here to see where his store is, as he announced he will be going independent.

Scrap kit of choice. I am using Time Heals by Farrah's Designer Scraps.


Font of choice, I am using Scriptina


Plugins: no outside plugins used.


Just remember that my choices of papers and elements is just a suggestion, change it up and make it yours! You don't have to follow mine exactly.

Add a drop shadow of your choosing to tubes & elements throughout. I usually use 1, 1, 50, 5 unless otherwise noted. 


Let's get started!

Open the template, delete the top layer (my credits).

Change the canvas size to about 850 x 750, we'll crop it in the end, we just want room to work for now.

Make background one layer active, click in it with your magic wand, selections, invert.
Open paper 1, resize by 20%, copy and paste as a new layer. Click delete on your keyboard, leave selected.
Open your first tube, copy and paste as a new layer, arrange within the frame how you want it. Click delete on your keyboard. Deselect. Change the blend mode to Luminance(L) or another that suits you. Delete the original template background layer.

Do the same for backgrounds 2 and 3, using papers 8 & 3 and using a different tube in each one.

Now go back to frame 1 layer, make sure you are on that layer, click inside it with your magic wand. Add a new raster layer, flood fill with a color that compliments. Adjust, add/remove noise, add noise, with the following settings:
Uniform, monochrome checked, 100%. Make sure to add your drop shadow to the frame. Delete the original template frame.

Do the same for frames 2 & 3.

Once you get done with filling all the frames, Click on frame one, merge down onto the tube layer and again onto the background layer. Do this again for frame 2 and frame 3 sets. This way you have each tube, frame and background separate So that we can move them around a bit more easily.

Grab your crop tool, click on your tag, and drag the edges so that they are almost touching the edges of your tag, then double click on it. We're doing this because some of the papers may have hung over the edge of the tag and when we move the picture frames around the hidden bits outside your canvas will show and we don't want that!

Move your frames around a bit so they are more to your liking.

Open your tube, copy and paste as a new layer. If you use the same tube as me, resize by 85%

 Now we'll start adding elements.
Add whichever you'd like. I added the following and any amount I resized will be beside it.

Lace 2, 25%, erase any bits that hang too far over the frames, arrange along the bottom

Flower, 15%, arrange around the bottom middle, duplicate & mirror arrange on the top (see tag for reference). Duplicate the one on the bottom again, image, rotate to the right by 90. Take the eraser tool and erase most of the white bits from it.

Shells, 14%
Light, 20%
Bottle, 14%
Flower 2, 10%, rotate left by 88, mirror, duplicate, merge down

Crop it, then resize.
Open paper 5, resize to 600 x 600 pixels. Copy and paste as a new layer, drag it to just above the white background layer.
Open your mask, go to layers, new mask, from image, find the mask in the drop down menu,
click ok. Go to your layer palette, click on the mask and choose to delete it.
Merge group. 
It wasn't dark enough or large enough but I wanted that paper and mask, 
so I duplicated the mask a few times, resized it by 130%, then went to
Brightness and Contrast with the brightness set at -53 and contrast at 53.

Add your copyrights and credits as needed and your name and you're done.

Wednesday, January 18, 2012

Sweet Valentine


For this tutorial you will need the following:

Paint Shop Pro, I am using PSP X, you should be able to use any version.

Tube of choice, I am using the artwork of Keith Garvey, which you need a license to use. You can get it at PTE, here.

Scrap kit of choice. I am using a Valentine Collab by Designs by Vaybs which you can find on her blog here.

Font of choice, I am using Miss Fitzpatrick

Mask: Vix big mask 19, here.

Plugins: Xero Radiance


Just remember that my choices of papers and elements is just a suggestion, change it up and make it yours! You don't have to follow mine exactly.


Let's get started!

Open a new canvas 650 x 650 white background.

Open frame2 copy and paste as a new layer, rotate by 90 and resize by 70%.

Click inside the frame with your magic wand, selections, modify, expand by 3.

Open paper 9, copy and paste as a new layer between the frame and background layer, resize by 70%, selections, invert, click delete on your keyboard. Leave selected.

Open your close up tube, copy and paste as a new layer between the paper and frame. Arrange it in the frame, click delete on your keyboard. Deselect.

Duplicate the tube, on the top layer adjust, blur gaussian blur 3. Change the blend mode to soft light. On the original (bottom) tube layer apply Xero Radiance with the default settings except change blue to 0.

Add a drop shadow to your frame and bottom tube.

Open WA4, copy and paste as a new layer, resize by 82%, drag to the bottom.

Open WA6, resize by 63%, copy and paste as a new layer, add drop shadow.

Open element, copy and paste as a new layer, resize by 40%, add a drop shadow, arrange on the right, drag this layer below the word art layer we put across the bottom of the frame.

Open element 7, copy and paste as a new layer, resize by 65%, arrange on the left, add a drop shadow.

Open paper 11, copy and paste as a new layer just above the white background. Open your mask, go to layers, new mask layer, from image, find the mask in the drop down box, click ok. In the layer palette, delete the mask, click yes. Merge group.

Crop & resize.

Add text, copyright and credits as needed & save.

Monday, December 5, 2011

Winter WIshes

For this tutorial you will need the following:
Paint Shop Pro, I am using PSP X, you should be able to use any version.
Tube of choice, I am using the artwork of Keith Garvey, which you need a license to use. You can get it at PTE.
Scrap kit of choice. I am using a PTU kit, All Wrapped Up by Jen's Sweet Temptations.
SSCTemplate 20 by me, here.
Font of choice, I am using Sh*t Happens
Plugins: No outside plugins
Just remember that my choices of papers and elements is just a suggestion, change it up and make it yours! You don't have to follow mine exactly.
For the drop shadow in this tut I used 1, 1, 50, 5 black throughout unless otherwise noted.
Let's get started!
Open the template, change the canvas size to 650 x 650.
Delete the following layers, the top credits layer, circle 1, circle 4, circle 1 frame and circle 4 frame.
Rotate the other layers to the left by 45.
Fill each of the remaining layers with papers of your choice from the scrap kit by clicking on each layer with your magic wand, selections invert, copy and paste the paper, click delete on your keyboard and delete each of the original raster layers. Leave the top square layer for last.
I also added noise 100%, uniform and monochrome checked, on the two square frame layers. Add drop shadow to your liking as you go along.
When you fill the top square layer, leave selected, open your close up tube, copy and paste as a new layer, arrange in the square and click delete on your keyboard. Deselect, duplicate the tube, on the top layer, adjust blur, gaussian blur, 3. Change the blend mode to soft light. Change the blend mode on the original tube to Luminance(L), add a very light drop shadow. I used 1, 1, 15, 1 black.
Copy and paste your main tube as a new layer, add a drop shadow.
Add any elements you'd like. I used the following with drop shadows and if I resized them, the amount is beside it.
Bow 1, 30%
Snowman 1, 65%
Lantern, 30%
Mouse, 25%
Add a paper just above the white background layer. Open the mask, layers, new mask, from image. Find the mask in the drop down box, click ok. Delete the mask in the layer palette and merge group.
Crop, resize, add your name and copyright & credits as needed. On my name, I added noise at 50, uniform and monochrome checked and added a drop shadow.

Saturday, November 19, 2011

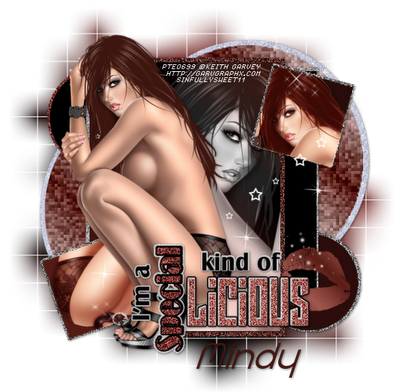
Licious

For this tutorial you will need the following:
Paint Shop Pro, I am using PSP X, you should be able to use any version.
Tube of choice, I am using the artwork of Keith Garvey, which you need a license to use. You can get it at PTE.
No scrap kit used in this tut.
Font of choice, I am using Radius.
Special Kind of Licious template by Savage.
Mask: WSL84 by WeeScotsLass
Plugins: Xero Fritillary
Remember, my tube and color choices are not mandatory for you to use. You can choose whatever tube and matching colors you'd like. You can go exactly off my tut or change it up and make it however you'd like.
Let's get started!
Open the template, delete the top (credits) layer.
Resize to about 585 x 551 pixels.
Change canvas size to 700 x 700 pixels.
Add a new raster layer above the background layer. Flood fill with white, delete the original background layer.
Put black as your foreground and #3e1710 as your background. Make this a foreground/background gradient by right clicking the foreground color in your color palette and click on the gradient tab in the box.
Choose foreground/background in the drop down box. Set Angle at 45, repeats at 2.
Choose linear & click ok.
On your layer palette, make center rectangle layer active, click inside with your magic wand. Add a new raster layer, flood fill with your gradient, leave selected.
If you're using the same tube, open your tube and choose the middle tube that shows her from the waist up. Mirror it, copy and paste as a new layer, resize by 90%, arrange in the rectangle, selections, invert, click delete on your keyboard. Deselect.
Change your blend mode to Luminance(L) on your layer palette.
Delete the original center rectangle layer.
On your layer palette, make right rectangle layer active, click inside with your magic wand. Add a new raster layer, flood fill with black. Delete the original right rectangle layer.
On your layer palette, make left rectangle layer active, click inside with your magic wand. Add a new raster layer, flood fill with #3e1710. Delete the original left rectangle layer.
On your layer palette, make circle 1 layer active, click inside with your magic wand, go to selections, modify, smooth, use default settings. Add a new raster layer, flood fill with black. Delete the original circle 1 layer
Do the same for circle 2, but use #2c0d0c to fill.
On your layer palette, make big circle 1 layer active, click inside with your magic wand, go to selections, modify, smooth, use default settings.
In your color palette, make the background white, the foreground #5d2019, and make a gradient using the same settings as above.
Add a new raster layer, flood fill with your gradient. Deselect.
Apply Xero Fritillary using the following settings top to bottom:
5
30
10
40
Delete the original big circle 1 layer.
Do the same as above for big circle 2 layer. If you seem to be getting too much white with the gradient fill, go into your gradient settings and click on invert then try flood filling again.
Make the lips layer active. Selections, select all, float, defloat, add a new raster layer and fill with the same gradient you just used on the big circles. Fill it about 3 or 4 times. Deselect and delete the original lips layer. Add a drop shadow of your choice (I used 1, 1, 50, 5 throughout this tag)
Make square 2 layer active, click inside with your magic wand, add a new raster layer, flood fill with #280d0a, leave selected, selections, invert, copy and paste your main tube, arrange in the square, selections, invert, click delete on your keyboard. Deselect.
Duplicate your tube, on the top layer, adjust blur, gaussian blur by 3, change the blend mode to soft light. On the bottom tube, change the blend mode to screen.
Delete the original square 2 layer.
Do the same as above for the square 1 layer, but fill it with #541c16 and mirror your tube before copy and pasting it into the square.
Add drop shadows to big circle 1 back, big circle 2 back, and left & right rectangle backs.
Make square 2 back layer active, click inside with your magic wand, add a new raster layer, flood fill with #808080. Deselect adjust, add remove noise, add noise 100%, uniform & monochrome checked. Add a drop shadow, delete the original square 2 back layer.
Do the same for all the remaining backs on the shapes. I filled some with the grey and some with a brown, use my tag for reference.
Make the "Special" word art layer active, selections, select all, float, defloat, add new raster layer, flood fill with #68231d, deselect, add noise settings as above, delete the original layer.
Do the same with the "licious" layer using #a75d55.
Merge all the word art layers together. I just started on the top one, right clicked, chose merge down, and just kept going down the layer palette until they were all merged. Then add a drop shadow.
Add your main tube below the word art layer, add a drop shadow.
Make a new raster layer just above the white background layer. Make the foreground in your color palette #4f100b, the background black. Make a foreground/background gradient like we did above, flood fill with this gradient.
Add your mask by opening the mask in psp, go to layer, new mask layer, from image, find the mask in the drop down box, click ok. In the layer palette, delete the mask, click yes, then merge group. Resize the mask layer by 107%.
Crop, delete the white background layer if you want it transparent.
Add your text and copyright info.

Saturday, October 1, 2011

Everyday Lady

For this tutorial you will need the following:
Paint Shop Pro, I am using PSP X, you should be able to use any version.
Tube of choice, I am using the artwork of Keith Garvey, which you need a license to use. You can get it at PTE.
Scrap kit of choice. I am using Everyday Lady by Wicked Princess and you can find it here.
Collab template 3 by Deb and Tamie , you can find it on the Creative Misfits blog. It's the last one in the group.
Font of choice, I am using
Mask: wsl84 by weescotslass creations, here.
Plugins: no outside plugins needed
Just remember that my choices of papers and elements is just a suggestion, change it up and make it yours! You don't have to follow mine exactly.
Let's get started!
Open your template, resize by setting the width to about 650, it should then auto size the height. Change your canvas size to about 700 x 600.
Delete raster 7 layer.
Make raster 5 active, click on it with your magic wand, open a paper, copy and paste as a new layer, selections invert, click delete on your keyboard. Deselect, add drop shadow, delete the original layer.
Do the same for each shape in the template (except raster 8, 9, & 11), changing papers to whichever paper you like.
On raster 11, adjust, add/remove noise, add noise, uniform, 70, monochrome checked. Add drop shadow.
Do the same for raster 8 & 9.
On raster 12 and copy of vector 1, adjust, hue and saturation, colorize, change them both to 0.
On each of the top square layers, make sure it's active, selections, select all, float, defloat, invert, open your close up tube, copy and paste as a new layer, arrange it how you want, click delete on your keyboard. Change the blend mode to luminance (L)
Copy and paste your full tube, arrange to the right, add a drop shadow.
Add any elements you like, resizing as needed (make sure to go to adjust sharpen, and sharpen after resizing) and adding drop shadow. I used the following:
Dog, resized 25%
Flower branches, resized 30%
Flowerbunch, resized at 20%
Bird, resized at 20%
Satin bow, resized at 25%
Open a paper of choice, copy and paste as a new layer, just above the white background layer. Open your mask, go to layers, new mask layer, from image, find your mask in the drop down box, click on it. Then in your layer palette, delete the mask, merge group. Resize your mask by about 116%.
Add your copyrights and credits as needed. Add your name or other text.
Crop, resize and save.

Sunday, July 31, 2011

Garvey Diva

For this tutorial you will need the following:
Paint Shop Pro, I am using PSP X, you should be able to use any version.
Tube of choice, I am using the artwork of Keith Garvey which you need a license to use. You can get it at PTE.
Scrap kit of choice. I am using Opposites Attract Lovey by Shani of Wicked Princess Scraps. You can find the stores she sells at shown on the top left side of her blog.
Font of choice, I am using Impact for the word Diva and Honey Script Semi Bold for my name.
Mask: gemsmasks160 by Gems Taggin Scraps.
Plugins: no outside plugins
Just remember that my choices of papers and elements is just a suggestion, change it up and make it yours! You don't have to follow mine exactly.
Let's get started!
Open a new canvas 650 x 650 white.
Open the scalloped frame element, copy and paste as a new layer, resize by 65%. Add a drop shadow.
Open the heart wreath frame, copy and paste as a new layer, resize by 55%. Click inside it with your magic wand, make sure you click in the little parts around the outside edge, get in between all the vines, make sure you either hold down the shift key while doing so or make sure the mode on your magic wand is set to add (shift) then modify, expand by 2.
Open paper 6, copy and paste as a new layer, selections modify, invert, click delete on your keyboard. Drag the paper between the two frame layers and leave it selected.
Open your close up tube, copy and paste as a new layer and arrange it where you want it in the frame. Duplicate the tube and hide the duplicate for now. Drag the original under your wreath frame and erase the bits that hang out of the bottom. Deselect and add a drop shadow to your tube and wreath frame.
Unhide your duplicate tube, drag it above the wreath frame layer. Erase the bits that hang over the bottom. This way you have her head above the frame and you can erase the parts on the lower part without having to spend a lot of time erasing tiny bits of frame at the top or her on the bottom. This works really well when you have tiny little parts to erase.
Open up the elements you want to use, resize as needed and add them to your tag, drop shadow on each layer. The ones I used are as follows:
Makeup box resized at 45%
Makeup resized at 25% mirrored
Perfume bottles resized at 25%
Shoe resized at 25%
Lipstick resized at 25%
Open a paper, copy and paste as a new layer, drag it down just above the background layer, open your mask. Apply mask by going to layers, new mask layer, from image, find your mask in the drop down menu, click ok. Delete the mask and merge group.
Add your name, any other text you'd like, copyrights and credits as needed.

Tuesday, June 28, 2011

Captured Beauty

For this tutorial you will need the following:
Paint Shop Pro, I am using PSP X, you should be able to use any version.
Tube of choice, I am using the artwork of Keith Garvey which you need a license to use. You can purchase his work at PSP Tubes Emporium.
Scrap kit of choice. I am using Evantide by Juicy Bits. It is a PTU kit that you can find here.
Font of choice, I am using More Enchanted Prairie Dog
Plugins: Xero Porcelain, Visman Extravaganza Transmission
Just remember that my choices of papers and elements is just a suggestion, change it up and make it yours! You don't have to follow mine exactly.
Let's get started!
Open a new canvas 650 x 650, white.
Open element 4, copy and paste as a new layer and resize by 145%.
Click inside your frame with the magic wand, selections, modify, expand by 3, selections, modify, invert.
Open paper 15, copy and paste as a new layer, drag it below the frame. Click delete on your keyboard and leave selected.
Copy and paste your tube, preferably a close up, or if you are using the same tube as me, or one that has 3 different sizes, use the mid sized tube. Position it how you want it, and click delete on your keyboard. Deselect.
Duplicate your tube, on the top (duplicated) layer, adjust, blur, gaussian blur of 3. Change the blend mode to soft light.
On the bottom tube apply Xero Porcelain at the default settings, except change the bottom slider all the way to zero. Add a drop shadow to this bottom tube.
Close off your white background layer and merge visible the other layers, add a drop shadow to the merged image. I used 1, 1, 50, 5 then -1, -1, 50, 5, then duplicate the merged image.
On the bottom layer, adjust blur, gaussian blur 15. Apply VM Extravaganza Transmissions with the following settings top to bottom: 9, 15, 60.
Use your mover tool to pull the layer you just applied transmission filter to, and pull it over to the left so you have a good portion of it showing. Duplicate it and pull this top duplicated layer over the the right so you have a good portion showing on that side. Lower the opacity of these two layers to around 70.
Now go ahead and add any elements you like to decorate it up.
Add your name, copyright and any credits you need to add. Crop the excess off and save.