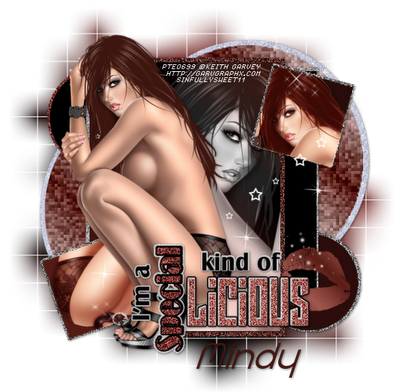
For this tutorial you will need the following:
Paint Shop Pro, I am using PSP X, you should be able to use any version.
Tube of choice, I am using the artwork of Keith Garvey, which you need a license to use. You can get it at PTE.
No scrap kit used in this tut.
Font of choice, I am using Radius.
Special Kind of Licious template by Savage.
Mask: WSL84 by WeeScotsLass
Plugins: Xero Fritillary
Remember, my tube and color choices are not mandatory for you to use. You can choose whatever tube and matching colors you'd like. You can go exactly off my tut or change it up and make it however you'd like.
Let's get started!
Open the template, delete the top (credits) layer.
Resize to about 585 x 551 pixels.
Change canvas size to 700 x 700 pixels.
Add a new raster layer above the background layer. Flood fill with white, delete the original background layer.
Put black as your foreground and #3e1710 as your background. Make this a foreground/background gradient by right clicking the foreground color in your color palette and click on the gradient tab in the box.
Choose foreground/background in the drop down box. Set Angle at 45, repeats at 2.
Choose linear & click ok.
On your layer palette, make center rectangle layer active, click inside with your magic wand. Add a new raster layer, flood fill with your gradient, leave selected.
If you're using the same tube, open your tube and choose the middle tube that shows her from the waist up. Mirror it, copy and paste as a new layer, resize by 90%, arrange in the rectangle, selections, invert, click delete on your keyboard. Deselect.
Change your blend mode to Luminance(L) on your layer palette.
Delete the original center rectangle layer.
On your layer palette, make right rectangle layer active, click inside with your magic wand. Add a new raster layer, flood fill with black. Delete the original right rectangle layer.
On your layer palette, make left rectangle layer active, click inside with your magic wand. Add a new raster layer, flood fill with #3e1710. Delete the original left rectangle layer.
On your layer palette, make circle 1 layer active, click inside with your magic wand, go to selections, modify, smooth, use default settings. Add a new raster layer, flood fill with black. Delete the original circle 1 layer
Do the same for circle 2, but use #2c0d0c to fill.
On your layer palette, make big circle 1 layer active, click inside with your magic wand, go to selections, modify, smooth, use default settings.
In your color palette, make the background white, the foreground #5d2019, and make a gradient using the same settings as above.
Add a new raster layer, flood fill with your gradient. Deselect.
Apply Xero Fritillary using the following settings top to bottom:
5
30
10
40
Delete the original big circle 1 layer.
Do the same as above for big circle 2 layer. If you seem to be getting too much white with the gradient fill, go into your gradient settings and click on invert then try flood filling again.
Make the lips layer active. Selections, select all, float, defloat, add a new raster layer and fill with the same gradient you just used on the big circles. Fill it about 3 or 4 times. Deselect and delete the original lips layer. Add a drop shadow of your choice (I used 1, 1, 50, 5 throughout this tag)
Make square 2 layer active, click inside with your magic wand, add a new raster layer, flood fill with #280d0a, leave selected, selections, invert, copy and paste your main tube, arrange in the square, selections, invert, click delete on your keyboard. Deselect.
Duplicate your tube, on the top layer, adjust blur, gaussian blur by 3, change the blend mode to soft light. On the bottom tube, change the blend mode to screen.
Delete the original square 2 layer.
Do the same as above for the square 1 layer, but fill it with #541c16 and mirror your tube before copy and pasting it into the square.
Add drop shadows to big circle 1 back, big circle 2 back, and left & right rectangle backs.
Make square 2 back layer active, click inside with your magic wand, add a new raster layer, flood fill with #808080. Deselect adjust, add remove noise, add noise 100%, uniform & monochrome checked. Add a drop shadow, delete the original square 2 back layer.
Do the same for all the remaining backs on the shapes. I filled some with the grey and some with a brown, use my tag for reference.
Make the "Special" word art layer active, selections, select all, float, defloat, add new raster layer, flood fill with #68231d, deselect, add noise settings as above, delete the original layer.
Do the same with the "licious" layer using #a75d55.
Merge all the word art layers together. I just started on the top one, right clicked, chose merge down, and just kept going down the layer palette until they were all merged. Then add a drop shadow.
Add your main tube below the word art layer, add a drop shadow.
Make a new raster layer just above the white background layer. Make the foreground in your color palette #4f100b, the background black. Make a foreground/background gradient like we did above, flood fill with this gradient.
Add your mask by opening the mask in psp, go to layer, new mask layer, from image, find the mask in the drop down box, click ok. In the layer palette, delete the mask, click yes, then merge group. Resize the mask layer by 107%.
Crop, delete the white background layer if you want it transparent.
Add your text and copyright info.

No comments:
Post a Comment