Pages

Friday, December 31, 2010

Diva Style

For this tutorial you will need the following:
Paint Shop Pro, I am using PSP X, you should be able to use any version.
Tube of choice, I am using the artwork of Jose Cano. This tube is an ACD group exclusive and is not available for purchase at any stores. Only members of Another Creative Design are eligible. You can go HERE to join and learn about how to earn the tube.
Scrap kit of choice. I am using I Promise You which is a PTU kit and you can find it at Wicked Princess Scraps HERE.
Font of choice, I am using
Plugins: Eye Candy 4000 Shadow Lab (or just a drop shadow will work)
Just remember that my choices of papers and elements is just a suggestion, change it up and make it yours! You don't have to follow mine exactly.
Let's get started!
Open a new 600x600 white canvas.
Open paper 3 and set it as your background pattern and set at 75%. You can do this by right clicking on your background in your color palette and then clicking the pattern tab and scrolling through to find your paper. Then in the percentage box change it to 75%.
Set your foreground to null.
Using your circle preset shape draw out a good sized circle. Objects, align, center in canvas, then change to raster layer and add a drop shadow.
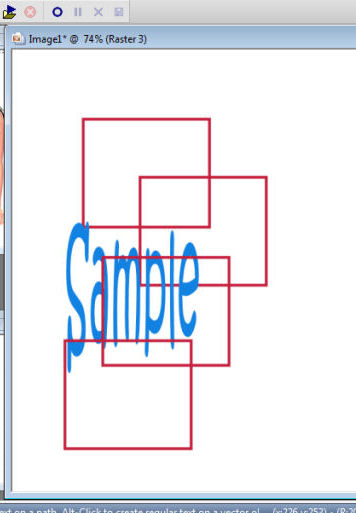
Now open paper 10 and do the same thing, except this time use your rectangle tool and draw out a large rectangle. See my tag for reference. Once you get it drawn, change to raster layer.
Selections, select all, float, defloat, invert.
Copy your tube and paste as a new layer. Arrange how you like it in the center of the rectangle. Selections, invert, on your tube layer, now take your eraser tool and erase any parts you don't want hanging over.
Now selections invert, make sure you are on your rectangle layer, selections, modify, expand by 3. Make a new raster layer below your rectangle and flood fill with #b07e87.
Expand by 3 again, add new raster layer below the one you just did, flood fill with white.
Do the same as above except this time expand by 5 and flood fill with #f9e1de.
I then went ahead and merged all the rectangle sections together, then applied Eye Candy 4000 shadowlab with the following settings to both the rectangle and the tube:
Center Offset Direction: 315
Center Offset Distance: 4.33
Overall Opacity: 100%
Overall blur: 56
Perspective blur: 0
Color black
Draw only outside selection checked
I then went back and erased the part of the shadow that was under the legs of the tube where it cut off her legs in the rectangle.
Now open the arch element and copy and paste it just below your tube. You may or may not need to erase part of the tube or arch if it looks funny. I didn't bother erasing any because I covered it with another element. It's totally up to you depending on what elements you use. If you are copying my tut exactly, you won't need to erase anything.
Open the heart sucker, copy and paste as a new layer, resize by 40%, rotate to the left by 15. duplicate and mirror. Arrange the two on the left lower side. add drop shadow to both then merge together. Duplicate and mirror.
Add your name, copyright and any scrap kit credits needed.
Crop, resize and save!

Wednesday, December 22, 2010

Christmas At Grandma's

For this tutorial you will need the following:
Paint Shop Pro, I am using PSP X, you should be able to use any version.
Tube of choice, I am using the artwork of Ismael Rac, which you need a license to use. You can get at his site HERE.
Scrap kit of choice. I am using Christmas at Grandmas from Juicy Bits, which you can purchase at her store HERE.
Font of choice, I am using Zebra.
Mask: Monti circle mask which you can get at Monti's site HERE. My link should take you to her mask page, if it doesn't click the masks link on the left and the mask is just a little down the page.
Plugins:
Just remember that my choices of papers and elements is just a suggestion, change it up and make it yours! You don't have to follow mine exactly.
Let's get started!
Open a new canvas 650x650 white background.
Open element 19, copy and paste as a new layer, resize by 70%.
Click inside it with your magic wand, selections, expand by 5. Open paper 02, copy and paste as a new layer, below the frame, selections, invert, click delete on your keyboard. Leave selected.
Open your tube, copy and paste as a new layer, take your eraser tool and erase the bits that you don't want hanging over the frame, then go ahead and deselect. Add drop shadow to your tube and frame.
Open element 01, copy and paste as a new layer, rotate to the right by 20. Drag down below the frame and background paper. Add drop shadow.
Open element 29, copy and paste as a new layer, resize by 50% add drop shadow and arrange over the left middle part of the frame.
Open one of the tag elements, copy and paste as a new layer, resize by 50% add a drop shadow and arrange it so that it looks like it's hanging from the bow.
Open element 43, copy and paste as a new layer, resize by 65%, add a drop shadow and arrange on the lower part of the frame.
Open element 26, copy and paste as a new layer, resize by 30%, add a drop shadow and arrange it on the right lower side of tag.
Open both candy canes, copy and paste as new layers resize them both by 20%, then mirror one of them. Rotate one to the left by 20 and the other to the right by 20. Add drop shadow, then merge them together. Arrange on the right side of the little house.
Open one of the mugs, copy and paste as a new layer, resize by 20% then again by 65%. Add a drop shadow and arrange on the bottom by the house.
Open a paper of your choice, copy and paste as a new layer just above your white background layer. Open your mask, go to layers, new mask layer, from image and apply the mask. Then on your layers palette, delete the mask layer and merge the group. Resize the mask if necessary.
Open your alpha. Take your selection tool and draw around the m, copy and paste as a new layer. Go back to your alpha, deselect, draw around the e, copy and paste as a new layer, ect until you get all the letters to spell Merry. Duplicate your r, then arrange the letters out. I rotated a couple of them by 20 to the left or right. Once they're arranged how you like them, merge them all together and then resize by about 50%. Add a drop shadow.
Do the same as above to get the word Christmas.
Add your copyright and credits as necessary.
Add your name or text.
Crop tag and resize as needed.
I always delete the white background layer and then save as a .png so it's transparent and I don't have the white background.

Friday, November 12, 2010

Trendsetter

For this tutorial you will need the following:
Paint Shop Pro, I am using PSP X, you should be able to use any version.
Tube(s) of choice, I am using the beautiful artwork of Ismael Rac, which you need a license to use. You can get at his store HERE. I am using one full length tube, and a close up.
Scrap kit of choice. I am using Trendsetter by Juicy Bits which you can get HERE.
Font of choice, I am using the alpha that came with the kit.
Plugins: VM Extravaganza-Transmission,
Just remember that my choices of papers and elements is just a suggestion, change it up and make it yours! You don't have to follow mine exactly.
Let's get started!
Open a new canvas 600 x 600 white background.
Open Frame 4, copy and paste as a new layer, resize by 65%.
Copy and paste your tube as a new layer, I resized mine by 85%, then hide it for now.
With your magic wand, click inside the frame, then selection, modify, expand by 3.
Open paper 9, copy and paste as a new layer just above your white background layer, resize by 60%, selections, invert, make sure you are still on the paper layer and click delete on your keyboard, leave selected.
Open your close up tube, copy and paste as a new layer, arrange how you want in the frame, click delete on your keyboard, then deselect.
Duplicate the tube, on the top layer, adjust blur, gaussian blur by 3, change the opacity to soft light.
On the original layer adjust, hue and saturation, change both to 0, then add a drop shadow just to the bottom tube.
Now go ahead and unhide the other tube.
Open paper 15, make your elipse tool active, and make your background pattern paper 15, your foreground set to null . Draw out a largish circle that is a little taller than your frame, so you can see it above and below (see my tag for reference), convert to raster layer. Add a drop shadow.
Open paper 8 and do the same as above, just put the circle over to the right side of the frame, drag it below the pink circle layer, add a drop shadow. Merge the two together, apply VM Transmission-Extravaganza with the following settings:
Line Width: 6
Offset: 18
Contrast: 40
Now lower the opacity to about 45.
Open scatter 2, copy and paste just above the layer we just made with the circles, resize by 60% and add your drop shadow.
Open the pink Hearts layer, copy and paste as a new layer just above your frame, resize by 85%, add your drop shadow.
Open heart01, copy and paste as a new layer, resize by 45%, arrange over the top right corner of the frame, add your drop shadow.
Open the alpha, use your lasso tool to go around the letters you need, copy and paste as a new layer, resize them whatever size you want them, I did mine by 45% then sharpened them, after you arrange them all how you want them, merge them together and add a drop shadow.
Add any copyright and credits you need to add.
Crop your tag, and if you want a transparent tag without the white background, delete that layer and save as a .png file.

Friday, November 5, 2010

Masquerade Ball

For this tutorial you will need the following:
Paint Shop Pro, I am using PSP X, you should be able to use any version.
Tube of choice, I am using one of the tubes that came with the scrap kit. It is by Lisa at Sophisticated Imaging.
Scrap kit of choice. I am using Masquerade Ball by Wicked Princess Scraps.
Template 2 by Deb & Mich at Creative Misfits Creations. It's the 4th one down. Just click on the link above the templates where it says Deb & Mich.
Font of choice, I am using
Mask: WSL mask 302, which you can find at Weescotslass Creations.
Plugins: No outside plugins used.
Just remember that my choices of papers and elements is just a suggestion, change it up and make it yours! You don't have to follow mine exactly.
Let's get started!
Open your template. Delete the Copyright, and Raster 1 and 2 layers. I resized mine (all layers) so that it was 575x441 and then changed the canvas size to 650x650. This made the size of the template smaller and then gave me room to work. We'll crop any excess off at the end. I also added a new layer above the background layer and flood filled with white and deleted the background layer that was there. I just find it easier to work with doing it that way.
Make raster3 layer active, selections, select all, float, defloat. Open paper 6, copy and paste as a new layer, arrange how you like it, selections, invert, click delete on your keyboard. Deselect and delete the original layer.
Do the same for the oval frame layer picking a darker paper to use (I used 9), then add a drop shadow.
Repeat for the circle layer. I used paper 16.
Make the white dots layer active, and make the color replacer tool active. Set black as your foreground and white as the background and then go over the dotted layer with the color replacer tool. This will change your dots to black.
Make the diamond dots layer active, use your dropper tool to pick the color of the diamond dots and make it your background color (right click) then left click on a dark color from the paper you used in the circle layer.
Now go over all the dots in the diamond dot layer and diamond dots 2 & 3 layers and change the colors.
Click inside the big diamond layer, selections modify, expand by 3. Open paper 19, copy and paste as a new layer, resize by 65%, selections, invert and click delete on your keyboard. Leave selected.
Open a tube of your choice, copy and paste as a new layer, arrange into the diamond as you like it, click delete and deselect.
Go back to your big diamond layer, selections, select all, float, defloat, add a new layer above the diamond layer and below the paper layer you just put on. Flood fill with the dark color you changed the dotted lines to.
Deselect and delete the original diamond layer. Add a drop shadow.
Duplicate your tube layer. On the top layer blur, gaussian blur of 3, change the blend mode to soft light. On the original layer, change the blend mode to Luminance (L).
Fill the left and right diamond layers as instructed above.
Copy and paste your tube, resize if necessary. If you use the same tube I did, I resized by 64%. Add a drop shadow.
Add any elements you like, resizing as necessary.
Open a paper of your choice, paste it above the white background layer. Open your mask, layers, new mask layer, from image, find your mask in the drop down box, click ok. Delete the mask layer, merge the group. Resize mask if necessary and I changed the opacity of mine to 56%.
Add your name, copyright and other credits as needed.
Crop and save.

Saturday, October 23, 2010

Bianca Hallows Eve

For this tutorial you will need the following:
Paint Shop Pro, I am using PSP X, you should be able to use any version.
Tube of choice, I am using the artwork of Ismael Rac, which you need a license to use. You can get at his store HERE.
Scrap kit of choice. I am using All Hallow's Eve by Juicy Bits which you can get HERE.
Font of choice, I am using BlackadderITC
Mask: Artmama Mask11 which you can get at Artmama's Studio HERE. It is in the 4/23/10 post.
Plugins: No outside plugins used.
Just remember that my choices of papers and elements is just a suggestion, change it up and make it yours! You don't have to follow mine exactly.
Let's get started!
Open a new canvas, size 650x650 white.
Open frame03, copy and paste as a new layer, resize by 65%.
Click inside the frame with your magic wand, selections, expand by 5.
Open paper 7, copy and paste as a new layer, drag it below the frame, selections, invert, make sure you are on your paper layer and click delete on your keyboard. Keep selected.
Open your tube, copy and paste as a new layer, arrange how you want it, take your eraser tool and erase the parts that hang over where you don't want them. Deselect and add a drop shadow to the tube and the frame.
Open tag01 element, copy and paste as a new layer, resize by 65%, arrange it where you want it, add a drop shadow.
Open ribbon02, copy and paste as a new layer, resize by 55%, drag it down across the bottom of your frame, add a drop shadow. Erase the bits that show beyond her shoe on the left and beyond the tag on the right.
Open candyscatter02, copy and paste as a new layer, resize by 55%, drag it below your frame and paper layer, arrange near the bottom of the tag.
Open bats02, copy and paste as a new layer, resize by 45%, arrange to the top left, add a drop shadow. Duplicate the layer, mirror it and then drag it back to the left side and arrange it.
Open a paper of your choice copy and paste as a new layer, drag it down just above the white background layer. Open your mask, layers, new mask layer, from image, search in the drop down box for your mask, click ok. Delete the mask layer, merge group. Rotate to the left by 90 degrees.
Add your name to the tag element.
Add your copyright and credits info.
Crop any excess and resize if needed then save.

Tuesday, September 21, 2010

Returning to College

I'm so excited and I wanted to share with all of you. As of 10/5 I am returning to college. I am entering the Graphic Design program at the Art Institute of Pittsburgh, through their online program. I'm going to be taking classes in drawing, painting, and digital art, learning how to use the Adobe Creative Suite (Photoshop, Illustrator, InDesign and more). I'm hoping when I get done to be able to do some work from home, whether it be a little extra income on the side or being able to have a career out of it. You never know, when I get done, I might be creating tubes for you!

Thursday, September 16, 2010

Little Emo Love Notes

For this tutorial you will need the following:
Paint Shop Pro, I am using PSP X, you should be able to use any version.
Tube of choice, I am using the artwork of Juicy Bits, which you need a license to use. You can get it at her store HERE.
Scrap kit of choice. I am using a PTU kit called Love Notes, which is also by Juicy Bits.
Font of choice, I am using Carrington
Mask: WSL170 by weescotslass, you can find it HERE.
Plugins: Eye Candy 4000 Gradient Glow (optional for name text)
Just remember that my choices of papers and elements is just a suggestion, change it up and make it yours! You don't have to follow mine exactly.
Let's get started!
Open a new canvas 600x600 white.
Open Frame 1, copy and paste as a new layer, resize by 75%, rotate to the right by 45.
Take your magic wand, hold down the shift key and click inside each of the parts of the frame. Selections, modify, expand by 3.
Open paper 4, copy and paste as a new layer, drag below your frame layer, selections, invert, click delete on your keyboard and leave selected.
Open your tube, copy and paste as a new layer, drag below your frame layer. If you are using the same tube as I am, resize by about 95%.
Take your eraser tool and erase the bits that hang over the frame on the right side. (part of her skirt, her foot, and her shirt)
Now, take your eraser and erase the bits of her skirt that show above the middle frame and bottom frame on the left side. Do not erase her shoe or her head.
Deselect and duplicate what is left of your tube. Drag the duplicate layer above your frame layer and lower the opacity to around 20%. You want to be able to see the frame through your tube.
Take your eraser tool and erase the bits of her leg and skirt that show over the bottom part of the middle frame and then raise the opacity back to 100%.
Now you should have her shoe sticking out of the lower frame and her head popping out of the top/middle frame.
Add a drop shadow to the bottom tube layer and the frame. I used 1, 1, 50, 5.
Open paper 9, copy and paste it above your white background layer. Open your mask, go to Layers, New Mask Layer, From Image, and on the drop down box, find your mask and then click ok. Delete the mask and merge the group together. Rotate it to the left by 90.
Now it's just a matter of adding whatever elements you'd like into your kit.
I used the glitter, pasted it above the mask and dragged it so it showed over to the left side of the frame.
Then open Journal Tag2, copy and paste as a new layer, resize by 70, rotate to the left by 40, image flip, add a drop shadow. Arrange it near the middle of the frames.
Open flower 1, copy and paste as a new layer, resize by 40, arrange it on the right side where the top and middle frame parts come together.
Open flower 2, copy and paste as a new layer, resize by 25%, arrange it over the other flower so it's how you like it, add a drop shadow.
Open the ribbonstriped element, copy and paste as a new layer, resize by 35%, add a drop shadow, drag that layer below the flower layers and arrange it how you want it.
Open notepad3, copy and paste as a new layer, resize by 27%, add a drop shadow, arrange under her foot.
Add your copyright info.
Add your name. I did mine using #c91f44 with a stroke 1 using the same color to make it a bit thicker. Then I added a gradient glow of 4 using #b44500 and then added my drop shadow.
Crop your tag and resize, then save!

Friday, September 10, 2010

Beautiful Disaster

For this tutorial you will need the following:
Paint Shop Pro, I am using PSP X, you should be able to use any version.
Tube of choice, I am using the artwork of Ismael Rac which you need a license to use. You can get at his store HERE.
Scrap kit of choice. I am using Sweet by Juicy Bits which you can find HERE.
Template 186 by Blissfully Beth. You can get it HERE.
Filters: Eye Candy 4000 Gradient Glow (optional for name text)
Just remember that my choices of papers and elements is just a suggestion, change it up and make it yours! You don't have to follow mine exactly.
Let's get started!
Open your template, delete the copyright layer, click on the background layer, add a new raster layer, flood fill with white then delete the gradient background layer. This step isn't necessary if you don't like to have the white background there, I just find it easier to see my work with it there. We will delete it at the end.
Make the white circle layer active, click inside it with your magic wand. Open paper 11, copy and paste as a new layer, selections, invert, click delete on your keyboard. Leave selected.
Open your close up tube, copy and paste, then arrange it into the large circle. Once you have it where you want it, click delete on your keyboard and deselect. Change blend mode on tube to Luminance (L). Delete the original white circle layer.
Make the circle frame layer active, click inside it with your magic wand. Open paper 8, copy and paste as a new layer, selections, invert, click delete on your keyboard. Deselect, add a drop shadow of your choice and delete the original layer.
Do the same for the small circle and frame. This time use a smaller tube. I also made the tube face the opposite way of the large tube.
Make rectangle 2 layer active, click inside with your magic wand. Open paper 16, copy and paste as a new layer, resize by 85%, arrange in the rectangle how you like it, selections, invert, click delete on your keyboard. Delete the original layer.
Do the same for rectangle 3 layer.
Make copy of rectangle frame layer active, click on it with your magic wand, open paper 13, copy and paste as a new layer, selections, invert, click delete on your keyboard. Deselelect, add drop shadow, delete original layer.
Do the same for copy (2) of rectangle frame.
Do the same on rectangle 1 and the frame layer as we have been doing above. I used paper 14 inside the rectangle and paper 2 for the frame.
Add your tube, arrange and resize as needed, add drop shadow.
Open bracket 2, mirror, resize by 65%, arrange near the bottom right, drag the layer below your rectangle layer that has your word art on it. Duplicate it, mirror and flip it. Add drop shadow to each layer.
Open tag 1, copy and paste as a new layer, rotate to the left by 30. Arrange it so it is showing over the top of your tag, then drag the layer down to the bottom, just above your white background layer. Add drop shadow.
Open brad 3, resize by 50%, arrange over the pointy part of the bracket. Duplicate and put over the other bracket. Add drop shadows.
Add any other elements if you'd like to add them.
Add your name. I did mine in black then added a gradient glow of 6 using #b7d4c0, and a slight drop shadow.
Add your copyright info.
Crop your tag and resize, then save.

Sunday, August 29, 2010

Pirates Life

For this tutorial you will need the following: Two or three tubes of your choice. I am using the artwork of Elias Chatzoudis which you must purchase a license to use at MPT. PTU scrap kit by Wicked Princess Scraps called Buried Treasure. Diamonds2 template by Mythical at Creative Misfits Creations. It is the 6th set down, click on the preview to download. Pirates Life wordart by Bethany. Font of choice. I am using Rapscallion. Plugins: Eye Candy 4000 Gradient Glow Please remember that my tutorial is just a guideline. You can change up tubes, papers, elements as you'd like to make it your tag! Let's get started. Open your template, resize all layers by 90%, change canvas size to 650x600, delete credits layer, words, top bar and bottom bar layers and both top and bottom diamond layers. Activate the pink circle layer, click on it with your magic wand. Open paper 3, copy and paste as a new layer, selections, invert, click delete on your keyboard. Deselect. Delete original circle. Activate the white circle layer, selections, float, defloat, invert, open paper 9, copy and paste as a new layer, click delete on your keyboard. Deselect, delete original circle layer, add drop shadow of choice. Activate the white rectangle layer, click inside it with your magic wand, open paper 14, copy and paste as a new layer, selections, invert, click delete on your keyboard. Leave selected. Open your tubes. Copy and paste your first tube into the rectangle area, arrange to your liking on the right side, resize as necessary. Click delete on your keyboard. Do the same with another tube, only arrange it in the middle. Do the same with another tube on the left side, or if you want, deselect and duplicate your first tube that is on the right, and mirror it. Merge the three tube layers down together add a drop shadow, change the blend mode to luminance, drop the opacity to 75. Activate the outside rectangle layer, selections, select all, float, defloat, invert, open paper 20, copy and paste as a new layer, click delete on your keyboard. Deselect and add a drop shadow. Copy and paste your main tube, resize if necessary and add a drop shadow, arrange to the bottom left. Open your word art, copy and paste as a new layer. Resize by 30% and then again by 60%. Apply the eye candy 4000 gradient glow, white, width 5, add drop shadow. Open treasureboxside element, copy and paste as a new layer, resize by 40%, image mirror, add drop shadow and arrange to the bottom right. Open the monthlyledger element, copy and paste as a new layer, add a drop shadow, drag it to the bottom layer, arrange to the right side. Open gold element, copy and paste as a new layer, resize by 20%, arrange in front of treasure chest, on the left side. Do the same with gold coin stack, but place it to the right side of the treasure chest. Do the same with coins, but after resizing, mirror it, and place it in front of the other 2 gold elements, in the middle. Merge the 3 layers together and add a drop shadow. If you want any other elements, add those, resizing as necessary. Add your copyright info and scrapkit credits as needed. Add your name or other text. I did the font color in black then added gradient glow of 6 with the color #ad6f20 and added my drop shadow. Crop your tag and resize as necessary and save!

Friday, August 27, 2010

Flutterby Fae

For this tutorial you will need the following: Paint Shop Pro, I am using PSPX but any version should work. Scrap kit of choice. I am using a PTU kit by Wicked Princess Scraps called Flutterby Dreams. Rac Stalkers Coolest Template #1 by me that I made for the Rac Stalkers Forum, which you can get HERE. Tube of choice. I am using the tubes that came with the kit. Font of choice. I am using Remember, the papers and elements I use are my choices for my tag, you don't have to make it just like mine, if you want to change it up and use different papers and elements, go ahead! It's your tag!! Let's get started! Open your template, shift D to duplicate, close the original. Delete the credits layer and the word art layer. Resize your canvas to 650x600. You might not use the excess space, but I always like to have the extra space to work and then crop down my tag at the end. Activate top right circle layer, click on it with your magic wand. Open paper 2, copy and paste as a new layer, selections, invert, on your paper layer, click delete on your keyboard. Add a drop shadow of your choice. Delete the original circle layer. Do the same for top circle layer, using paper 18. Do not add drop shadow to this layer. On all the pink circle layers I did the same as above, but used paper 5. Only add a drop shadow to the outside circles. On the two white circle layers I used paper 11, following the same steps as for the first circle. Make the white star layer active, click on it with your magic wand, open paper 16, resize by 60% copy and paste as a new layer, selections, invert, click delete on your keyboard. Delete the original star layer. Make the pink star frame layer active, click on it with your magic wand, add a new raster layer, flood fill with white, deselect, add/remove noise, add noise with the following settings: Gaussian, monochrome, 100%. Add drop shadow, delete original pink layer. Make black center circle layer active, click on it with magic wand, open paper 2, copy and paste, selections, invert, click delete on your keyboard. Merge left and right square layers together, make that layer active, click inside the squares with your magic wand, follow steps as above to paste paper 14 inside. Make sure to add a drop shadow. Open your main tube, copy and paste as a new layer, resize if necessary, arrange where you want it. Add any embellishments you'd like. Add your name, copyright info & credits as needed. Crop & save.

Monday, August 23, 2010

Challenge Templates

Over at the Official Rac Stalkers forum we had another template challenge. These are my templates that I made for it. You are welcome to use them for your personal tagging and in tutorials. If you use them in a tut, please direct people back here for download! Thanks. You can download them HERE. You can also find more awesome templates made by my fellow Ismael Rac Stalkers HERE.

Wednesday, August 4, 2010

Secret Garden

For this tutorial you will need the following: Paint Shop Pro, I am using PSP X, you should be able to use any version. Tube of choice, I am using the artwork of Valarie Wade which you need a license to use. I purchased mine at AMI, but she is now at My Tag Art. Scrap kit of choice. I am using Mama's Garden, which is a PTU kit by Wicked Princess Scraps. Font of choice, I am using Dear Joe Four Mask: I didn't use one for this tag, but you can add one if you like. Plugins: No outside filters used. Just remember that my choices of papers and elements is just a suggestion, change it up and make it yours! You don't have to follow mine exactly. Let's get started! Open a new 650x650 canvas, white background. Open paper 14, set it as your background pattern in your color palette. Using your preset elipse tool with width set to 0, draw out a good sized circle. Objects, align, center in canvas, and convert to raster layer. Selections, select all, float, modify, expand by 5, invert, open paper 2, copy and paste as a new layer above the white background layer, click delete on your keyboard. Selections, invert, modify, expand by 7. Open paper 20, copy and paste as a new layer above the white background layer. Selections, invert, click delete on your keyboard. Deselect On the middle layer, add/remove noise, uniform and monochrome checked, percent at 75. On the outside circle, add a drop shadow of your choice. Go back on the first circle layer we did. Selections, select all, float, defloat, invert. Open your tube, copy and paste as a new layer. Resize as necessary. Use your eraser tool to erase the bits you don't want hanging over the edge of the circle. I merged the 3 circle layers together. You can merge them or leave them separate. Open paper 18, set it as your background pattern in your color palette. Using your preset shapes tool, draw out a rectangle just a bit wider than your circles. Move it near the top of your tag. Convert to raster layer, duplicate, image, flip. Merge the two rectangle layers together. Selections, select all, float, defloat, modify, expand by 7, flood fill with white. Add your drop shadow. Then apply it again, but change whatever numbers you have for the horizontal and vertical to the same number but negative. Ex: if you had them at 1 and 1, change them to -1 and -1 or if 1 and 2 change to -1 and -2, and so on. Add any other elements you like to your tag, resizing and adding drop shadow as necessary. I used the grasshopper, butterfly, bee, a couple of the hearts, several flowers, and a bow. If you want to add a mask you can, I didn't on mine, but that's completely up to you. Crop your tag, resize as necessary. Add your name and copyright info/credits. Save your tag and you're done!

Sunday, August 1, 2010

Summer Fun

For this tutorial you will need the following: Paint Shop Pro. I am using PSP X but any version should work fine. Jasc Animation Shop 3. Tube(s) of choice. I am using the artwork of Ismael Rac which you must have a license to use. I got this tube when he was with AMI, but you can also get it at his new store. Be sure to use the proper copyright info/license number depending on whether you bought it at AMI or at his new store. If you bought it at AMI, use your AMI license number and if you bought at his new store, use the license you got there. Also, remember you cannot mix tubes that you bought at different stores! No scrap kits used in this tut. Filters: MuRa Meister copies, VM Natural Sparkle Font of choice. I am using Vivaldi & Verdana Let's get started! Open a new raster layer 600 x 250 1. Copy and paste your close up tube as a new layer. Apply MuRa Miesters Copies with the wallpaper rotate setting, don't change any of the settings, just use the default settings for the wallpaper rotate. 2. Adjust blur, motion blur, angle at 135, strength at 100%. 3. Copy and paste a tube above this background layer, add a drop shadow. I used 1, 1, 40, 5. Arrange it to the left side of your tag. 4. Copy and paste two other tubes arranging them to the right side of your tag. Merge those two tubes together then change the blend mode to Luminance (L) and drop the opacity to about 75. 5. Choose a color from your tube for your background and another for the foreground. 6. Set your cursor over the left side of your canvas until you get a little arrow that points left and right. Click on it and drag your canvas out and you'll see grey showing on both sides of your canvas. 7. Now, taking your preset shape tool set to rectangle, width set at 5, draw out a thin rectangle that goes all the way across your canvas into the grey on both sides of your canvas. This is so that it's a bit longer than the canvas and when we apply the effect to it, it doesn't shrink up and leave blank spaces on the sides. Convert it to a raster layer. 8. Go to effects, distortion effects, wave with the following settings: Horizontal displacement -Amplitude and Wavelength =1 Vertical displacement - Amplitude =2 and Wavelength =10 Edge mode = transparent 9. Click inside it with your magic wand. Duplicate 2 times for a total of 3 layers. Hide the top 2 layers. 10. On the bottom layer adjust, add/remove noise, add noise, uniform, monochrome checked, percent at 40. 11. Unhide the middle layer and do the same, but change the percent to 50. 12. Do the same for the top layer, change the percent to 60. Deselect and add a drop shadow to each of these layers. 13. Write out the words Summer Fun or a similar phrase and arrange it in the middle of the wave. 14. Add a new raster layer, selections, select all, modify, contract 3, invert flood fill with the color you picked for the outside edge of your wave layer. 15. Selections, invert, modify, contract 3 and add a new raster layer under the first one, invert, and flood fill with the color you chose for the inside of your wave layer. 16. Do the same as above, but this time, fill it again with the first color you used. 17. Merge those 3 layers together and add your drop shadow. 18. Add your name and copyright information. To Animate: 1. Close off the top 2 wave layers. Copy merged and paste into animation shop as a new animation. 2. Close off the bottom layer and unhide the middle layer. Copy merged and paste into animation shop after current frame. 3. Close off the middle layer and unhide the top layer. Copy merged and paste into animation shop after current frame. 4. Click on "view animation" see if you like how the animation looks. If not, you can click on "animation" and then "frame properties" and change the numbers around til you get something you like. This speeds up or slows down the speed. For the Avatar 1. Open a new 150 x 150 canvas (you may make it smaller if the forum you are going to use it at requires smaller.) 2. Copy your background layer from your tag and paste it as a new layer into your avatar canvas. 3. Copy each of your wave layers and paste as a new layer into your avatar canvas. 4. Copy and paste your tube into your avatar canvas, resize if necessary and move it around so that her face is showing on the left side. 5. Follow the instructions above #14 - 17 to make a frame on your avatar. 6. Put your initial over the wave layer. 7. Add your copyright info. 8. Follow the instructions for animating your tag to animate your avatar!

Black & White Sophistication

For this tutorial you will need the following: Paint Shop Pro, I am using PSP X, you should be able to use any version. Tube of choice, I am using the artwork of Ismael Rac which you need a license to use. You can get at his store. Scrap kit of choice. I am using Sophisticated by Juicy Bits. Font of choice, I am using Riesling Mask: WSL Mask297 by Weescotslass Creations Plugins: MuRa Meisters Copies Just remember that my choices of papers and elements is just a suggestion, change it up and make it yours! You don't have to follow mine exactly. Let's get started! Open frame 1, window, duplicate and close out the original. Rotate to the right by 90 make sure all layers is checked, then resize by 80% and change your canvas size to 650x600. Take your magic wand and click inside the frame, selections, modify, expand by 5. Open a new canvas about 300x300 white background. Copy and paste a close up of your tube inside it. Apply Mura Meister copies using the wallpaper rotate setting, and don't change anything on it, just use the presets for that one. Adjust, blur, gaussian blur, set at 10. Colorize it by going to adjust, hue and saturation and change them both to 0. Now, take this paper you just made and copy and paste it to your original canvas where your frame is. Arrange it how you'd like it, and selections invert, make sure you're on the layer you made and click delete on your keyboard. Drag that layer below your frame. Add a drop shadow to your frame. I used 1, 1, 40, 5 black. Copy and paste your full sized tube as a new layer, resize if needed, I resized mine by 80%. Add your drop shadow. Open element WA1, copy and paste as a new layer, rotate it to the left by 20, drag it below your tube layer. (You might have to change the amount of rotation or not rotate at all depending on the tube you use). Add your drop shadow. Add any other embellishments you'd like to your tag. Open paper 3, open your mask, copy and paste just above your white background. Go to layers, new mask layer, from image, then in the drop down box look for you mask and click on it. make sure you DO NOT have invert mask checked and then apply your mask. Delete the mask layer and click yes on the pop up box. Merge the layers together as a group. I resized my mask by 75%. Add your name. Add your copyright info and any other credits necessary. Crop and resize your tag as necessary and you're done!

Thursday, July 22, 2010

Platinum Heart

For this tutorial you will need the following: Paint Shop Pro, I am using PSP X, you should be able to use any version. Tube of choice, I am using the artwork of Juicy Bits which you need a license to use. You can get at her store HERE. Scrap kit of choice. I am using Wild Thing by Juicy Bits. Font of choice, I am using Mask of choice Plugins: no outside plugins used Just remember that my choices of papers and elements is just a suggestion, change it up and make it yours! You don't have to follow mine exactly. Let's get started! Open a new canvas 650 x 600 white. Open paper 3, set it as your background and using your elipse tool, draw out a medium sized circle in the middle of your canvas. Objects, align, center in canvas, then convert to raster layer. Selections, select all, float, defloat, modify, expand by 5. Add a new raster layer below your circle and flood fill with white. Selections, modify, expand by 10, open paper 7, set this one as your foreground add a new raster layer and flood fill with that pattern. Selections, modify, expand by 5, add a new raster layer and flood fill with #960f5b. Deslect. On the white layer and the last layer that you did, adjust, add/remove noise, monochrome, 45%, uniform. Hide your white background layer, and merge visible. Add a drop shadow. Open paper 2, set it as your background layer, set your foreground as white. Using your elipse tool with the stroke set to 10, draw out another circle. Convert to raster layer, take your magic wand tool and click inside the white part. Adjust, add/remove noise with the same settings as above, add a drop shadow, arrange to the top left side of your large circle. Duplicate that small circle and drag the copy to the bottom right side. Open frame 1, copy and paste as a new layer, resize about 40%. Click inside with your magic wand, expand by 5, open paper 10, resize that also by 40%, copy and paste as a new layer, selections, invert, on the paper layer, click delete on your keyboard. Copy and paste your tube as a new layer, resize if needed. Place it in the frame and erase the bits that hang over the edge. Deselect and add your drop shadow. Add any extra elements you'd like. Open a paper of your choice, copy and paste it above your white background layer and apply the mask. Delete the mask, then merge the group together. Add your name and any copyright and credits needed.

Wild Thing

For this tutorial you will need the following: Paint Shop Pro, I am using PSP X, you should be able to use any version. Tube of choice, I am using the artwork of Ismael Rac, which you need a license to use. You can get at his new store HERE. Scrap kit of choice. I am using Wild Thing by Juicy Bits. Font of choice, I am using Cajun Boogie Plugins: Pixelate Sector Mosiac Just remember that my choices of papers and elements is just a suggestion, change it up and make it yours! You don't have to follow mine exactly. Let's get started! Open a new canvas 600 x 250 white background. Open paper 4, copy and paste as a new layer, dupicate. On the top layer adjust, blur, gaussian blur 29, set Blend Mode to Luminance (L). On the original layer, adjust blur, gaussian blur 6. Apply Pixelate Sector Mosiac with the following settings: Theta Tiles 15 Rho Tiles 37 Open your tube, copy and paste as a new layer, drag to the left side, add a drop shadow. Take your cursor and place it on the left side of your canvas until you get the little arrows that point left and right. Click on your canvas and drag it out. You'll see grey boxes on each side of your tag. Now, click on your preset shapes, rectangle tool. Set the background color as any color, we're going to fill it in later with a paper. We are going to do it this way so that when you apply the wave effect, the paper doesn't get distorted. Draw out a skinny rectangle all the way across your tag. Start way to the left out in the grey area, and drag it well into the grey area on the right. Convert to raster layer. Now go to effects, distortion effects, wave with the following settings: Horizontal Displacement Amplitude and Wavelength: 1 Vertical Displacement Amplitude 2, Wavelength 10 Transparent Now open paper 5, and set it as your foreground. To do this, right click on foreground, choose pattern, and in the drop down box, look for your paper. On the waved rectangle layer that you just made, selections, select all, float, defloat, add a new raster layer and flood fill with your pattern. Selections, modify, expand by 5, add a new raster layer under this layer and flood fill with white. Adjust, add/remove noise settings Uniform, 45%, monochrome checked. Add a drop shadow and merge these two layers together. Open heart doodle, resize by 75%, copy and paste as a new layer, arrange below your tube, add a drop shadow. Open the stars layer, copy and paste as a new layer, resize by 45%. Arrange to the top right side of tag, add drop shadow. Copy and paste again, resize by 40% this time arrange near the middle, add drop shadow, merge two layers together. Add a new raster layer, selections, select all, modify, contract by 2, invert, add a new raster layer, flood fill with pink from your stars. Selections, invert, modify, contract 3, invert, add a new raster layer below the pink layer, flood fill with black or white. Selections, invert, modify, contract 2, invert, add a new raster layer below that black or white layer and flood fill with the pink again. Deselect Merge the 3 frame layers together and add a drop shadow. Add your copyright info and your name, save and you're done with the tag. For the avatar: Open a new canvas either 125x125 or 150x150 depending on the size the site allows you to use. Most use the smaller size. Go to your finished tag and merge together the two background layers. Copy and paste them into the avatar canvas. Resize by 40%. Copy and paste your tube as a new layer, move to the left. Copy and paste the heart layer, resize by 50%, move below your tube layer. Make the frame the same way you did for the tag. Add your copyright info. Add the first letter of your name. Save it and you're done!

Tuesday, July 13, 2010

Don't Get Your Panties

For this tutorial you will need the following: Paint Shop Pro, I am using PSP X, you should be able to use any version. Tube of choice, I am using the artwork of Juicy Bits which you need a license to use. You can get HERE. Scrap kit of choice. I am using Vinyl Vixen which I purchased at AMI but you can now purchase through Juicy Bits store. Font of choice, I am using Reisling, Rockwell Extra Bold, and Scriptina Plugins: Tramages Tow the Line Just remember that my choices of papers and elements is just a suggestion, change it up and make it yours! You don't have to follow mine exactly. Let's get started! Open a new 600 x 600 canvas flood fill with white. Open frame 2, copy and paste as a new layer, resize by 75%. Take your selection tool set on rectangle and draw out a rectangle covering most of the frame. You want to go over to where it's mostly solid so that when we fill it with a paper, you don't have little white spots showing in the middle of the furry parts of the frame. Selections, invert. Open paper 7, resize by 75% twice, copy and paste as a new layer, click the delete button on your keyboard. Open your tube, copy and paste as a new layer, duplicate, on the original layer, erase the bits that hang over your frame, deselect, add a drop shadow. Unhide the top layer and erase the bits that hang over the frame. You don't have to be careful, because you have the bottom tube showing through. Open the journal tag element, copy and paste as a new layer, drag it down just above your white background. Adjust blur, gaussian by 20. Apply Tramages tow the line, default settings. Change the opacity to about 55%. Open one of the panties elements, resize by 35%, copy and paste as a new layer, rotate to the left by about 30 and drag to the bottom right corner. Add a drop shadow. Open doodle 1, copy and paste as a new layer, resize by about 60% drag to the bottom just above your layer you applied the tramages to. Open one of the bottle caps, resize by 25% copy and paste as a new layer, drag to bottom right corner, add drop shadow. Add text and copyright info. Crop, resize, save and you're done!

Saturday, July 10, 2010

All Access

For this tutorial you will need the following: Paint Shop Pro, I am using PSP X, you should be able to use any version. Tube of choice, I am using the artwork Ismael Rac, which you need a license to use. He's gone independent now, and you can purchase his work and get your license at his store HERE. Scrap kit of choice. I am using Rock Star by Juicy Bits. You can find it HERE. Font of choice, I am using Angelic War Mask of your choice Plugins: none used in this tutorial. Just remember that my choices of papers and elements is just a suggestion, change it up and make it yours! You don't have to follow mine exactly. Let's get started! Open frame 12, rotate to the right by 90%, make sure all layers is checked. Resize by 80% and then change the canvas size to 500x600. Click inside your frame with your magic wand, selections, modify, expand by 5, open paper 22, copy and paste as a new layer. Resize by 80%, selections, invert, make sure you are on your paper layer, and click delete on your keyboard. Selections, invert, modify, contract by 5 then invert again. Copy and paste your tube as a new layer, take your eraser tool and erase the bits that hang over on the bottom. Deselect and add a drop shadow. Using your preset shapes tool, on elipse, open paper 5, click on the background color and click on pattern, on the drop down box find your paper and select that. Change the angle to 0 and the scale to 50, click ok. Draw out a largish circle. Click on that layer in your layer palette, click arrange, send to bottom. Convert to raster layer. Selections, select all, float, modify, expand by 5, add a new raster layer, flood fill with #b7937d, deselect. Adjust, add/remove noise with the following settings: uniform, monochrome checked, percent at 50. Open paper 16, copy and paste as a new layer, drag to the bottom, resize by 75%, apply your mask. Make sure to delete the mask and merge the group together. Depending on the mask you use, you may have to resize. Add any elements you like, resizing as necessary. Add your copyright and credits as needed. Add your name and save.

Tuesday, July 6, 2010

Gorjuss Circles

For this tutorial you will need the following: Paint Shop Pro, I am using PSP X, you should be able to use any version. Tube of choice, I am using the artwork of Suzanne Woolcott which you need a license to use. I purchased mine at AMI, but she is now selling her art on her own site. You can get it HERE Font of choice, I am using Plugins: MuRa Meister Copies L en K's Mayra Filter Factory A Rings Let's get started! Open a new canvas 600 x 250 with a transparent background. Open your tube and coy and paste as a new layer. Apply MuRa Meister Copies using the Wallpaper Rotate preset. Duplicate it and hide the top layer. On the bottom layer apply Effects>Art Media Effects>Brush Strokes with the following settings: Softness 20 Bristles 160 Width 5 Opacity 50 Length 10 Density 25 Angle 102 Color #505050 Apply this affect a total of 2 times. Apply Gaussian blur at 20. Unhide your top layer and apply the L en K's Mayra with the following settings top to bottom: 0 149 76 2 Now apply Filter Factory A Rings. Click inside several of the lines with your magic wand and hold down your shift key at the same time until you get them all selected. Hit the delete key on your keyboard. Change the opacity to about 25 or 30. Copy your tube and paste as a new layer, resize as necessary. Move to the left side, add a drop shadow. Paste your tube again, move to the right side, resize if necessary, mirror and add a drop shadow. Change the blend mode to Soft Light and change the opacity to 65. Add a new raster layer, selections, select all, modify, contract by 3, invert. Pick a dark color from your tube and flood fill. Deselect. Add a drop shadow. Add your copyright info and your name.

Tuesday, June 15, 2010

Sweet Caroline

For this tutorial you will need the following: Paint Shop Pro, I am using PSP X, you should be able to use any version. Tube of choice, I am using the artwork of Aiya at Juicy bits which you need a license to use. You can get it HERE. Scrap kit of choice. I am using High School Sweetheart by Aiya at Juicy Bits. You can find it HERE. Font of choice, I am using Mask: Aqua Rebel 315 mask 50, which you can get HERE. Plugins: Eye Candy 3.1 glow (or if you have a different version of Eye Candy, use Gradient Glow) If you have some sparkles from a scrap kit, you can add those too. I have some that were shared by someone who made them in a group I belong to for a grab bag challenge and they can't be shared. There are a lot of them around, so I'm sure you have some or can find some easily! Just remember that my choices of papers and elements is just a suggestion, change it up and make it yours! You don't have to follow mine exactly. Let's get started! Open a new canvas about 700 x 700, white background. We'll crop it and resize at the end. This just gives us some extra room to work. Set your foreground to #264a6a and your background to null. Using your preset rectangle tool with the width set to 12, draw out a large rectangle. Objects, align, center in canvas. Convert to raster layer. Click inside the rectangle with your magic wand, selections, modify, expand by 3 selections, invert. Open paper 9, copy and paste as a new layer, click delete on your keyboard, drag it below the frame layer. Leave selected. Open your tube, copy and paste as a new layer, arrange how you want in your frame, erase the bits that hang over the frame with your eraser tool. Deselect, add a drop shadow to your tube and your frame layers. Open paper 4, set your background as a pattern using your paper, set your foreground to null. Draw out a circle. Convert to raster layer. Selections, select all, defloat, modify, expand by 4. Add a new raster layer and flood fill with #cf4368. Adjust, add/remove noise with the following settings: Random, Monochrome checked and Noise set at 100%. Add a drop shadow. Merge. Pull to the top left side of your frame. Do the same as above for a second circle that you will pull to the bottom right side of your frame. Open the heart strings element, copy and paste as a new layer, resize by about 80%. Arrange to the top left, add a drop shadow. Open paper 6, copy and paste as a new layer just above your white background. Open your mask, go to layers, new mask layer, from image. Look for your mask in the drop down box and apply it to the paper. Delete the mask layer and merge your group. You may have to resize your mask layer. I resized mine by 93%, then I mirrored it and lowered the opacity to 60. If you want to add some small circles, just pick a color and set it as your background color and draw out some small circles around your frame like I did on mine. Add your sparkles if you are using them. Add your copyright info. Add your name. I used Eye Candy 3.1 glow set at white and width at 4 then added my drop shadow. Crop your tag and resize. If you want to save as a transparent tag, then save it as a .png file.

Wednesday, June 9, 2010

AMI Loss

Today is a very sad day in the tagging world. The creator of AMI, Leah, has passed away. Her family has chosen not to carry on the business, and all the artists there will have to find a new licensing company to go with, or do it on their own. It's sad for her family, for her artists, and for all of us who have grown to know and love her as an Admin at the Ismael Rac Stalkers forum, and as a Customer Service person at AMI. I was on the Creative Team for AMI for several months and loved working with AMI. Sadly, that part of my blog has come to an end. May Leah's friends and family, and the artists who she helped find comfort today and in the days to come.

Monday, June 7, 2010

Little Mermaid

For this tutorial you will need the following: Paint Shop Pro, I am using PSP X, you should be able to use any version. Tube of choice, I am using the artwork of Lisa Victoria which you need a license to use. You can get it at AMI. Scrap kit of choice. I am using a FTU kit by Artmama, called Beach Morning, which you can find at her blog, Artmama's Studio. Font of choice, I am using Sweetheart Script Mask: gemsmask21 from Gems Taggin Scraps Plugins: No outside plugins used. Just remember that my choices of papers and elements is just a suggestion, change it up and make it yours! You don't have to follow mine exactly. Let's get started! Open a new canvas, 700 x 700 white background. You can crop and resize at the end, this just gives us room to work. Set your background to black, foreground to null and with your preset shapes tool, draw out a largish circle in the middle of your canvas, objects, align, center in canvas. Convert to raster layer, selections, select all, float, defloat, invert. Open your tube, copy and paste as a new layer and arrange it in the circle, erase the bits that hang off where you don't want them. Selections, invert, make sure you are back on your black circle layer, make your foreground a color from your tube, selections, modify, expand by 5, add a new raster layer and fill with that color from your tube. Deselect and drag that layer below your black circle. Adjust, add/remove noise with the following settings: Random, monochrome checked, noise at 100%, add a drop shadow of your choice. Back on your tube layer, duplicate the tube. On the original layer, gaussian blur of 3. On the duplicate layer change the blend mode to overlay and add a drop shadow to the top duplicate layer. Pick another color from your tube and set it as your background color, draw out a largish circle and pull it over to the left of your tag so its sort of peeking out from under your black circle. Convert to raster layer, and follow the instructions above for making a frame around it. This time, choose a color that is a few shades darker than what you used to draw the circle. When you are finished, merge the circle and the frame together, duplicate, image mirror, image flip, add a drop shadow to both. Pick another darkish color from your tube and set it as your foreground, background is null. Take your preset rectangle shape, with width set at about 5 and draw out a rectangle to the left of your circle (see my tag as a reference), and then convert to raster layer. Drag it below your circles. Add the noise with the same settings as above. Click inside it with your magic wand, selections, modify, expand 2, open a paper of your choice, copy and paste as a new layer, selections, invert, click delete on your keyboard. Click inside one of your circles with your magic wand, invert. Open the seashell embellishment, copy and paste as a new layer, arrange it how you want it click delete on your keyboard. Do the same for the other circle. Add embellishment 31, resize and rotate as needed to have it lay correctly on the tops of both of the bottom circle layers. The amounts you will have to resize and rotate will depend on how big you drew out your circles, so just play with the settins til you get something you like. My resize was at 45%, and I rotated mine about 57, so that might give you something to go from. Also, add a drop shadow to each one. Add any seashell embellishments along the bottom that you like, resizing as necessary. Open Beach Mornings 4 paper, copy and paste as a new layer, drag it just above your white background layer, open your mask, Layers, new mask layer, from image, search for your mask in the drop down bar and apply it. Delete the mask, then merge the group together.

In Love With Paris

For this tutorial you will need the following: Paint Shop Pro, I am using PSP X, you should be able to use any version. Tube of choice, I am using the artwork of Ismael Rac which you need a license to use. You can get at AMI Scrap kit of choice. I am using In Love With Paris, a PTU kit by Aiya at Juicy Bits which you can purchase HERE Font of choice, I am using Pushkin Plugins: Eye Candy 3.1 Glow (or gradient glow in another version) Just remember that my choices of papers and elements is just a suggestion, change it up and make it yours! You don't have to follow mine exactly. Let's get started! Open a new canvas about 700 x 700 with a white background. You can crop it down and resize at the end, this just gives us room to work. Open frame 1, copy and paste as a new layer. Take your magic wand and click inside the frame, selections, modify, expand by 2, open a paper, copy and paste as a new layer, selections, invert, make sure you are on your paper layer and click delete on your keyboard.Drag the paper layer below your frame. Leave selected, copy and paste your tube as a new layer. Arrange it how you'd like and erase the bits that hang over the bottom. Deselect and add a drop shadow of your choosing. Add gradient glow, or if you use Eye Candy 3.1 like I do, glow with width of 3, color white. Add whatever elements you'd like. I used the following: Chain Charm: erase top chain loops, add to right side of tag, add drop shadow. Doodle 2, add gradient glow width 3 white, add drop shadow arrang on the bottom of the tag, to the right. Doodle 3 and Leaf 3, resized and rotated as needed, add drop shadow, arrange to the left of tag. Add your ©info. Add your name. I added a glow of 3 and my drop shadow to my name. Crop your tag, and resize if necessary. If you want a transparent tag, delete your white background layer and save as a .png file.

Sunday, May 23, 2010

Old School Summer

For this tutorial you will need the following: Paint Shop Pro, I am using PSPX, but any version should work. Two tubes of your choice. I am using the gorgeous artwork of Ismael Rac which you must purchase at AMI to use. Effects and Plugins: Sepia Toning, which comes with PSP X Penta.com Color Dot Toadies Ommadawn Font used: Angelic War Let's get started! Open a new canvas about 700x700 with a white background. You can crop it down and get rid of the white at the end. This just makes it easier for us to work. Using your preset shape tool set at rectangle, set your foreground to #c5203e and your background to null, line width about 5. Draw out a smallish rectangle. Convert to raster layer and then duplicate it 3 times. Arrange them so they are overlapping how you'd like them. Make the second rectangle down active and click inside it with your magic wand tool. Now, make the top rectangle active, click delete on your keyboard. Do the same for the third rectangle down, then deselect. Merge the top 3 rectangles together. Now, make the third rectangle down active, click inside it with your magic wand. Now get on the bottom rectangle layer and make it active, click delete on your keyboard. Merge it with the other layer with the 3 rectangles. Click inside each of the rectangles with your magic wand while holding the shift key down, selections, modify, expand by 2, add a new raster layer and flood fill with #1381e2. Open one of your tubes, copy and paste it as a new layer, selections, invert, click delete on your keyboard, deselect and add a drop shadow. Take your magic wand and on your rectangles layer, click inside 2 of the frames holding down the shift key. Now go to your tube layer and go to Effects>Image Effects> Sepia Toning and use the default setting. Deselect. Back on the blue background layer inside your rectangles, apply Penta.com Color dot with the following settings top to bottom: 90, 2, 255, 255, 255. Hide your white background layer again, and merge all layers visible, add a drop shadow, then unhide your white background. Duplicate your merged layer. On the bottom layer, blur, gaussian blur by 20. Duplicate the blurred layer and mirror it. Drag the two blurred layers around to where they show how you like them and then merge them together. Then apply Toadies Ommadawn with the following settings top to bottom: 12, 8, 234, 17. Add your full tube and give it a drop shadow. Add your name. Add your copyright info, crop and resize as necessary and save!

Tuesday, May 11, 2010

Angel Wing

For this tutorial you will need the following: Paint Shop Pro, I am using PSP X, you should be able to use any version. Tube of choice, I am using the artwork of Ismael Rac, which you need a license to use. You can get it at AMI. Scrap kit of choice. I am using Night Wings by Kat NKDA which is a PTU kit that you can also purchase at AMI. Font of choice, I am using Pea Lovey Dovey Mask: I am using the mask that came with the Night Wings kit. Plugins: No outside filters used. Just remember that my choices of papers and elements is just a suggestion, change it up and make it yours! You don't have to follow mine exactly. Let's get started! Open a new canvas 700x700 white. Open element 13, copy and paste as a new layer and resize by 45%. Click inside it with your magic wand, selections, modify, expand by 8. Open paper 2, copy and paste as a new layer, selections, invert, make sure the paper layer is active, and click delete on your keyboard. Leave selected Open your tube, copy and paste as a new layer and drag it below the frame. Take your eraser and erase the bits you don't want showing at the bottom of your frame and then deselect. Add a drop shadow. I used 1, 1, 35, 6. Now take your freehand selection tool (the one that looks like a lasso) and make sure it's set on Add(Shift) and that Feather is set to 0. Draw around the parts you want showing above the frame. Go to selections, promote selection to layer, then select none. Now move the layer you just made above the frame. Open element 1, copy and paste as a new layer, resize by 20% then again by 40% and then sharpen. Arrange it to the left side of your frame and add a drop shadow. Do the same with element 2, arrange it just under element 1. Open element 10, copy and paste as a new layer, resize by 40%, add a drop shadow and arrange to the top right, drag down below the frame and paper layer. Open element 28, copy and paste as a new layer, resize by 40%, rotate to the right by 105, add a drop shadow, drag it below your top tube layer. Open element 15, copy and paste as a new layer, resize by 40%, add a drop shadow. Drag it below element 28 and arrange it across the bottom of your frame. Open paper 12, copy and paste as a new layer, drag it down to just above your white background layer. Open your mask, apply by going to Layers, New Mask Layer, From Image, click on the drop down menu and find your mask, click ok. Delete the mask layer and merge the group. Add your name to the little metal piece (element 15) that you placed at the bottom of your frame. To get the engraved look, I did the text in black and then added my drop shadow. Then applied 3D effect cutout with the following settings: Vertical: 10 Horizontal: 10 Opacity: 50 Blur: 5 Shadow Color: Black Fill Color: White (have box checked) Make sure to add your copyright info. If you want a transparent image, then delete or hide the white background layer and save as a .png.