Pages

Showing posts with label Mystical Scraps CT. Show all posts

Tuesday, February 3, 2015

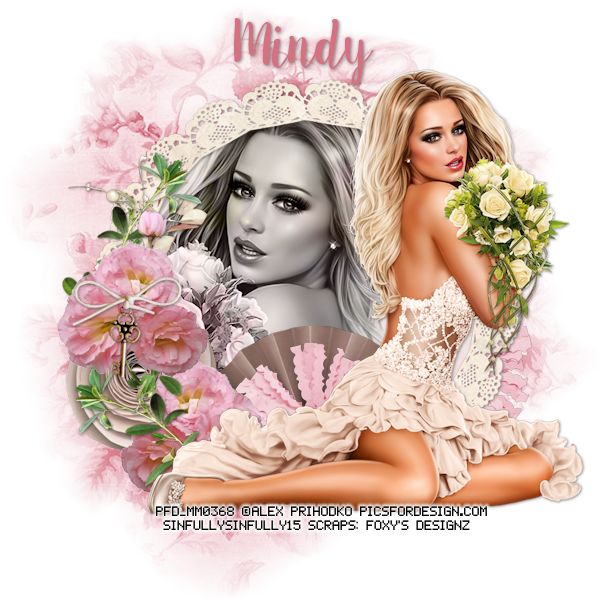
Loving Moments


Snaggable versions of this tag in my Fotki album

For this tutorial you will need the following:

Paint Shop Pro, I am using PSP X7, you should be able to use any version.

Tube of choice, I am using the artwork of Alex Prihodko (Bridal Bouquet tube)
which you need a license to use.  

Scrap kit of choice. I am using a PTU kit by Foxy's Designz  called Loving Moments

Font of choice, I am using Sweet Pea

Mask of your choice, mine is no longer available online, but if you have it
it is BeckyMask023, if you don't, just use another mask

Plugins: No outside plugins


Just remember that my choices of papers and elements is just a suggestion, change it up and make it yours! You don't have to follow mine exactly.

Add a drop shadow of your choosing to tubes & elements throughout. I usually use 1, 1, 50, 5 unless otherwise noted.


Let's get started!

Open a new canvas 850 x 850 pixels with a white background

Open frame 4 copy and paste as a new layer  resize 75%
click inside with your magic wand, selections, modify, expand 2, selections, invert
  open paper 2 copy and paste as a new layer 
copy and paste your mirrored tube
arrange in your frame
erase the bits that hang out of your frame where you don't want them
change the blend mode to Luminance(L)

Copy and paste your tube as a new layer, resize by 55% arrange on the right

Now add your elements:

element 43 resize 40% arrange on the bottom left, duplicate, mirror, drag above original layer
element 39 resize 46% arrange between the two pink flower layers, underneath them
element 4 resize 60% arrange over the top flower cluster

element 35 rotate left 90 arrange below the top pink flowers, but over the others, erase what shows below the tube

element 40 resize 50% arrange below the tube & flowers layers in the center
element 38 resize 55% arrange one over the fan, duplicate, drag to the far right under the frame
erase what shows under the tube from the one over the fan

element 10 resize 35% arrange below the leaves on the top left
element 25 resize 35% arrange in the leaves on the top left

add paper 8 above the white background
apply your mask merge group, resize 93% duplicate & merge together

crop and resize
add your copyright and credits as needed
add your text and save

Wednesday, January 21, 2015

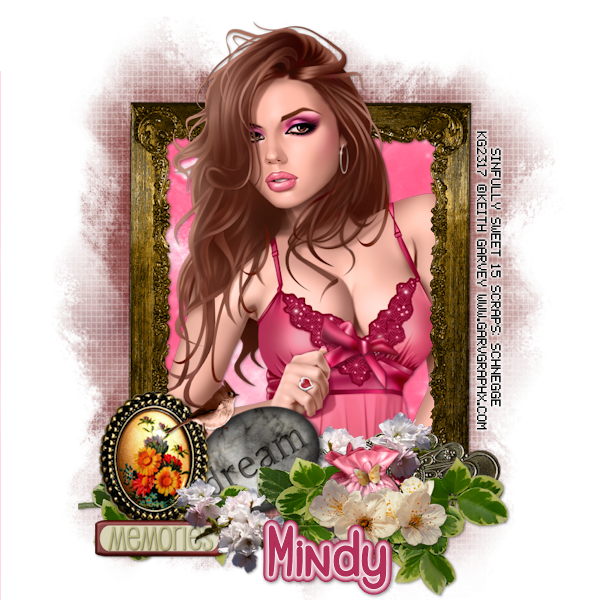
Dreaming


Snaggable versions of this tag in my Fotki album

For this tutorial you will need the following:

Paint Shop Pro, I am using PSP X7, you should be able to use any version.

Tube of choice, I am using the artwork of Keith Garvey (Mila tube) which you need a license to use.  

Scrap kit of choice. I am using a PTU kit Ginny by Schnegge Scraps  

Font of choice, I am using Gants de Soie


Plugins: No outside plugins used


Just remember that my choices of papers and elements is just a suggestion, change it up and make it yours! You don't have to follow mine exactly.

Add a drop shadow of your choosing to tubes & elements throughout. I usually use 1, 1, 50, 5 unless otherwise noted.


Let's get started!

Open a new canvas 850 x 850 pixels with a white background

Open element 28 copy and paste as a new layer, resize 75%, rotate right 90 
click inside with your magic wand, selections, modify, expand 2, selections, invert
open paper 4 copy and paste as a new layer 
click delete on your keyboard,

Copy and paste your tube as a new layer,
arrange in your frame
erase the bits that hang out of your frame where you don't want them

Now add your elements:
element 9 resize 65% arrange on the bottom left corner
element 18 resize 75% arrange across the bottom of the frame
element 59 resize 60% rotate left 30 arrange between the other two elements 

element 12 arrange below the brooch layer and above the other two at the bottom
element 4 resize 75% duplicate & arrange the duplicate on the right, below the other layers
resize the original 75% again and erase the stem, arrange below the brooch

element 10 resize 45% arrange on the leaves on the bottom right
element 46 resize 35% arrange on top of the two elements on the left
element 30 resize 35% arrange between the flowers on the bottom
element 45 resize 35% arrange on the bottom left


crop and resize
add your copyright and credits as needed
add your text and save
Tuesday, January 6, 2015

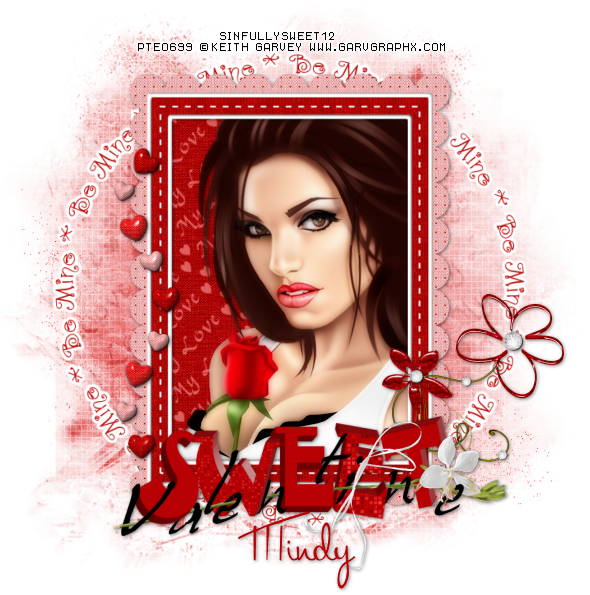
Sweet Valentine


Snaggable versions of this tag are in my Fotki album

For this tutorial you will need the following:

Paint Shop Pro, I am using PSP X7, you should be able to use any version.

Tube of choice, I am using the artwork of Alicia Mujica (Mandy tube)
which you need a license to use.  

Scrap kit of choice. I am using a PTU kit by Mellie Beans called Love Reigns  

Font of choice, I am using: Scriptina

Plugins: No outside plugins


Just remember that my choices of papers and elements is just a suggestion, change it up and make it yours! You don't have to follow mine exactly.

Add a drop shadow of your choosing to tubes & elements throughout. I usually use 1, 1, 50, 5 unless otherwise noted.


Let's get started!

Open a new canvas 850 x 850 pixels with a white background

Open element 19 copy and paste as a new layer, resize 70%
click inside with your magic wand, selections, modify, expand 2, selections, invert
open paper 1 copy and paste as a new layer 
click delete on your keyboard, leave selected

Copy and paste your tube as a new layer, resize by 45%
arrange in your frame
erase the bits that hang out of your frame where you don't want them, deselect

add your elements

element 5 resize 40% arrange bottom center of the frame
element 6 resize 60% arrange behind and right of the cupcake, duplicate & mirror
element 24 resize 55% rotate left 25 arrange below flower on left

element 15 resize 45% arrange to the right of and behind the corset
element 48 resize 60% arrange on the right, above the other flowers, erase the green stems
element 36 resize 55% arrange in front of pink & white heart

element 16 resize 55% arrange behind the pink flowers, duplicate, resize 75%, arrange between the pink flowers and the whitish flowers at the bottom, duplicate & mirror

element 22 resize 45% arrange to the left of and below the cupcake layer, erase the chain
element 47 arrange on left, duplicate & mirror, erase some of the hearts that overlap


crop and resize
add your copyright and credits as needed
add your text and save
Wednesday, December 17, 2014

North Pole Toon


Snaggable versions of this tag in my Fotki album

For this tutorial you will need the following:

Paint Shop Pro, I am using PSP X7, you should be able to use any version.

Tube of choice, I am using the artwork of Pinup Toons which you need a license to use.
This tube is the December 2013 bonus tube that was available with a $10 purchase in that month.
You cannot get it anymore unless CDO does a bonus bonanza which they are doing right now through December 25th, 2014.  

Scrap kit of choice. I am using a kit from Creative Scraps by Crys called Country Christmas 

Font of choice, I am using Scriptina


Plugins: No outside plugins


Just remember that my choices of papers and elements is just a suggestion, change it up and make it yours! You don't have to follow mine exactly.

Add a drop shadow of your choosing to tubes & elements throughout. I usually use 1, 1, 50, 5 unless otherwise noted.


Let's get started!

Open a new canvas 850 x 850 pixels with a white background

open frame 1 copy and paste as a new layer
click inside with your magic wand, selections, modify, expand 2, selections, invert
open paper 7 copy and paste as a new layer 
click delete on your keyboard

Copy and paste your tube as a new layer, 
arrange in your frame
erase the bits that hang out of your frame where you don't want them
then deselect

add your elements:
element 21 arrange on the left between tube and frame layers
element 29 resize 50% arrange in front of tree on left
element 22 resize 50% arrange in front of the tree to the left of the sign
element 27 resize 30% arrange on top of the gift
element 36 resize 45% arrange to the right of the gift, erase the stone path
element 26 resize 65% arrange across bottom of frame, below gingerbread house layer
element 8 arrange behind other layers on the bottom


crop and resize
add your copyright and credits as needed
add your text and save
Sunday, December 7, 2014

Waiting For Christmas


Snaggable versions of this tag in my Fotki album

For this tutorial you will need the following:

Paint Shop Pro, I am using PSP X7, you should be able to use any version.

Tube of choice, I am using the artwork of Misticheskaya (Christine tube) which you need a license to use.  

Scrap kit of choice. I am using a PTU kit by Bella Caribena called A Gift From Lucia  

Font of choice, I am using Script MT Bold


Plugins: no outside plugins


Just remember that my choices of papers and elements is just a suggestion, change it up and make it yours! You don't have to follow mine exactly.

Add a drop shadow of your choosing to tubes & elements throughout. I usually use 1, 1, 50, 5 unless otherwise noted.


Let's get started!

Open a new canvas 850 x 850 pixels with a white background

Copy and paste your tube as a new layer, resize by 35%

add the following elements
element88 arrange behind tube layer
element 4 arrange on the right side of fireplace
element 31 resize 65% arrange in front of fireplace on right
element 97 resize 50% arrangek to the left of the other gifts
element 51 resize 40% arrange in front of tree
element 83 resize 30% arrange in front of tube
element 16 resize 30% arrange above mantel

crop and resize
add your copyright and credits as needed
add your text and save

Wednesday, November 19, 2014

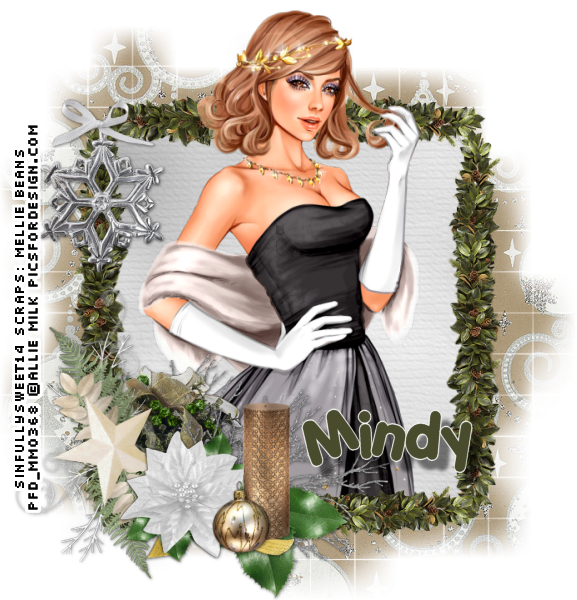
Holly Days


For this tutorial you will need the following:

Paint Shop Pro, I am using PSP X7, you should be able to use any version.

Tube of choice, I am using the artwork of Ellie Milk (Snow Princess Prepaid Project tube) which you need a license to use.  

Scrap kit of choice. I am using a PTU kit called  HollyDays by Mellie Beans  

Font of choice, I am using Porky's

Mask: WSL Mask 84 mask links on right sidebar

Plugins: No outside plugins used
I do use Eye Candy 4000 Gradient Glow on all my copyrights/credits layers
I do this because some forums will make a .png tag show up with a black background and then your
copyright doesn't show. 


Just remember that my choices of papers and elements is just a suggestion, change it up and make it yours! You don't have to follow mine exactly.

Add a drop shadow of your choosing to tubes & elements throughout. I usually use 1, 1, 50, 5 unless otherwise noted.


Let's get started!

Open a new canvas 850 x 850 pixels with a white background

Open element 14 copy and paste as a new layer 
click inside with your magic wand, selections, modify, expand 2, selections, invert
open paper 3 copy and paste as a new layer 
click delete on your keyboard, leave selected

Copy and paste your tube as a new layer, resize by 60%
arrange in your frame
erase the bits that hang out of your frame where you don't want them

add the following elements:
element 27 resize 50% mirror horizontal (just regular mirror on earlier versions of PSP) arrange on the bottom left corner

element 28  resize 50% arrange to the right of element 27
element 13 resize 40% mirror horizontal arrange to the right of element 28
element 6 resize 40% arrange on top left corner

element19  resize 40% arrange on the bottom left, behind the other elements
take your eraser tool and erase the ribbon that sticks way up on the top

element 3 resize 40% mirror horizontal arrange below the other layers on the bottom
duplicate, drag left and up
element 18 resize 25% arrange on the holly leaves
element 11 resize 25% arrange to the left of the candle

apply paper 1 above the white background
apply your mask and merge group
duplicate about 4 times and merge them all together to make it a bit darker

crop and resize
add your copyright and credits as needed
add your text and save

Wednesday, November 5, 2014

Christmas 2014


Snaggable tags for this tag in my Fotki album of Christmas snags

For this tutorial you will need the following:

Paint Shop Pro, I am using PSP X, you should be able to use any version.

Tube of choice, I am using the artwork of Alicia Mujica (Winter 2014 tube) which you need a license to use. 

Scrap kit of choice. I am using a PTU kit by Bella Caribena called Isabelle Xmas

Font of choice, I am using Dear St. Nick

Mask: Vix Big Mask 1

Plugins: No outside plugins used
I do use Eye Candy 4000 Gradient Glow on all my copyrights/credits layers
I do this because some forums will make a .png tag show up with a black background and then your
copyright doesn't show.


Just remember that my choices of papers and elements is just a suggestion, change it up and make it yours! You don't have to follow mine exactly.

Add a drop shadow of your choosing to tubes & elements throughout. I usually use 1, 1, 50, 5 unless otherwise noted.


Let's get started!

Open a new canvas 950 x 950 pixels with a white background

Copy and paste your tube as a new layer, resize by 45%

add the following elements:
element 97 arrange behind tube

element 96 arrange on bottom right, duplicate, mirror, duplicate and drag to center, merge these 3
duplicate & flip, drag down so it's just above the other group, merge together, drag 
below element 97

element 98 arrange on bottom right
element 78 arrange behind and to the left of element 98
element 89 resize 115% arrange behind fence to the left of your tube

element 31 resize 80% arrange in front of tube, duplicate, drag left
element 95 arrange behind the other trees on the right, duplicate, mirror
element 85 arrange behind tube & other elements in the center

element 55 resize 45% arrange in front of the tube
element 8 resize 65% arrange on far right by fence
element 58 resize 35% arrange on left by fence
element 56 resize 35% arrange in front of the other present

element 12 resize 35% arrange on the left
element 11 resize 28% mirror, arrange on left

Copy and paste paper 10 above the white background
apply your mask & merge group

crop and resize
add your copyright and credits as needed
add your text and save
Saturday, October 18, 2014

Go Go Music


For this tutorial you will need the following:

Paint Shop Pro, I am using PSP X, you should be able to use any version.

Tube of choice, I am using the artwork of Keith Garvey (Dottie Go Go tube)
which you need a license to use. 

Scrap kit of choice. I am using a PTU scrap kit, Music, by Schnegge

Font of choice, I am using Mandala Home

Plugins: No outside plugins used
I do use Eye Candy 4000 Gradient Glow on all my copyrights/credits layers
I do this because some forums will make a .png tag show up with a black background and then your
copyright doesn't show.


Just remember that my choices of papers and elements is just a suggestion, change it up and make it yours! You don't have to follow mine exactly.

Add a drop shadow of your choosing to tubes & elements throughout. I usually use 1, 1, 50, 5 unless otherwise noted.


Let's get started!

Open a new canvas 850 x 850 pixels with a white background

open frame 3 copy and paste as a new layer rotate left 90, resize 85%
click inside with your magic wand, make sure you get in the little sections of the ribbon that are inside the frame area
selections, modify, expand 2, selections, invert
open paper 7 copy and paste as a new layer
click delete on your keyboard,
leave selected, open your close up tube, copy and paste as a new layer
arrange in the frame, click delete on your keyboard, and deselect
change the blend mode to Luminance(L) and drop the opacity to 70

Open your main tube, copy and paste as a new layer and arrange on the right side
 
 add the following elements:
 element 9 resize 25% arrange on left bottom corner
 element 8 resize 25% arrange to the right of element 9
element 7 resize 30% arrange to the right of element 8

element 6 resize 20% arrange in front of amp and speaker (elements 8 & 9)
element 11 resize 20% arrange on top right
element 3 resize 40% arrange in front of amp and speaker

element 2 resize 17% arrange so it's over her hand, drop the opacity low enough that you can see her
hand through the tambourine and then erase the part that shows over her hand, then bring the opacity back up to 100. It should look like she's holding it.

element 19 resize 45% arrange above the elements on the left
element 29 resize 32% arrange to the right of element 19
element 17 resize 40% arrange on bottom behind the other elements

element 5 resize 40% arrange at the top, duplicate, resize 75% drag up and right
element 15 resize 75% rotate left 30 arrange at top behind the frame & paper, duplicate, drag down

Copy and paste your tube as a new layer, resize by %
arrange in your frame
erase the bits that hang out of your frame where you don't want them


crop and resize
add your copyright and credits as needed
add your text and save
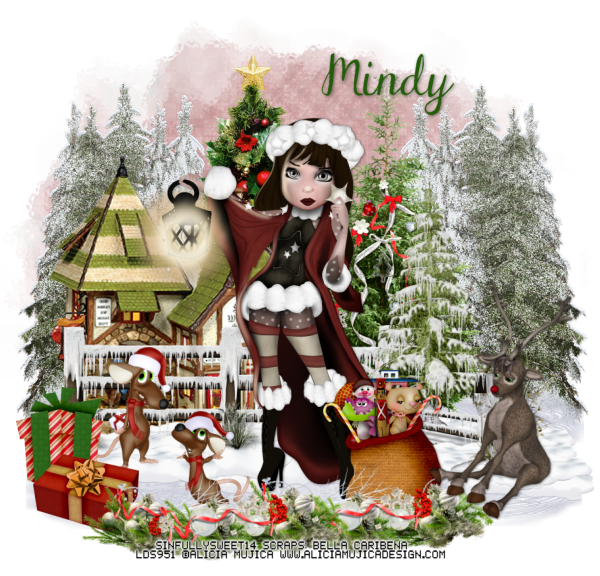
Monday, October 13, 2014

Glorious Autumn


For this tutorial you will need the following:

Paint Shop Pro, I am using PSP X, you should be able to use any version.

Tube of choice, I am using the artwork of Alicia Mujica which you need a license to use. 

Scrap kit of choice. I am using a PTU kit by Mellie Beans called Autumn, Glorious Autumn 

Font of choice, I am using Mademoiselle Camille

Mask of your choice

Plugins: No outside plugins used
I do use Eye Candy 4000 Gradient Glow on all my copyrights/credits layers
I do this because some forums will make a .png tag show up with a black background and then your
copyright doesn't show.


Just remember that my choices of papers and elements is just a suggestion, change it up and make it yours! You don't have to follow mine exactly.

Add a drop shadow of your choosing to tubes & elements throughout. I usually use 1, 1, 50, 5 unless otherwise noted.


Let's get started!

Open a new canvas 850 x 850 pixels with a white background

open element 21 copy and paste as a new layer
click inside with your magic wand, selections, modify, expand 2, selections, invert
open paper 7 copy and paste as a new layer
click delete on your keyboard and deselect

Copy and paste your tube as a new layer, resize 45% arrange so she's sitting on the bottom of the frame
 
 now add your elements:
element 7 resize 65% arrange on bottom right below tube layer, duplicate & mirror
element 20 resize 45% arrange on bottom right
element 2 resize 25% arrange behind basket on right

element 3 resize 40% arrange to the left of the pink flower
 element 23 resize 25% & 90% arrange in front of basket
element 22 rotate right 90 and mirror, arrange under other elements on right side
element 4 resize 35% arrange behind tube on left side

duplicate the two flowers and the leaves that are on the right side, mirror them and arrange on the left

element 7 resize 75% arrange across center of tag, duplicate & drag down & to right

add paper 3 above the white background
apply your mask and merge group

crop and resize
add your copyright and credits as needed
add your text and save
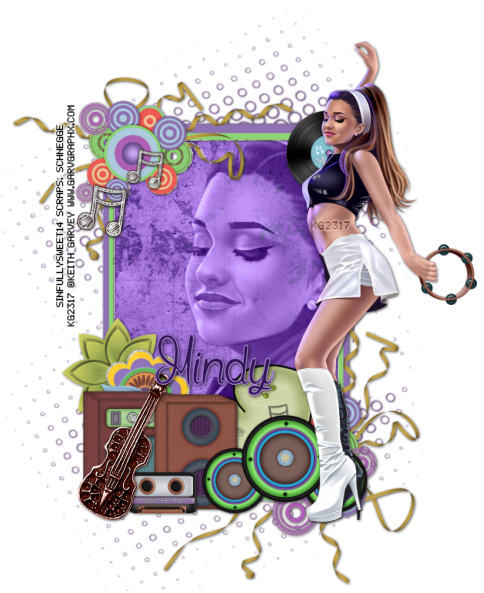
Wednesday, September 17, 2014

Lazy Autumn Day


For this tutorial you will need the following:

Paint Shop Pro, I am using PSP X, you should be able to use any version.

Tube of choice, I am using the artwork of Alicia Mujica (Drusila tube) which you need a license to use. 

Scrap kit of choice. I am using a PTU kit, Harvest Nights by Scrappin With Lil Ole Me

Font of choice, I am using Anysome

Mask of your choice

Plugins: no outside plugins used
I do use Eye Candy 4000 Gradient Glow on all my copyrights/credits layers
I do this because some forums will make a .png tag show up with a black background and then your
copyright doesn't show.


Just remember that my choices of papers and elements is just a suggestion, change it up and make it yours! You don't have to follow mine exactly.

Add a drop shadow of your choosing to tubes & elements throughout. I usually use 1, 1, 50, 5 unless otherwise noted.


Let's get started!

Open a new canvas 950 x 850 pixels with a white background

open element 61 copy and paste as a new layer rotate left 90 resize 80%
click inside with your magic wand, selections, modify, expand 2, selections, invert
open paper 22 copy and paste as a new layer
click delete on your keyboard, leave selected
open your tube, copy & paste as a new layer, resize 45%
arrange in frame & erase the bits that hang out of your frame where you don't want them

add the following elements

element 6 resize  25% arrange on bottom left, duplicate several times until you have enough to
go across the bottom and arrange how you like

element 4 resize 25% duplicate several times & arrange between acorns

element 11 resize  43% arrange on far right
element 12 resize  25% arrange left of the apple bushel
element 16 arrange on right, just above the frame layer
element 14 resize  25% , duplicate 3 times arrange on the bottom in between the other leaves
element 55 resize  25% rotate left 25 arrange in the leaves

add paper 8 above the white background
apply your mask, merge group

crop and resize
add your copyright and credits as needed
add your text and save

Sunday, September 7, 2014

Fiona Fae


For this tutorial you will need the following:

Paint Shop Pro, I am using PSP X, you should be able to use any version.

Tube of choice, I am using the artwork of Ishika Chowdhury (Fiona tube)
which you need a license to use. 

Scrap kit of choice. I am using a PTU kit Tareena Norella by Schnegge Scraps

Font of choice, I am using Dear Joe

Mask: DVB80 by Designs by Vaybs

Plugins: No outside plugins
I do use Eye Candy 4000 Gradient Glow on all my copyrights/credits layers
I do this because some forums will make a .png tag show up with a black background and then your
copyright doesn't show.


Just remember that my choices of papers and elements is just a suggestion, change it up and make it yours! You don't have to follow mine exactly.

Add a drop shadow of your choosing to tubes & elements throughout. I usually use 1, 1, 50, 5 unless otherwise noted.


Let's get started!

Open a new canvas 850 x 850 pixels with a white background
open frame 4 copy and paste as a new layer resize 90%
click inside with your magic wand, selections, modify, expand 2, selections, invert
open paper 7 copy and paste as a new layer
click delete on your keyboard, deselect

copy and paste your tube as a new layer, resize by 65% in front of frame
 
 add the following elements
 element 1 arrange in front of tube
element 34 resize  55% arrange on bottom right
element 31 resize  55% arrange on bottom left
element 30 resize  35% arrange in front of rock on bottom left
element 32 resize  55% arrange on bottom left
element 7 resize  55% arrange on top right, duplicate, mirror
arrange on the left, erase the two biggest butterflies

 copy and paste paper 6 above the white background
apply your mask, merge group

crop and resize
add your copyright and credits as needed
add your text and save

Tuesday, August 26, 2014

Loves Zombies


For this tutorial you will need the following:

Paint Shop Pro, I am using PSP X, you should be able to use any version.

Tube of choice, I am using the artwork of Wendy Gerber (Zombie Chick tube) 
which you need a license to use. 

Scrap kit of choice. I am using a PTU kit, Cute But Deadly 1 by Toxic Desirez

Font of choice, I am using Rat Infested Mailbox

Mask: VixMaskHalloween0904 by Vix PSP
I don't see this particular mask on her blog anymore but she has a lot of 
Halloween masks here

Plugins: No outside plugins used
I do use Eye Candy 4000 Gradient Glow on all my copyrights/credits layers
I do this because some forums will make a .png tag show up with a black background and then your
copyright doesn't show.


Just remember that my choices of papers and elements is just a suggestion, change it up and make it yours! You don't have to follow mine exactly.

Add a drop shadow of your choosing to tubes & elements throughout. I usually use 1, 1, 50, 5 unless otherwise noted.


Let's get started!

Open a new canvas 850 x 850 pixels with a white background
Copy and paste your tube as a new layer, resize by 75%


 add the following elements
city arrange behind your tube
canned food resize  55% arrange on bottom right
virus resize  35% arrange on bottom left
brain resize  35% arrange behind & right of brain
gas mask resize  50% rotate right 30 arrange behind canned food
Skulls & roses resize  50% arrange right of brain
 cuppy resize  35% arrange left of canned food
gun resize  35% arrange in front of brain & virus
hand resize  40% arrange above brain & virus
bloody eye resize  25% arrange by gun
blood logo (biohazard symbol) resize 25% arrange on tube

add a new raster layer above your white background
flood fill with #990408
apply your mask and merge group

crop and resize
add your copyright and credits as needed
add your text and save
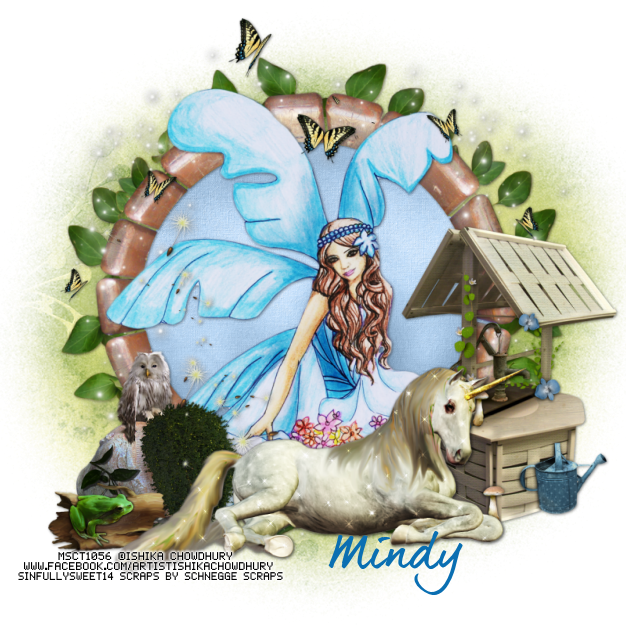
Friday, August 15, 2014

Whispers


For this tutorial you will need the following:

Paint Shop Pro, I am using PSP X, you should be able to use any version.

Tube of choice, I am using the artwork of Gary Rudisill (Whisper tube) which you need a license to use. 

Scrap kit of choice. I am using a PTU kit, Just Breathe by Honored Scraps. Right now it is a kit
that you can get free with a $5 purchase at Mystical Scraps

Font of choice, I am using Another Shabby

Plugins: Visman Extravaganza - Transmission
I do use Eye Candy 4000 Gradient Glow on all my copyrights/credits layers
I do this because some forums will make a .png tag show up with a black background and then your
copyright doesn't show.


Just remember that my choices of papers and elements is just a suggestion, change it up and make it yours! You don't have to follow mine exactly.

Add a drop shadow of your choosing to tubes & elements throughout. I usually use 1, 1, 50, 5 unless otherwise noted.


Let's get started!

Open a new canvas 850 x 850 pixels with a white background
open element 42 copy and paste as a new layer resize 135%
click inside with your magic wand, selections, modify, expand 2, selections, invert
open paper 10  copy and paste as a new layer
click delete on your keyboard
leave selected

copy and paste your tube as a new layer, resize by 60%
arrange in your frame
erase the bits that hang out of your frame where you don't want them

merge the frame & background layers together
duplicate & on the duplicate gaussian blur at 20
apply VM Extravaganza Transmission with the following settings top to bottom
4
15
45
resize it 105% and drop the opacity to 55
 
 Now you can add your elements:
 element 23 resize  45% arrange on the bottom a little left of the point in the bottom of the heart frame
element 56 arrange on the left side of the clock
element 36 resize  55% arrange to the left of, and behind the violin
duplicate, drag to the right side of the violin
element 37 arrange on the bottom, duplicate and mirror
I erased some of the flowers because where they overlapped there were too many
element 15 resize  55% rotate right 30 arrange behind & on the right side of the clock
element 28 resize  40% rotate right 15 arrange in front of the clock & heart

arrange in your frame
erase the bits that hang out of your frame where you don't want them

crop and resize
add your copyright and credits as needed
add your text and save

Sunday, August 10, 2014

Beach Day


For this tutorial you will need the following:

Paint Shop Pro, I am using PSP X, you should be able to use any version.

Tube of choice, I am using the artwork of Ismael Rac (2014 Sexy Daisy tube) 
which you need a license to use. 

Scrap kit of choice. I am using a PTU kit by Black Widow Creations called Sand in Toes

Font of choice, I am using Acryle Script

Mask of your choice

Plugins: no outside plugins
I do use Eye Candy 4000 Gradient Glow on all my copyrights/credits layers
I do this because some forums will make a .png tag show up with a black background and then your
copyright doesn't show.


Just remember that my choices of papers and elements is just a suggestion, change it up and make it yours! You don't have to follow mine exactly.

Add a drop shadow of your choosing to tubes & elements throughout. I usually use 1, 1, 50, 5 unless otherwise noted.


Let's get started!

Open a new canvas 850 x 850 pixels with a white background

open  copy and paste as a new layer rotate right 90
take your freehand selection tool set on rectangle and draw a rectangle over the center third
of the rectangle, click delete on your keyboard.
selections, select none
now take the selection tool and select around the top section,
edit, cut, edit, paste as a new layer, deselect, now drag the two sections together
so it makes a rectangle, then merge them together
click inside with your magic wand, expand by 2
make a new layer under the frame
open paper 6 make sure you are on the blank layer under the frame, paste into selection
Copy and paste your tube as a new layer, resize by 60%
arrange in your frame
erase the bits that hang out of your frame where you don't want them

Now add your elements:
element 1 arrange on bottom of frame, erase anything outside the frame
element 39 resize  70% arrange on bottom right corner
element 24 resize  45% arrange on bottom right
element 20 resize  75% arrange to the right of the birdhouse
element 3 resize  15% arrange to the right of the birdhouse
element 30 resize  60% arrange on right
element 37 resize  40% arrange to the left of the birdhouse

add paper 9 above the white background, 
apply your mask, merge group

crop and resize
add your copyright and credits as needed
add your text and save

Tuesday, July 22, 2014

Sorbet Dreams


For this tutorial you will need the following:

Paint Shop Pro, I am using PSP X, you should be able to use any version.

Tube of choice, I am using the artwork of Alehandra Vanhek (Dolly tube) which you need a license to use. 

Scrap kit of choice. I am using a PTU kit, Sorbet Dreams by Scrappin With Lil Ole Me

Font of choice, I am using Aligot de Mirabelle

Mask: WSL84, masks on are the right sidebar part way down the page

Plugins: No outside plugins
I do use Eye Candy 4000 Gradient Glow on all my copyrights/credits layers
I do this because some forums will make a .png tag show up with a black background and then your
copyright doesn't show.


Just remember that my choices of papers and elements is just a suggestion, change it up and make it yours! You don't have to follow mine exactly.

Add a drop shadow of your choosing to tubes & elements throughout. I usually use 1, 1, 50, 5 unless otherwise noted.


Let's get started!

Open a new canvas 850 x 850 pixels with a white background

open element 107 copy and paste as a new layer
click inside with your magic wand, selections, modify, expand 2, selections, invert
open paper 16 copy and paste as a new layer
click delete on your keyboardCopy and paste your tube as a new layer, resize by 55%
arrange in your frame
erase the bits that hang out of your frame where you don't want them

 Add the following elements:
element 26 resize  45% duplicate & mirror arrange one on the bottom in the center, the other on the right side up a little way from the bottom

element 43 resize  40% arrange at the bottom of the set of flowers on the right side

element 72 resize  40% arrange above & behind flowers on the right side
duplicate, resize 85%, mirror, arrange between apples and flowers on the bottom center]

element 47 resize  40% arrange below apples

element 33 resize  55% mirror arrange between layers so it shows over the apples and out beyond the flowers in the center bottom

element 30 resize  65% arrange between flower layers on the right side, duplicate, mirror, flip, resize 75%
arrange between the flower and fruits on the bottom further to the left

element 87 resize  40% arrange on left side under the flowers & vine
element 88 resize  30% arrange in front of the flowers on the bottom center area
element 110 resize  20% arrange over the apple box
element 13 resize  25% arrange over the top of the flower on the right side at the top

click on one of the flower clusters on the right side, duplicate & mirror, arrange
so it's behind the apple basket

add paper 8 above the white background
apply your mask and merge group


crop and resize
add your copyright and credits as needed
add your text and save

Tuesday, July 15, 2014

Toxic Apple


For this tutorial you will need the following:

Paint Shop Pro, I am using PSP X, you should be able to use any version.

Tube of choice, I am using the artwork of Tony Tzanoukakis (Snow White tube) which you need a license to use. 

Scrap kit of choice. I am using Toxic Apple a PTU kit by Toxic Desirez

Font of choice, I am using Into The Wild

Mask: dmsk0670 which I can no longer find links to, if you don't have 
it just find another similar to it

Plugins: No outside plugins used
I do use Eye Candy 4000 Gradient Glow on all my copyrights/credits layers
I do this because some forums will make a .png tag show up with a black background and then your
copyright doesn't show.


Just remember that my choices of papers and elements is just a suggestion, change it up and make it yours! You don't have to follow mine exactly.

Add a drop shadow of your choosing to tubes & elements throughout. I usually use 1, 1, 50, 5 unless otherwise noted.


Let's get started!

Open a new canvas 850 x 850 pixels with a white background

Open image 3 in your scrap kit, shift D to duplicate & close the original
promote background layer by right clicking on it in your layer palette and clicking promote background layer in the pop up box
Apply your mask, then merge group, copy and paste on your tag canvas, resize 85%
Add the following to your tag
castle resize  85% arrange so it looks like the path on the mask layer is going up to the castle door

Copy and paste your tube as a new layer, arrange on the left side of the castle

cauldron resize  35% arrange on the right side of the castle
hag resize  45% arrange behind and to the right of the cauldron
tree resize  60% mirror & arrange to the left of and behind tube
grass resize  60% arrange in front of cauldron
bunny resize  25% arrange in front of tree
apple resize  15% arrange by snow white's foot
shrooms resize  15% arrange in front of the skulls in front of the cauldron
shroom resize  15% arrange at the base of the tree


crop and resize
add your copyright and credits as needed
add your text and save

Sunday, July 6, 2014

Buzzy


For this tutorial you will need the following:

Paint Shop Pro, I am using PSP X, you should be able to use any version.

Tube of choice, I am using the artwork of Tezza's Dezignz (Beatrice tube) which you need a license to use. 

Scrap kit of choice. I am using a PTU kit by TLP Designz called A Splash of Yellow  

Template 578 by Millie's PSP Madness

Font of choice, I am using Blissful Thinking

Mask: WSL Mask 84 Links to masks are on the right sidebar

Plugins: No outside plugins
I do use Eye Candy 4000 Gradient Glow on all my copyrights/credits layers
I do this because some forums will make a .png tag show up with a black background and then your
copyright doesn't show.


Just remember that my choices of papers and elements is just a suggestion, change it up and make it yours! You don't have to follow mine exactly.

Add a drop shadow of your choosing to tubes & elements throughout. I usually use 1, 1, 50, 5 unless otherwise noted.


Open your template, shift D to duplicate and close the original
Delete the following layers: cr

Change the canvas size to 700 x 700

Fill the layers with papers, to do this make sure the layer you want to fill has been clicked on in your layer palette.
Click inside the shape with your magic wand, selections, modify, invert, open your paper, copy and paste as a new layer,
click delete on your keyboard.
Delete the original template layer

So I used the following for each layer

layer 1 use paper 3
layer 2 use paper 3
layer 3 use paper 8
layer 4 use paper 10
layer 5 use paper 9 add noise, random, monochrome, 50
layer 6 use paper 4
layer 7 use paper 5
layer 8 use paper 4
 
Copy and paste your tube as a new layer, resize by 90%


Add the following elements:
bow 4 resize  35% flip, mirror arrange on the right at the bottom of the rectangle
clip 2 resize  45% rotate left 45 arrange on top left
tag 3 resize  45% arrange where the circle and rectangle meet on the right

Add a new raster layer above the white background
flood fill with #eed82d and apply your mask


crop and resize
add your copyright and credits as needed
add your text and save

Wednesday, June 18, 2014

In the Woods


For this tutorial you will need the following:

Paint Shop Pro, I am using PSP X, you should be able to use any version.

Tube of choice, I am using the artwork of Wendy Gerber (Legend) which you need a license to use. 

Scrap kit of choice. I am using a PTU kit called Where the Fae Play by MellieBeans

Font of choice, I am using Silky Written

Mask of your choice

Plugins: No outside plugins
I do use Eye Candy 4000 Gradient Glow on all my copyrights/credits layers
I do this because some forums will make a .png tag show up with a black background and then your
copyright doesn't show.


Just remember that my choices of papers and elements is just a suggestion, change it up and make it yours! You don't have to follow mine exactly.

Add a drop shadow of your choosing to tubes & elements throughout. I usually use 1, 1, 50, 5 unless otherwise noted.


Let's get started!

Open a new canvas 850 x 850 pixels with a white background
add the following
element 43 resize  80% duplicate twice and arrange how you like it
element 38 resize  75% arrange on the left side, duplicate & mirror

Copy and paste your tube as a new layer, resize by 75%

element 4 resize  20% arrange on the left, in the grass
element 48 resize  15% arrange in front of the blue flowery thing on the left
element 10 resize  15% mirror, arrange in front of the leaves
element 20 resize  15% arrange at the base of the tree, duplicate, arrange at the base of the other tree
element 5 resize  15% arrange by blue flower
element 3 resize  15% arrange above the flowers at the bottom
element 29 arrange just above the grass layer, drop opacity to 80

add paper 2 above the white background
apply your mask

crop and resize
add your copyright and credits as needed
add your text and save

Sunday, June 8, 2014

Summer Wedding


For this tutorial you will need the following:

Paint Shop Pro, I am using PSP X, you should be able to use any version.

Tube of choice, I am using the artwork of Kreative Graphics (Romance) which you need a license to use. 

Scrap kit of choice. I am using a PTU kit, Secret Garden by Jackie's Jewels

Font of choice, I am using Black Olives

Mask: Vix Big Mask 1

Plugins: No outside plugins used
I do use Eye Candy 4000 Gradient Glow on all my copyrights/credits layers
I do this because some forums will make a .png tag show up with a black background and then your
copyright doesn't show.


Just remember that my choices of papers and elements is just a suggestion, change it up and make it yours! You don't have to follow mine exactly.

Add a drop shadow of your choosing to tubes & elements throughout. I usually use 1, 1, 50, 5 unless otherwise noted.


Let's get started!

Open a new canvas 1000 x 1000 pixels with a white background

Open the following and copy and paste as a new layer
element 44 resize  80% arrange just above the center
element 57 resize  80% arrange on the right of the trellis, duplicate & mirror
element 84 arrange so it looks like it's going under the trellis in the center

element 98 recolor by changing the hue to 60 saturation to 161
arrange it behind the trellis and fence layers
duplicate it several times and arrange it around so it looks like the area is covered in grass
I mirrored some and flipped some to make it fit together better.
Once your done merge all the grassy layers together, except the one behind the fence

Copy and paste your tube as a new layer, resize by 65% arrange on the left side of trellis

element 29 arrange on far right, in front of fence
element 66 arrange on left, duplicate & drag to the right
element 50 resize  25%  duplicate 3 times and arrange on left
element 31 resize  65% arrange on left
element 47 resize 45% arrange by trees on right
element 58 resize  45% arrange by trellis on left side, duplicate, arrange on far right side

Add paper 15 above the white background
apply your mask
resize 125%

crop and resize
add your copyright and credits as needed
add your text and save

Wednesday, June 4, 2014

Beach Bum


For this tutorial you will need the following:

Paint Shop Pro, I am using PSP X, you should be able to use any version.

Tube of choice, I am using the artwork of Ismael Rac (Summer Fun Girl) which you need a license to use. 

Scrap kit of choice. I am using  a PTU kit, Sand Castles by Scrappin With Lil Ole Me

Font of choice, I am using Black Olives

Mask: Gems Mask 172

Plugins: No outside plugins
I do use Eye Candy 4000 Gradient Glow on all my copyrights/credits layers
I do this because some forums will make a .png tag show up with a black background and then your
copyright doesn't show.


Just remember that my choices of papers and elements is just a suggestion, change it up and make it yours! You don't have to follow mine exactly.

Add a drop shadow of your choosing to tubes & elements throughout. I usually use 1, 1, 50, 5 unless otherwise noted.


Let's get started!

Open a new canvas 850 x 850 pixels with a white background

open element 90 copy and paste as a new layer resize 85%
selections, select all, float defloat,
open paper 18 copy and paste as a new layer
click delete on your keyboard, deselect and delete the frame layer

Now click inside the new frame, selections, modify, expand 2
open paper 10 copy and paste as a new layer
click delete on your keyboard,

 Copy and paste your tube as a new layer, resize by 65%
arrange in your frame
erase the bits that hang out of your frame where you don't want them

 Now we can add our elements
 element 1 resize  55% arrange on bottom right
element 19 resize  55% arrange behind element 1
element 20 resize  35% arrange on bottom right

element 21 arrange on right, between the element 1 and the lighthouse layers
duplicate, resize 45% arrange just below the boat layer

element 37 arrange just above the frame layer at the bottom of the tag
element 8 resize  25% arrange on bottom left
element 15 resize  25% arrange between frame and clam shell on left
element 94 resize  25% arrange between clam shell and boat
element 16 resize  45% arrange just above element 1 layer on right


crop and resize
add your copyright and credits as needed
add your text and save