Pages

Showing posts with label FTU tut. Show all posts

Thursday, February 5, 2015

Mystic Moon


Snaggable versions of this tag in my Fotki album

For this tutorial you will need the following:

Paint Shop Pro, I am using PSP X7, you should be able to use any version.

Tube of choice, I am using the artwork of Charmaine Flannery (Mystic Moon tube)
which you need a license to use.  

Font of choice, I am using Snap ITC

Plugins: Visman Extravaganza - Transmission
Xero - Fritillary


Just remember that my choices of papers and elements is just a suggestion, change it up and make it yours! You don't have to follow mine exactly.

Add a drop shadow of your choosing to tubes & elements throughout. I usually use 1, 1, 50, 5 unless otherwise noted.


Let's get started!

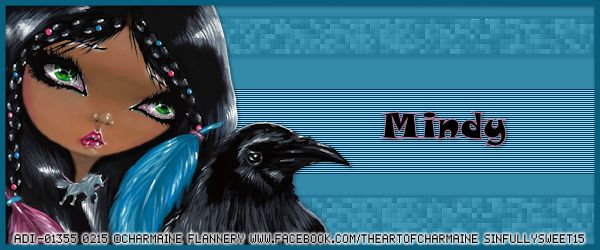
Banner Tag

Open a new canvas 600 x 250 pixels with a white background

Copy and paste your tube as a new layer, resize by 38%

Add a new raster layer below the tube, flood fill with #338aa9
Take your selection tool set on rectangle, draw out a wide rectangle covering about 1/3 of the center of the canvas

Apply Visman Extravaganza - Transmission with the following settings
Line Width = 6
Offset = 191
Contrast = 85

Deselect

Take your selection tool set on rectangle again, and select the middle 1/3 of the top section

Apply Visman Extravaganza - Fritillary with the following settings:
Granularity = 5
Aggression = 30
Tessilation = 15
Variation = 45

promote to layer then deselect
then  duplicate

move one to the center of the bottom 1/3 of the tag

Merge these 2 layers together, take your magic wand, click outside of the rectangles with the fritillary
then selections, invert, modify, expand 3 
add a new raster layer below it, then flood fill with #075e7d
then merge these two layers together, add a drop shadow

Once I got to this part and tried to drop opacity, I noticed the top part didn't get lighter, so I hid the layers and realized that the fritillary was still on the background layer at the top, so I hid the tube and the fritillary layers and erased it at the top, then clicked on it with my magic wand, expanded by 2, and flood filled it with #338aa9

Then, unhide the tube and the fritillary layers, and change the opacity of the fritillary layer to 35

Now make sure you are on the white background layer, 
take your crop tool and crop the tag with the tool set on snap crop rectangle to layer opaque
selections, select all, modify, set selection borders, set at 5
make a new raster layer at the top and flood fill with #338aa9
then deselect

add your copyright and credits as needed
add your text and save


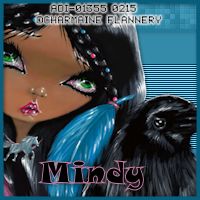
Avatar

Open a new canvas 200 x 200 or whatever size you need for your forum

Copy and paste the background from the banner
copy and paste the tube from the banner
crop the same way you did for the banner

make a border the same way you did for the banner except change the width to 3

add your copyright and credits as needed
add your text and save

Friday, November 21, 2014

Boxed In


For this tutorial you will need the following:

Paint Shop Pro, I am using PSP X7, you should be able to use any version.

Tube of choice, I am using the artwork of Terri Lynne Albright which you need a license to use.  

Font of choice, I am using Playbill

Plugins: No outside plugins used


Let's get started!

Open a new canvas 250 x 500 pixels with a white background

Copy and paste your tube into the canvas resize 80% arrange in frame
Pick a medium to light color from your tube add a new layer above the white background and flood fill with that color. I used #cd90f6

Make sure you are on the white background layer
make your crop tool active, then on the top click on the snap to layer opaque
double click on your tag, this will crop everything so it's no larger than your white background

Duplicate your tube, hide the top layer
Make sure you are on the bottom layer, effects, photo effects, vignette
Click your mouse on the top left corner, and drag it all the way to the bottom right
then use the following settings:
dark/light: -82
blur: 20
diffuse glow: 35
feather edge: 50
add a drop shadow to this layer

unhide the top layer, adjust blur, gaussian 3, change blend mode to soft light

make sure you're on the colored background, apply texture effects, textures, small dimples with the following settings:
size percent: 280
smoothness: 0
depth: 4
ambience 0
shininess: 0
color: #a541d7
angle: 315
intensity:
83
elevation: 59

set your foreground color to #52255c
make sure you're on the white background
selections, select all, modify, set selection borders,set it at 5
make a new raster layer above the tubes, flood fill with #52255c
add noise with the following settings: random, monochrome checked, 50

If you want to make a matching avatar, make a new canvas whatever size you want and just
copy and paste the layers into the avatar, then resize your tube to whatever fits it how you want, then
do the frame the same way you did for the tag. I usually make an avatar frame a little smaller, like 2 or 3 pixels


add your copyright and credits as needed
add your text and save
Monday, November 10, 2014

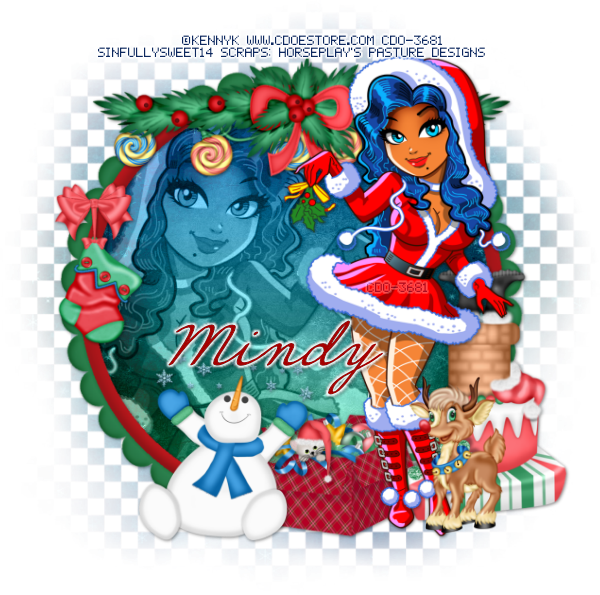
Christmas Cheer


Snaggable versions of this tag available in my Fotki album 

For this tutorial you will need the following:

Paint Shop Pro, I am using PSP X, you should be able to use any version.

Tube of choice, I am using the artwork of KennyK-Individual Tube-18-2 which you need a license to use. 
You can get it at CDO.

Scrap kit of choice. I am using a FTU kit that was previously PTU by Horesplay's Pasture Designs called Christmas Cheer 

Font of choice, I am using Hirondelle

Mask: DBV Mask 107

Plugins: No outside plugins used
I do use Eye Candy 4000 Gradient Glow on all my copyrights/credits layers
I do this because some forums will make a .png tag show up with a black background and then your
copyright doesn't show.


Just remember that my choices of papers and elements is just a suggestion, change it up and make it yours! You don't have to follow mine exactly.

Add a drop shadow of your choosing to tubes & elements throughout. I usually use 1, 1, 50, 5 unless otherwise noted.


Let's get started!

Open a new canvas 850 x 850 pixels with a white background

open element 21  copy and paste as a new layer resize 75%
click inside with your magic wand, selections, modify, expand 2,
add a new raster layer below the frame layer, make sure you are on this layer
copy and paste paper 4 into selection, selections, invert

mirror your close up tube, copy and paste as a new layer above the paper, 
arrange in the frame, click delete on your keyboard
change the blend mode to Luminance(L) drop the opacity to 60

Copy and paste your main tube as a new layer, arrange on the right

Add the following elements:
element 58 resize 75% arrange across top of frame
element 57 arrange under element 58, erase what sticks out beyond the sides of ele58
element 22 resize 65% arrange behind & to the right of the tube
element 17 resize 45% arrange to the left of the tube
element 15 resize 45% arrange on left side of frame
element 6 resize 45% arrange to the left of the gift box
element 11 resize 45% arrange in front of tube on right

copy and paste paper 7 as a new layer above the white background
apply your mask, merge group, resize 80%

crop and resize
add your copyright and credits as needed
add your text and save
Sunday, October 12, 2014

Witch Hour


For this tutorial you will need the following:

Paint Shop Pro, I am using PSP X, you should be able to use any version.

Tube of choice, I am using the artwork of Alicia Mujica (Selina tube) which you need a license to use. 

Font of choice, I am using Reaching For Heaven

Plugins: MuRa Meister Copies, Xenofex 1.1 Shower Door, Eye Candy 4000 Shadow Lab

I do use Eye Candy 4000 Gradient Glow on all my copyrights/credits layers
I do this because some forums will make a .png tag show up with a black background and then your
copyright doesn't show.


Just remember that my choices of papers and elements is just a suggestion, change it up and make it yours! You don't have to follow mine exactly.

Add a drop shadow of your choosing to tubes & elements throughout. I usually use 1, 1, 50, 5 unless otherwise noted.


Let's get started!

Banner

Open a  new canvas 600 x 250 pixels with a white background

Open your tube, copy and paste as a new layer, arrange so her face is in the canvas, then crop the tag by clicking on the white background, get your crop tool active, then at the top where it says snap crop rectangle to, click on "layer opaque, then double click on the canvas

Apply MuRa Meister Copies - wallpaper rotate with the default settings

adjust blur, motion blur with the following settings:
angle 62, strength 100
then
angle 141, strength 100

 
Apply Xenofex 1.1 Shower Door with the following settings:
Setting Fuzzed Out, Dot Size 4, Random Seed 60

 Copy and paste your tube as a new layer, drag it to the right & arrange it, change the blend mode to Luminance(L) and drop the opacity to about 38

Paste your tube as a new layer again, resize 45% arrange it on the left
apply Alien Skin Eye Candy 4000 Shadow Lab with the following settings:
Center offset direction: 16
Center offset distance: 28.80
Overall opacity: 100
Overall blur (pixels) 20.16
Perspective Blur: 0
Color: Black
Draw only outside selection checked

Make sure you're on the white background layer and crop the tag again like we did earlier
 
 Still on the white background layer, selections, select all, modify, set selection borders, set at 5
make a new layer at the very top, flood fill with #a10999

 add noise, monochrome, uniform, set at 55

delete the white background layer
 
add your copyright and credits as needed
add your text and save


Avatar

Open a new canvas 200 x 200 or whatever size you need for your forum

copy and paste the background from your banner, arrange in the canvas how you want it

copy and paste the small tube from your banner to your avatar, arrange how you want it.

crop it as we did with the banner

make a frame the same way we did with the banner, except on set selection borders, set it at 3

delete the white background layer

add your copyright and credits as needed
add your text and save
Monday, June 30, 2014

USA Nurse


For this tutorial you will need the following:

Paint Shop Pro, I am using PSP X, you should be able to use any version.

Tube of choice, I am using the artwork of Ninaste at Beehive Studio (USA Pride tube) which you need a license to use.  This tube is VERY versitile, it comes with color choices for hair, a USA flag layer, a Canadian flag layer, a nurse layer, a USA Navy and USA soldier (camouflage) layers, so it will work well for a variety of tags.

Scrap kit of choice. I am using a FTU kit by Wicked Princess Scraps called Adam's Heart

Font of choice, I am using Coughy Machine

Mask: Vix big mask 18

Plugins: No outside plugins used
I do use Eye Candy 4000 Gradient Glow on all my copyrights/credits layers
I do this because some forums will make a .png tag show up with a black background and then your
copyright doesn't show.


Just remember that my choices of papers and elements is just a suggestion, change it up and make it yours! You don't have to follow mine exactly.

Add a drop shadow of your choosing to tubes & elements throughout. I usually use 1, 1, 50, 5 unless otherwise noted.


Let's get started!

Open a new canvas 850 x 850 pixels with a white background

Add the following elements to your canvas
Hospital resize  75% arrange on the right, just up above the center of the canvas
ambulance resize  75% arrange on the left in front of hospital
bed resize  60% mirror arrange on right, in front of hospital
Copy and paste your tube as a new layer, resize by 55% arrange in the center
clipboard resize  65% rotate left 20 arrange behind ambulance
heart 1 resize  65% arrange behind clipboard and hospital
wheelchair resize  65% arrange on the left in front of the ambulance
IV resize  55% arrange to the right of the wheelchair
jar resize  65% arrange in front of wheelchair and IV
pill pack resize  35% arrange to the left of the jar
syringe resize  35% rotate left 90 arrange in front of jar & pill pack
kid 8 resize  40% arrange at the end of the bed
bear resize  40% arrange at the end of the bed
pill bottle resize  30% arrange between bear & kid 8
love pills resize  30%  rotate left 20 arrange to the left of the other pill bottle

Set your background on your color palette to #b40000 and foreground to white
set the gradient to linear angle 45 repeats 4
add a new raster layer above the white background, flood fill with the gradient
add your mask

crop and resize
add your copyright and credits as needed
add your text and save

Wednesday, January 8, 2014

Chloe


For this tutorial you will need the following:

Paint Shop Pro, I am using PSP X, you should be able to use any version.

Tube of choice, I am using the artwork of Alicia Mujica which you need a license to use.  
This little cutie is Chloe and she is part of a 3 pack limited edition set.

Scrap kit of choice. I am using a FTU kit by PolkaDot Scraps called Lucious 

Font of choice, I am using Freeze!


Plugins: Alien Skin Eye Candy 4000 Gradient Glow
I do use Eye Candy 4000 Gradient Glow on all my copyrights/credits layers
I do this because some forums will make a .png tag show up with a black background and then your
copyright doesn't show. 


Just remember that my choices of papers and elements is just a suggestion, change it up and make it yours! You don't have to follow mine exactly.

Add a drop shadow of your choosing to tubes & elements throughout. I usually use 1, 1, 50, 5 unless otherwise noted.


Let's get started!

Open a new canvas 850 x 850 pixels with a white background

open fram 4 copy and paste as a new layer 
click inside with your magic wand, selections, modify, expand 2, selections, invert
open paper 9 copy and paste as a new layer click delete on your keyboard

Copy & paste your tube as a new layer resize 40% arrange on left of frame

Copy and paste heart 1 as a new layer
click inside with your magic wand, selections, modify, expand 2, selections, invert
open paper 8 copy and paste as a new layer click delete on your keyboard

Mirror your tube, copy and paste as a new layer, resize 35% arrange in the frame, 
click delete on your keyboard & deselect, merge heart frame, tube & background paper together
resize 55% rotate right by 30
add drop shadow of 1, 1, 50, 5 and -1, -1, 50 and 5

arrange frame about half way up the right side of the circle frame

Add the following elements
flower 3 resize 55% arrange so the knot on the bow is over the bottom center of heart frame duplicate
drag below the heart frame layer and up so it's showing above & behind it
gems resize 60% arrange on bottom left side of heart frame
be mine word art arrange across bottom of frame add gradient glow of 5 color #a40000
button 3 resize 40% arrange on left below tube layer
 bow 2 resize 35% arrange on top center of circle frame
 cherry charm resize 35%  arrange so stem is in center of bow
Copy and paste frame 1 above the white background

Copy & paste paper 2 above the white background
apply your mask

crop and resize
add your copyright and credits as needed
add your text and save

Thursday, July 4, 2013

Lovely


For this tutorial you will need the following:

Paint Shop Pro, I am using PSP X, you should be able to use any version.

Tube of choice, I am using the artwork of Roman Zaric, which you need a license to use.  

Scrap kit of choice. I am using a FTU kit by Wicked Princess Scraps called You Are Beautiful.
She has a link on here post sending you to here mediafire folder to download FTU kits.
When you click my link to go to her page, it will have a link in that post to go to her mediafire page and you will have to scroll through the pages to get the kit. They are posted in alphabetical order though, so it's not too hard to find. :) 


Font of choice, I am using GeeKnee


Plugins: Eye candy 4000 gradient glow, Penta.com color dot


Just remember that my choices of papers and elements is just a suggestion, change it up and make it yours! You don't have to follow mine exactly.

Add a drop shadow of your choosing to tubes & elements throughout. I usually use 1, 1, 50, 5 unless otherwise noted.


Let's get started!

Open your template, shift D to duplicate, close the original.

Delete raster 3 & small squares layers

Change the canvas size to 850 x 850 pixels

Flood fill the background layer with white


Fill the layers with papers, to do this make sure the layer you want to fill has been clicked on in your layer palette. 
Click inside the shape with your magic wand, selections, modify, invert, open your paper, copy and paste as a new layer, 
click delete on your keyboard.
Delete the original template layer

Some layers,  you may just want to flood fill with a color from your kit. To do this, click on the layer in your layer palette, add another raster layer above it,
click inside the shape with your magic wand, and flood fill it with your color
Delete the original template

I used these papers on each layer:
Raster 2 & copy of raster 2, use paper 4
rectangle shape left & right, use paper 3
square left & right, use paper 2
rectangle back, use paper 10

For the three white frames, add/remove noise with these settings:
Uniform
monochrome checked
75

Rectangle: No paper, apply penta.com color dot with the following settings top to bottom
90
2
255
255
255

Open your tube, copy and paste as a new layer, arrange on right

Add the following elements, see my tag for placement
Flower swag 2
Flower cluster 3, resize 50%
wire drag down below all the frames
Doodle, resize 50% apply gradient glow of 4 white 
flower scatter, resize 50%

Open paper 9, copy and paste as a new layer right above the white background layer, apply your mask

crop and resize
add your copyright and credits as needed
add your text and save

Saturday, June 29, 2013

femme Fatale


For this tutorial you will need the following:

Paint Shop Pro, I am using PSP X, you should be able to use any version.

Tube of choice, I am using the artwork of Ismael Rac which you need a license to use.  
At the time of this tutorial the tube was a preview of tubes that are coming soon. However,
the tube should be in the store very soon after this post goes up. If you don't see it in the store, check back in a day or so. It's called 2013 Pinup Girl

Scrap kit of choice. I am using  High Maintenance, by Inzpired Creationz, which used to be a PTU kit, but now is FTU


Font of choice, I am using Scriptina


Plugins: No outside plugins used


Just remember that my choices of papers and elements is just a suggestion, change it up and make it yours! You don't have to follow mine exactly.

Add a drop shadow of your choosing to tubes & elements throughout. I usually use 1, 1, 50, 5 unless otherwise noted.


Let's get started!

Open your template, shift D to duplicate, close the original.

Delete the credits layer & teal dotted line

Resize the template to about 650 x 650 then change the canvas size to about 850 x 850. 
Add a new layer, flood fill with white, and send that layer to the bottom.

Fill the layers with papers, to do this make sure the layer you want to fill has been clicked on in your layer palette. 
Click inside the shape with your magic wand, selections, modify, invert, open your paper, copy and paste as a new layer, 
click delete on your keyboard.
Delete the original template layer

Some layers, like the frames, you may just want to flood fill with a color from your kit. To do this, click on the layer in your layer palette, add another raster layer above it,
click inside the shape with your magic wand, and flood fill it with your color
Delete the original template layer

I am using the following on each layer:
White circle bottom & top & teal noisy circle frame use paper 9
blk square bottom and grey square top & grey bottom rectangle use paper 8
Teal octogon top & bottom use paper 4
Grey rectangle top use paper 10
Blk circle, use paper 1

Now go back to the big circle in the middle of the template, selections, select all, float, defloat, invert
open your tube, mirror it, copy and paste as a new layer, and arrange in the circle, once it's where you want it, click delete on your keyboard. Drop the opacity to about 50

Now copy and paste your full tube and arrange on the right side. 
If you are using the same tube as me, I resized her about 45%
Drag the word art layer up so it's over the tube

Add a new raster layer above the white background, make a gradient using two colors from your kit (I used red and black) repeats on 4, angle on 30, flood fill this layer and apply your mask.

Now we'll add our elements. Please check my tag for exact placement.

Doggy 1 resize 55%
Purse 1 resize 55%
Wallet resize 40%
Bow 1 resize 30%
Star charm resize 50%
Champagne resize 60%
Camera resize 40% mirror
Makeup 2 resize 80%
Eye shadow resize 30%
Blush resize 55%
Nail polishes resize 45%
Lipstick resize 40%
Ribbon 3
Perfume 2 resize 40%

crop and resize
add your copyright and credits as needed


add your text and save

Sunday, June 9, 2013

Party in the USA


For this tutorial you will need the following:

Paint Shop Pro, I am using PSP X, you should be able to use any version.

Tube of choice, I am using the artwork of Ismael Rac which you need a license to use.  

Scrap kit of choice. I am using Party In the USA a FTU kit by Sweet Tooth Studio, available at Scrap Candy 


Font of choice, I am using BodieMF Flag

Plugins: Xero Radiance, Eye Candy 4000 Gradient Glow


Just remember that my choices of papers and elements is just a suggestion, change it up and make it yours! You don't have to follow mine exactly.

Add a drop shadow of your choosing to tubes & elements throughout. I usually use 1, 1, 50, 5 unless otherwise noted.


Let's get started!

Open your template, shift D to duplicate it and close the original.
Delete Raster 1 layer & raster 11

Change the canvas size to about 900 x 900 or 1000 x 1000 depending on how much room you like to have to work around in.

To fill the layers with papers, make the layer active in your layer palette, click inside the shape with your magic wand, selections, invert,
open your paper, copy and paste as a new layer, click delete on your keyboard.
Deselect and delete the original raster layer of the template.

To fill the layers that have noise on them (raster 10 & copy of raster 10) you will have to make it active in your layer palette, selections, select all, float, defloat, invert, then go ahead and copy and paste your paper and click delete on your keyboard.

I used the following papers on the following layers:

Copy 2 of raster 2, Raster 8, & raster 4, use paper 5
Raster 3, use paper 2
Raster 6 & copy of raster 2, use paper 6
Raster 5 & raster 2, use paper 4
Raster 7, use paper 8
Raster 9 & copy of raster 9, use paper 10

Raster 10 & copy of raster 10, use paper 6
add noise to these two layers, monochrome, uniform, 100

Add your main tube and arrange in the middle. Resize it by about 60% if you are using the same one as I am

click on one of the front square layer (raster 9 or copy of raster 9 layer that you filled with paper 10)
selections, select all, float, defloat, invert.
Copy your tube and paste it into the frame, arrange it where you want, click delete on your keyboard.
Deselect. Duplicate the tube, on the top layer, blur, gaussian blur 3, change the blend mode to soft light.
On the bottom layer apply Xero Radiance with the default settings.

Do the same for the other square layer on the other side.

Now just add your elements. Check my tag for exact placement.

Element 20, resize 95%
Element 22, resize 75%
Element 25, resize 55%
Element 16, rotate right 90
Element 14
Element 5, resize 45%
Element 23, resize 65% rotate right 90


Crop and resize
add your copyright and credits as needed
add your text and save 

On my name I used background #4364a4 foreground #ab2315,
then apply gradient glow with a width of 5 and the color set on white

Thursday, October 11, 2012

In Remembrance


For this tutorial you will need the following:

Paint Shop Pro, I am using PSP X, you should be able to use any version.

Tube of choice, I am using the artwork of Frank Munoz which you need a license to use.

Font of choice, I am using  Daniel Script

Plugins:
Mura Meisters Copies
Xero Fritillary
Xero Radiance


Just remember that my choices of papers and elements is just a suggestion, change it up and make it yours! You don't have to follow mine exactly.

Add a drop shadow of your choosing to tubes & elements throughout. I usually use 1, 1, 50, 5 unless otherwise noted.


Let's get started!

Open a new canvas 600 x 250 white background

Open your tube, copy and paste as a new layer
apply Mura Meisters Copies Wallpaper Rotate using default
settings except change the top number to 28

Adjust blur, gaussian blur 20
Adjust blur radial blur with the following settings
blur type twirl
strength 100
twirl degree 0
eliptical checked
horizontal offset 30
vertical offset 40
protect center 10

Duplicate and hide the top layer.

On the bottom layer, apply texture effects fine leather with the following settings:
color #dcdcdc
angle 30
blur 40
transparency 250
number of furrows 40
length of furrors 4

Apply Xero Radiance default settings to this bottom layer

On the top layer, apply Xero Fritillary default settings except change the bottom number to 15
Change blend mode to soft light.

Add your tube.

Add your copyright/credits, your text and your name then save

Circle It


For this tutorial you will need the following:

Paint Shop Pro, I am using PSP X, you should be able to use any version.

Tube of choice, I am using the artwork of Snapshot Ninja Photography, which you need a license to use.  

Font of choice, I am using Zebra

Plugins: Mura Meister Copies
Xero Porcelain & Fritillary
Eye Candy 4000 Shadowlab


Just remember that my choices of papers and elements is just a suggestion, change it up and make it yours! You don't have to follow mine exactly.

Add a drop shadow of your choosing to tubes & elements throughout. I usually use 1, 1, 50, 5 unless otherwise noted.


Let's get started!

Open a new canvas 600 x 250, white background.

Open your tube, copy and paste as a new layer.

Apply Mura Meister Copies, wallpaper rotate with the default settings.

Adjust blur, motion blur with the radius set to 47, strength at 100, repeat and duplicate.

On the bottom layer adjust, blur, radial blur with the following settings:
Twirl
Strength 100
Twirl degrees 0
Eliptical checked
horizontal offset 0
vertical offset 0
protect center 10

Effects, edge effects, enhance more, repeat
Apply Xero Porcelain default settings

On the top copy, apply Xero Fritillary using the default settings, but change variation to 15.
Change the blend mode to Soft light.

Choose a color from your tube as your background color and white as the foreground.
Go to the gradients tab, and select circular, angle 0 and repeats at 20.
Add a new raster layer and flood fill with your gradient.

Effects, texture effects, weave with the following settings:
Gap size 2
width 14
opacity 15
all the colors set to white
fill gaps checked

Now apply effects, texture effects, blinds with the following settings:
width 2
opacity 20
color black
horizontal and light from top checked

Change the opacity of this layer to soft light

Copy and paste your tube as a new layer, arrange on the right.
Apply Eye Candy Shadow Lab with the following settings top to bottom
225
28.80
100
20.16
0
color black
draw only outside selection checked

Leave your colors set how you used them for the gradient. 
Use your preset shapes tool set on rectangle width at 4 
and draw out a rectangle just below the center of the tag and all the way from the left side to just behind the tube.

Make sure you are on the white background layer, click selections, select all, float, defloat
modify, set selection borders set at 3
Add a new raster layer at the top and fill the selection with your gradient.

Drag your tube to the top.

Add your copyright/credits & your name then save.

Thursday, August 23, 2012

Love Vines


For this tutorial you will need the following:

Paint Shop Pro, I am using PSP X, you should be able to use any version.

Tube(s) of choice, I am using the artwork of VeryMany which you need a license to use. You can find it at Pics For Design.  

Scrap kit of choice. I am using a FTU kit, Sweet Magnolia by Dallien Design

Font of choice, I am using Janda Elegant Handwriting

Mask of your choice.

Plugins: no outside plugins used


Just remember that my choices of papers and elements is just a suggestion, change it up and make it yours! You don't have to follow mine exactly.

Add a drop shadow of your choosing to tubes & elements throughout. I usually use 1, 1, 50, 5 unless otherwise noted.


Let's get started!

Open a new canvas 750 x 750 white

Open frame 8, resize by about 25%, copy and paste as a new layer.
Click inside it with your magic wand, expand by 5, selections, invert. Open paper 5, resize by 25%, copy and paste as a new layer, click delete on your keyboard.
Merge these two layers together, move over to the left, duplicate mirror & flip. You'll probably have to arrange the flipped one a bit to make it even with the left frame.

Open frame 6, resize by 25%, copy and paste as a new layer.
Click inside it with your magic wand, expand by 5, selections invert.
Open paper 15, resize by 25%, copy and paste as a new layer, drag below frame 6, click delete on your keyboard. Leave selected.

Open your close up tube, copy and paste as a new layer. I mirrored mine and resized by 80%.
Arrange it where you want in the frame, click delete on your keyboard.

Open your main tube, copy and paste as a new layer. I resized mine by 60%, depending on what tube you use, you many need to change that amount.

Add any elements you'd like. These are what I added with the resizing amount next to them. 
Element 7, 35%, duplicate, mirror
Element 14, 35%, duplicate, mirror
Element 16, rotate right by 90, resize by 90%, arrange on bottom
Element 27, resize by 25%, arrange on bottom left, duplicate, mirror arrange on right, near the middle
Element 25, resize by 25%, arrange on top left.

Open paper 6, resize to your canvas size. Copy and paste as a new layer, just above the white background layer.
Open your mask, go to layers, new mask layer, from image, find the mask in the drop down box, click ok.
Find the mask in your layer palette, delete. Answer yes to the pop up box, then merge group.

Crop and resize.
Add your copyright & credits as needed.
Add your name, save and you're done!

Wednesday, January 18, 2012

Sweet Valentine


For this tutorial you will need the following:

Paint Shop Pro, I am using PSP X, you should be able to use any version.

Tube of choice, I am using the artwork of Keith Garvey, which you need a license to use. You can get it at PTE, here.

Scrap kit of choice. I am using a Valentine Collab by Designs by Vaybs which you can find on her blog here.

Font of choice, I am using Miss Fitzpatrick

Mask: Vix big mask 19, here.

Plugins: Xero Radiance


Just remember that my choices of papers and elements is just a suggestion, change it up and make it yours! You don't have to follow mine exactly.


Let's get started!

Open a new canvas 650 x 650 white background.

Open frame2 copy and paste as a new layer, rotate by 90 and resize by 70%.

Click inside the frame with your magic wand, selections, modify, expand by 3.

Open paper 9, copy and paste as a new layer between the frame and background layer, resize by 70%, selections, invert, click delete on your keyboard. Leave selected.

Open your close up tube, copy and paste as a new layer between the paper and frame. Arrange it in the frame, click delete on your keyboard. Deselect.

Duplicate the tube, on the top layer adjust, blur gaussian blur 3. Change the blend mode to soft light. On the original (bottom) tube layer apply Xero Radiance with the default settings except change blue to 0.

Add a drop shadow to your frame and bottom tube.

Open WA4, copy and paste as a new layer, resize by 82%, drag to the bottom.

Open WA6, resize by 63%, copy and paste as a new layer, add drop shadow.

Open element, copy and paste as a new layer, resize by 40%, add a drop shadow, arrange on the right, drag this layer below the word art layer we put across the bottom of the frame.

Open element 7, copy and paste as a new layer, resize by 65%, arrange on the left, add a drop shadow.

Open paper 11, copy and paste as a new layer just above the white background. Open your mask, go to layers, new mask layer, from image, find the mask in the drop down box, click ok. In the layer palette, delete the mask, click yes. Merge group.

Crop & resize.

Add text, copyright and credits as needed & save.

Thursday, January 12, 2012

Music Speaks (No Scraps)


For this tutorial you will need the following:

Paint Shop Pro, I am using PSP X, you should be able to use any version.

Tube of choice, I am using the artwork of Freya Langford-Sidebottom, which you need a license to use. You can get it at Artistically Inclined Licensing.

Template from Misfits Collab by April Dawn & MzDixi. You can find it here, and it's the first set on the blog post. When you download the templates, it's the second template in the folder.

Music word art by Deb  from Creative Misfits, which you can find here.

Font of choice, I am using Bank Script

Plugins: Alien Skin Eye Candy 2000 - HSB Noise, Tramages - Tow the Line


Just remember that my choices of papers and elements is just a suggestion, change it up and make it yours! You don't have to follow mine exactly.


Let's get started!

Change the canvas size to 850 x 850 pixels. 

Delete the following layers mask 1, mask 2, mask 3, mask 4, cr info, word art, word art outline.

In your color palette, set your foreground to #3a51a0 and your background to black. Then click on your foreground and choose gradients, find foreground/background and set it to linear, angle 45, repeats 3.

Make the big pink square layer active, click inside it with your magic wand. Add a new raster layer above it and flood fill with your gradient. Deselect and delete the original layer. Add a drop shadow to the gradient layer.

Make outterbk layer active, click inside it with your magic wand, add a new raster layer, flood fill with black. Deselect.

Apply HSB Noise filter with the default settings, apply it again, this time hit the Random Seed button a couple times before applying it. Add a drop shadow and delete the original template layer.

Make the inner square layer active, click inside it with your magic wand, add a new raster layer above it, flood fill with #6f84cb then deselect. 

Apply Tramages - Tow the Line using default settings. Delete the original template layer.

Fill both the upper and lower pink rectangles with #1b2549 using the same technique used above, then add drop shadows to both and delete the original layers.

Do the same with upperdkpinkrectangle and lowerdkpinkrectangle (the two going across the very top and bottom), fill with #212e5d, add drop shadow and delete the original layers.

Do the same with pink lines 1 and pink lines 2, fill with #8c9dd6 and do not add drop shadow to these layers.

Make the pink inner circle layer active, selections, select all, float, defloat, add a new raster layer and flood fill with black. Deselect, add a drop shadow and delete the original layer.

Make a new canvas sized 700 x 700 pixels, flood fill with #8c9dd6. 

Back on your template layer, make pink dots layer active, selections, select all, float, defloat, invert, copy and paste the new canvas you just made, click delete on your keyboard. Deselect and delete the original layer.

Do the same as above for the pink circle frame layer.

Go back on the black circle layer, selections, select all, float, defloat, invert. Take your close up tube layer, and mirror it. Then copy and paste as a new layer & arrange it in the circle how you want it, click delete on your keyboard and deselect. I erased the bits that were beyond the blue border. You can erase them or leave them depending on what you like. 

Change the blend mode on the tube to Luminance(L) and drop the opacity to about 70.

Add your main tube, add a drop shadow to the tube.

Open your word art, copy and paste as a new layer. Take your magic wand and click inside the pink letters. Add a new raster layer and flood fill with #6f84cb. Deselect and merge the blue layer down.

Crop, resize, add text, credits and copyright as needed and save.

Friday, December 16, 2011

Exclusive tut & Templates

Over at the ACDivas forum we had some Christmas contests. One was for tutorials exclusive to the forum and one was for Christmas templates that would be exclusive to the forum. Here are my entries, and if you'd like to download the templates or try the tut, come on over and join the Divas! We'd love to have you there. You can find the forum HERE.

My tut:


My templates:


Saturday, November 19, 2011

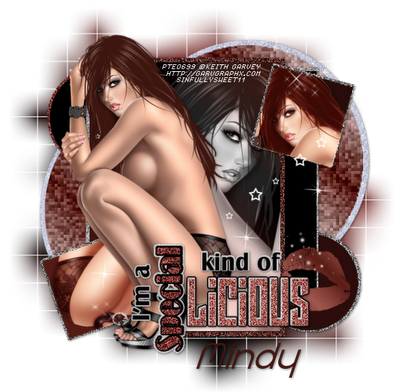
Licious

For this tutorial you will need the following:
Paint Shop Pro, I am using PSP X, you should be able to use any version.
Tube of choice, I am using the artwork of Keith Garvey, which you need a license to use. You can get it at PTE.
No scrap kit used in this tut.
Font of choice, I am using Radius.
Special Kind of Licious template by Savage.
Mask: WSL84 by WeeScotsLass
Plugins: Xero Fritillary
Remember, my tube and color choices are not mandatory for you to use. You can choose whatever tube and matching colors you'd like. You can go exactly off my tut or change it up and make it however you'd like.
Let's get started!
Open the template, delete the top (credits) layer.
Resize to about 585 x 551 pixels.
Change canvas size to 700 x 700 pixels.
Add a new raster layer above the background layer. Flood fill with white, delete the original background layer.
Put black as your foreground and #3e1710 as your background. Make this a foreground/background gradient by right clicking the foreground color in your color palette and click on the gradient tab in the box.
Choose foreground/background in the drop down box. Set Angle at 45, repeats at 2.
Choose linear & click ok.
On your layer palette, make center rectangle layer active, click inside with your magic wand. Add a new raster layer, flood fill with your gradient, leave selected.
If you're using the same tube, open your tube and choose the middle tube that shows her from the waist up. Mirror it, copy and paste as a new layer, resize by 90%, arrange in the rectangle, selections, invert, click delete on your keyboard. Deselect.
Change your blend mode to Luminance(L) on your layer palette.
Delete the original center rectangle layer.
On your layer palette, make right rectangle layer active, click inside with your magic wand. Add a new raster layer, flood fill with black. Delete the original right rectangle layer.
On your layer palette, make left rectangle layer active, click inside with your magic wand. Add a new raster layer, flood fill with #3e1710. Delete the original left rectangle layer.
On your layer palette, make circle 1 layer active, click inside with your magic wand, go to selections, modify, smooth, use default settings. Add a new raster layer, flood fill with black. Delete the original circle 1 layer
Do the same for circle 2, but use #2c0d0c to fill.
On your layer palette, make big circle 1 layer active, click inside with your magic wand, go to selections, modify, smooth, use default settings.
In your color palette, make the background white, the foreground #5d2019, and make a gradient using the same settings as above.
Add a new raster layer, flood fill with your gradient. Deselect.
Apply Xero Fritillary using the following settings top to bottom:
5
30
10
40
Delete the original big circle 1 layer.
Do the same as above for big circle 2 layer. If you seem to be getting too much white with the gradient fill, go into your gradient settings and click on invert then try flood filling again.
Make the lips layer active. Selections, select all, float, defloat, add a new raster layer and fill with the same gradient you just used on the big circles. Fill it about 3 or 4 times. Deselect and delete the original lips layer. Add a drop shadow of your choice (I used 1, 1, 50, 5 throughout this tag)
Make square 2 layer active, click inside with your magic wand, add a new raster layer, flood fill with #280d0a, leave selected, selections, invert, copy and paste your main tube, arrange in the square, selections, invert, click delete on your keyboard. Deselect.
Duplicate your tube, on the top layer, adjust blur, gaussian blur by 3, change the blend mode to soft light. On the bottom tube, change the blend mode to screen.
Delete the original square 2 layer.
Do the same as above for the square 1 layer, but fill it with #541c16 and mirror your tube before copy and pasting it into the square.
Add drop shadows to big circle 1 back, big circle 2 back, and left & right rectangle backs.
Make square 2 back layer active, click inside with your magic wand, add a new raster layer, flood fill with #808080. Deselect adjust, add remove noise, add noise 100%, uniform & monochrome checked. Add a drop shadow, delete the original square 2 back layer.
Do the same for all the remaining backs on the shapes. I filled some with the grey and some with a brown, use my tag for reference.
Make the "Special" word art layer active, selections, select all, float, defloat, add new raster layer, flood fill with #68231d, deselect, add noise settings as above, delete the original layer.
Do the same with the "licious" layer using #a75d55.
Merge all the word art layers together. I just started on the top one, right clicked, chose merge down, and just kept going down the layer palette until they were all merged. Then add a drop shadow.
Add your main tube below the word art layer, add a drop shadow.
Make a new raster layer just above the white background layer. Make the foreground in your color palette #4f100b, the background black. Make a foreground/background gradient like we did above, flood fill with this gradient.
Add your mask by opening the mask in psp, go to layer, new mask layer, from image, find the mask in the drop down box, click ok. In the layer palette, delete the mask, click yes, then merge group. Resize the mask layer by 107%.
Crop, delete the white background layer if you want it transparent.
Add your text and copyright info.

Sunday, September 18, 2011

Pumped Up Kicks

For this tutorial you will need the following:
Paint Shop Pro, I am using PSP X, you should be able to use any version.
Three tubes, I am using the artwork of Armando Huerta, which you need a license to use. I got mine at MPT, but since they closed I don't think he has gone to any stores to sell. So if you don't have any of his artwork, you'll have to use another artist.
Font of choice, I am using The beautiful Ones
Plugins: Xero Fritillary, Two Moon Rotate & Fade Away, Xenofex 2 Constellation
My word art here.
Just remember that my choices of papers and elements is just a suggestion, change it up and make it yours! You don't have to follow mine exactly.
Let's get started!
Open a new transparent canvas 600 x 250
Open your main tube, pick two colors from your tube, a light and a dark. I used #c4dff3 & #84bce5.
Make a gradient with these two colors, it should be linear with an angle of 45 and 1 repeats. Flood fill your canvas with this gradient.
Apply Xero Fritillary with the following settings top to bottom:
5
30
10
15
Edge effects, enhance.
Apply the Two Moon Rotate & Fade Away with the following settings top to bottom:
94
15
Open your other two tubes.
Copy and paste one tube, arrange it to the left side and duplicate it.
On the top tube layer apply gaussian blur 3.
On the bottom tube layer change the blend mode to Luminance (L) and drop the opacity to around 70.
Open another tube, this time arrange it on the right side and follow the same steps as you did on the first tube.
Open your main tube, copy and paste as a new layer add a drop shadow 1, 1, 100, 5 arrange slightly off center to the left.
Make your background layer active.
Selections, select all, modify, set selection borders and set it at 2.
Add a new raster layer at the top of the tag, flood fill with one of the colors you used for your background, but change it so that it's a bit darker. I changed mine to #575e83
Deselect, add noise guassian, 70, monochrome checked.
Go back to your background layer, do the same as above, but set selection borders at 4.
Add a new raster layer under the last border you did, flood fill it with black. This time instead of adding noise, apply Xenofex 2 Constellation with the following settings top to bottom:
1.98
50
50
25
50
75
fill with solid color checked and the color should be black.
Merge the two border layers together and add drop shadow 1, 1, 50, 5
Add your word art & your name.
Add any credits needed.