Pages

Thursday, November 26, 2009

Let it Snow

For this tut you will need the following: Paint shop pro (I used PSP X but you should be able to use any version to do this), and Animation Shop. The "New Xmas Mask" by Chas at Chas ScrapnBitz Scrapkit (PTU) Listen by Aiya of Juicy Bits I am using the artwork of Elias Chatzoudis which you must purchase at MPT to use. Tag template 79 by Missy at Divine Intentions. Scroll about half way down the page, and a link to her templates is on the right hand side. Plugins: Xero Radiance, Vanderlee Snowflakes Font of choice, I used Peas Miss Stalker. Open the template, delete the copyright layer and resize the canvas to 600x600. It will give you room to work and you can always crop down later. If you like to keep the white background layer while you work, you can click on that layer and flood fill it back in with white to cover the bare edges that resizing left. Click on the circle layer, selections, select all, float, defloat, invert, copy paper 4 and paste as a new layer, and on that paper layer, hit delete on your keyboard. Deselect. Delete the original circle layer. Add a drop shadow. I used 0, 0, 60, 5 Click on your snowflakes layer. Selections, select all, float, defloat, add new raster layer and flood fill with white. Delete the original snowflakes layer. On the scalloped circle layer, click inside with your magic wand, selections invert. Open paper 12, copy and paste it as a new layer. Make sure you are on that layer, and hit delete on your keyboard. Deselect, and apply the same drop shadow you used above. Delete the original scalloped circle layer. Click on your background frame layer, click inside it with your magic wand, selections invert, open paper 13, copy and paste as a new layer, hit delete on your keyboard. Leave selected. Open your tube, and paste the closeup as a new layer. Arrange it how you like and then on the tube layer, hit delete on your keyboard. Deselect. Duplicate your tube and on the top (duplicate) layer, go to adjust, blur, gaussian blur, and change it to 3. Change the blend mode to overlay. On the bottom (original) tube layer, apply Xero Radiance with the following settings top to bottom: 128, 50, 128, 255 and then drop the opacity to about 45 Now on the wordart template layer, take your magic wand and hold down the shift key and click on each letter. Add a new raster layer and flood fill white. Deselect and delete the original wordart layer. On your white wordart layer, click adjust, add remove noise, and use the following settings: Gaussian, monochrome, and noise set to 50%. On that same layer, selections, select all, float, defloat, modify, expand by 3. Make a new raster layer below your white wordart layer and flood fill with #638a89. Merge those two layers together and if you'd like, add the same drop shadow you've been using. Add your tube and add the same drop shadow. Open the heart01 element and add it just below your circle layer. Add a very small drop shadow. I used 0, 0, 30, 1. Duplicate it, image mirror, image, flip and move it into place. Open paper 14, copy and paste it just above your white background layer, and then open your mask. Layers, new mask layer, from image. In the drop down menu, search for your mask, and then click ok. Delete the mask layer and merge the group. Arrange the mask layer to where you'd like it. 
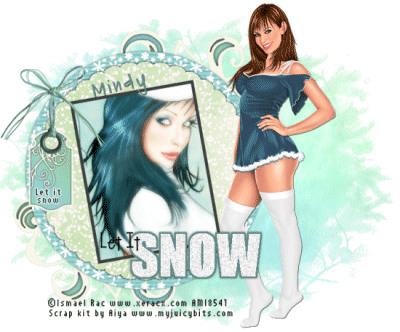
Add any other elements you'd like. I added a ribbon and tag and put the words "Let it snow" on the tag. Add your name and copyright info. If you are not going to animate, then you can crop your image down, and save. If you want to save as transparent, then delete the white background layer and save as a .png file If you want to animate, then let's go on. To animate: Click on your scalloped layer, which should be right above your white snowflakes. Selections, select all, float, defloat. Duplicate it twice for a total of 3 layers. Do not deselect. Click on the bottom layer. Apply the Vanderlee snowflakes, change the amount to 90 and the random seed to 1255 (or you can choose another number). Leave the other numbers as is and click ok. Do the same thing for the second layer just changing the random seed to 3081 (or any other number, but not the same as the first layer). Do the same for the top layer, but change the random seed to 4530 (or any other number, but not the same as the first two layers). Deselect. Open animation shop. Back in PSP, hide the top two scalloped circle layers and your white background layer, copy merged and take it to your animation shop. Paste as a new animation. Back in PSP, hide the bottom layer and unhide the middle layer. Copy merged and take to animation shop. Paste after current frame. Back in PSP, hide the middle layer and unhide the top layer. Copy merged and take to animation shop. Paste after current frame. Now you have an animation with 3 frames. Click on the first frame, and go to animation, frame properties and change it to 15. Move the slider at the bottom over until it shows frame 2, click on it and go to animation, frame properties and change it to 25. Do the same thing to go to frame 3 and change that one to 30. Crop and resize your animation as necessary and save. You're all done! I hope you enjoyed this tutorial. Comments are appreciated, and if you want to send in any completed tags, I'd love to get a slide show started of tags made from my tuts! Here's an example using the same colors and kit, just changed the tube so I could use it in the Rac Stalkers group.

Wednesday, November 25, 2009

Fallen Angel

You will need the following: Tube of choice. I used the wonderful artwork of Ismael Rac which you have to purchase to use. You can get it at AMI. PTU scrap kit Alyce from Aiya at Juicy Bits Plugins: Xero Radiance, Penta.com Color Dot My word art HERE. Mask of choice. I used one called Omask011_LT, I don't know who made it, so I am not providing it, but if you happen to have it you can use that one, otherwise, just choose one you like. Open a new 650x650 canvas, flood fill white. Open paper 5 of the add on and set it as your background, by clicking on background and then clicking on the patterns tab and selecting that paper. Make sure the scale is at 100% Click on your preset shapes and choose ellipse. Draw out an ellipse that covers most of your canvas. Objects, align, center in canvas and convert to a raster layer. Add drop shadow of choice. I used 1, 1, 60, 5 Change your foreground to black. On your ellipse layer that you just drew out, selections, select all, float, defloat, modify, contract by 15, add a new raster layer and flood fill with black. Add drop shadow. Open paper 9. Selections, modify, contract by 5. Click on your foreground and click the pattern tab, browse to paper 9 and select it. Add a new raster layer and flood fill with that pattern. Add drop shadow. Open paper O2A0. Selections, modify, contract by 10. Change your foreground to the 02A0 paper and add a new raster layer, flood fill with that pattern. Add drop shadow. Selections, modify, contract by 10 again. Add a new raster layer, change your foreground to #b90f3e and flood fill. Leave selected. Copy and paste close up of your tube or if you don't have a close up, paste your tube, and resize to get it larger, selections, invert, click on your tube layer, and hit delete on your keyboard. Deselect. Add drop shadow to the last ellipse that you just pasted your tube into. Duplicate tube layer. On top layer, adjust blur, gaussian blur, 3. Change blend mode to soft light. On bottom tube layer, apply xero radiance plugin with default settings. Lower the opacity of both tube layers to around 60%. Now with your selection tool set to rectangle, click on your top ellipse layer, and draw out a rectangle covering a portion to the left hand side. Now go to your Tramages Tow the line plugin, and apply with the following settings, top to bottom, 80, 54, 48, 9. Deselect. With your selection tool again, and on the same ellipse, go somewhere in the middle of the ellipse and draw out another largish rectangle. Go to your Penta.com color dot plugin and apply it with the following settings, top to bottom, 90, 2, 255, 255, 255. Deselect. Add your tube and give it the same drop shadow you added to your ellipse layers. Open paper 6 and paste it above your white background layer. Apply the mask, by going to layers, new mask layer, from image, on the drop down box, pick the mask and click ok. Click on the mask layer and delete it, and then merge the group. Change your foreground to white and your background to #b90f3e. Click on your text tool and using the font Impact with your stroke set to 2, size 20, type out the word angel in all caps. Stretch out to how you want it. Add drop shadow. Change font to a script font, stroke set to 0 and then change your background to black and type out your name over the word angel, and apply your drop shadow. Add any elements if you want. Add your license info and © info. Delete your white background layer, crop excess off, resize if needed. To save as a transparent .png file, click on file, export, PNG optimizer, click ok, then browse to the location you want to save it, and name it and click ok. You're all done!

Tuesday, November 24, 2009

Joined Juicy Bits CT team

I am pleased to announce that I have joined the creative team of Juicy Bits by Aiya. I will be posting tuts using her PTU scrap kits, so be on the lookout for those. I will still post tuts using no scrap kits of FTU scrap kits along with her kits too, so don't worry they won't be all PTU kit tuts. You can find her blog HERE and you can find her store with tons of wonderful kits HERE The tut in my previous post is using one of her wonderful Christmas kits.

Saturday, November 21, 2009

Cuddly Christmas

I am using the awesome Artwork of Ismael Rac which you must purchase at AMI to use. Supplies: Cuddly Christmas scrap kit from Aiya at Juicy Bits. It is a PTU kit. Tag Template 6 from Harley at Dreamgirl Productionz. WSL mask 78 from weescotslass creations Font: Sweetheart Script-limited No filters used Open your template, click window, duplicate, and then close out your original. Delete the copyright layer. Image, canvas size, and change to 650x650 to give you plenty of extra room to work, and you can crop it down at the end. Click on your white background layer and flood fill with white to fill the area left open when you resized, or you can delete the white background layer right now if you'd like. I usually leave it there while I'm working and delete it at the end. Click on the front square layer with your magic wand, open paper 17 and paste as a new layer, selections invert, make sure you are on the paper layer, and hit delete on your keyboard. Deselect. Delete the original front square layer. Open your tube, and paste as a new layer above your frame, resize as needed. If you are using the same tube as I am, I resized 80%. Erase the bits of tube that hang over the frame where you don't want them. Add drop shadow of choice. I used 1, 1, 60, 5 Click on back rectangle left layer with your magic wand and copy and paste paper 13, selections, invert, make sure you are on the paper layer, and hit delete on your keyboard. Deselect. Delete the original rectangle layer. Do the same for back rectangle right layer. Click on the front square frame layer that is right below your front rectangle layer (the first one we did. Selections, select all, float, defloat, copy paper 3 and paste as a new layer, selections invert, make sure you are on the paper layer, and hit delete on your keyboard. Add the same drop shadow you used on your tube. Delete the original frame layer. Do as above for both of the back rectangle layer frames. Click on rectangle one with your magic wand, selections invert, open paper 12, copy and paste as a new layer, hit delete on your keyboard. Delete the original rectangle layer. Make rectangle frame 1 layer active, selections, select all, float, defloat, invert and paste paper 3 as a new layer, then hit delete on your keyboard. Deselect and add your drop shadow, delete the original frame layer.j Do this for the last 3 rectangle layers. Copy paper 8 and paste it just above your white background layer. Open your mask. Click on layers, new mask layer, from image, and scroll down to find your mask layer, make sure invert mask data is NOT checked, and click ok. Delete the mask layer and then merge the group together. Change the opacity to about 60%. Add any other elements you like, resizing as needed. Add your name and copyright info. Crop tag, delete white background layer. To save as a transparent tag, click on File, export, PNG optimizer, and click ok, then just browse to where you want to save your tag, and it will be transparent!