

Sunday, January 31, 2010
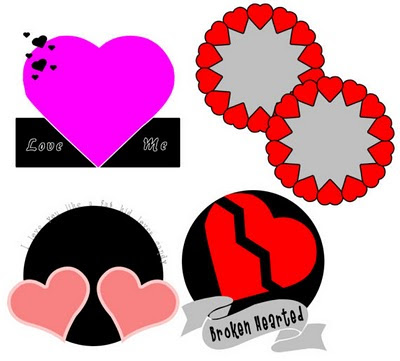
Valentine's Templates
Over at the Rac Stalker's forum, we had another template challenge, and this time the theme was Valentine's Day and/or love. We had a great turn out.
You can check them out at the forum or you can head on over to our challenge goodies blog here. If you are interested in joining in on the fun, come on over to the forum and join us!
This is my set of templates and you can download them HERE.


Saturday, January 30, 2010
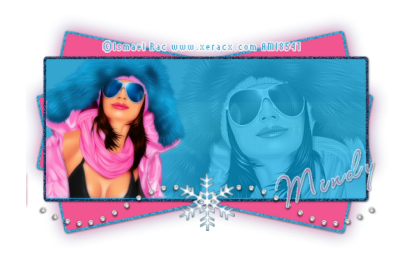
Heartbreaker General
 For this tut you will need the following:
Any version of Paint Shop Pro. I am using PSP X.
A tube of your choice. I am using the wonderful artwork of Ismael Rac, which you must purchase to use. You can get it at AMI.
A nurse or medical scrap kit. I am using a PTU kit called Naughty Nurse by Wicked Princess Scraps.
Plugin: Alien Skin Eye Candy 3.1 Glow
Font of choice, I am using Standing Room Only.
Let's get started!
Open a new 700 x 700 white canvas. You can crop it down and delete the white background at the end.
Open your tube, copy and paste as a new layer, resize if necessary, and add a drop shadow.
Open the STAT element, copy and paste as a new layer, move near the bottom of your tube, so that the line goes across her legs. Add a drop shadow. Take your eraser tool and erase part of the line that goes over one of her legs so that it looks like she's stepping over it.
Open the chart element. Copy and paste as a new layer, resize by about 55%. Duplicate twice, on the bottom layer, rotate to the left by 20, on the middle layer, rotate to the right by 20.
Open one of the pills, copy and paste as a new layer, resize by about 33%, apply Eye Candy Glow, size about 4, fat, white, add your drop shadow. Arrange it near the top of the heart.
Add your ©info and credits as needed.
Add your name, and you're done!
For this tut you will need the following:
Any version of Paint Shop Pro. I am using PSP X.
A tube of your choice. I am using the wonderful artwork of Ismael Rac, which you must purchase to use. You can get it at AMI.
A nurse or medical scrap kit. I am using a PTU kit called Naughty Nurse by Wicked Princess Scraps.
Plugin: Alien Skin Eye Candy 3.1 Glow
Font of choice, I am using Standing Room Only.
Let's get started!
Open a new 700 x 700 white canvas. You can crop it down and delete the white background at the end.
Open your tube, copy and paste as a new layer, resize if necessary, and add a drop shadow.
Open the STAT element, copy and paste as a new layer, move near the bottom of your tube, so that the line goes across her legs. Add a drop shadow. Take your eraser tool and erase part of the line that goes over one of her legs so that it looks like she's stepping over it.
Open the chart element. Copy and paste as a new layer, resize by about 55%. Duplicate twice, on the bottom layer, rotate to the left by 20, on the middle layer, rotate to the right by 20.
Open one of the pills, copy and paste as a new layer, resize by about 33%, apply Eye Candy Glow, size about 4, fat, white, add your drop shadow. Arrange it near the top of the heart.
Add your ©info and credits as needed.
Add your name, and you're done!
Stargazer
 For this tutorial you will need the following:
Scrap kit of choice. I am using the PTU kit by Kat NKDA called Stargazer. You can purchase it at AMI.
Tube of choice. I am using the tube that came with Kat's Stargazer bundle. You can purchase the kit separately or a bundle that includes the tube and other items.
Font of choice. I used Moonstar.
Plugins: Alien Skin Eye Candy 3.1 Glow (optional for name)
Open a new canvas 700 x 700 either transparent or white if you like the white background to work with.
Open element 5, copy and paste as a new layer, resize by 65%.
Open element 17, copy and paste as a new layer, resize by 85%, make sure it's lined up in the middle of the round element. Click inside it with your magic wand, selections, modify, expand by 5. Open a paper of choice, copy and paste as a new layer, resize if necessary, selections, invert, click delete on your keyboard. Drag it below your frame layer. Leave selected.
Open a close up of your tube, mirror it(if you don't have a close up, then just resize it and sharpen) copy and paste as a new layer, and click delete on your keyboard. Change the blend mode to Luminance(L).
Click inside the circle element layer, selections, modify, expand by 5, selections, invert, open another paper, copy and paste as a new layer and click delete on your keyboard. Drag it below your round element.
Copy and paste the moon as a new layer, move it to the right of your tag, add a drop shadow.
Add any other elements you might like on your tag.
Add your tube as a new layer, add a drop shadow.
Add your name and ©info and/or credits as necessary.
For this tutorial you will need the following:
Scrap kit of choice. I am using the PTU kit by Kat NKDA called Stargazer. You can purchase it at AMI.
Tube of choice. I am using the tube that came with Kat's Stargazer bundle. You can purchase the kit separately or a bundle that includes the tube and other items.
Font of choice. I used Moonstar.
Plugins: Alien Skin Eye Candy 3.1 Glow (optional for name)
Open a new canvas 700 x 700 either transparent or white if you like the white background to work with.
Open element 5, copy and paste as a new layer, resize by 65%.
Open element 17, copy and paste as a new layer, resize by 85%, make sure it's lined up in the middle of the round element. Click inside it with your magic wand, selections, modify, expand by 5. Open a paper of choice, copy and paste as a new layer, resize if necessary, selections, invert, click delete on your keyboard. Drag it below your frame layer. Leave selected.
Open a close up of your tube, mirror it(if you don't have a close up, then just resize it and sharpen) copy and paste as a new layer, and click delete on your keyboard. Change the blend mode to Luminance(L).
Click inside the circle element layer, selections, modify, expand by 5, selections, invert, open another paper, copy and paste as a new layer and click delete on your keyboard. Drag it below your round element.
Copy and paste the moon as a new layer, move it to the right of your tag, add a drop shadow.
Add any other elements you might like on your tag.
Add your tube as a new layer, add a drop shadow.
Add your name and ©info and/or credits as necessary.
Thursday, January 28, 2010
Winter Moon
 For this tutorial you will need the following:
Any version of Paint Shop Pro. I am using PSP X.
Two tubes of your choice. I am using the artwork of Ismael Rac, which you must purchase to use. You can find his work at AMI.
Scrap kit of choice. I am using Stargazer at PTU kit by Kat NKDA which you can also purchase at AMI.
Template 15 by Samantha at Paradise Designs.
Font of choice. I am using Pea Lovey Dovey
Plugin: Eye Candy 3.1 glow (optional for use on the name)
Let's get started.
Open up your template, resize by 85% all layers. Then change the canvas size to about 650 x 650. Delete the copyright and splatter layers.
Make the oval layer active, click inside it with your magic wand. Open paper 9 (or you can choose another, you don't have to make yours exactly like mine) copy and paste as a new layer. Selections invert, and click delete on your keyboard. Add a drop shadow of choice and delete the original oval layer.
Make the angled rectangle layer active, click inside it with your magic wand, selections, invert. Open a paper (I used paper 10) Copy and paste as a new layer, click delete on your keyboard, deselect, add a drop shadow and delete the original layer.
Make the white rectangle layer active, selections, select all, float, defloat, add a new raster layer, flood fill with #204564. Adjust, add/remove noise Gaussian, 50%, monochrome checked. Add a drop shadow and delete the original layer. Do the same with the Bar layer.
Make your black rectangle layer active. Click inside it with your magic wand, selections, modify, expand by 2. Open paper 11, selections, invert, click delete on your keyboard and leave selected.
Open one of your tubes, copy and paste as a new layer, resize if necessary, click delete on your keyboard. Do the same with the second tube. Deselect and take your eraser and erase the parts of the tubes that go into the other rectangle. Add a drop shadow to each of your tubes. Make sure your tube layers are below the frame layer.
Open element 21, copy and paste as a new layer, resize by 64%, drag down below the oval layer and arrange it so it shows around the top of your tag. See mine for reference.
Open element 43, copy and paste as a new layer, resize by 64%, make sure it's on the top layer, add a drop shadow, duplicate it, then mirror it so that you have a moon on both sides of your rectangle.
Open element 28, copy and paste as a new layer, resize by 40%, arrange to the bottom right of your tag, duplicate and mirror, merge the two layers down together and add a drop shadow.
Open element 37, copy and paste as a new layer, resize by 40%, arrange below your flower layer on the right, duplicate and mirror, merge the two layers down together and add a drop shadow.
Open element 41, copy and paste as a new layer, resize by 50%, arrange in the middle where there is an open space between the flowers, drag it down so it is between the element 28 and element 37 layers. Add a drop shadow.
Add your copyright info and your name. Crop and resize as necessary. If you would like it to be transparent, delete your white background layer and save as a .png file.
For this tutorial you will need the following:
Any version of Paint Shop Pro. I am using PSP X.
Two tubes of your choice. I am using the artwork of Ismael Rac, which you must purchase to use. You can find his work at AMI.
Scrap kit of choice. I am using Stargazer at PTU kit by Kat NKDA which you can also purchase at AMI.
Template 15 by Samantha at Paradise Designs.
Font of choice. I am using Pea Lovey Dovey
Plugin: Eye Candy 3.1 glow (optional for use on the name)
Let's get started.
Open up your template, resize by 85% all layers. Then change the canvas size to about 650 x 650. Delete the copyright and splatter layers.
Make the oval layer active, click inside it with your magic wand. Open paper 9 (or you can choose another, you don't have to make yours exactly like mine) copy and paste as a new layer. Selections invert, and click delete on your keyboard. Add a drop shadow of choice and delete the original oval layer.
Make the angled rectangle layer active, click inside it with your magic wand, selections, invert. Open a paper (I used paper 10) Copy and paste as a new layer, click delete on your keyboard, deselect, add a drop shadow and delete the original layer.
Make the white rectangle layer active, selections, select all, float, defloat, add a new raster layer, flood fill with #204564. Adjust, add/remove noise Gaussian, 50%, monochrome checked. Add a drop shadow and delete the original layer. Do the same with the Bar layer.
Make your black rectangle layer active. Click inside it with your magic wand, selections, modify, expand by 2. Open paper 11, selections, invert, click delete on your keyboard and leave selected.
Open one of your tubes, copy and paste as a new layer, resize if necessary, click delete on your keyboard. Do the same with the second tube. Deselect and take your eraser and erase the parts of the tubes that go into the other rectangle. Add a drop shadow to each of your tubes. Make sure your tube layers are below the frame layer.
Open element 21, copy and paste as a new layer, resize by 64%, drag down below the oval layer and arrange it so it shows around the top of your tag. See mine for reference.
Open element 43, copy and paste as a new layer, resize by 64%, make sure it's on the top layer, add a drop shadow, duplicate it, then mirror it so that you have a moon on both sides of your rectangle.
Open element 28, copy and paste as a new layer, resize by 40%, arrange to the bottom right of your tag, duplicate and mirror, merge the two layers down together and add a drop shadow.
Open element 37, copy and paste as a new layer, resize by 40%, arrange below your flower layer on the right, duplicate and mirror, merge the two layers down together and add a drop shadow.
Open element 41, copy and paste as a new layer, resize by 50%, arrange in the middle where there is an open space between the flowers, drag it down so it is between the element 28 and element 37 layers. Add a drop shadow.
Add your copyright info and your name. Crop and resize as necessary. If you would like it to be transparent, delete your white background layer and save as a .png file.
Winter Hottie
 For this tutorial you will need the following:
A tube of your choice. I am using the artwork of Ismael Rac which you have to purchase to use. You can find his work at AMI.
Scrap kit elements of your choice.
Font of choice. I used Lainie Day SH
Plugins: Penta.com Color Dot, Xero Radiance, Eye Candy 3.1 glow
Open a new canvas 700 x 700 flood fill white.
Pick a dark color from your tube, and set it as the background. Use your preset shapes set to rectangle and draw out a good sized rectangle across your canvas and then convert to raster layer.
Selections, select all, float, defloat, selections, modify, expand by 5. Add a new raster layer and flood fill with a contrasting color from your tube. Deselect and drag it below your rectangle layer. Adjust, add/remove noise, add noise with the following settings: Gaussian, 50%, monochrome checked. merge the two layers together, and duplicate. Rotate the top one to the left by about 12 and add a drop shadow of your choice, then rotate the bottom one to the right by the same amount and add a drop shadow. Merge these two togther.
Change the background to the color that you just used for the border of the lower rectangle. Draw out another rectangle over the top of the one you have, about the same size and then convert to a raster layer.
Take your selection tool set on rectangle and draw out a rectangle in the middle of that rectangle about a third of the way up and down and all the way across (see mine for reference). Add a new raster layer, flood fill with the same color as you used for your rectangle (in my case it's the bluish color) then apply Penta.com color dot with the default settings. Deselect and then change the opacity to about 45%, then merge it down into the larger rectangle.
Selections, select all, float, defloat, invert, open your tube and copy and paste as a new layer, arrange it to the right of your rectangle and click delete on your keyboard. Leave selected, change the blend mode to Luminance(L). Lower the opacity to about 40%
Mirror your tube and copy and paste it again, resize it smaller (I did mine by 55%), click delete on your keyboard. Deselect and duplicate your tube. On the top layer apply gaussian blur at 3 change the blend mode to soft light. On the original tube layer that is at the bottom, apply Xero Radiance.
Make the top rectangle layer active again, selections, select all, float, defloat, modify, expand by 5. Add a new raster layer and fill with the color you used for the top rectangle, except make it a few shades darker. Drag this layer below your rectangle, add/remove noise with the same settings as above, merge the two rectangle layers together.
Now take your bottom rectangles that you have merged (the ones that you rotated and merged on the first step) and duplicate it. On the bottom layer, adjust, blur, gaussian blur by 15.
Add whatever elements you'd like to your tag.
Set your foreground and background each to a color from your rectangles, set the stroke at 1 and write out your name with your text tool, grab the little line in the center for rotating your text and pull it so that it rotates somewhat to the left (or you can use the rotate feature and rotate however many degrees you want). Convert to raster layer and add Eye Candy 3.1 glow, fat, width 2 color white, and then add your drop shadow.
Add your copyright info/credits.
Crop down any extra space you have around your tag and resize if necessary. If you'd like it to be transparent, delete the white background layer and save as a .png file.
For this tutorial you will need the following:
A tube of your choice. I am using the artwork of Ismael Rac which you have to purchase to use. You can find his work at AMI.
Scrap kit elements of your choice.
Font of choice. I used Lainie Day SH
Plugins: Penta.com Color Dot, Xero Radiance, Eye Candy 3.1 glow
Open a new canvas 700 x 700 flood fill white.
Pick a dark color from your tube, and set it as the background. Use your preset shapes set to rectangle and draw out a good sized rectangle across your canvas and then convert to raster layer.
Selections, select all, float, defloat, selections, modify, expand by 5. Add a new raster layer and flood fill with a contrasting color from your tube. Deselect and drag it below your rectangle layer. Adjust, add/remove noise, add noise with the following settings: Gaussian, 50%, monochrome checked. merge the two layers together, and duplicate. Rotate the top one to the left by about 12 and add a drop shadow of your choice, then rotate the bottom one to the right by the same amount and add a drop shadow. Merge these two togther.
Change the background to the color that you just used for the border of the lower rectangle. Draw out another rectangle over the top of the one you have, about the same size and then convert to a raster layer.
Take your selection tool set on rectangle and draw out a rectangle in the middle of that rectangle about a third of the way up and down and all the way across (see mine for reference). Add a new raster layer, flood fill with the same color as you used for your rectangle (in my case it's the bluish color) then apply Penta.com color dot with the default settings. Deselect and then change the opacity to about 45%, then merge it down into the larger rectangle.
Selections, select all, float, defloat, invert, open your tube and copy and paste as a new layer, arrange it to the right of your rectangle and click delete on your keyboard. Leave selected, change the blend mode to Luminance(L). Lower the opacity to about 40%
Mirror your tube and copy and paste it again, resize it smaller (I did mine by 55%), click delete on your keyboard. Deselect and duplicate your tube. On the top layer apply gaussian blur at 3 change the blend mode to soft light. On the original tube layer that is at the bottom, apply Xero Radiance.
Make the top rectangle layer active again, selections, select all, float, defloat, modify, expand by 5. Add a new raster layer and fill with the color you used for the top rectangle, except make it a few shades darker. Drag this layer below your rectangle, add/remove noise with the same settings as above, merge the two rectangle layers together.
Now take your bottom rectangles that you have merged (the ones that you rotated and merged on the first step) and duplicate it. On the bottom layer, adjust, blur, gaussian blur by 15.
Add whatever elements you'd like to your tag.
Set your foreground and background each to a color from your rectangles, set the stroke at 1 and write out your name with your text tool, grab the little line in the center for rotating your text and pull it so that it rotates somewhat to the left (or you can use the rotate feature and rotate however many degrees you want). Convert to raster layer and add Eye Candy 3.1 glow, fat, width 2 color white, and then add your drop shadow.
Add your copyright info/credits.
Crop down any extra space you have around your tag and resize if necessary. If you'd like it to be transparent, delete the white background layer and save as a .png file.
Thursday, January 21, 2010
New Goodies Blog
Hey everyone if you go over HERE there is a wonderful new blog called Stalkers Creations Goodies. What it is, is a blog for those of us at the Rac Stalkers Forum who participate in the creation challenges (we do templates and scrap kits, I have some here on my blog) to have their creations posted in a blog outside the forum for those of you who are not members of the forum. It makes it easier for those of you who are not members to snag some great goodies to use. We have stuff that is created by beginners as well as more advanced creators, so there's something for everyone.
You can still join the Rac Stalkers forum, of course. We are always looking for more Ismael Rac fans too! If you like Rac and you like lots of fun activities please come on over to Rac Stalkers and register and join the fun. If you like to create templates and scrap kits, we run a monthly challenge for each and you can make some and add to the goodies! So run on over to the new blog and check it out! Make sure to bookmark us!

Tuesday, January 19, 2010
New Award
I got a new award, got it twice actually, from Lis at LisDesignz and from Tiffany at Sweet Southern Comfort Creations. Thank you so much ladies!
Now I need to pass it on:
.........Artmama
.........Jess
.........Patty
.........Breeze

Tut using my template
Tiffany over at Sweet Southern Comfort Creations has an awesome tutorial using one of my templates. You can find her tut over HERE.


Thursday, January 14, 2010
Templates
Here are two new templates that I made for the template creation challenge over at the Xeracx Stalkers forum.
 You can download them HERE.
You can download them HERE.
Tuesday, January 12, 2010
Be Mine
 Please remember that tutorials are just a guide. You can change up elements, use a completely different kit, add stuff to it, or take stuff away. It's YOUR tag, make it how you like it!
For this tut you will need the following:
Any version of Paint Shop Pro. I am using PSP X.
Tube of choice. I am using the wonderful work of Ismael Rac which you must purchase to use. You can find his work at AMI.
Scrap kit of choice. I am using the kit Clearly Yours by Aiya at Juicy Bits.
Tag template Be Mine by Jess. She has given me permission to link directly to her download because she doesn't have it put on her blog. You can find it HERE.
Font of choice. I used Sheer Grace.
Plugin Visman Extravaganza Transmission and Alien Skin Eye Candy 3.1 Glow or another version of Alien Skin's gradient glow will work also.
Let's get started!
Open your tag template, on Raster 6 layer, click selections, select all, float, defloat, invert. Open paper 8, copy and paste as a new layer, resize by 50%. Click delete on your keyboard. Deselect and delete the original raster 6.
Make Raster 4 active, click inside it with your magic wand, and flood fill right on that layer with white, deselect.
Make Raster 2 layer active, click inside it with your magic wand, selections, modify, expand by 2, invert. Open paper 1, copy and paste as a new layer, click delete on your keyboard and then deselect. Leave the original layer and merge that layer down into it.
Make Raster 3 active. Using Eye Candy glow, set the width at 2, fat, color as white and apply that to Raster 3 layer.
Now open some heart elements. Resize them to about the same size as the hearts on the template and rotate them so they lay about the same direction as the ones there. Merge all the hearts into one layer and then delete the Raster 1 layer.
Make Raster 7 active, selections, select all, float, defloat, invert. Copy paper 1 and paste as a new layer. Click delete on your keyboard. Deselect and delete the original raster 7 layer. Add a drop shadow, I used 1, 1, 60, 5.
Make Raster 8 active, selections, select all, float, defloat, invert. Open paper 9, copy and paste as a new layer, and on that layer, click delete on your keyboard. Deselect, delete the original raster 8 layer, and rotate to the right by 26 and add your drop shadow.
Maker Raster 5 active, selections, select all, float, defloat, add a new raster layer and flood fill with #cc8fa6. Deselect and apply Eye Candy glow width of 5, fat, and color white, add drop shadow. Delete the original raster 5 layer.
Open your tube, copy and paste as a new layer, resize if necessary. Add your drop shadow then with your eraser tool, erase the bits that hang over the bottom of the circle.
Duplicate the hearts layer and the little circles layer. Drag them both above your tube layer. Erase the ones that hang over your tube where you don't want them.
Open the rose element, copy and paste as a new layer. Resize it and move it over to the left of your tag, add a drop shadow, erase any bits that hang over the partial circle.
duplicate your large circle layer, the split circle layer, the rectangles that you rotated, and the white part of the split circle layer, drag each of them to the bottom so that they are below the template and merge them together. Then go to adjust, blur, gaussian blur and change the setting to 10. Then apply Visman Extravaganza Transmission with the following settings: Line width 6, Offset 0, Contrast 40.
Add your name and all your copyright info.
Crop down and resize if needed. Delete the white background layer, and save as a .png file so that it's transparent.
Please remember that tutorials are just a guide. You can change up elements, use a completely different kit, add stuff to it, or take stuff away. It's YOUR tag, make it how you like it!
For this tut you will need the following:
Any version of Paint Shop Pro. I am using PSP X.
Tube of choice. I am using the wonderful work of Ismael Rac which you must purchase to use. You can find his work at AMI.
Scrap kit of choice. I am using the kit Clearly Yours by Aiya at Juicy Bits.
Tag template Be Mine by Jess. She has given me permission to link directly to her download because she doesn't have it put on her blog. You can find it HERE.
Font of choice. I used Sheer Grace.
Plugin Visman Extravaganza Transmission and Alien Skin Eye Candy 3.1 Glow or another version of Alien Skin's gradient glow will work also.
Let's get started!
Open your tag template, on Raster 6 layer, click selections, select all, float, defloat, invert. Open paper 8, copy and paste as a new layer, resize by 50%. Click delete on your keyboard. Deselect and delete the original raster 6.
Make Raster 4 active, click inside it with your magic wand, and flood fill right on that layer with white, deselect.
Make Raster 2 layer active, click inside it with your magic wand, selections, modify, expand by 2, invert. Open paper 1, copy and paste as a new layer, click delete on your keyboard and then deselect. Leave the original layer and merge that layer down into it.
Make Raster 3 active. Using Eye Candy glow, set the width at 2, fat, color as white and apply that to Raster 3 layer.
Now open some heart elements. Resize them to about the same size as the hearts on the template and rotate them so they lay about the same direction as the ones there. Merge all the hearts into one layer and then delete the Raster 1 layer.
Make Raster 7 active, selections, select all, float, defloat, invert. Copy paper 1 and paste as a new layer. Click delete on your keyboard. Deselect and delete the original raster 7 layer. Add a drop shadow, I used 1, 1, 60, 5.
Make Raster 8 active, selections, select all, float, defloat, invert. Open paper 9, copy and paste as a new layer, and on that layer, click delete on your keyboard. Deselect, delete the original raster 8 layer, and rotate to the right by 26 and add your drop shadow.
Maker Raster 5 active, selections, select all, float, defloat, add a new raster layer and flood fill with #cc8fa6. Deselect and apply Eye Candy glow width of 5, fat, and color white, add drop shadow. Delete the original raster 5 layer.
Open your tube, copy and paste as a new layer, resize if necessary. Add your drop shadow then with your eraser tool, erase the bits that hang over the bottom of the circle.
Duplicate the hearts layer and the little circles layer. Drag them both above your tube layer. Erase the ones that hang over your tube where you don't want them.
Open the rose element, copy and paste as a new layer. Resize it and move it over to the left of your tag, add a drop shadow, erase any bits that hang over the partial circle.
duplicate your large circle layer, the split circle layer, the rectangles that you rotated, and the white part of the split circle layer, drag each of them to the bottom so that they are below the template and merge them together. Then go to adjust, blur, gaussian blur and change the setting to 10. Then apply Visman Extravaganza Transmission with the following settings: Line width 6, Offset 0, Contrast 40.
Add your name and all your copyright info.
Crop down and resize if needed. Delete the white background layer, and save as a .png file so that it's transparent.
Monday, January 11, 2010
Love me, love my pet
 For this tut you will need the following:
Tube of choice. I am using the artwork of Ismael Rac which you must have a license to use and you can get at AMI.
Scrap kit Pet Shop which you can purchase at Addicted 2 Scraps.
Font of choice. I used Pricedown and Scriptina
Plugin Xenofex 1.1 Shower Door, Alien Skin Eye Candy 3.1 Glow
Ok, lets get started!
Open a new canvas about 700 x 700, flood fill white.
Open element A2S_PS33 (the polaroid)copy and paste as a new layer, resize about 65%. Take your magic wand tool and click inside the square part. Selections, modify, expand by 5.
Open one of the papers, I used PS15, copy and paste as a new layer, selections, invert, drag the paper below the polaroid frame. Leave selected.
Open your tube, copy and paste as a new layer, take your eraser tool and erase the parts that hang below the frame. Deselect and add a drop shadow to your tube and your polaroid. I used 1, 1, 60, 5 as my drop shadow throughout this tut.
Open element PS35, (or another similar one of a different color)copy and paste as a new layer, drag it below your paper layer (that you made your background in the polaroid. Resize by 75%. Click inside with your magic wand, selections, modify, expand by 5, selections, invert.
Open a paper of choice, copy and paste as a new layer. Click delete on your keyboard, drag that layer below the round frame layer.
Open some of the bubble elements (PS38, 39, 40)copy and paste as a new layer, drag them below the circle frame/paper. Place them around the circle frame until you get it how you'd like. You might want to duplicate some and resize them smaller. See my tag for reference.
Open one of the ribbons, copy and paste as a new layer, resize by 70%, arrange where you'd like it near the bottom of the polaroid, take your eraser tool, and erase the parts that hang over the edge.
Copy and paste some of the other elements that you like, resizing as necessary.
Merge the round frame and it's background, and then duplicate it. On the bottom layer, drag it to the very bottom, go to adjust, blur, gaussian blur, set at 10. Apply Xenofex Shower Door plugin with the following settings: Dot size 7, random seed 50. Apply it again, but this time, change the random seed to 70.
Using a wide font (I used Price down) type out Love me Love my pets, using #375370. Now apply Eye Candy 3.1 glow with a width of 5, white set at fat. Apply it again, changing the width to 2 and the color to #375370. Add your drop shadow.
Now with a thinner script style font, add your name, and apply a drop shadow.
Add your © info and credits.
Crop and resize as necessary. If you want it to be transparent, delete the white background layer and save as a .png.
You're all done!
For this tut you will need the following:
Tube of choice. I am using the artwork of Ismael Rac which you must have a license to use and you can get at AMI.
Scrap kit Pet Shop which you can purchase at Addicted 2 Scraps.
Font of choice. I used Pricedown and Scriptina
Plugin Xenofex 1.1 Shower Door, Alien Skin Eye Candy 3.1 Glow
Ok, lets get started!
Open a new canvas about 700 x 700, flood fill white.
Open element A2S_PS33 (the polaroid)copy and paste as a new layer, resize about 65%. Take your magic wand tool and click inside the square part. Selections, modify, expand by 5.
Open one of the papers, I used PS15, copy and paste as a new layer, selections, invert, drag the paper below the polaroid frame. Leave selected.
Open your tube, copy and paste as a new layer, take your eraser tool and erase the parts that hang below the frame. Deselect and add a drop shadow to your tube and your polaroid. I used 1, 1, 60, 5 as my drop shadow throughout this tut.
Open element PS35, (or another similar one of a different color)copy and paste as a new layer, drag it below your paper layer (that you made your background in the polaroid. Resize by 75%. Click inside with your magic wand, selections, modify, expand by 5, selections, invert.
Open a paper of choice, copy and paste as a new layer. Click delete on your keyboard, drag that layer below the round frame layer.
Open some of the bubble elements (PS38, 39, 40)copy and paste as a new layer, drag them below the circle frame/paper. Place them around the circle frame until you get it how you'd like. You might want to duplicate some and resize them smaller. See my tag for reference.
Open one of the ribbons, copy and paste as a new layer, resize by 70%, arrange where you'd like it near the bottom of the polaroid, take your eraser tool, and erase the parts that hang over the edge.
Copy and paste some of the other elements that you like, resizing as necessary.
Merge the round frame and it's background, and then duplicate it. On the bottom layer, drag it to the very bottom, go to adjust, blur, gaussian blur, set at 10. Apply Xenofex Shower Door plugin with the following settings: Dot size 7, random seed 50. Apply it again, but this time, change the random seed to 70.
Using a wide font (I used Price down) type out Love me Love my pets, using #375370. Now apply Eye Candy 3.1 glow with a width of 5, white set at fat. Apply it again, changing the width to 2 and the color to #375370. Add your drop shadow.
Now with a thinner script style font, add your name, and apply a drop shadow.
Add your © info and credits.
Crop and resize as necessary. If you want it to be transparent, delete the white background layer and save as a .png.
You're all done!
Friday, January 8, 2010
Coffee & Cake
 For this tut you will need:
Any version of Paint Shop Pro. I am using PSP X.
Scrap kit Good Morning at Addicted 2 Scraps.
3 tubes of your choice. I am using the artwork of Caron Vincent which you must have a license to use. You can get yours at CILM.
Mask of choice. I am using a mask from Weescotslass #81 (Wsl_81) which you can find on her site HERE.
Font of choice. I am using Carlotta
Plugins: Eye Candy 3.1 glow (or another version of gradient glow)
Let's begin.
Open a new canvas size 700 x 700 flood fill with white.
Open element el28, copy and paste as a new layer in your canvas.
Open paper pp6. Click inside the large middle square of your frame with your magic wand. Selections, modify, expand by 5, selections, invert. Copy and paste your paper as a new raster layer, on that layer, click delete on your keyboard. Leave selected, drag that layer below your frame layer.
Open one of your tubes, copy and paste as a new layer, resize if needed. Duplicate your tube, bring one above the frame layer and hide it. Make sure the other is below the frame layer. Take your eraser tool and erase the bits that hang below the bottom of the frame. Once you do that, deselect and add a drop shadow.
Unhide the top tube layer. Erase the bits that you don't want hanging below the frame. You don't have to be very careful how you erase because you have the lower one showing.
Now back on your frame layer, take your magic wand, and hold down your shift key, click inside each of the smaller frames. Selections, modify, expand 5, selections, invert.
Open paper pp18, copy and paste as a new layer, resize by 70%, click delete on your keyboard, leave selected, and drag that paper layer below your frame.
Open a tube, arrange so that the part you want showing is showing in the top frame. You may need to resize your tube. Now on that tube layer, click delete on your keyboard. Do the same for the lower frame, then deselect.
Add a new raster layer just above your white background layer. Flood fill with a color from your tube. I used #70b9df. Open your mask. Go to Layers, New Mask Layer, From Image, in the drop down box, look for your mask and then click ok. Delete the mask layer, merge the group. Resize if you'd like. I resized by 85%.
Open ele41, resize by 70%, copy and paste as a new layer. Using Eye Candy 3.1 glow, set to white, 3 width and fat, apply the glow, add a drop shadow.
Open a cupcake or doughnut element, resize (I resized by 15%), copy and paste above the bottom frame, add a drop shadow.
Do the same with one of the mug or cup elements.
Open ele38 resize by 70%, mirror, copy and paste as a new layer, position to the left side of your tag.
Add your © info, scrapkit credits and your name, crop and resize as necessary, and you're done.
Save your file as a transparent file by deleting the white background layer and saving as a .png file.
For this tut you will need:
Any version of Paint Shop Pro. I am using PSP X.
Scrap kit Good Morning at Addicted 2 Scraps.
3 tubes of your choice. I am using the artwork of Caron Vincent which you must have a license to use. You can get yours at CILM.
Mask of choice. I am using a mask from Weescotslass #81 (Wsl_81) which you can find on her site HERE.
Font of choice. I am using Carlotta
Plugins: Eye Candy 3.1 glow (or another version of gradient glow)
Let's begin.
Open a new canvas size 700 x 700 flood fill with white.
Open element el28, copy and paste as a new layer in your canvas.
Open paper pp6. Click inside the large middle square of your frame with your magic wand. Selections, modify, expand by 5, selections, invert. Copy and paste your paper as a new raster layer, on that layer, click delete on your keyboard. Leave selected, drag that layer below your frame layer.
Open one of your tubes, copy and paste as a new layer, resize if needed. Duplicate your tube, bring one above the frame layer and hide it. Make sure the other is below the frame layer. Take your eraser tool and erase the bits that hang below the bottom of the frame. Once you do that, deselect and add a drop shadow.
Unhide the top tube layer. Erase the bits that you don't want hanging below the frame. You don't have to be very careful how you erase because you have the lower one showing.
Now back on your frame layer, take your magic wand, and hold down your shift key, click inside each of the smaller frames. Selections, modify, expand 5, selections, invert.
Open paper pp18, copy and paste as a new layer, resize by 70%, click delete on your keyboard, leave selected, and drag that paper layer below your frame.
Open a tube, arrange so that the part you want showing is showing in the top frame. You may need to resize your tube. Now on that tube layer, click delete on your keyboard. Do the same for the lower frame, then deselect.
Add a new raster layer just above your white background layer. Flood fill with a color from your tube. I used #70b9df. Open your mask. Go to Layers, New Mask Layer, From Image, in the drop down box, look for your mask and then click ok. Delete the mask layer, merge the group. Resize if you'd like. I resized by 85%.
Open ele41, resize by 70%, copy and paste as a new layer. Using Eye Candy 3.1 glow, set to white, 3 width and fat, apply the glow, add a drop shadow.
Open a cupcake or doughnut element, resize (I resized by 15%), copy and paste above the bottom frame, add a drop shadow.
Do the same with one of the mug or cup elements.
Open ele38 resize by 70%, mirror, copy and paste as a new layer, position to the left side of your tag.
Add your © info, scrapkit credits and your name, crop and resize as necessary, and you're done.
Save your file as a transparent file by deleting the white background layer and saving as a .png file.
Thursday, January 7, 2010
My new blog
I am now selling my hand painted boxes on my new blog Sinfully Sweet Creations/Heart Shaped Box. Each box is custom painted to your specifications and then shipped to you. Right now I am only offering 3 choices in boxes, but if it goes well I have 2 or 3 more designs I am planning on offering. Payment is secure payment through paypal.
Wednesday, January 6, 2010
I've joined another CT
I am happy to announce I have joined the Creative Team at Addicted 2 Scraps. You will be seeing tuts featuring her scraps here in the coming months. Please go on over and have a look at her site. She's got a LOT of very pretty scrap kits!
 Hosted on Fotki
Hosted on Fotki
Tuesday, January 5, 2010
Tut Stop
Looking for a tut? Check out Tut Stop! Lots of blogs and tuts listed there. They are having a contest, so please, if you join tell them Mindy of Sinfully Sweet Creations sent you! You can join whether you are a tut writer or not, because it is made for those who want to find tuts to be able to find them!

Subscribe to:
Posts (Atom)