Pages

Showing posts with label no scraps. Show all posts

Sunday, May 6, 2018

Mother's Day


For this tutorial you will need the following:

Paint Shop Pro, I am using PSP X7, you should be able to use any version.

Tube of choice, I am using the artwork of Alicia Mujica, Martina tube which you need a license to use.  


Font of choice, I am using Pea Lovey Dovey

Mask: Vix Big Mask 001

Plugins: No outside plugins used


Just remember that my choices of papers and elements is just a suggestion, change it up and make it yours! You don't have to follow mine exactly.

Add a drop shadow of your choosing to tubes & elements throughout. I usually use 1, 1, 50, 5 unless otherwise noted.
 

Let's get started!

Open a new canvas 850 x 850 pixels with a white background
Copy and paste your tube as a new layer, drag it down so you can see her face
Adjust, blur, gaussian blur, 50

Crop it, then resize it to 85%
Open your mask, layers, new mask layer, from image, find mask in drop down box, apply

Copy and paste your tube again, resize 40%

With your color set on #2c99ad take your rectangle tool and draw out a rectangle,
duplicate twice, arrange them, merge together

Make sure you're on the rectangles layer, click inside each rectangle with your magic wand 
set on add, selections, invert

Copy your tube again, paste in your canvas, arrange how you want in the rectangles, 
click delete on your keyboard, merge the tube and rectangles layers

Add a drop shadow of 8, 8, 75, 10 to the rectangles

Copy and paste your word art that came with the tube, resize 40% 

Take your eraser tool and set the hardness to around 8,size 75, shape round
 erase her legs so it looks like she's blending into the mask 

crop and resize
add your copyright and credits as needed
add your text and save

Thursday, February 5, 2015

Mystic Moon


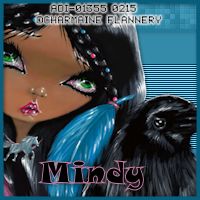
Snaggable versions of this tag in my Fotki album

For this tutorial you will need the following:

Paint Shop Pro, I am using PSP X7, you should be able to use any version.

Tube of choice, I am using the artwork of Charmaine Flannery (Mystic Moon tube)
which you need a license to use.  

Font of choice, I am using Snap ITC

Plugins: Visman Extravaganza - Transmission
Xero - Fritillary


Just remember that my choices of papers and elements is just a suggestion, change it up and make it yours! You don't have to follow mine exactly.

Add a drop shadow of your choosing to tubes & elements throughout. I usually use 1, 1, 50, 5 unless otherwise noted.


Let's get started!

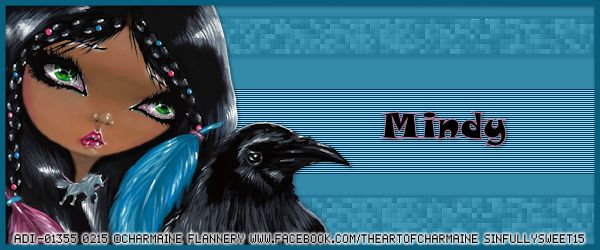
Banner Tag

Open a new canvas 600 x 250 pixels with a white background

Copy and paste your tube as a new layer, resize by 38%

Add a new raster layer below the tube, flood fill with #338aa9
Take your selection tool set on rectangle, draw out a wide rectangle covering about 1/3 of the center of the canvas

Apply Visman Extravaganza - Transmission with the following settings
Line Width = 6
Offset = 191
Contrast = 85

Deselect

Take your selection tool set on rectangle again, and select the middle 1/3 of the top section

Apply Visman Extravaganza - Fritillary with the following settings:
Granularity = 5
Aggression = 30
Tessilation = 15
Variation = 45

promote to layer then deselect
then  duplicate

move one to the center of the bottom 1/3 of the tag

Merge these 2 layers together, take your magic wand, click outside of the rectangles with the fritillary
then selections, invert, modify, expand 3 
add a new raster layer below it, then flood fill with #075e7d
then merge these two layers together, add a drop shadow

Once I got to this part and tried to drop opacity, I noticed the top part didn't get lighter, so I hid the layers and realized that the fritillary was still on the background layer at the top, so I hid the tube and the fritillary layers and erased it at the top, then clicked on it with my magic wand, expanded by 2, and flood filled it with #338aa9

Then, unhide the tube and the fritillary layers, and change the opacity of the fritillary layer to 35

Now make sure you are on the white background layer, 
take your crop tool and crop the tag with the tool set on snap crop rectangle to layer opaque
selections, select all, modify, set selection borders, set at 5
make a new raster layer at the top and flood fill with #338aa9
then deselect

add your copyright and credits as needed
add your text and save


Avatar

Open a new canvas 200 x 200 or whatever size you need for your forum

Copy and paste the background from the banner
copy and paste the tube from the banner
crop the same way you did for the banner

make a border the same way you did for the banner except change the width to 3

add your copyright and credits as needed
add your text and save

Friday, November 21, 2014

Boxed In


For this tutorial you will need the following:

Paint Shop Pro, I am using PSP X7, you should be able to use any version.

Tube of choice, I am using the artwork of Terri Lynne Albright which you need a license to use.  

Font of choice, I am using Playbill

Plugins: No outside plugins used


Let's get started!

Open a new canvas 250 x 500 pixels with a white background

Copy and paste your tube into the canvas resize 80% arrange in frame
Pick a medium to light color from your tube add a new layer above the white background and flood fill with that color. I used #cd90f6

Make sure you are on the white background layer
make your crop tool active, then on the top click on the snap to layer opaque
double click on your tag, this will crop everything so it's no larger than your white background

Duplicate your tube, hide the top layer
Make sure you are on the bottom layer, effects, photo effects, vignette
Click your mouse on the top left corner, and drag it all the way to the bottom right
then use the following settings:
dark/light: -82
blur: 20
diffuse glow: 35
feather edge: 50
add a drop shadow to this layer

unhide the top layer, adjust blur, gaussian 3, change blend mode to soft light

make sure you're on the colored background, apply texture effects, textures, small dimples with the following settings:
size percent: 280
smoothness: 0
depth: 4
ambience 0
shininess: 0
color: #a541d7
angle: 315
intensity:
83
elevation: 59

set your foreground color to #52255c
make sure you're on the white background
selections, select all, modify, set selection borders,set it at 5
make a new raster layer above the tubes, flood fill with #52255c
add noise with the following settings: random, monochrome checked, 50

If you want to make a matching avatar, make a new canvas whatever size you want and just
copy and paste the layers into the avatar, then resize your tube to whatever fits it how you want, then
do the frame the same way you did for the tag. I usually make an avatar frame a little smaller, like 2 or 3 pixels


add your copyright and credits as needed
add your text and save

Monday, September 12, 2011

I'm No Angel

For this tutorial you will need the following:
Paint Shop Pro, I am using PSP X, you should be able to use any version.
Tube of choice, I am using the artwork of Barbara Jensen, which you need a license to use. You can get it at her site here. This tube, however, is exclusive to Scraps and the City and you can get it here.
Template10 by Mindy Mae, which you can get here. Just look on the right sidebar for download links.
Font of choice, I am using Brushtip Travis, Dagobert
Plugins: no outside plugins, we'll just use ones that are standard with PSP.
Just remember that my choices of papers and elements is just a suggestion, change it up and make it yours! You don't have to follow mine exactly.
Let's get started!
Open the template, change the canvas size to 650 x 650 to give a little space to work.
Delete the following layers: raster 1, stars, hearts, and little circles.
Click inside the circle with your magic wand, make your foreground a gradient, choose the grey accent gradient from your drop down box, angle 45, repeats 1.
Add a new raster layer and flood fill with your gradient. Deselect.
Effects, texture effects, weave with the following settings, 2, 8, 30 weave and gap both white, fill gaps checked.
Click inside the white border on the circle layer we just used, add a new raster layer below the gradient, flood fill with white and deselect. Delete the original circle layer.
On the white border layer, add noise uniform, 80, monochrome checked. Add a drop shadow.
Add a drop shadow to the stitches and the angel circle layer.
Open your tube, copy and paste as a new layer, resize if needed, add a drop shadow.
Now, make your gradient circle layer active, selections, select all, float, defloat. Now make your tube layer active, take your eraser tool and erase the bits that hang over the bottom too far, then deselect.
Bring the big angel word art layer to the top, click inside it with your magic wand. Add a new raster layer, flood fill with white.
Add noise, uniform 80, monochrome unchecked.
Selections, modify, expand by 3, add a new raster layer under the angel word art, flood fill with black. Deselect, merge the white layer and black layer together, delete the original word art layer.
Free rotate to the left by about 15 add a drop shadow.
Use your text tool to add the words "I'm no" I did mine in black, then selections, modify, expand by 2, added a new raster layer, flood filled with white, deselect, and merged the two together, rotate the same as we did the angel layer and add a drop shadow.
Move both of these layers up to the top left of your tag.
Recolor the lines by making that layer active, and using adjust hue and saturation to get it to the color that matches your tube. I did mine by changing hue to 67 and saturation to 154.
Add your copyright and name and you're done!

Tuesday, July 6, 2010

Gorjuss Circles

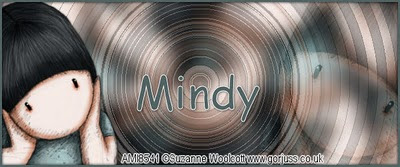
For this tutorial you will need the following: Paint Shop Pro, I am using PSP X, you should be able to use any version. Tube of choice, I am using the artwork of Suzanne Woolcott which you need a license to use. I purchased mine at AMI, but she is now selling her art on her own site. You can get it HERE Font of choice, I am using Plugins: MuRa Meister Copies L en K's Mayra Filter Factory A Rings Let's get started! Open a new canvas 600 x 250 with a transparent background. Open your tube and coy and paste as a new layer. Apply MuRa Meister Copies using the Wallpaper Rotate preset. Duplicate it and hide the top layer. On the bottom layer apply Effects>Art Media Effects>Brush Strokes with the following settings: Softness 20 Bristles 160 Width 5 Opacity 50 Length 10 Density 25 Angle 102 Color #505050 Apply this affect a total of 2 times. Apply Gaussian blur at 20. Unhide your top layer and apply the L en K's Mayra with the following settings top to bottom: 0 149 76 2 Now apply Filter Factory A Rings. Click inside several of the lines with your magic wand and hold down your shift key at the same time until you get them all selected. Hit the delete key on your keyboard. Change the opacity to about 25 or 30. Copy your tube and paste as a new layer, resize as necessary. Move to the left side, add a drop shadow. Paste your tube again, move to the right side, resize if necessary, mirror and add a drop shadow. Change the blend mode to Soft Light and change the opacity to 65. Add a new raster layer, selections, select all, modify, contract by 3, invert. Pick a dark color from your tube and flood fill. Deselect. Add a drop shadow. Add your copyright info and your name.