Pages

Sunday, November 30, 2014

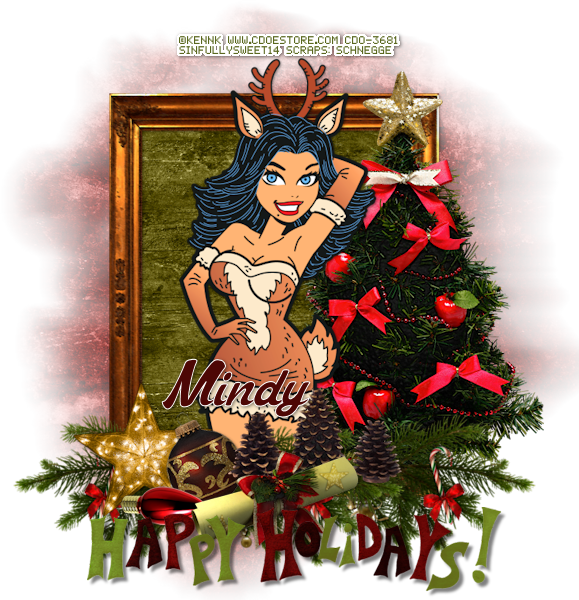
Reindeer Christmas


For this tutorial you will need the following:

Paint Shop Pro, I am using PSP X7, you should be able to use any version.

Tube of choice, I am using the artwork of Kenny K Individual tube 38-1 which you need a license to use.  This tube is at CDO

Scrap kit of choice. I am using Schnegge Christmas Colab 2014  which was part of the Christmas Collab available at CDO in November 2014 when you bought 2 kits you got it free. It will no longer be available after Nov 30th 2014

Font of choice, I am using Mastoc

Mask of your choice 

Plugins: no outside plugins used


Just remember that my choices of papers and elements is just a suggestion, change it up and make it yours! You don't have to follow mine exactly.

Add a drop shadow of your choosing to tubes & elements throughout. I usually use 1, 1, 50, 5 unless otherwise noted.


Let's get started!

Open a new canvas 850 x 850 pixels with a white background

Open frame copy and paste as a new layer resize 90%
click inside with your magic wand, selections, modify, expand 2, selections, invert
open paper 4 copy and paste as a new layer 
click delete on your keyboard, leave selected

Copy and paste your close up tube as a new layer
arrange in your frame
erase the bits that hang out of your frame where you don't want them

Now add your elements
element 2 resize 45% rotate right 30 arrange on bottom left corner
duplicate, mirror horiztonal (regular mirror in older versions of PSP)
duplicate that layer, drag to the left

element 9 arrange on right below the tube & just above the frame
element 8 resize 45% arrange on bottom left
element 11 resize 35% arrange to the right of the star

element 10 resize 32% rotate left 90 arrange in front of star and other christmas ornament
element 7 resize 45% arrange to the left  of the other decorations
element 4 resize 45% arrange behind scroll layer
wordart arrange at the bottom add drop shadow of 5, 5, 50, 5

add paper 3 above the white background, 
apply your mask, merge group


crop and resize
add your copyright and credits as needed
add your text and save
Saturday, November 29, 2014

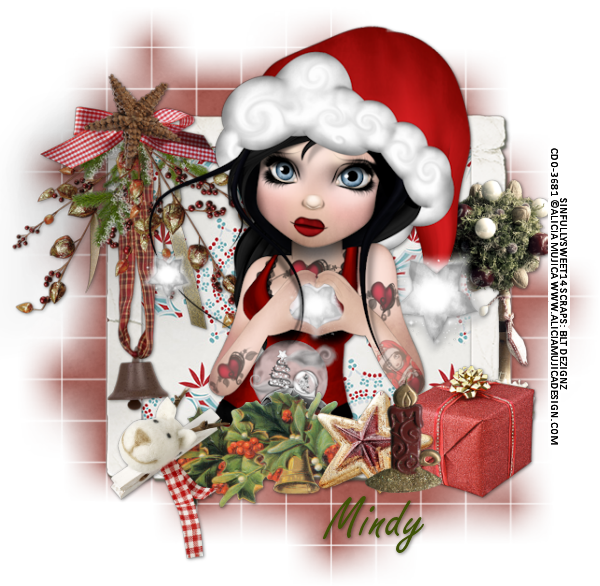
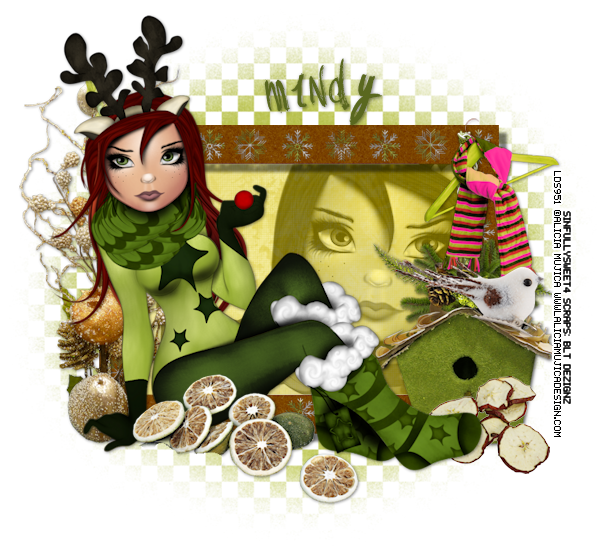
Christmas Cider


Snaggable versions of this tag in my Fotki album

For this tutorial you will need the following:

Paint Shop Pro, I am using PSP X7, you should be able to use any version.

Tube of choice, I am using the artwork of Alicia Mujica which you need a license to use.  
This tube is called Green Star and she was in the Black Friday 2014 pack. 

Scrap kit of choice. I am using a PTU kit, Christmas Cider by BLT Dezignz 

Font of choice, I am using Vtks Rash


Plugins: no outside plugins used


Just remember that my choices of papers and elements is just a suggestion, change it up and make it yours! You don't have to follow mine exactly.

Add a drop shadow of your choosing to tubes & elements throughout. I usually use 1, 1, 50, 5 unless otherwise noted.


Let's get started!

Open a new canvas 850 x 850 pixels with a white background

Open frame  copy and paste as a new layer, resize 25% then 65%
click inside with your magic wand, selections, modify, expand 2, selections, invert
open paper 2 resize 800 x 800 pixels
 copy and paste as a new layer 
click delete on your keyboard. leave selected

Mirror horizontal (this is just mirror on earlier versions of PSP) your tube, copy and paste as a new layer under the frame, 
resize 75%
arrange in the frame, click delete on your keyboard
change the blend mode to Luminance(L) drop opacity to about 55
deselect, add a drop shadow of 10, 10, 50, 5 to your frame

Go back to your tube, mirror back to how it was, then copy and paste as a new layer above the frame
resize 40% arrange on the left side of the frame

now add your elements:
deco resize 20% arrange on left below tube layer
 limes resize 20%  then 40% arrange in front of tube, I erased the two darker ones on the bottom
birdhouse resize 15% arrange on bottom right, below tube layer
apples resize 15% & 35% arrange in front of birdhouse
bird resize 25% arrange on top of birdhouse
scarf resize 15% then 50% arrange on top left

open paper 4, resize to 850 x 850 pixels
copy and paste as a new layer above the white background
apply your mask, merge group
resize 90%

add your copyright and credits as needed
add your text and save

Thursday, November 27, 2014

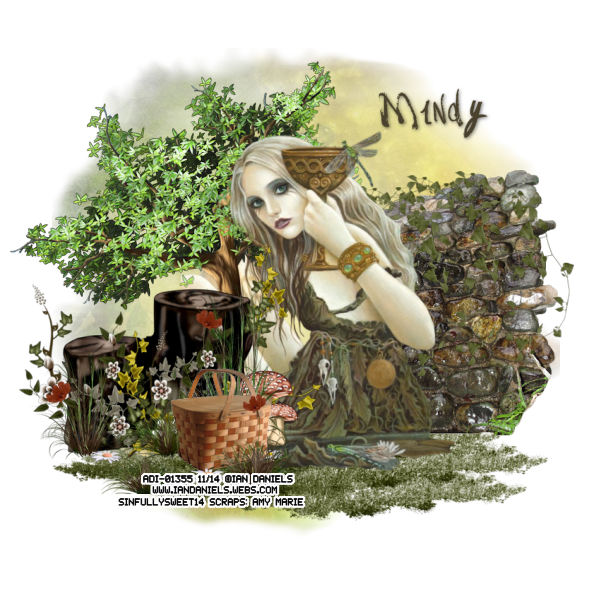
Dragonfly Picnic


Snaggable versions of this tag in my Fotki album

For this tutorial you will need the following:

Paint Shop Pro, I am using PSP X7, you should be able to use any version.

Tube of choice, I am using the artwork of Ian Daniels (ID-AA1 Tube)which you need a license to use.  

Scrap kit of choice. I am using a PTU kit, Spring Browny by Amy Marie's Kits 

Font of choice, I am using Vtks Rash

Mask of your choice

Plugins: no outside plugins


Just remember that my choices of papers and elements is just a suggestion, change it up and make it yours! You don't have to follow mine exactly.

Add a drop shadow of your choosing to tubes & elements throughout. I usually use 1, 1, 50, 5 unless otherwise noted.


Let's get started!

Open a new canvas 850 x 850 pixels with a white background

Copy and paste your tube as a new layer, resize by 85%

Now we'll build our tag by adding the elements:
element24 arrange under tube, duplicate 4 times, arrange around so you have a good sized patch of grass, then hide the tube and white background, merge visible, unhide the hidden layers

element 47 arrange in front of tube on left
element 7 resize 75% arrange in front of tube on bottom left
element 1 arrange behind tree stump, duplicate, drag down to the left

element 27 arrange in front of tube on left, duplicate, drag the duplicate below the tube
take your eraser tool and erase just what is over the face & body of your tube but leave where the tree is covering her legs

element 45 mirror horizontal arrange behind tube on right
element 20 resize 55%  flip vertically duplicate 2 times arrange across top of wall

copy and paste paper 18 as a new layer above the white background
apply your mask, merge group


crop and resize
add your copyright and credits as needed
add your text and save
Wednesday, November 26, 2014

Coffee Bean


Snaggable versions of this tag in my Fotki album

For this tutorial you will need the following:

Paint Shop Pro, I am using PSP X7, you should be able to use any version.

Tube of choice, I am using the artwork of Anna Marine Individual Tube 49-1 which you need a license to use.  

Scrap kit of choice. I am using a PTU scrap kit by Ladyhawwk Designs IB-Anna Marine-49-1

Font of choice, I am using Segoe Script

Mask of your choice

Plugins: No outside plugins used


Just remember that my choices of papers and elements is just a suggestion, change it up and make it yours! You don't have to follow mine exactly.

Add a drop shadow of your choosing to tubes & elements throughout. I usually use 1, 1, 50, 5 unless otherwise noted.


Let's get started!

Open a new canvas 850 x 850 pixels with a white background

Open frame 1 copy and paste as a new layer 
click inside with your magic wand, selections, modify, expand 2, selections, invert
open paper 4 copy and paste as a new layer 
click delete on your keyboard,

Copy and paste your close up tube as a new layer, resize by 90%
arrange in your frame
erase the bits that hang out of your frame where you don't want them

Now add your elements:
element24  resize 60% arrange on bottom right, duplicate, mirror horizontal
element 3 resize 50% arrange above flowers on right side
element 30 resize 46% arrange bottom center
element 28 resize 46% arrange to the right of element 30
element 29 resize 35% arrange behind the coffee beans layer
element 26 resize 45% arrange behind beans & cinnamon sticks
element 22  resize 45% arrange between the coffee cup and coffee beans
element 23 resize 60% rotate right 80 arrange behind coffee cup on the left

add paper 6 above the white background
apply your mask, merge group, duplicate, merge together, resize 85%

crop and resize
add your copyright and credits as needed
add your text and save

Monday, November 24, 2014

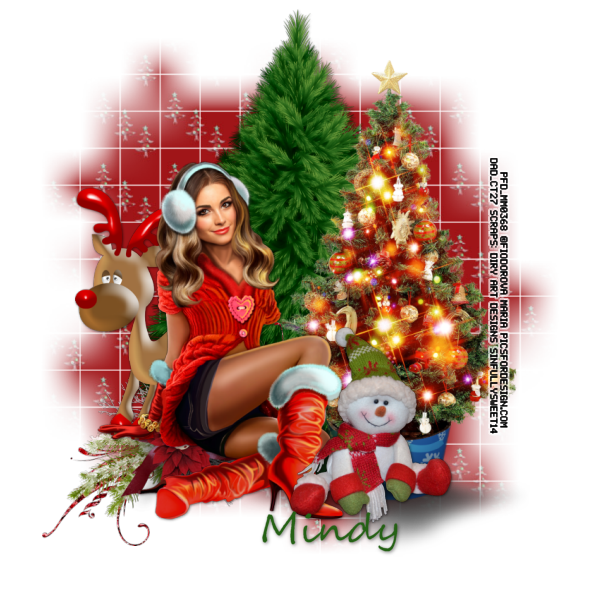
CT Tag Show Off Diry Art


New tag using the artwork of Fidor from PFD
and PTU scrap kit Feeling Christmas by Diry Art available here:
Diry Art Store Ya *Christmas 2013 Combo - 4 scrap kits*

Snaggable versions of this tag at Fotki
--------------------------------------------------------------------------------------------------------
And... CHECK OUT THIS GREAT PROMOS!
• RAW- Every Sunday 12 hours 50% OFF all products:
• Diry Art StoreYa
- *CHRISTMAS 2013 COMBO* 4 scrapkits:
- *BUILD YOUR OWN CU or PU COMBO*
- *VIP CU MEMBERSHIP*
· 1 month membership: http://tinyurl.com/kem762j
· 6 months membership: http://tinyurl.com/k2kbx6v
• CU Raining Digitals- 20% OFF until Nov 30th:

Dear Santa


Snaggable versions of this tag in my Fotki album

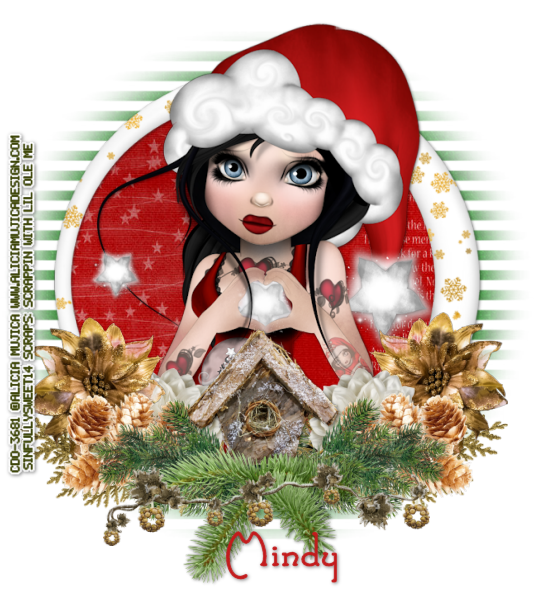
For this tutorial you will need the following:

Paint Shop Pro, I am using PSP X7, you should be able to use any version.

Tube of choice, I am using the artwork of Alicia Mujica CDO Exclusive tube 8A which you need a license to use.  This tube is not available in her store, but only at CDO.

Scrap kit of choice. I am using PTU kit, Dear Santa, by Scrappin With Lil Ole Me  

Font of choice, I am using Santa's Sleigh Full

You'll find it in the October 2014 posts, for some reason when I clicked the post
it would not give me the direct url to that post in the address bar.
You can also find it by clicking "Masks" on the left sidebar, and it's just a few posts down


Plugins: No outside plugins used


Just remember that my choices of papers and elements is just a suggestion, change it up and make it yours! You don't have to follow mine exactly.

Add a drop shadow of your choosing to tubes & elements throughout. I usually use 1, 1, 50, 5 unless otherwise noted.


Let's get started!

Open a new canvas 850 x 850 pixels with a white background

Open element 14 copy and paste as a new layer, resize 90%
open paper 6 copy and paste as a new layer
click delete on your keyboard,
leave selected


Copy and paste your close up tube as a new layer
arrange in your frame
erase the bits that hang out of your frame where you don't want them

add your elements: 

element 148 resize 50%  mirror vertically, arrange on bottom right, duplicate, mirror horizontally
element 13 resize 40% arrange on top of the gold colored branches, duplicate, mirror horizontally
element 9 resize 40% arrange bottom center

element 58 resize 40% arrange in front of birdhouse
element 18 resize 45% arrange at the bottom of the branches
element 17 resize 20% arrange in front of birdhouse

element 117 resize 25% arrange below the green branches on right, duplicate, mirror horizontally, 
element 134 resize 35% arrange in front of flowers duplicate & mirror horizontally
element 121 resize 35% arrange behind flower & pincones, duplicate & mirror horiztonally

copy and paste paper 23 above the white background
apply your mask, merge group, resize 85%

crop and resize
add your copyright and credits as needed
add your text and save

Sunday, November 23, 2014

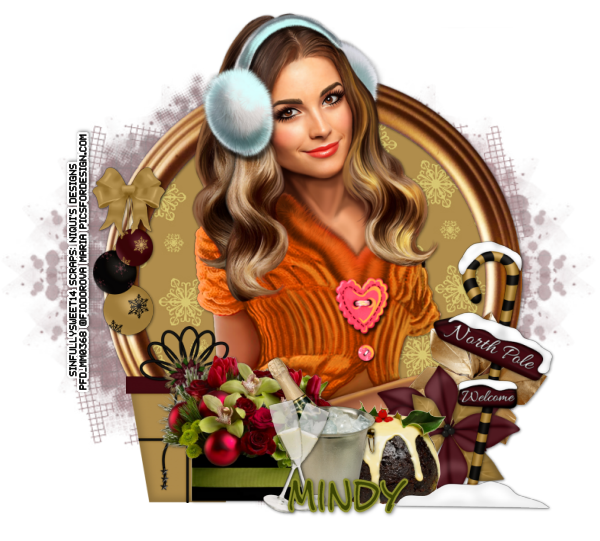
Christmas Joy


Snaggable versions of this tag in my Fotki album

For this tutorial you will need the following:

Paint Shop Pro, I am using PSP X7, you should be able to use any version.

Tube of choice, I am using the artwork of Fedor (Mia tube) which you need a license to use.  

Scrap kit of choice. I am using a PTU kit, Christmas Joy by Niqui's Designs 

Font of choice, I am using CC Jim Lee


Plugins: No outside plugins used


Just remember that my choices of papers and elements is just a suggestion, change it up and make it yours! You don't have to follow mine exactly.

Add a drop shadow of your choosing to tubes & elements throughout. I usually use 1, 1, 50, 5 unless otherwise noted.


Let's get started!

Open a new canvas 850 x 850 pixels with a white background

Open element 37 copy and paste as a new layer resize 80%
click inside with your magic wand, selections, modify, expand 2, selections, invert
open  copy and paste as a new layer 
click delete on your keyboard, leave selected

Copy and paste your tube as a new layer, resize by 
arrange in your frame
erase the bits that hang out of your frame where you don't want them

Add the following elements
element 64 resize 55% arrange on bottom left
element 42 resize 40% arrange to the left of the flowers
element 38 resize 40% arrange to the right of the flowers

element 53 resize 30% mirror horizontal arrange to the right of and behind ice bucket
element 39 resize 29% arrange in front of flowers & ice bucket
element 51 resize 40% mirror horizontal arrange on left side

element 3 resize 35% arrange behind & right of the cake
element 30 resize 35% arrange above & behind other flower
element 2 resize 60% arrange in front of flowers on right

add paper 8 above the white background
apply your mask, merge group
resize 105% drop the opacity to 50


crop and resize
add your copyright and credits as needed
add your text and save

Friday, November 21, 2014

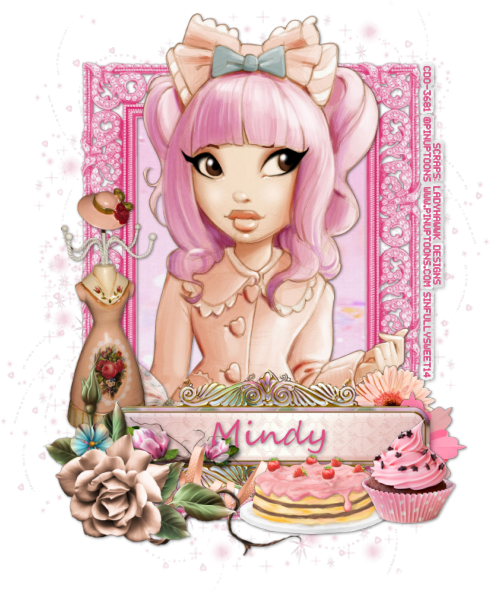
Pretty In Pink


Snaggable versions of this tag in my Fotki album

For this tutorial you will need the following:

Paint Shop Pro, I am using PSP X7, you should be able to use any version.

Tube of choice, I am using the artwork of Pinup Toons- Individual Tube-203-2 which you need a license to use. 


Font of choice, I am using Segoe Script

Plugins: No outside plugins used


Just remember that my choices of papers and elements is just a suggestion, change it up and make it yours! You don't have to follow mine exactly.

Add a drop shadow of your choosing to tubes & elements throughout. I usually use 1, 1, 50, 5 unless otherwise noted.


Let's get started!

Open a new canvas 850 x 850 pixels with a white background

Open frame 2 copy and paste as a new layer 
layer  use paper
click inside with your magic wand, selections, modify, expand 5, selections, invert
open paper 3 copy and paste as a new layer 
click delete on your keyboard

Copy and paste your tube as a new layer
arrange in your frame
erase the bits that hang out of your frame where you don't want them

Now add your elements:
element 9 resize 55% mirror horizontal arrange on bottom left corner
element 13 resize 65% arrange on right side below the flowers layer
element 20 resize 80% arrange across bottom, above & behind flower & dress form layers

element 19 resize 35% rotate right 35 arrange just above tube layer on left bottom
element 4 resize 55% arrange on bottom right corner
element 21 resize 40% arrange on the bottom, just left of cupcake

element 17 resize 45% arrange behind and to the right of the cupcake
element 6 resize 25% arrange behind other flower
element 5 resize 35% arrange behind cake and the flower cluster on the left

element 2 arrange above white background, duplicate, flip vertical, drag to bottom, merge these two

crop and resize
add your copyright and credits as needed
add your text and save

Boxed In


For this tutorial you will need the following:

Paint Shop Pro, I am using PSP X7, you should be able to use any version.

Tube of choice, I am using the artwork of Terri Lynne Albright which you need a license to use.  

Font of choice, I am using Playbill

Plugins: No outside plugins used


Let's get started!

Open a new canvas 250 x 500 pixels with a white background

Copy and paste your tube into the canvas resize 80% arrange in frame
Pick a medium to light color from your tube add a new layer above the white background and flood fill with that color. I used #cd90f6

Make sure you are on the white background layer
make your crop tool active, then on the top click on the snap to layer opaque
double click on your tag, this will crop everything so it's no larger than your white background

Duplicate your tube, hide the top layer
Make sure you are on the bottom layer, effects, photo effects, vignette
Click your mouse on the top left corner, and drag it all the way to the bottom right
then use the following settings:
dark/light: -82
blur: 20
diffuse glow: 35
feather edge: 50
add a drop shadow to this layer

unhide the top layer, adjust blur, gaussian 3, change blend mode to soft light

make sure you're on the colored background, apply texture effects, textures, small dimples with the following settings:
size percent: 280
smoothness: 0
depth: 4
ambience 0
shininess: 0
color: #a541d7
angle: 315
intensity:
83
elevation: 59

set your foreground color to #52255c
make sure you're on the white background
selections, select all, modify, set selection borders,set it at 5
make a new raster layer above the tubes, flood fill with #52255c
add noise with the following settings: random, monochrome checked, 50

If you want to make a matching avatar, make a new canvas whatever size you want and just
copy and paste the layers into the avatar, then resize your tube to whatever fits it how you want, then
do the frame the same way you did for the tag. I usually make an avatar frame a little smaller, like 2 or 3 pixels


add your copyright and credits as needed
add your text and save

Alicia Mujica CT Tag Show Off


New tag set using the sweet Zoe tube by Alicia Mujica


Also using Alicia's Zoe tube. Snag tags for this tag here


Also using Alicia's Zoe tube. Snag tags for this tag here


Thursday, November 20, 2014

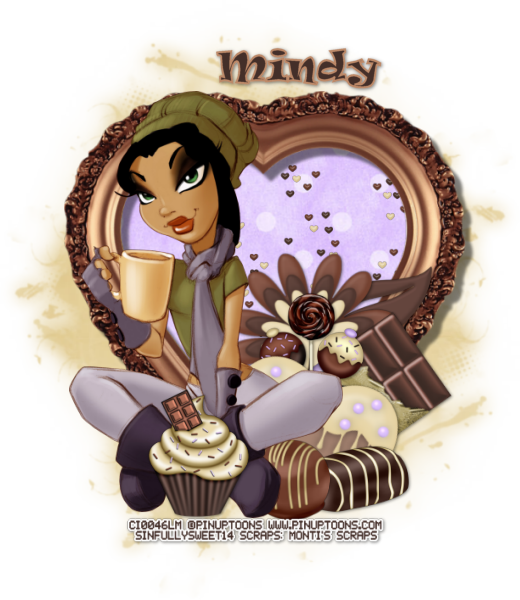
Cocoa


Snaggable versions of this tag in my Fotki album

For this tutorial you will need the following:

Paint Shop Pro, I am using PSP X7, you should be able to use any version.

Tube of choice, I am using the artwork of PinupToons-Individual Tube 55-2 which you need a license to use, available at CDO

Scrap kit of choice. I am using a PTU kit by Monti's Scraps, IB-Melissa Dawn-18-1 
also available at CDO.  This kit was inspired by the Melissa Dawn tube, but you can use it with any artist you'd like. 

Font of choice, I am using Ravie


Plugins: No outside plugins
I do use Eye Candy 4000 Gradient Glow on all my copyrights/credits layers
I do this because some forums will make a .png tag show up with a black background and then your
copyright doesn't show. 


Just remember that my choices of papers and elements is just a suggestion, change it up and make it yours! You don't have to follow mine exactly.

Add a drop shadow of your choosing to tubes & elements throughout. I usually use 1, 1, 50, 5 unless otherwise noted.


Let's get started!

Open a new canvas 850 x 850 pixels with a white background

Open frame 2 copy and paste as a new layer resize 80% then 90%
click inside with your magic wand, selections, modify, expand 2, selections, invert
open paper 1 copy and paste as a new layer 
click delete on your keyboard, deselect

Copy and paste your tube as a new layer, arrange just left of the center of the frame

add the following elements:

element 34 resize 40% arrange on the right side of the frame
element 21 resize 40% rotate right 20 arrange below the flower
element 32 resize 40% rotate left 35 arrange between flower and heart
element 11 resize 30% arrange behind heart
element 29 resize 40% arrange on right side of frame, between the frame & paper layers
element 2 resize 25% arrange in front of tube
element 38 resize 30% arrange behind flower on right side
element 18 resize 25% arrange on the left side of the heart
element 16 resize 15% arrange to the left of element 18

Copy and paste paper 7 above the white background
apply your mask, duplicate, mirror horizontal, drag down, merge the two together
resize 90%

crop and resize
add your copyright and credits as needed
add your text and save

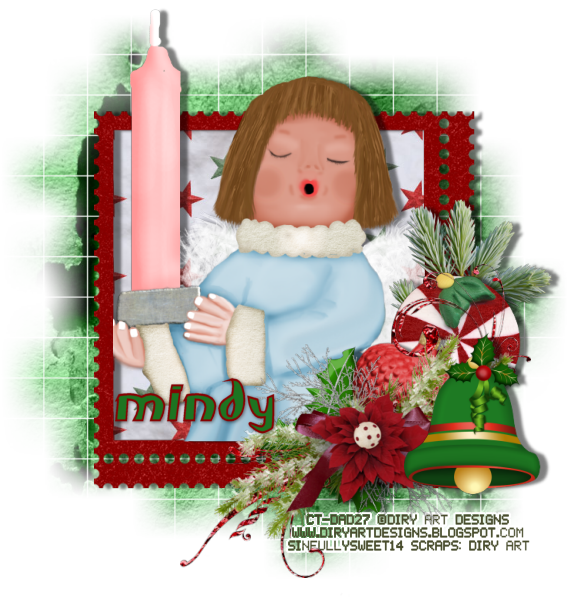
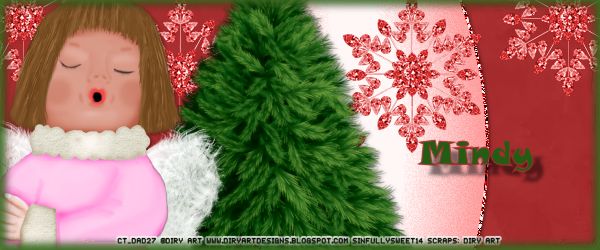
Noel - Diry Art CT Show Off Tags

These two tags were both made using the Cute little Angel CU tube by Diry Art available at:

The scrap kit used on both tags is called Feeling Christmas, by Diry Art, available at:
Diry Art Store Ya in a bundle with a total of 4 kits


Snaggable versions of the second tag in my fotki album


And... CHECK OUT THIS GREAT PROMOS!
RAW- Every Sunday 12 hours 50% OFF all products

- *CHRISTMAS 2013 COMBO* 4 scrapkits:

- *BUILD YOUR OWN CU or PU COMBO*

- *VIP CU MEMBERSHIP*
CU Raining Digitals- 20% OFF until Nov 30th

Wednesday, November 19, 2014

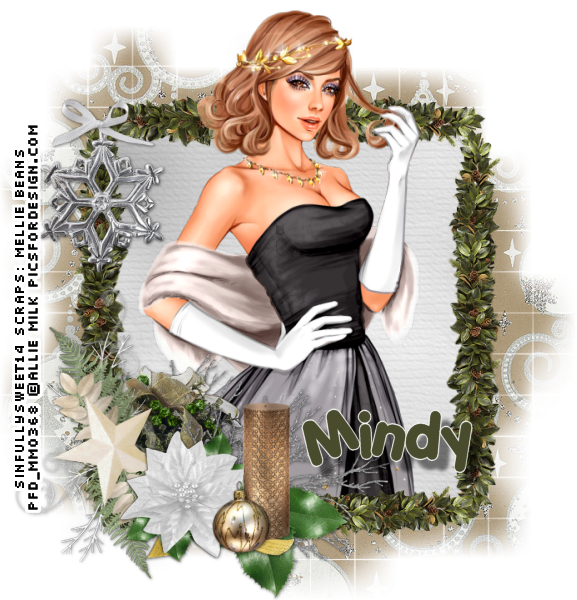
Holly Days


For this tutorial you will need the following:

Paint Shop Pro, I am using PSP X7, you should be able to use any version.

Tube of choice, I am using the artwork of Ellie Milk (Snow Princess Prepaid Project tube) which you need a license to use.  

Scrap kit of choice. I am using a PTU kit called  HollyDays by Mellie Beans  

Font of choice, I am using Porky's

Mask: WSL Mask 84 mask links on right sidebar

Plugins: No outside plugins used
I do use Eye Candy 4000 Gradient Glow on all my copyrights/credits layers
I do this because some forums will make a .png tag show up with a black background and then your
copyright doesn't show. 


Just remember that my choices of papers and elements is just a suggestion, change it up and make it yours! You don't have to follow mine exactly.

Add a drop shadow of your choosing to tubes & elements throughout. I usually use 1, 1, 50, 5 unless otherwise noted.


Let's get started!

Open a new canvas 850 x 850 pixels with a white background

Open element 14 copy and paste as a new layer 
click inside with your magic wand, selections, modify, expand 2, selections, invert
open paper 3 copy and paste as a new layer 
click delete on your keyboard, leave selected

Copy and paste your tube as a new layer, resize by 60%
arrange in your frame
erase the bits that hang out of your frame where you don't want them

add the following elements:
element 27 resize 50% mirror horizontal (just regular mirror on earlier versions of PSP) arrange on the bottom left corner

element 28  resize 50% arrange to the right of element 27
element 13 resize 40% mirror horizontal arrange to the right of element 28
element 6 resize 40% arrange on top left corner

element19  resize 40% arrange on the bottom left, behind the other elements
take your eraser tool and erase the ribbon that sticks way up on the top

element 3 resize 40% mirror horizontal arrange below the other layers on the bottom
duplicate, drag left and up
element 18 resize 25% arrange on the holly leaves
element 11 resize 25% arrange to the left of the candle

apply paper 1 above the white background
apply your mask and merge group
duplicate about 4 times and merge them all together to make it a bit darker

crop and resize
add your copyright and credits as needed
add your text and save

Monday, November 17, 2014

Down Home Xmas


Snaggable versions of this tag in my Fotki album

For this tutorial you will need the following:

Paint Shop Pro, I am using PSP X7, you should be able to use any version.

Tube of choice, I am using the artwork of Alicia Mujica Exclusive Tube 9c which you need a license to use.  This tube is a CDO exclusive and not available anywhere else.

Scrap kit of choice. I am using a PTU kit called Down Home Holiday by BLT Dezignz  

Font of choice, I am using Freestyle Script

Mask: WSLMask84 links to masks are on the right sidebar part way down page

Plugins: no outside plugins used
I do use Eye Candy 4000 Gradient Glow on all my copyrights/credits layers
I do this because some forums will make a .png tag show up with a black background and then your
copyright doesn't show. 


Just remember that my choices of papers and elements is just a suggestion, change it up and make it yours! You don't have to follow mine exactly.

Add a drop shadow of your choosing to tubes & elements throughout. I usually use 1, 1, 50, 5 unless otherwise noted.


Let's get started!

Open a new canvas 850 x 850 pixels with a white background

Open frame 3 copy and paste as a new layer, resize 115%
click inside with your magic wand, selections, modify, expand 2, selections, invert
open paper 5 copy and paste as a new layer below the frame
click delete on your keyboard
leave selected
Copy and paste your close up tube as a new layer
arrange in your frame
erase the bits that hang out of your frame where you don't want them

add your elements
bell resize70 % arrange on top left corner, below the tube layer
box resize 25% arrange on bottom right corner
candle resize 25% arrange on bottom right corner
tree resize 40% arrange below the tube layer on the right side
ephemera resize 25% arrange behind the candle
star resize35 % arrange between ephemera and candle
reindeer clip resize 45% arrange on bottom left corner

copy and paste paper 6 as a new layer above the white background
apply your mask and merge group, resize 90%


crop and resize
add your copyright and credits as needed
add your text and save

Sunday, November 16, 2014

Winter Sparkle


Snaggable versions of this tag in m Fotki album


For this tutorial you will need the following:

Paint Shop Pro, I am using PSP X, you should be able to use any version.

Tube of choice, I am using the artwork of Alicia Mujica Exclusive Tube 8b which you need a license to use. 
This tube is one of her CDO exclusive tubes and it is not available anywhere else.

Scrap kit of choice. I am using a PTU kit, Winter Sparkle by Scrappin With Lil Ole Me 

Font of choice, I am using Channel


Plugins: No outside plugins
I do use Eye Candy 4000 Gradient Glow on all my copyrights/credits layers
I do this because some forums will make a .png tag show up with a black background and then your
copyright doesn't show. 


Just remember that my choices of papers and elements is just a suggestion, change it up and make it yours! You don't have to follow mine exactly.

Add a drop shadow of your choosing to tubes & elements throughout. I usually use 1, 1, 50, 5 unless otherwise noted.


Let's get started!

Open a new canvas 850 x 850 pixels with a white background

open element 121 copy and paste as a new layer resize 80%
click inside with your magic wand, selections, modify, expand 2
make a new raster layer below the frame, make sure you're on that layer
copy and paste paper 28 into selection

Copy and paste your tube as a new layer, arrange so she's sitting on the frame

add the following elements:
element 4 resize 60% arrange under the tube on the bottom left side of frame, duplicate & mirror
element 81 arrange below the tube so it looks like she's sitting on it
element 6 resize 35% arrange on bottom left
element 66 resize 60% arrange on right, under the layer 81

element 30 resize 45% arrange behind & left of the snowman
element 13 resize 40% arrange on bottom right
element 34 resize 30% arrange in front of star on bottom right
element 15 resize 45% arrange on bottom right

element 27 resize 45% arrange in front of tube
element 80 resize 45% arrange beneath the other pine branch
element 20 resize 35% arrange on top right
element 115 resize 40% arrange on top left
element 125 resize 40% arrange behind snowman on bottom left

open paper 7 copy and paste as a new layer above the white background
apply your mask and merge group, resize 90%

crop and resize
add your copyright and credits as needed
add your text and save

Friday, November 14, 2014

Alicia Mujica (Peronsal) CT Tag Show Off


CT tag show off for Alicia Mujica personal CT
This tube is one of the new exclusive tubes Alicia has available at CDO - Alicia Mujica Exclusive 8a
the scrap kit is the matching IB Alicia Mujica 8a Kit also available at CDO

Snaggable versions of this tag available in my Fotki album

Winter Glisten


Snaggable versions of this tag in my Fotki album

For this tutorial you will need the following:

Paint Shop Pro, I am using PSP X, you should be able to use any version.

Tube of choice, I am using the artwork of Trinita (Hot Tea 2) which you need a license to use.  

Scrap kit of choice. I am using  a PTU kit called Glisten by BLT Dezignz
I am using a tagger sized kit instead of full sized so if you get the full size kit, the amounts you 
have to resize will be different.

Font of choice, I am using  SF Jacques Cartier


Plugins: No outside plugins used
I do use Eye Candy 4000 Gradient Glow on all my copyrights/credits layers
I do this because some forums will make a .png tag show up with a black background and then your
copyright doesn't show. 


Just remember that my choices of papers and elements is just a suggestion, change it up and make it yours! You don't have to follow mine exactly.

Add a drop shadow of your choosing to tubes & elements throughout. I usually use 1, 1, 50, 5 unless otherwise noted.


Let's get started!

Open a new canvas 850 x 850 pixels with a white background

add paper 1 above the white background
apply your mask, merge group

Copy and paste your tube as a new layer, resize by 35%

Add the following:
tree 2 arrange to the left of your tube & behind it
deco resize 80% arrange on the left side of the tube, above the tube layer
duplicate it and mirror it, drag this layer below the tube layer

reindeer resize 90% mirror arrange below tube layer, on the right side of tube
frame accent resize 145% arrange above mask layer, change Hue to 252, saturation to 253
duplicate twice, merge together, duplicate, merge together (this just makes it show up better)

lantern resize 55% arrange in front of tube in the snowy layer near her feet
baubles 2 resize 55% arrange in snow in front of tree
frame 3 arrange just above the frame accent layer, arrange it so the tree and reindeer cover the top corners to somewhat hide them

crop and resize
add your copyright and credits as needed
add your text and save

Thursday, November 13, 2014

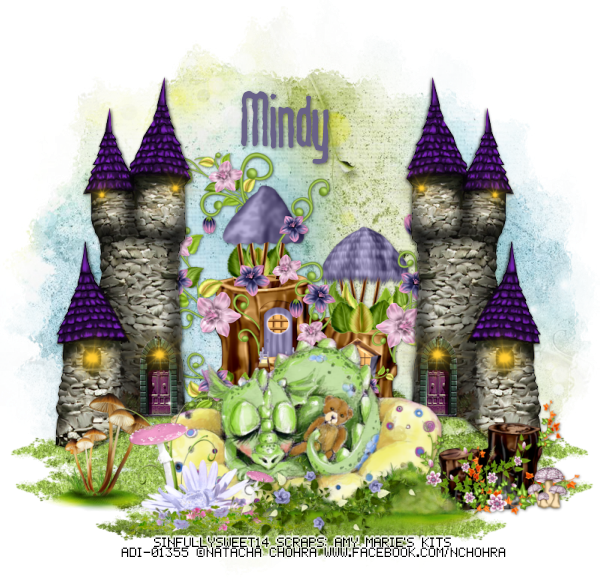
Dream Of Dragons


Snaggable versions of this tag available in my Fotki album


For this tutorial you will need the following:

Paint Shop Pro, I am using PSP X, you should be able to use any version.

Tube of choice, I am using the artwork of Natacha Chohra (Naptime tube) which you need a license to use.  
Scrap kit of choice. I am using a PTU kit Fairy Dusk by Amy Marie's Kits 

Font of choice, I am using Mahrpedig Sans


Plugins: No outside plugins used
I do use Eye Candy 4000 Gradient Glow on all my copyrights/credits layers
I do this because some forums will make a .png tag show up with a black background and then your
copyright doesn't show. 


Just remember that my choices of papers and elements is just a suggestion, change it up and make it yours! You don't have to follow mine exactly.

Add a drop shadow of your choosing to tubes & elements throughout. I usually use 1, 1, 50, 5 unless otherwise noted.


Let's get started!

Open a new canvas 850 x 850 pixels with a white background

open element 120 copy and paste as a new layer, 
duplicate, drag up to the right, duplicate and mirror, 
get all 3 layers arranged how you like, then merge the 3 together
duplicate, flip, drag back down so it touches the original layer, merge these two together

add the following:
element 91arrange on the left edge of the grass, duplicate & mirror
element 15 mirror, arrange in between the two castle layers

Copy and paste your tube as a new layer, resize by 60% arrange in the center of the grass

element 13 resize 55% arrange on the right side of your tube
element 106 resize 55% mirror, arrange on the right side of the tube
element 61 resize 55% mirror arrange on left side of tube
element 104 resize 35% arrange in front of the castle on the left
element 53 resize 45% arrange in front of tube

copy and paste paper 9 above the white background
apply your mask & merge group

crop and resize
add your copyright and credits as needed
add your text and save

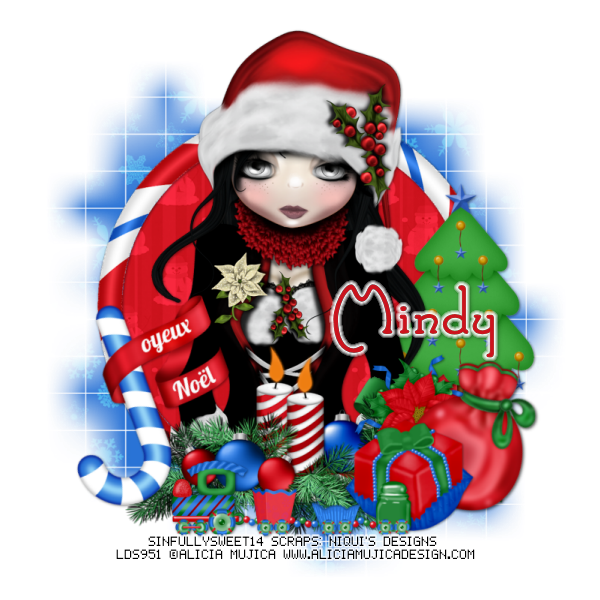
Here Comes Xmas


Snaggable versions of this tag available in my Fotki album 

For this tutorial you will need the following:

Paint Shop Pro, I am using PSP X, you should be able to use any version.

Tube of choice, I am using the artwork of Alicia Mujica (Mama's Coming tube) which you need a license to use.  

Scrap kit of choice. I am using a PTU kit by Niqui's Designs called Here Comes Xmas 

Font of choice, I am using Santa's Sleigh

Mask: WSL84 Masks links on right sidebar, part way down the page

Plugins: No outside plugins used
I do use Eye Candy 4000 Gradient Glow on all my copyrights/credits layers
I do this because some forums will make a .png tag show up with a black background and then your
copyright doesn't show. 


Just remember that my choices of papers and elements is just a suggestion, change it up and make it yours! You don't have to follow mine exactly.

Add a drop shadow of your choosing to tubes & elements throughout. I usually use 1, 1, 50, 5 unless otherwise noted.


Let's get started!

Open a new canvas 850 x 850 pixels with a white background

open 38 copy and paste as a new layer resize 75%
click inside with your magic wand, selections, modify, expand 2, selections, invert
open paper 8 copy and paste as a new layer 
click delete on your keyboard,

Copy and paste your tube as a new layer, resize by 60%
arrange in your frame
erase the bits that hang out of your frame where you don't want them
deselect

add the following elements to your tag
element 70 resize 75% arrange on bottom center
element 9 resize 55% arrange on the right
element 31 resize 35% rotate right 20 arrange below the tree
element 17 resize 35% then 85% arrange to the left of the bag
element 33 resize 30% arrange behind gift and bag
element 11 resize 45% rotate left 20 arrange on bottom left
element 18 resize 45% arrange at the bottom in front of the other elements

copy and paste paper 3 above the white background
apply your mask & merge group

crop and resize
add your copyright and credits as needed
add your text and save

Wednesday, November 12, 2014

Christmas Friends


For this tutorial you will need the following:

Paint Shop Pro, I am using PSP X, you should be able to use any version.

Tube of choice, I am using a PFD Exclusive tube which was part of the Prepaid Projects at PFD which you need a license to use.  

Scrap kit of choice. I am using a PTU kit, Joyeux Noel by Scrappin With Lil Ole Me 

Font of choice, I am using CF Jacques Cartier

Mask of your choice

Plugins: No outside plugins
I do use Eye Candy 4000 Gradient Glow on all my copyrights/credits layers
I do this because some forums will make a .png tag show up with a black background and then your
copyright doesn't show. 


Just remember that my choices of papers and elements is just a suggestion, change it up and make it yours! You don't have to follow mine exactly.

Add a drop shadow of your choosing to tubes & elements throughout. I usually use 1, 1, 50, 5 unless otherwise noted.


Let's get started!

Open a new canvas 850 x 850 pixels with a white background

open 81 copy and paste as a new layer
click inside with your magic wand, selections, modify, expand 2, selections, invert
open paper 18 copy and paste as a new layer 
click delete on your keyboard
Copy and paste your tube as a new layer, arrange in the frame
take your eraser tool and erase whatever sticks out past the frame that you don't want

add the following elements:
element 130 resize 50% arrange bottom center of frame
element 44 resize 50% arrange to the left of the lantern
element 106 resize 40% arrange to the right of the lantern
element 50 resize 40% arrange at the bottom of the lantern
element 58 resize 40% arrange in front of the presents on the left
element 11 resize 50% arrange on the left, duplicate & mirror
element 29 resize 35% arrange on the left, duplicate, mirror, arrange on the right

add paper 15 above the white background
apply your mask, merge group

crop and resize
add your copyright and credits as needed
add your text and save
Monday, November 10, 2014

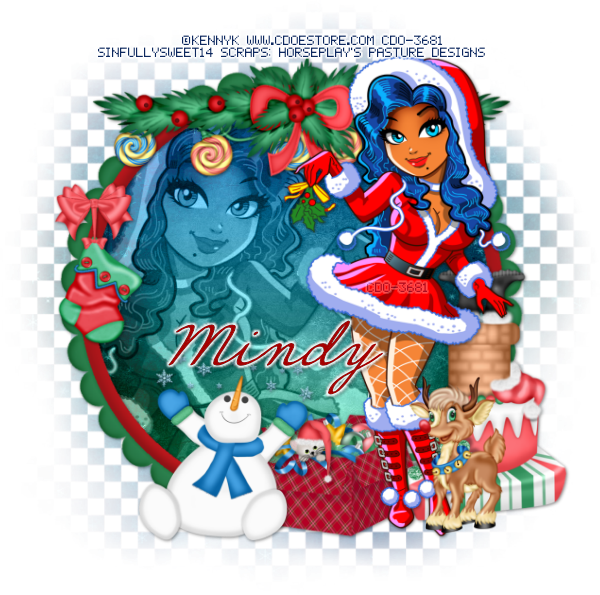
Christmas Cheer


Snaggable versions of this tag available in my Fotki album 

For this tutorial you will need the following:

Paint Shop Pro, I am using PSP X, you should be able to use any version.

Tube of choice, I am using the artwork of KennyK-Individual Tube-18-2 which you need a license to use. 
You can get it at CDO.

Scrap kit of choice. I am using a FTU kit that was previously PTU by Horesplay's Pasture Designs called Christmas Cheer 

Font of choice, I am using Hirondelle

Mask: DBV Mask 107

Plugins: No outside plugins used
I do use Eye Candy 4000 Gradient Glow on all my copyrights/credits layers
I do this because some forums will make a .png tag show up with a black background and then your
copyright doesn't show.


Just remember that my choices of papers and elements is just a suggestion, change it up and make it yours! You don't have to follow mine exactly.

Add a drop shadow of your choosing to tubes & elements throughout. I usually use 1, 1, 50, 5 unless otherwise noted.


Let's get started!

Open a new canvas 850 x 850 pixels with a white background

open element 21  copy and paste as a new layer resize 75%
click inside with your magic wand, selections, modify, expand 2,
add a new raster layer below the frame layer, make sure you are on this layer
copy and paste paper 4 into selection, selections, invert

mirror your close up tube, copy and paste as a new layer above the paper, 
arrange in the frame, click delete on your keyboard
change the blend mode to Luminance(L) drop the opacity to 60

Copy and paste your main tube as a new layer, arrange on the right

Add the following elements:
element 58 resize 75% arrange across top of frame
element 57 arrange under element 58, erase what sticks out beyond the sides of ele58
element 22 resize 65% arrange behind & to the right of the tube
element 17 resize 45% arrange to the left of the tube
element 15 resize 45% arrange on left side of frame
element 6 resize 45% arrange to the left of the gift box
element 11 resize 45% arrange in front of tube on right

copy and paste paper 7 as a new layer above the white background
apply your mask, merge group, resize 80%

crop and resize
add your copyright and credits as needed
add your text and save