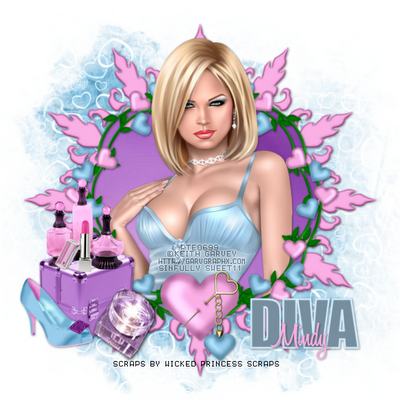
For this tutorial you will need the following:
Paint Shop Pro, I am using PSP X, you should be able to use any version.
Tube of choice, I am using the artwork of Keith Garvey which you need a license to use. You can get it at PTE.
Scrap kit of choice. I am using Opposites Attract Lovey by Shani of Wicked Princess Scraps. You can find the stores she sells at shown on the top left side of her blog.
Font of choice, I am using Impact for the word Diva and Honey Script Semi Bold for my name.
Mask: gemsmasks160 by Gems Taggin Scraps.
Plugins: no outside plugins
Just remember that my choices of papers and elements is just a suggestion, change it up and make it yours! You don't have to follow mine exactly.
Let's get started!
Open a new canvas 650 x 650 white.
Open the scalloped frame element, copy and paste as a new layer, resize by 65%. Add a drop shadow.
Open the heart wreath frame, copy and paste as a new layer, resize by 55%. Click inside it with your magic wand, make sure you click in the little parts around the outside edge, get in between all the vines, make sure you either hold down the shift key while doing so or make sure the mode on your magic wand is set to add (shift) then modify, expand by 2.
Open paper 6, copy and paste as a new layer, selections modify, invert, click delete on your keyboard. Drag the paper between the two frame layers and leave it selected.
Open your close up tube, copy and paste as a new layer and arrange it where you want it in the frame. Duplicate the tube and hide the duplicate for now. Drag the original under your wreath frame and erase the bits that hang out of the bottom. Deselect and add a drop shadow to your tube and wreath frame.
Unhide your duplicate tube, drag it above the wreath frame layer. Erase the bits that hang over the bottom. This way you have her head above the frame and you can erase the parts on the lower part without having to spend a lot of time erasing tiny bits of frame at the top or her on the bottom. This works really well when you have tiny little parts to erase.
Open up the elements you want to use, resize as needed and add them to your tag, drop shadow on each layer. The ones I used are as follows:
Makeup box resized at 45%
Makeup resized at 25% mirrored
Perfume bottles resized at 25%
Shoe resized at 25%
Lipstick resized at 25%
Open a paper, copy and paste as a new layer, drag it down just above the background layer, open your mask. Apply mask by going to layers, new mask layer, from image, find your mask in the drop down menu, click ok. Delete the mask and merge group.
Add your name, any other text you'd like, copyrights and credits as needed.

No comments:
Post a Comment