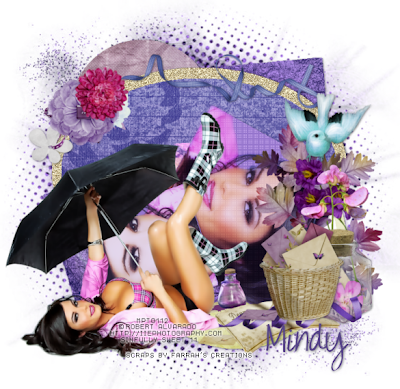
For this tutorial you will need the following:
Paint Shop Pro, I am using PSP X, you should be able to use any version.
Tube of choice, I am using the artwork of Robert Alvarado which you need a license to use. You can get it at MPT.
Scrap kit of choice. I am using Love Letters by Farrah at Designer Scraps.
udooaktemplate By Brutal Designs from template pack 9.
Font of choice, I am using Just Realize.
Mask: Any mask of your choice, I used ACD Mask 1 by Chas, which is available to ACD Divas members only.
Plugins: Penta Color Dot, Xero Porcelain, Xero Radiance
Just remember that my choices of papers and elements is just a suggestion, change it up and make it yours! You don't have to follow mine exactly.
Let's get started!
Open the template, shift D to duplicate, close the original. Delete the following layers: credits, word art, and word art 2.
(optional step) Resize to around 600 x 600 then change the canvas size to 650 x 650. I just do this so that I'm not resizing my tube a lot, so that the tag itself is closer to what I like it in size. If you want to just increase the canvas size and resize the whole thing at the end, that's fine too.
Flood fill your background with white to make it easier to see what you are doing.
Make your blk circle top layer active, click on it with your magic wand. Open paper 3, resize by 30% then by 65%. Copy and paste as a new layer, selections invert, make sure you are on the paper layer, and click delete on your keyboard. Delete the original layer.
Do the same using various papers for the following layers: blk circle bottom, dk grey square top and bottom, resizing the papers as needed.
Click on the pink oval layer with your magic wand, add a new raster layer and flood fill with #d6c59c. Add/remove noise 75% uniform monochrome checked, add a drop shadow.
Click on purple oval with your magic wand, open paper 9, resize by 30%, copy and paste as a new layer, selections invert, click delete on your keyboard, leave selected. Open your tube, copy and paste the close up as a new layer, arrange inside the oval layer to the left side, click delete on your keyboard.
Change the blend mode on your tube to screen. Delete the original oval layer.
Click on the green square layer with your magic wand, add a new raster layer, flood fill with #9676cd, apply penta dot and cross with the default settings, mirror your close up tube, copy and paste as a new layer, selections invert, click delete on your keyboard. Deselect.
Duplicate your tube, on the top layer, gaussian blur 3, change blend mode to soft light. On the bottom layer, apply Xero Porcelain at the default settings, drop the opacity on this tube to about 60.
Delete the original green square layer.
Click on grey square right, add a new raster layer and flood fill with #9676cd, mirror your tube back to how it was originally, copy and paste as a new layer and arrange it in the square, selections invert, click delete on your keyboard, deselect and delete the original layer.
Apply Xero Radiance at default settings drop the opacity to 70.
Apply drop shadow to all shape layers.
Copy and paste your tube, resize if necessary, add a drop shadow. If you are using the same tube as I did, I resized mine by 85%.
Open some of your flower elements, copy and paste and resize as needed and arrange them over the top of the tag.
Open ribbon 2 element, resize 3 times by 50%, rotate to the left by 90 and mirror, drag it under the flowers and add drop shadow.
Do the same with ribbon 1 element, drag it between the diary and basket layers.
Open the bird element, resize 3 times by 50, arrange near the top right, add drop shadow.
Open the basket, image mirror, resize by 50 twice, copy and paste as a new layer, add drop shadow.
Open the diary, resize 3 times by 50, copy and paste drag below basket layer, add drop shadow.
Open jar element resize 3 times by 50, copy and paste as a new layer, drag below basket layer, add drop shadow.
Open tag element, resize same as above, copy and paste move to the top of the tag.
Open paper 10, copy and paste as a new layer, just above your white background layer, open your mask, go to layers, new mask layer, from image, find your mask in your drop down menu, apply it, delete the mask layer and merge group. I resized mine by 110%.
Add your name, copyright and credits as needed. Crop, resize, and save.

No comments:
Post a Comment