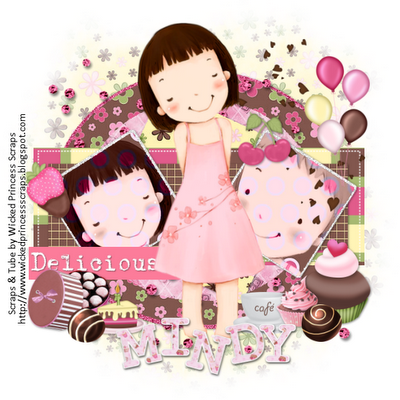
For this tutorial you will need the following:
Paint Shop Pro, I am using PSP X, you should be able to use any version.
Tube of choice, I am using the tube that came with the kit.
Scrap kit of choice. I am using Chef Otelia by Wicked Princess Scraps, you can find it on her blog here, and the stores she sells at are located on her top left side of the blog. Isn't it just the cutest kits?
Collab template #3 by Tamie and Deb which you can find at the Creative Misfits Creations blog. It's the last link of the post for June 15th 2011.
Font of choice, I did not use a font, I used the alphas provided in the kit.
Mask: DVB Mask 111 by Designs By Vaybs
Plugins: none used
Just remember that my choices of papers and elements is just a suggestion, change it up and make it yours! You don't have to follow mine exactly.
Let's get started!
Open your template, shift D to duplicate. delete raster 5 layer (credits) and raster 9. Note: if you are using different papers than me, you might want to leave raster 9 til the end and decide if the dotted lines look good over the paper you have chosen to use.
Since it's pretty large, I like to resize my template to start out, so I resized it to 600 x 456 then changed the canvas size to 650 x 650.
Make raster 3 layer active, click on it with your magic wand. Open paper 8, copy and paste as a new layer, selections invert, make sure you are on the paper layer, click delete on your keyboard. Selections invert again, selections modify, expand by 5, add a new raster layer below the paper layer, flood fill with a pink from the paper. Deselect.
Add noise to the frame layer, uniform, monochrome checked 75%. Add a drop shadow. Delete the original layer.
Add papers to the following layers the same way as above. Make sure to delete the original raster layers as you go along.
Copy of raster 3 using paper 5
Raster 6 using paper 7, add a drop shadow.
Raster 2 using paper 10 resized by 73% add drop shadow
Raster 4 using paper 13 add drop shadow
Raster 1 and copy of raster 1 using paper 14
On raster 7 and raster 9, add the same noise setting you did on the outside oval frame and add a drop shadow.
Open your tubes, go back and select the left side small square layer by going to selections, select all, float, defloat, invert. Copy and paste one of your tubes over the square, arrange how you want, click delete on your keyboard. Do the same for the other square on the other side.
Change the blend mode of these tubes to luminence (L)
Copy and paste your full size tube, arrange in the middle of the tag, add your drop shadow.
Open the bead splatter element, copy and paste as a new layer, drag it down so that it is just above all the oval layers in the middle.
Copy and paste various elements that you like, resizing and adding drop shadow as necessary.
I used:
Candybox resize by 25%
Birthday cake resize by 25%
Chococupcake resize by 20%
Heartcupcake resize by 28%
Cafecup resize by 20%
Tag 3 resize by 45%
Chocohearts resize by 75%
Cherry resize by 20%
Strawberry resize by 20%
Balloons resized by 45%
Choco4 resize by 15%
Choco2 resize by 15%
Open paper 11, copy and paste as a new layer, drag down so it is just above your background layer. Open your mask, layers, new mask layer, from image, find your mask in the drop down menu and apply. Delete the mask and merge group. Drop opacity to 60%.
Open up the letters you need for your name using the alphas provided in the kit, resizing as necessary.
Crop, resize and save!

No comments:
Post a Comment