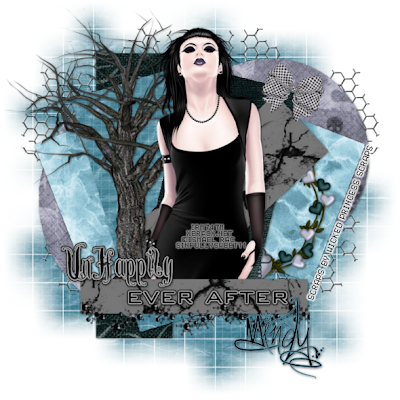
For this tutorial you will need the following:
Paint Shop Pro, I am using PSP X, you should be able to use any version.
Tube of choice, I am using the artwork of Ismael Rac which you need a license to use. You can get it at his store here.
Scrap kit of choice. I am using Dark Angel by Wicked Princess Scraps. You can find it on her blog here and the links to the stores she sells at are on the left sidebar at the top.
Template by Brutal Designs. You can find it in template pack 9 here.
Font of choice, I am using sick capital vice
Mask: WSL84 from Weescotslass Creations
Plugins: Eye Candy 4000 Gradient Glow
Just remember that my choices of papers and elements is just a suggestion, change it up and make it yours! You don't have to follow mine exactly.
Let's get started!
Open your template, shift D to duplicate it, close the original, delete the copyright layer and blk rect top layer. I then cropped it and resized it to 600 on the longest side then changed the canvas size to 650x650. You can do that or not, it's just that I like the template a little smaller to work with.
Starting with the bottom layer, click inside it with your magic wand, then open the paper you want to use, copy and paste it as a new layer, then go to selections, invert and then making sure you are on the paper layer, click delete on your keyboard. Add a drop shadow.
Do this for each of the shape layers.
Merge your two text layers together, make your foreground white and background black, click on your color replacer tool and go over the text with that. It will change to black. Now apply eye candy 4000 gradient glow width 3 and for the color, click on the little arrow shaped slider under the color box, click the white color, then drag it over and click on black so that it's white fading into black then apply it.
Add a drop shadow.
Add your tube, resize if necessary, add a drop shadow.
Drag the top horizontal rectangle down a little to cover the bottom of your tube. Do the same with your word art. If necessary, erase the bits of tube still hanging below the rectangle layer.
Open the creepy tree element, copy and paste as a new layer, drag it below your tube layer, add a drop shadow, erase any bits that stick out where they don't look right.
Open Heart wreath frame, copy and paste as a new layer, resize by 55%, drag it so it is just above the small rectangle on the bottom right side. Add a drop shadow.
Open the wire element, copy and paste as a new layer, drag to the bottom, arrange it so it's sticking out of the left side, then duplicate and mirror.
Open doodad, copy and paste as a new layer, drag it to the bottom, just over the bottom edge of the small rectangle that your word art is on. Resize by 80%.
Open the bow, copy and paste as a new layer, resize by 20% free rotate to the right by 20, add a drop shadow. See my tag for placement reference.
Open your mask, open paper 11, copy and paste as a new layer. Drag it down to the bottom. Apply mask by going to layer, new mask layer, from image, find the mask in the drop down box, click ok. Delete the mask then merge group.
Add your name or any other text you want. Add your copyright and necessary credits. Crop and save.

No comments:
Post a Comment