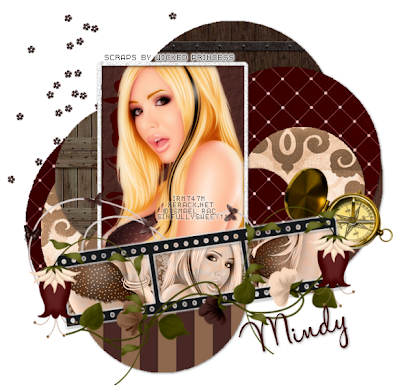
For this tutorial you will need the following:
Paint Shop Pro, I am using PSP X, you should be able to use any version.
Tube of choice, I am using the artwork of Ismael Rac, which you need a license to use. You can get it at his store here.
Scrap kit of choice. I am using Georgetta Cartrite by Wicked Princess. You can find it on her blog here, and the stores she sells at are listed on the top left side of her blog.
Circles template 3 by Brutal Designs from template pack 11 which you can find here.
Font of choice, I am using Halo Handletter
Plugins: Xero Porcelain, Eye Candy 4000 Gradient Glow
Just remember that my choices of papers and elements is just a suggestion, change it up and make it yours! You don't have to follow mine exactly.
Let's get started!
Open your template, shift D to duplicate, close the original. Resize to 600 x 600, then change the canvas size to 650x650.
Fill each of the circle layers with a paper from the kit by clicking on the layer with your magic wand, selections invert, open the paper, copy and paste as a new layer, selections, invert, make sure you are on the paper layer, and click delete on your keyboard. You can look at mine for an example or just fill with whichever papers you want to use.
As you fill each circle, delete the original layer and add a drop shadow to your layers that you added the papers to.
On your rectangle frame layer, add noise, uniform, monochrome about 55%, and add a drop shadow.
Click on the pink rectangle layer, add a paper background the same way you did the circle layers. Leave selected and open your tube. Copy and paste your tube as a new layer. Click delete on your keyboard. Deselect.
Duplicate your tube. On the top layer, adjust, blur gaussian blur 3, change the blend mode to soft light. On the bottom layer, apply Xero Porcelain at the default settings except change the blue to zero.
Merge the 3 purple rectangle layers (for your filmstrip) down together. Click on it with your magic wand, fill with a paper and leave selected.
copy and paste your tube as a new layer, arrange it in the film strip how you'd like it, click delete on your keyboard. Do this 3 times to fill the filmstrip. Change the blend mode on your tube layers to Luminance (L)
Add a gradient glow to your black film strip layer, I used a glow width of 4, white, then add a drop shadow.
Add whatever elements you'd like, resizing if necessary. I used the following:
Bling flower - bottom layer left side
Butterfly string - resize by 40% - drag it below the filmstrip layer, arrange over the rectangle frame layer so it shows over the top of your large tube.
Pansy flower - rotate to left by 12 add a drop shadow, arrange it so that this layer is on top of your filmstrip layer so it lays across the bottom of the filmstrip.
Gold compass - resize by 45% arrange near the top left of filmstrip.
Teardrop - resize by 45% arrange over the top right of filmstrip, duplicate, mirror, arrange over the top left side of filmstrip.
Add your name and credits, crop and resize!

thanks this one was fun i did this with a steampunk kit
ReplyDelete