Pages

Friday, January 31, 2014

Happy Days


For this tutorial you will need the following:

Paint Shop Pro, I am using PSP X, you should be able to use any version.

Tube of choice, I am using the artwork of Ismael Rac, (2014 Fun Girl Pinup Girl
which you need a license to use. 

Scrap kit of choice. I am using 7 of 2014 by Amy Marie 

Font of choice, I am using CAC Shishoni Brush

Mask: WSL Mask 84 by Weescotslass Creations links to masks are on the right sidebar

Plugins: No outside plugins used
I do use Eye Candy 4000 Gradient Glow on all my copyrights/credits layers
I do this because some forums will make a .png tag show up with a black background and then your
copyright doesn't show.


Just remember that my choices of papers and elements is just a suggestion, change it up and make it yours! You don't have to follow mine exactly.

Add a drop shadow of your choosing to tubes & elements throughout. I usually use 1, 1, 50, 5 unless otherwise noted.


Let's get started!

Open a new canvas 850 x 850 pixels with a white background

Copy & paste your tube as a new layer, resize 45%

Add the following elements:
element 13 arrange on the right, behind tube
element 14 arrange on the left, behind tube & jukebox
element 15 arrange behind & above car
element 20 arrange between the gumball machine and jukebox
element 25 resize 45% arrange on the bottom right
element 26 resize 45% arrange by puppy on bottom right

Add paper 3 above the white background
apply your mask

crop and resize
add your copyright and credits as needed
add your text and save

Thursday, January 30, 2014

Love's Garden 2


For this tutorial you will need the following:

Paint Shop Pro, I am using PSP X, you should be able to use any version.

Tube of choice, I am using the artwork of Alehandra VanHeck, which you need a license to use. 
This tube is part of PFD's Exclusive Club

Scrap kit of choice. I am using  Unicorns N Fairies, a PTU kit by Amy Marie

Font of choice, I am using A T & Love

Mask: Vix Big Mask 1
Plugins: No outside plugins
I do use Eye Candy 4000 Gradient Glow on all my copyrights/credits layers
I do this because some forums will make a .png tag show up with a black background and then your
copyright doesn't show.


Just remember that my choices of papers and elements is just a suggestion, change it up and make it yours! You don't have to follow mine exactly.

Add a drop shadow of your choosing to tubes & elements throughout. I usually use 1, 1, 50, 5 unless otherwise noted.


Let's get started!

Open a new canvas 1000 x 1000 pixels with a white background
You can crop it and resize it at the end, I knew I was creating a scene with grass and water
and trees, etc and wanted plenty of space to work it out.

Open 86 (grass), duplicate several times and arrange them around until you get a decent sized patch of 
grass you may want to mirror and/or flip several of them to get them where they all go together and 
hide the open spots on the edges. Once you get them all how you want them, hide the white background layer and merge visible, then unhide the white background.

Open layer 62, copy and paste as a new layer, arrange below the grass layer, and over slightly left
Add layer 35, mirror, arrange it to the right of the water layer to hide the edge
add layer 84 to the left of the water, hiding that edge

Copy and paste your tube, resize 30% arrange in the center

Add the following elements
element 37 resize 80% arrange in the water
 element 46 resize 80% arrange on right side of tree that we placed by the water
duplicate, resize the copy 75% arrange on left side of tree
element 41 arrange between the tree and tube
 element 75 resize 75% arrange by tree, duplicate & arrange by tube, duplicate, resize 75% 
arrange on the right side
element 54 resize 30% arrange on the right

Apply a paper of choice above the white background
apply your mask

crop and resize
add your copyright and credits as needed
add your text and save

Sunday, January 26, 2014

Strawberry Picnic


For this tutorial you will need the following:

Paint Shop Pro, I am using PSP X, you should be able to use any version.

Tube of choice, I am using the artwork of Alicia Mujica which you need a license to use. 
This tube is an Exclusive tube to CDO and can only be purchased there 
The link when you click Alicia's name takes you to her personal store, the link when you click the tube name will take you to her exclusive at CDO store.

Scrap kit of choice. I am using a PTU kit, Strawberry Dreams by Amy Marie

Font of choice, I am using Little Miss Priss

Plugins: No outside plugins used
I do use Eye Candy 4000 Gradient Glow on all my copyrights/credits layers
I do this because some forums will make a .png tag show up with a black background and then your
copyright doesn't show.


Just remember that my choices of papers and elements is just a suggestion, change it up and make it yours! You don't have to follow mine exactly.

Add a drop shadow of your choosing to tubes & elements throughout. I usually use 1, 1, 50, 5 unless otherwise noted.


Let's get started!

Open a new canvas 950 x 850 pixels with a white background

Copy & paste element 88 to your canvas, duplicate, mirror, drag the duplicate to the right
Copy & paste element 103, arrange in front of 88 and to the left, duplicate & mirror, 
merge these two together, duplicate & flip, drag the duplicate down in front of the original merged layer
duplicate again & drag down
Duplicate the layer 88 layers a couple times and drag down to fill in the spots left with the element 103 layers
When you are happy with the big grassy area, hide the white background and merge visible

copy and paste your tube resize 75% arrange in the center of the grass to the right

add the following elements
element 99 resize 55% arrange to the left of and behind tube layer, duplicate & mirror
element 48 resize 35% arrange in front of tube, to the right
element 42 resize 55% arrange by the pail
element 56 resize 75% rotate left 90 arrange in front of tube
element 105 resize 75% arrange behind & to the left of tube
element 110 arrange behind tube on right
element 41 resize 20% arrange on the bottom right corner of the grass, duplicate drag over by the rocks on the left side of the canvas
element 16 resize 20% arrange on rocks
element 126 arrange on left behind the grassy hills, duplicate & mirror
element 123 arrange on right, behind fence, duplicate, resize 75% arrange on left
element 101 arrange between the two trees, duplicate, arrange on the far right
element 33 arrange on the far left at the bottom corner of the grass
element 24 resize 25% arrange by the pail
element 21 resize 20% arrange by tube


crop and resize
add your copyright and credits as needed
add your text and save

Saturday, January 25, 2014

CT Tag Show off Alicia Mujica

The tag above was made using a scrap kit by Hania Designs
and the Blossom tube by Alicia Mujia available here


The tags above were made using Alica Mujica's Lola's Love tube

Think About You


For this tutorial you will need the following:

Paint Shop Pro, I am using PSP X, you should be able to use any version.

Tube of choice, I am using the artwork of Alicia Mujica, which you need a license to use. 

Font of choice, I am using Dagobert


Plugins:No outside plugins used
I do use Eye Candy 4000 Gradient Glow on all my copyrights/credits layers
I do this because some forums will make a .png tag show up with a black background and then your
copyright doesn't show.


Just remember that my choices of papers and elements is just a suggestion, change it up and make it yours! You don't have to follow mine exactly.

Add a drop shadow of your choosing to tubes & elements throughout. I usually use 1, 1, 50, 5 unless otherwise noted.


Let's get started!

Open a new canvas 850 x 850 pixels with a white background

Open element 68
click inside with your magic wand, selections, modify, expand 2, selections, invert
open  paper 9 copy and paste as a new layer, click delete on your keyboard
merge the two layers together 
rotate right 25

Copy and paste your tube in your canvas

Add the following elements
element 16 resize 65  arrange to the left of the tube & below the tube layer
element 25 arrange between frame and tube at the bottom
element 2 arrange between frame and element 25 (leaves & flowers)
element 54 resize 60% arrange on bottom right side of frame
element 94 arrange on left behind heart frame I erased the back end of the arrow that was showing at the top
element 30 arrange on top right, duplicate & mirror, drag the duplicate down and right
element 86 rotate left 25 arrange on top right, duplicate, drag down and right
erase any bits of beads that show up where you don't want them

crop and resize
add your copyright and credits as needed
add your text and save

Tuesday, January 21, 2014

CT Tag Show Off - Alicia Mujica

The tag above was made using Alicia Mujica's tube Chic Chicky available here
 Scrap kit Cafe Time by Tiny Turtle Designs


The tag above was made using Alicia Mujica's tube Boom Boom available here
Scrap kit Sea Breeze by Tiny Turtle Designs


The tag above was made using Alicia Mujica's tube Amelie available here
Scrap kit Spring Valentine by Tiny Turtle Designs

Elegance


For this tutorial you will need the following:

Paint Shop Pro, I am using PSP X, you should be able to use any version.

Tube of choice, I am using the artwork of Ismael Rac, 2014 Pinup Pose, which you need a license to use. 

Scrap kit of choice. I am using a PTU kit, Elegance, by Amy Marie

Font of choice, I am using Riesling

Mask: Horseplay's Pasture Mask 11

Plugins: Xero Porcelain
I do use Eye Candy 4000 Gradient Glow on all my copyrights/credits layers
I do this because some forums will make a .png tag show up with a black background and then your
copyright doesn't show.


Just remember that my choices of papers and elements is just a suggestion, change it up and make it yours! You don't have to follow mine exactly.

Add a drop shadow of your choosing to tubes & elements throughout. I usually use 1, 1, 50, 5 unless otherwise noted.


Let's get started!

Open a new canvas 850 x 850 pixels with a white background

open 41 copy and paste as a new layer resize 90%
click inside with your magic wand, selections, modify, expand 2, selections, invert
open paper 21 copy and paste as a new layer click delete on your keyboard
Open your tube, mirror it, paste it in the frame, arrange it how you want it, click delete on your keyboard
Duplicate your tube, the top tube, adjust blur, gaussian by 3, change the blend mode to soft light
on the bottom tube, apply Xero Porcelain with the default settings but change blue to zero
 
 Copy & paste your main tube, resize 45% arrange on left

Add the following elements
element 25 resize 90% arrange on bottom right
element 24 resize70%  arrange above the other flowers on the right
element 49 resize 60% arrange on bottom right
element 46 resize 50% arrange in front of chest on bottom right
element 7 resize 40% arrange to the left of the chest on the bottom
element 27 resize 75%  arrange between the perfume bottle and chest
element 20 resize 40%  arrange to the left of perfume bottle
element 55 resize 40% arrange on top of chest
element 68, arrange across bottom, erase bits that go over the top of some elements so it looks like it's wrapping through them

Add paper 20 above the white background & apply your mask

crop and resize
add your copyright and credits as needed
add your text and save

Monday, January 20, 2014

CT Tag Show Off - Alicia Mujica

The tag above was made using Alicia Mujica's cute tube called All You Need Is Love available here
and her matching kit with the same name available here 


The tags above were made with Alicia Mujica's tube I Think I Need Swords available here

Saturday, January 18, 2014

CT Tag Show Off - Alicia Mujica

Two new tags using the artwork of Alicia Mujica - Romantic Chick tube available on her blog
and a PTU scrap kit, also by Alicia called All You Need Is Love, also available on her blog


Friday, January 17, 2014

Cherish


For this tutorial you will need the following:

Paint Shop Pro, I am using PSP X, you should be able to use any version.

Tube of choice, I am using the artwork of Alicia Mujica (All You Need Is Love) which you need a license to use. 

Scrap kit of choice. I am using  a PTU kit, All You Need Is Love by Alicia Mujica
which matches her tube

Font of choice, I am using Blueprint 
(with the stroke set at 1 and both foreground & background set on the same color)

Mask: WSL84 by Weescotslass Creations

Plugins: No outside plugins used
I do use Eye Candy 4000 Gradient Glow on all my copyrights/credits layers
I do this because some forums will make a .png tag show up with a black background and then your
copyright doesn't show.


Just remember that my choices of papers and elements is just a suggestion, change it up and make it yours! You don't have to follow mine exactly.

Add a drop shadow of your choosing to tubes & elements throughout. I usually use 1, 1, 50, 5 unless otherwise noted.


Let's get started!

Open a new canvas 850 x 850 pixels with a white background

Add the following:
Tube, resized at 40%
cloud 2  resize 40% arrange slightly to the left of tube, duplicate & mirror
They should overlap in the front/center of tube
element 26 resize 20% arrange on the left side of the clouds
element 33 resize 45%  arrange on the left side behind the tube & sign
black & white heart resize 35%  arrange on right, behind tube & clouds
Pink & black flower (15b) resize 35% arrange behind heart
white flower (15a) resize 35%  and mirror, arrange beside the other flower
white & black flower (15) resize 30% arrange behind the other 2 flowers

Add paper 2 above the white background
apply your mask

crop and resize
add your copyright and credits as needed
add your text and save
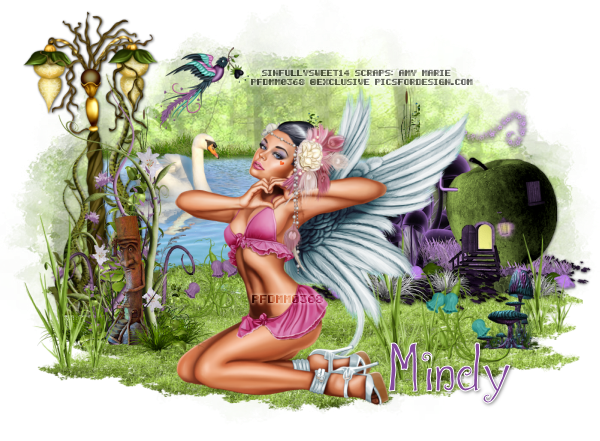
Strawberry Flirt


For this tutorial you will need the following:

Paint Shop Pro, I am using PSP X, you should be able to use any version.

Tube of choice, I am using the artwork of Ismael Rac (2014 BB Pinup Girl) which you need a license to use. 

Scrap kit of choice. I am using  a PTU kit, Strawberry Love, by Amy Marie 
(This kit was made to match a layer on a Derzi tube available at Beehive Studios)

Font of choice, I am using Fiolex Girls

Plugins: Xero Porcelain
I do use Eye Candy 4000 Gradient Glow on all my copyrights/credits layers
I do this because some forums will make a .png tag show up with a black background and then your
copyright doesn't show.


Just remember that my choices of papers and elements is just a suggestion, change it up and make it yours! You don't have to follow mine exactly.

Add a drop shadow of your choosing to tubes & elements throughout. I usually use 1, 1, 50, 5 unless otherwise noted.


Let's get started!

Open a new canvas 850 x 850 pixels with a white background

open element 27 copy and paste as a new layer, rotate left 90, resize 85%
click inside with your magic wand, selections, modify, expand 2, selections, invert
open paper 7 copy and paste as a new layer click delete on your keyboard

Copy and paste your tube, arrange in the frame, click delete on your keyboard
duplicate your tube, on the top layer, adjust blur, gaussian 3, change the blend mode to soft light
on the bottom layer, apply Xero Porcelain with the default settings, except change blue to zero
Adjust Hue & Saturation, change both to zero

 Copy and paste your tube again, mirror it and resize by 45%
 
 add the following elements:

element 14 resize 55% arrange on bottom right
element 23 resize 55% arrange on bottom right, behind gift
element 12 resize 55%  arrange on bottom right, behind the other 2 elements
element 20 resize 55% arrange on bottom left corner
element 37 resize 45% arrange between roses and gift
 element 10 resize 45% arrange above roses on left
element 24 resize 45% arrange above strawberries on left
element 64 arrange on top above white background, 
duplicate several times and arrange around tag


crop and resize
add your copyright and credits as needed
add your text and save

Thursday, January 16, 2014

Music Of Love


For this tutorial you will need the following:

Paint Shop Pro, I am using PSP X, you should be able to use any version.

Tube of choice, I am using the artwork of PinupToons (185-1) which you need a license to use, available at CDO

Scrap kit of choice. I am using  a PTU kit called 4 of 2014 by Amy Marie

Font of choice, I am using Kiss Me Kiss Me Kiss Me

Plugins: No outside plugins
I do use Eye Candy 4000 Gradient Glow on all my copyrights/credits layers
I do this because some forums will make a .png tag show up with a black background and then your
copyright doesn't show.


Just remember that my choices of papers and elements is just a suggestion, change it up and make it yours! You don't have to follow mine exactly.

Add a drop shadow of your choosing to tubes & elements throughout. I usually use 1, 1, 50, 5 unless otherwise noted.


Let's get started!


Open your template, shift D to duplicate and close the original
Delete the following layers - credits

Change the canvas size to 850 x 850 pixels, and resize the layers by 130%

Add a new layer at the bottom and flood fill with white so we can see what we are doing. 
I delete it at the end and save as a .png so it's got a nice transparent background

Fill the layers with papers, to do this make sure the layer you want to fill has been clicked on in your layer palette.
Click inside the shape with your magic wand, selections, modify, invert, open your paper, copy and paste as a new layer,
click delete on your keyboard.
Delete the original template layer

layer 1 use paper 17
layer 2 use paper 10
layer 3 use paper 5
layer 4 use paper 3
layer 5 use paper 1
layer 6 use paper 1
layer 7 use paper 17
layer 8 use paper 21
layer 9 use paper 3

Copy and paste your tube as a new layer, arrange on the left side

Now add your elements. I used the following:
element 119 resize 65% arrange on bottom, to the right of the tube
element 113 mirror & arrange below the tube layer, and to the left of it
element 48 resize 40% arrange below & to the left of the tube, duplicate & mirror, drag to the left
element 60 resize 25% arrange below tube on left, duplicate, mirror, drag to the left
element 118 resize 25% arrange in front of package
element 67 resize 40% arrange on bottom right
element 53 resize 40% arrange on bottom right, by the other rosebud
element 46 resize 40% arrange below the 2 rosebud layers
element 50 resize 75%  arrange in front of rosebuds on bottom
element 38 arrange on top right, above white background, duplicate & mirror.
merge these two layers together, drop opacity to 70
element 44 arrange above element 38 at top, duplicate & flip


crop and resize
add your copyright and credits as needed
add your text and save

Wednesday, January 15, 2014

Peaceful


For this tutorial you will need the following:

Paint Shop Pro, I am using PSP X, you should be able to use any version.

Tube of choice, I am using the artwork of Ismael Rac (Winter Glamour) which you need a license to use. 

Scrap kit of choice. I am using a PTU kit, Peaceful 2014 by Scrapjoy 

Font of choice, I am using Scrap Script

Mask: WSL84 by Weescotslass Creations

Plugins: No outside plugins
I do use Eye Candy 4000 Gradient Glow on all my copyrights/credits layers
I do this because some forums will make a .png tag show up with a black background and then your
copyright doesn't show.


Just remember that my choices of papers and elements is just a suggestion, change it up and make it yours! You don't have to follow mine exactly.

Add a drop shadow of your choosing to tubes & elements throughout. I usually use 1, 1, 50, 5 unless otherwise noted.


Let's get started!

Open your template, shift D to duplicate and close the original
Delete the following layers: info, font info, social, butterfly, white word art, layer 18 drop shadow,
butterfly outline, top wings, bottom wings, trail, rust circles, raster 7

Change the canvas size to 900  x 850 pixels so you have room to work

Fill the layers with papers, to do this make sure the layer you want to fill has been clicked on in your layer palette.
Click inside the shape with your magic wand, selections, modify, invert, open your paper, copy and paste as a new layer,
click delete on your keyboard.
Delete the original template layer

Some layers, like the frames, you may just want to flood fill with a color from your kit. To do this, click on the layer in your layer palette, add another raster layer above it,
click inside the shape with your magic wand, and flood fill it with your color
Delete the original template layer

left brown square use paper M5
right brown square  use paper M5
blue strips  use paper M6
rust strips  use paper M8
white oval  leave as is
creme oval  use paper M7
large brown circles use paper M5
large rust circles use paper M8
white strip  add noise, uniform, monochrome, 75
blue shape  use paper M6
creme center shape  use paper M3
inner blue frame  leave as is

Click inside the inner blue frame with your magic wand, selections, modify, expand 4, invert
Open your tube, copy and paste as a new layer, arrange in the frame, take your eraser tool and erase
the parts that hang over the bottom of the frame layer


Add the following elements:
element 21 resize 45% arrange below tube layer on right
element 29 resize 75% arrange on bottom right, duplicate a few times, mirror a few, 
arrange across the bottom, merge all these branches together
element 47 arrange on bottom left, between the branches layers and the tube, duplicate & mirror
element 48 arrange below the branches, duplicate several times and drag across so they show all the way across under the branches, merge these flower layers all together
element 38 resize 75% arrange on bottom left

Add paper M2 above the white background
apply your mask

crop and resize
add your copyright and credits as needed
add your text and save

Saturday, January 11, 2014

Your Kiss


For this tutorial you will need the following:

Paint Shop Pro, I am using PSP X, you should be able to use any version.

Tube of choice, I am using the artwork of Pinup Toons (162-3 & 187-1) which you need a license to use. 

Scrap kit of choice. I am using a PTU kit, White Flora by Amy Marie  


Plugins: No outside plugins used
I do use Eye Candy 4000 Gradient Glow on all my copyrights/credits layers
I do this because some forums will make a .png tag show up with a black background and then your
copyright doesn't show.


Just remember that my choices of papers and elements is just a suggestion, change it up and make it yours! You don't have to follow mine exactly.

Add a drop shadow of your choosing to tubes & elements throughout. I usually use 1, 1, 50, 5 unless otherwise noted.


Let's get started!

Open your template, shift D to duplicate and close the original
Change the canvas size to about 900 x850 pixels
Delete the following layers: info, font info, black square lines, small cream square, pixel words, small hearts

Fill the layers with papers, to do this make sure the layer you want to fill has been clicked on in your layer palette.
Click inside the shape with your magic wand, selections, modify, invert, open your paper, copy and paste as a new layer,
click delete on your keyboard.
Delete the original template layer

Some layers, like the frames, you may just want to flood fill with a color from your kit. To do this, click on the layer in your layer palette, add another raster layer above it,
click inside the shape with your magic wand, and flood fill it with your color
Delete the original template layer

 I used the following papers, colors or noise, on each layer
brown square  use paper 10
large cream square  use paper 7
tan strip  use paper 15
white strips add noise, monochromatic, uniform 50
gold circle  use paper 4
black dotted circle  use paper leave as is
white circle add noise, monochromatic, uniform 50
brown circle  use paper 10
left white heart add noise, monochromatic, uniform 50
dark pink heart set foreground to #d4c1d6 and background to #ff999a go over it with color changer to change color of the heart
right white heart add noise, monochromatic, uniform 50
light pink heart set foreground to #efcdce and background to #fdc0bf go over it with color changer to change color of the heart

Make the light pink heart layer active, click inside it with your magic wand, selections, invert, open one of your tubes, copy and paste as a  new layer, arrange it in the heart, click delete on your keyboard, deselect and change the blend mode to soft light

Do the same with the larger heart we changed to light purple except mirror the tube before 
you copy & paste it

Merge the 3 word art layers together and add a drop shadow

Copy and paste your main tube, arrange it on the right side of your tag

Now add the following elements
element 23 resize 70% arrange on top left
element 70 mirror arrange across top
element 77 resize 80% arrange across bottom right
element 72 resize 70%  arrange on bottom right over the leaves
element 6 arrange below the tube, flowers & leaves on right side
duplicate & drag up and between the two heart layers in the center

 Add paper 1 above the white background & apply your mask

crop and resize
add your copyright and credits as needed
add your text and save

Thursday, January 9, 2014

CT Tag Show Off for Alicia Mujica


Two new tags using the artwork of Alicia Mujica, this tube is called Chloe and she's from Alicia's 2014 St. Valentines Special Edition set of 3 tubes which you can find here 

Wednesday, January 8, 2014

Chloe


For this tutorial you will need the following:

Paint Shop Pro, I am using PSP X, you should be able to use any version.

Tube of choice, I am using the artwork of Alicia Mujica which you need a license to use.  
This little cutie is Chloe and she is part of a 3 pack limited edition set.

Scrap kit of choice. I am using a FTU kit by PolkaDot Scraps called Lucious 

Font of choice, I am using Freeze!


Plugins: Alien Skin Eye Candy 4000 Gradient Glow
I do use Eye Candy 4000 Gradient Glow on all my copyrights/credits layers
I do this because some forums will make a .png tag show up with a black background and then your
copyright doesn't show. 


Just remember that my choices of papers and elements is just a suggestion, change it up and make it yours! You don't have to follow mine exactly.

Add a drop shadow of your choosing to tubes & elements throughout. I usually use 1, 1, 50, 5 unless otherwise noted.


Let's get started!

Open a new canvas 850 x 850 pixels with a white background

open fram 4 copy and paste as a new layer 
click inside with your magic wand, selections, modify, expand 2, selections, invert
open paper 9 copy and paste as a new layer click delete on your keyboard

Copy & paste your tube as a new layer resize 40% arrange on left of frame

Copy and paste heart 1 as a new layer
click inside with your magic wand, selections, modify, expand 2, selections, invert
open paper 8 copy and paste as a new layer click delete on your keyboard

Mirror your tube, copy and paste as a new layer, resize 35% arrange in the frame, 
click delete on your keyboard & deselect, merge heart frame, tube & background paper together
resize 55% rotate right by 30
add drop shadow of 1, 1, 50, 5 and -1, -1, 50 and 5

arrange frame about half way up the right side of the circle frame

Add the following elements
flower 3 resize 55% arrange so the knot on the bow is over the bottom center of heart frame duplicate
drag below the heart frame layer and up so it's showing above & behind it
gems resize 60% arrange on bottom left side of heart frame
be mine word art arrange across bottom of frame add gradient glow of 5 color #a40000
button 3 resize 40% arrange on left below tube layer
 bow 2 resize 35% arrange on top center of circle frame
 cherry charm resize 35%  arrange so stem is in center of bow
Copy and paste frame 1 above the white background

Copy & paste paper 2 above the white background
apply your mask

crop and resize
add your copyright and credits as needed
add your text and save

Kisses


For this tutorial you will need the following:

Paint Shop Pro, I am using PSP X, you should be able to use any version.

Tube of choice, I am using the artwork of Ismael Rac (2013 Classy Girl & 2013 Sexy Lingerie) which you need a license to use.  

Scrap kit of choice. I am using a PTU kit by Amy Marie called Lady In Red 

Font of choice, I am using Scriptina

Plugins: Xero Porcelain
I do use Eye Candy 4000 Gradient Glow on all my copyrights/credits layers
I do this because some forums will make a .png tag show up with a black background and then your
copyright doesn't show. 


Just remember that my choices of papers and elements is just a suggestion, change it up and make it yours! You don't have to follow mine exactly.

Add a drop shadow of your choosing to tubes & elements throughout. I usually use 1, 1, 50, 5 unless otherwise noted.


Let's get started!

open a new canvas 800 x 800 pixels with a white background
open 23 copy and paste as a new layer resize 90%
click inside with your magic wand set on add, click into the corner where it doesn't go all the way up to the edge of the frame, selections, modify, expand 3, selections, invert
open paper 11 copy and paste as a new layer click delete on your keyboard

Copy and paste your close up tube, arrange in the frame, click delete on your keyboard, deselect
Duplicate the tube, on the top layer adjust blur, gaussian 3, change the blend mode to soft light
On the original, change the hue and saturation to 0
Apply Xero Porcelain with the default settings except change the blue to zero

Add your main tube, resize 45% mirror and arrange on the left side of the frame

Add the following elements:
element 83 resize 75% duplicate & mirror, arrange on bottom left & right
element 20 resize 55% arrange on bottom center
element 34 resize 45% arrange on left behind & above other rose, duplicate & mirror
element 6 resize 45% arrange on bottom to the right of the bow
element 72 resize 45% arrange on bottom left under the  rose, duplicate & rotate the duplicate left 45 and pull it up so it shows behind the top left rose
element 90 resize 45% arrange on bottom to the left of the bow
element 48 arrange above frame just above the white background layer
duplicate & drag the duplicate layer down & left, merge these two together, duplicate & drag right
element 74 resize 50% rotate right 30 arrange on left side of frame just above frame layer, duplicate & mirror
element 17 resize 55% arrange on bottom left, duplicate & mirror, drag left to arrange


crop and resize
add your copyright and credits as needed
add your text and save

Tuesday, January 7, 2014

Soft Love


For this tutorial you will need the following:

Paint Shop Pro, I am using PSP X, you should be able to use any version.

Tube of choice, I am using the artwork of Zlata M, (Elegical Angel PFD Exclusive) which you need a license to use.  

Scrap kit of choice. I am using a PTU Kit 3-2014 by Amy Marie 

Font of choice, I am using Cutie Pop

Plugins: No outside plugins
I do use Eye Candy 4000 Gradient Glow on all my copyrights/credits layers
I do this because some forums will make a .png tag show up with a black background and then your
copyright doesn't show. 


Just remember that my choices of papers and elements is just a suggestion, change it up and make it yours! You don't have to follow mine exactly.

Add a drop shadow of your choosing to tubes & elements throughout. I usually use 1, 1, 50, 5 unless otherwise noted.


Let's get started!

Open a new canvas 850 x 850 pixels with a white background

open your tube copy and paste as a new layer, resize 75%

Now we'll build up the tag with the elements from the kit using the following:

element 1 arrange on top left, behind the tube
element 25 resize 75%  arrange on bottom right in front of tube
element 4 resize 60% arrange on bottom left in front of tube
element 17 resize 60% arrange in front of tube on the bottom center
element 16 resize 60% arrange on left above & behind box
element 8  arrange on right, above dog
element 10 arrange on left about half way up behind all the other elements
element 13 arrange on right, behind tube, erase the small bud at the top
element 15 arrange in center of the tag
element 20 arrange on top right


crop and resize
add your copyright and credits as needed
add your text and save

Sunday, January 5, 2014

Sweet Angel


For this tutorial you will need the following:

Paint Shop Pro, I am using PSP X, you should be able to use any version.

Tube of choice, I am using the artwork of Spazz (Cassandra) which you need a license to use.  

Scrap kit of choice. I am using a PTU kit, Roses For Mia by Amy Marie

Font of choice, I am using Freebooter Script


Plugins: No outside plugins
I do use Eye Candy 4000 Gradient Glow on all my copyrights/credits layers
I do this because some forums will make a .png tag show up with a black background and then your
copyright doesn't show. 


Just remember that my choices of papers and elements is just a suggestion, change it up and make it yours! You don't have to follow mine exactly.

Add a drop shadow of your choosing to tubes & elements throughout. I usually use 1, 1, 50, 5 unless otherwise noted.


Let's get started!

Open a new canvas 850 x 850 pixels with a white background

open 16 copy and paste as a new layer 
click inside with your magic wand, selections, modify, expand 2, selections, invert
open paper 8 copy and paste as a new layer click delete on your keyboard

Copy & paste your tube as a new layer, resize 25% & mirror, arrange in front of frame

Add the following elements:
element 20 resize 75% arrange on bottom right of frame, duplicate & mirror
element 17 arrange behind flowers on bottom right, duplicate & mirror
element 23 resize 55% arrange on bottom right between flower layers
element 12 arrange on left, duplicate & mirror, erase what shows under the tube on both layers
element 72 resize 35% arrange on left, duplicate & arrange on right below the other flowers
element 21 arrange below clock layer on right, duplicate & mirror, resize 75% arrange on left
element 19 resize 55% arrange on right, below the tube
element 18 resize 35% arrange below some of the flower layers on right

add paper 2 above the white background layer
apply your mask

crop and resize
add your copyright and credits as needed
add your text and save

Wednesday, January 1, 2014

Love Me Kitty


For this tutorial you will need the following:

Paint Shop Pro, I am using PSP X, you should be able to use any version.

Tube of choice, I am using the artwork of PinUp Toons, which you need a license to use. 
I got mine at CILM, but you can now find his work at CDO, this tube is Individual Tube 84-3 

Scrap kit of choice. I am using  a PTU kit Love Me by Amy Marie

Font of choice, I am using Pea Goldilocks

Mask: BeckyMask23 her masks are no longer available, if you
don't have it, use something similar

Plugins: No outside plugins
I do use Eye Candy 4000 Gradient Glow on all my copyrights/credits layers
I do this because some forums will make a .png tag show up with a black background and then your
copyright doesn't show. 


Just remember that my choices of papers and elements is just a suggestion, change it up and make it yours! You don't have to follow mine exactly.

Add a drop shadow of your choosing to tubes & elements throughout. I usually use 1, 1, 50, 5 unless otherwise noted.


Let's get started!

Open a new canvas 850 x 850 pixels with a white background

open 21 copy and paste as a new layer resize 115% 
click inside with your magic wand, selections, modify, expand 2, selections, invert
open paper 8 copy and paste as a new layer click delete on your keyboard & deselect

open 77 copy and paste as a new layer under the paper

Open the tube, copy and paste it, arrange it so she's in the center of the frame

add the following:
element 35 arrange on right side of top heart, duplicate, 
mirror and arrange on left side of bottom heart
element 42 resize 35% arrange between the leaves & frame on bottom
element 38 resize 35% arrange on bottom right, behind & above the envelope
element 58 resize 50 arrange in front of hearts on bottom right
element 40 resize 25% arrange in front of envelope on bottom right
element sparkles 1 arrange just above the frame on the bottom, erase any that stick out too far
element 9 resize 55% arrange over leaves on top frame
element 1 resize 55% arrange under the flowers & leaves layer to hide the top part of the string

add paper 9 above the white background
apply your mask

crop and resize
add your copyright and credits as needed
add your text and save