Pages

Tuesday, April 28, 2015

Alicia Mujica CT Tag Show Off

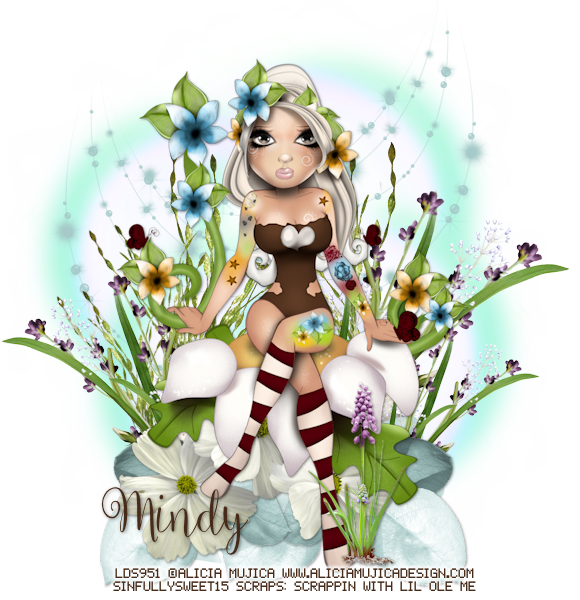
The tags below were made using Alicia Mujica's new spring kit called Secret Garden
and the following tubes
and Mandy

You can find snaggable versions of these tags in my Fotki album


Sunday, April 26, 2015

Sea Scape


Snaggable versions of this tag in my Fotki album

For this tutorial you will need the following:

Paint Shop Pro, I am using PSP X7, you should be able to use any version.

Tube of choice, I am using the artwork of Elias Chatzoudis (Sirena tube)
which you need a license to use.  

Scrap kit of choice. I am using a PTU kit, Sea Scape the Kit by Scrappin With Lil Ole Me 

Font of choice, I am using Bradley Hand ITC

Mask of your choice

Plugins: no outside plugins


Just remember that my choices of papers and elements is just a suggestion, change it up and make it yours! You don't have to follow mine exactly.

Add a drop shadow of your choosing to tubes & elements throughout. I usually use 1, 1, 50, 5 unless otherwise noted.


Let's get started!

Open a new canvas 950 x 950 pixels with a white background

Open element 79 copy and paste as a new layer
take your freehand selection tool set on point to point and 
make a square around the center edge of the frame, clicking once in each corner
and twice when you get back where you started

add a new raster layer below the frame,
make sure you are on that layer, copy paper 5 and paste into selection
then deselect

Copy and paste your tube as a new layer, arrange on the bottom left

Now add your elements:
element 36 resize 70% arrange on left between tube & frame
element 77 arrange between tube & boat 
element 61 resize 45% arrange on right side of boat

element 38 resize 25% arrange on element 61
element 92 resize 45% arrange on top right
element 82 resize 25% arrange at top of sign

element 47 resize 45% arrange on bottom right, duplicate, mirror, resize 75%
element 109 resize 35% arrange between cat tail reeds on bottom right
element 44 resize 25% arrange at bottom right

element 55 resize 45% arrange on bottom right side of tube
element 127 resize 25% arrange on bottom right
element 24 resize 25% arrange on bottom right

copy and paste paper 7 above the white background
apply your mask and merge group

crop and resize
add your copyright and credits as needed
add your text and save
Friday, April 24, 2015

Bridges


For this tutorial you will need the following:

Paint Shop Pro, I am using PSP X7, you should be able to use any version.

Tube of choice, I am using the artwork of Alicia Mujica which you need a license to use.  

Scrap kit of choice. I am using the inspired by kit, by Monti 

Font of choice, I am using DJB Carly Sue Got Married

Plugins: no outside plugins


Just remember that my choices of papers and elements is just a suggestion, change it up and make it yours! You don't have to follow mine exactly.

Add a drop shadow of your choosing to tubes & elements throughout. I usually use 1, 1, 50, 5 unless otherwise noted.


Let's get started!

Open a new canvas 850 x 850 pixels with a white background

Copy and paste your tube as a new layer

Now add your elements:
element 17 arrange behind tube
element 15 arrange on bottom left below element 17, 
duplicate twice, mirror one, arrange across bottom so it fills space below element 17

element 13 resize 70% arrange on bottom right, duplicate & mirror
element 11 resize 40% mirror & arrange on bottom left
element 7 arrange behind bridge on right

frame arrange behind bridge and tree
click inside with your magic wand, selections, modify, expand 2, selections, invert
open paper 1 copy and paste as a new layer 
click delete on your keyboard, deselect

element 19 arrange on left behind frame, duplicate, mirror, resize 75%
element 21 arrange at bottom between grass layers
element 10 resize 20% arrange in heart frame


crop and resize
add your copyright and credits as needed
add your text and save
Spring Sweets


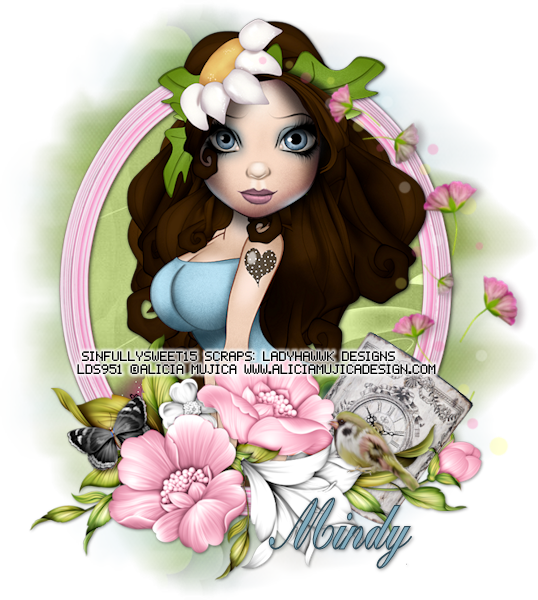
Snaggable versions of this tag in my Fotki album

For this tutorial you will need the following:

Paint Shop Pro, I am using PSP X7, you should be able to use any version.

Tube of choice, I am using the artwork of Alicia Mujica which you need a license to use.  

Scrap kit of choice. I am using the inspired by kit for this tube by Ladyhawwk Designs, LHD_IB-AliciaMujica-Exclusive-13A  

Font of choice, I am using Freestyle Script


Plugins: no outside plugins


Just remember that my choices of papers and elements is just a suggestion, change it up and make it yours! You don't have to follow mine exactly.

Add a drop shadow of your choosing to tubes & elements throughout. I usually use 1, 1, 50, 5 unless otherwise noted.


Let's get started!

Open a new canvas 950 x 950 pixels with a white background

Open frame 2 copy and paste as a new layer 
click inside with your magic wand, selections, modify, expand 2, selections, invert
open paper 1 copy and paste as a new layer 
click delete on your keyboard,

Copy and paste your tube as a new layer, 
arrange in your frame
erase the bits that hang out of your frame where you don't want them, deselect

Now add your elements:
element 4 resize 60% arrange on bottom left, duplicate & mirror
element 20 resize 85% arrange in center of two flower bunches
element 10 resize 45% arrange on left, behind other flowers, duplicate & mirror

element 6 resize 55% arrange on right side of teapot
element 17 resize 40% arrange on right side of cupcakes, duplicate, mirror, arrange to left & below teapot

element 16 esize 25% arrange on bottom left

add paper 2 above the white background,
apply your mask, merge group
I resized mine 100%

crop and resize
add your copyright and credits as needed
add your text and save
Sunday, April 19, 2015

Alicia Mujica CT tag show off

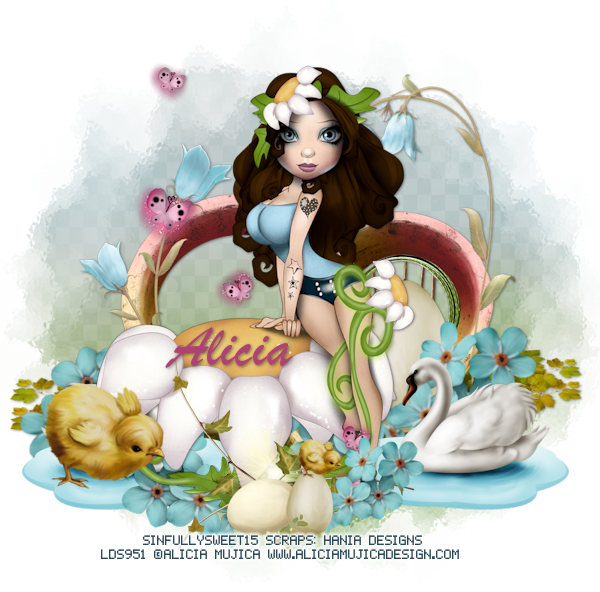
The following tags were made using the artwork of Alicia Mujica
This tube is a free tube in the month of April 2015 with a minimum purchase of 4 Euros
Snaggable versions of these tags available in my Fotki album


The above tag was made using Amy Marie's kit Blue Eyed Beauty


The tag above was made using Scrappin' With Lil Ole Me's kit Dreams


The tag above was made using the PTU kit Powder Blue Fantasy by Tiny Turtle Designs

Fly Away


Snaggable versions of this tag in my Fotki album

For this tutorial you will need the following:

Paint Shop Pro, I am using PSP X7, you should be able to use any version.

Tube of choice, I am using the artwork of Ismael Rac (2015 Pretty 4 You tube)
which you need a license to use.  

Scrap kit of choice. I am using a PTU kit by Scrapping With Lil Ole Me called Fly Away Home  

Font of choice, I am using Multicolored Butterflies

Plugins: no outside plugins


Just remember that my choices of papers and elements is just a suggestion, change it up and make it yours! You don't have to follow mine exactly.

Add a drop shadow of your choosing to tubes & elements throughout. I usually use 1, 1, 50, 5 unless otherwise noted.


Let's get started!

Open a new canvas 850 x 850 pixels with a white background

Open element 141 copy and paste as a new layer, resize 85%
 click inside with your magic wand, selections, modify, expand 2, selections, invert
open paper 20 copy and paste as a new layer 
click delete on your keyboard,

Copy and paste your tube as a new layer, resize by 55%
arrange in your frame
erase the bits that hang out of your frame where you don't want them, deselect

Now add your elements:
element 22 resize 55% then 90% arrange on bottom left, duplicate & mirror
element 121 resize 50% arrange on bottom left in front of other flowers, duplicate, mirror, resize 85%
element 29 rotate right 90 arrange on left, under the other elements, duplicate, mirror, duplicate & rotate left 90 drag below the other two layers

element 24 resize 35% arrange on left above leaves, duplicate drag right, duplicate, drag up
element 65 resize 35% rotate left 40 arrange above leaves on left, duplicate, mirror
element 43 resize 35% arrange on left below the flowers layers at the bottom

element 64 resize 35% arrange below element 43
element 11 resize 25% arrange on left


crop and resize
add your copyright and credits as needed
add your text and save

Friday, April 17, 2015

Naughty


Snaggable versions of this tag in my Fotki album

For this tutorial you will need the following:

Paint Shop Pro, I am using PSP X7, you should be able to use any version.

Tube of choice, I am using the artwork of Amy Matthews tube 33-3 which you need a license to use.  

Scrap kit of choice. I am using ScrapMonti_IB-AmyMathews-26-3 by Monti

Font of choice, I am using Rage Italic

Mask: WSLMask84  - Mask links on right sidebar

Plugins: No outside plugins


Just remember that my choices of papers and elements is just a suggestion, change it up and make it yours! You don't have to follow mine exactly.

Add a drop shadow of your choosing to tubes & elements throughout. I usually use 1, 1, 50, 5 unless otherwise noted.


Let's get started!

Open a new canvas 850 x 850 pixels with a white background

Open frame 2 copy and paste as a new layer 
click inside with your magic wand, selections, modify, expand 2, selections, invert
open paper 6 copy and paste as a new layer 
click delete on your keyboard, deselect

Copy and paste your tube as a new layer, arrange on the left

Now add your elements:
element 19 resize 45% arrange in top section of frame on left, duplicate, drag right
drop opacity of the one on the left to about 30

element 5 resize 35% arrange on top left, duplicate, drag to top right
element 15 resize 45% arrange in front of tube on left
word art 1 resize 45% arrange on bottom right

Copy and paste paper 1 above the white background
apply your mask, merge group, resize 110%

crop and resize
add your copyright and credits as needed
add your text and save

Sunday, April 12, 2015

Spring Break


Snaggable versions of this tag in my Fotki album

For this tutorial you will need the following:

Paint Shop Pro, I am using PSP X7, you should be able to use any version.

Tube of choice, I am using the artwork of Fedor (Melissa tube) which you need a license to use.  

Scrap kit of choice. I am using a PTU kit, Easter Break by Scrappin With Lil Ole Me

Font of choice, I am using Qaskin

Plugins: no outside plugins used


Just remember that my choices of papers and elements is just a suggestion, change it up and make it yours! You don't have to follow mine exactly.

Add a drop shadow of your choosing to tubes & elements throughout. I usually use 1, 1, 50, 5 unless otherwise noted.


Let's get started!

Open a new canvas 950 x 950 pixels with a white background

Open element 89 copy and paste as a new layer, resize 70%
click inside with your magic wand, selections, modify, expand 2,
make a new raster layer below the frame, make sure you're on that layer
copy and paste paper into selection, deselect

Copy and paste your tube as a new layer, resize by 30%
mirror, arrange on left side

now add your elements:
element 88 resize 55% arrange on top right, duplicate & mirror
element 14 resize 20% rotate left 20 arrange in center of two branches at top

element 104 resize 60% arrange behind and above the tube
element 63 mirror & resize 50% rotate right 30 arrange on top, duplicate, resize 50, arrange on top, duplicate & mirror

element 31 resize 55% arrange on left side of tube
element 28 resize 40% arrange on bottom right corner
element 26 resize 60% arrange on right
element 41 resize 30% arrange on top right


crop and resize
add your copyright and credits as needed
add your text and save

Sweetness


Snaggable versions of this tag in my Fotki album

For this tutorial you will need the following:

Paint Shop Pro, I am using PSP X7, you should be able to use any version.

Tube & kit of choice, I am using the PinUp Toons tube 216-1 from the bundle
along with the kit by Ladyhawwk designs, available at CDO.

Font of choice, I am using Sweet Pea

Mask: beckymask23, no longer available for download
if you don't have it, just use something else you like

Plugins: no outside plugins


Just remember that my choices of papers and elements is just a suggestion, change it up and make it yours! You don't have to follow mine exactly.

Add a drop shadow of your choosing to tubes & elements throughout. I usually use 1, 1, 50, 5 unless otherwise noted.


Let's get started!

Open a new canvas 850 x 850 pixels with a white background

Open frame 2 copy and paste as a new layer, resize 85%
click inside with your magic wand, selections, modify, expand 2, selections, invert
open paper 4 copy and paste as a new layer 
click delete on your keyboard,

Copy and paste your tube as a new layer
arrange in your frame

Now add your elements:

element 15 resize 75% arrange on bottom right
element 19 resize 65% arrange behind chair on right

element 17  resize 65% arrange below the chair layer to the left of it
element 7 resize 65% roate right 40 arrange in front of seat, duplicate, mirror, drag back over by original layer so they overlap

element 18 resize 55% rotate left 90 arrange on right side of chair
element 24 resize 55% arrange behind other flowers on the left
duplicate element 19 (the pink flowers that are just behind the chair on the left)
rotate left 90, drag below the other flowers and so they show below element 24 at the bottom

element 46 arrange behind chair, duplicate 3 times and just arrange between the different flower layers wherever you like them

frame 3 arrange behind first frame and background paper

add paper 7 above the white background,
apply mask, merge group
 I duplicated mine about 4 times and merge together to make it darker

crop and resize
add your copyright and credits as needed
add your text and save

Thursday, April 9, 2015

Ebony


Snaggable versions of this tag in my Fotki album

For this tutorial you will need the following:

Paint Shop Pro, I am using PSP X7, you should be able to use any version.

Tube of choice, I am using the artwork of Souldesigner (Ebony tube) which you need a license to use.  

Scrap kit of choice. I am using the matching PTU kit by Niqui's Designs, also called Ebony. 

Font of choice, I am using Sweet Pea

Plugins: No outside plugins


Just remember that my choices of papers and elements is just a suggestion, change it up and make it yours! You don't have to follow mine exactly.

Add a drop shadow of your choosing to tubes & elements throughout. I usually use 1, 1, 50, 5 unless otherwise noted.


Let's get started!

Open a new canvas 850 x 850 pixels with a white background

Open element 26 copy and paste as a new layer, resize 75%, rotate left 90
click inside with your magic wand, selections, modify, expand 2, selections, invert
open paper 15 copy and paste as a new layer 
click delete on your keyboard, deselect

Copy and paste your tube as a new layer, resize by 55%
arrange in center of the frame area

Now add your elements:
element 31 resize 35% arrange on the right side of frame, duplicate, arrange on top left side
element 52 arrange behind frame and background paper
element 42 resize 175% arrange behind wire
element 53 rotate left 90 arrange on bottom over tube layer
element 68 resize 65% rotate left 90, arrange on bottom left below tube layer
element 10 resize 85% arrange just between the frame layer & the wire layer


crop and resize
add your copyright and credits as needed
add your text and save

Saturday, April 4, 2015

Sunflower Wishes


For this tutorial you will need the following:

Paint Shop Pro, I am using PSP X7, you should be able to use any version.

Tube of choice, I am using the artwork of PinUp Toons (PinUpToons-216-3)
which you need a license to use.  

Scrap kit of choice. I am using a PTU kit ScrapMonti_IB-MelissaDawn-14-1 by Monti 

Font of choice, I am using Gigi

Plugins: No outside plugins used


Just remember that my choices of papers and elements is just a suggestion, change it up and make it yours! You don't have to follow mine exactly.

Add a drop shadow of your choosing to tubes & elements throughout. I usually use 1, 1, 50, 5 unless otherwise noted.


Let's get started!

Open a new canvas 850 x 850 pixels with a white background

Open  copy and paste as a new layer, resize 90%
click inside with your magic wand, selections, modify, expand 2
make a new raster layer below the frame, make sure you are on this layer
open paper 7 copy and paste into selection, deselect

add the following to your tag:
element 22 resize 80% arrange across bottom of the frame
element 5 resize 80% arrange on the right side of the frame under the grass layer
add your tube on the left side of the wishing well

element 26 resize 55% arrange on bottom left side of frame
element 6 arrange on the right side of the frame element, below the well, erase what shows under the grass at the bottom, duplicate & mirror

element 4 resize 40% arrange behind the tube, between tube and the well layers
element 21 resize 38% arrange on the right side of the well
element 30, flip & arrange between the frame & background paper

element 10 resize 20% arrange in frame
element 8 resize 20% arrange in the frame by the beehive 
element 23 resize 20% rotate left 35 arrange on bottom left


crop and resize
add your copyright and credits as needed
add your text and save

Thursday, April 2, 2015

Peep Show


Snaggable versions of this tag in my Fotki album

For this tutorial you will need the following:

Paint Shop Pro, I am using PSP X7, you should be able to use any version.

Tube of choice, I am using the artwork of PinUp Toons which you need a license to use.  
This tube is the April 2015 Bonus tube only available in the month of April 2015 with a $10 purchase of PinUp Toons tubes from CDO

Scrap kit of choice. I am using Peep Show, a PTU kit by Scrappin With Lil Ole Me 

Font of choice, I am using DJB Carly Sue Got Married

Plugins:  No outside plugins


Just remember that my choices of papers and elements is just a suggestion, change it up and make it yours! You don't have to follow mine exactly.

Add a drop shadow of your choosing to tubes & elements throughout. I usually use 1, 1, 50, 5 unless otherwise noted.


Let's get started!

Open a new canvas 850 x 850 pixels with a white background

Copy and paste your tube as a new layer

Open element 90 copy and paste as a new layer
click inside with your magic wand, selections, modify, expand 2, selections, invert
open paper 14 copy and paste as a new layer 
click delete on your keyboard,

Copy and paste your close up tube as a new layer
arrange in your frame
click delete on your keyboard
change the blend mode to Luminance(L)

Now add the following elements:
element 13 resize 75% arrange on bottom right side of frame
element 125 resize 65% mirror & arrange behind grass layer
element 7 arrange on left, below element 125
element 34 resize 35% arrange on the right side of the grass
element 40 resize 35% arrange on left side of tube
element 103 resize 95% arrange on right, below frame, duplicate, flip, mirror, merge together


crop and resize
add your copyright and credits as needed
add your text and save