For this tutorial you will need the following:
Paint Shop Pro, I am using PSP X, you should be able to use any version.
Tube of choice, I am using the artwork of Juicy Bits which you need a license to use. You can get at her store HERE.
Scrap kit of choice. I am using Wild Thing by Juicy Bits.
Font of choice, I am using
Mask of choice
Plugins: no outside plugins used
Just remember that my choices of papers and elements is just a suggestion, change it up and make it yours! You don't have to follow mine exactly.
Let's get started!
Open a new canvas 650 x 600 white.
Open paper 3, set it as your background and using your elipse tool, draw out a medium sized circle in the middle of your canvas. Objects, align, center in canvas, then convert to raster layer.
Selections, select all, float, defloat, modify, expand by 5. Add a new raster layer below your circle and flood fill with white.
Selections, modify, expand by 10, open paper 7, set this one as your foreground add a new raster layer and flood fill with that pattern.
Selections, modify, expand by 5, add a new raster layer and flood fill with #960f5b. Deslect.
On the white layer and the last layer that you did, adjust, add/remove noise, monochrome, 45%, uniform.
Hide your white background layer, and merge visible. Add a drop shadow.
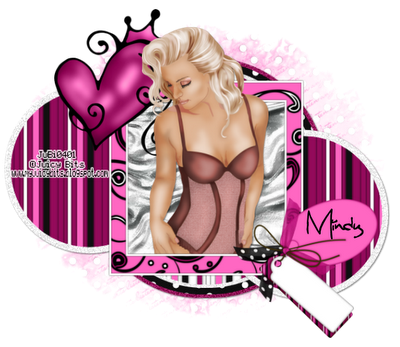
Open paper 2, set it as your background layer, set your foreground as white. Using your elipse tool with the stroke set to 10, draw out another circle. Convert to raster layer, take your magic wand tool and click inside the white part. Adjust, add/remove noise with the same settings as above, add a drop shadow, arrange to the top left side of your large circle.
Duplicate that small circle and drag the copy to the bottom right side.
Open frame 1, copy and paste as a new layer, resize about 40%. Click inside with your magic wand, expand by 5, open paper 10, resize that also by 40%, copy and paste as a new layer, selections, invert, on the paper layer, click delete on your keyboard.
Copy and paste your tube as a new layer, resize if needed. Place it in the frame and erase the bits that hang over the edge. Deselect and add your drop shadow.
Add any extra elements you'd like.
Open a paper of your choice, copy and paste it above your white background layer and apply the mask. Delete the mask, then merge the group together.
Add your name and any copyright and credits needed.
Thursday, July 22, 2010
Wild Thing
For this tutorial you will need the following:
Paint Shop Pro, I am using PSP X, you should be able to use any version.
Tube of choice, I am using the artwork of Ismael Rac, which you need a license to use. You can get at his new store HERE.
Scrap kit of choice. I am using Wild Thing by Juicy Bits.
Font of choice, I am using Cajun Boogie
Plugins: Pixelate Sector Mosiac
Just remember that my choices of papers and elements is just a suggestion, change it up and make it yours! You don't have to follow mine exactly.
Let's get started!
Open a new canvas 600 x 250 white background.
Open paper 4, copy and paste as a new layer, dupicate. On the top layer adjust, blur, gaussian blur 29, set Blend Mode to Luminance (L). On the original layer, adjust blur, gaussian blur 6. Apply Pixelate Sector Mosiac with the following settings:
Theta Tiles 15
Rho Tiles 37
Open your tube, copy and paste as a new layer, drag to the left side, add a drop shadow.
Take your cursor and place it on the left side of your canvas until you get the little arrows that point left and right. Click on your canvas and drag it out. You'll see grey boxes on each side of your tag.
Now, click on your preset shapes, rectangle tool. Set the background color as any color, we're going to fill it in later with a paper. We are going to do it this way so that when you apply the wave effect, the paper doesn't get distorted.
Draw out a skinny rectangle all the way across your tag. Start way to the left out in the grey area, and drag it well into the grey area on the right. Convert to raster layer.
Now go to effects, distortion effects, wave with the following settings:
Horizontal Displacement Amplitude and Wavelength: 1
Vertical Displacement Amplitude 2, Wavelength 10
Transparent
Now open paper 5, and set it as your foreground. To do this, right click on foreground, choose pattern, and in the drop down box, look for your paper.
On the waved rectangle layer that you just made, selections, select all, float, defloat, add a new raster layer and flood fill with your pattern. Selections, modify, expand by 5, add a new raster layer under this layer and flood fill with white.
Adjust, add/remove noise settings Uniform, 45%, monochrome checked. Add a drop shadow and merge these two layers together.
Open heart doodle, resize by 75%, copy and paste as a new layer, arrange below your tube, add a drop shadow.
Open the stars layer, copy and paste as a new layer, resize by 45%. Arrange to the top right side of tag, add drop shadow.
Copy and paste again, resize by 40% this time arrange near the middle, add drop shadow, merge two layers together.
Add a new raster layer, selections, select all, modify, contract by 2, invert, add a new raster layer, flood fill with pink from your stars.
Selections, invert, modify, contract 3, invert, add a new raster layer below the pink layer, flood fill with black or white.
Selections, invert, modify, contract 2, invert, add a new raster layer below that black or white layer and flood fill with the pink again. Deselect
Merge the 3 frame layers together and add a drop shadow.
Add your copyright info and your name, save and you're done with the tag.
For the avatar:
Open a new canvas either 125x125 or 150x150 depending on the size the site allows you to use. Most use the smaller size.
Go to your finished tag and merge together the two background layers. Copy and paste them into the avatar canvas. Resize by 40%.
Copy and paste your tube as a new layer, move to the left.
Copy and paste the heart layer, resize by 50%, move below your tube layer.
Make the frame the same way you did for the tag.
Add your copyright info.
Add the first letter of your name.
Save it and you're done!
Tuesday, July 13, 2010
Don't Get Your Panties
For this tutorial you will need the following:
Paint Shop Pro, I am using PSP X, you should be able to use any version.
Tube of choice, I am using the artwork of Juicy Bits which you need a license to use. You can get HERE.
Scrap kit of choice. I am using Vinyl Vixen which I purchased at AMI but you can now purchase through Juicy Bits store.
Font of choice, I am using Reisling, Rockwell Extra Bold, and Scriptina
Plugins: Tramages Tow the Line
Just remember that my choices of papers and elements is just a suggestion, change it up and make it yours! You don't have to follow mine exactly.
Let's get started!
Open a new 600 x 600 canvas flood fill with white.
Open frame 2, copy and paste as a new layer, resize by 75%.
Take your selection tool set on rectangle and draw out a rectangle covering most of the frame. You want to go over to where it's mostly solid so that when we fill it with a paper, you don't have little white spots showing in the middle of the furry parts of the frame. Selections, invert.
Open paper 7, resize by 75% twice, copy and paste as a new layer, click the delete button on your keyboard.
Open your tube, copy and paste as a new layer, duplicate, on the original layer, erase the bits that hang over your frame, deselect, add a drop shadow.
Unhide the top layer and erase the bits that hang over the frame. You don't have to be careful, because you have the bottom tube showing through.
Open the journal tag element, copy and paste as a new layer, drag it down just above your white background. Adjust blur, gaussian by 20.
Apply Tramages tow the line, default settings. Change the opacity to about 55%.
Open one of the panties elements, resize by 35%, copy and paste as a new layer, rotate to the left by about 30 and drag to the bottom right corner. Add a drop shadow.
Open doodle 1, copy and paste as a new layer, resize by about 60% drag to the bottom just above your layer you applied the tramages to.
Open one of the bottle caps, resize by 25% copy and paste as a new layer, drag to bottom right corner, add drop shadow.
Add text and copyright info.
Crop, resize, save and you're done!
Saturday, July 10, 2010
All Access
For this tutorial you will need the following:
Paint Shop Pro, I am using PSP X, you should be able to use any version.
Tube of choice, I am using the artwork Ismael Rac, which you need a license to use. He's gone independent now, and you can purchase his work and get your license at his store HERE.
Scrap kit of choice. I am using Rock Star by Juicy Bits. You can find it HERE.
Font of choice, I am using Angelic War
Mask of your choice
Plugins: none used in this tutorial.
Just remember that my choices of papers and elements is just a suggestion, change it up and make it yours! You don't have to follow mine exactly.
Let's get started!
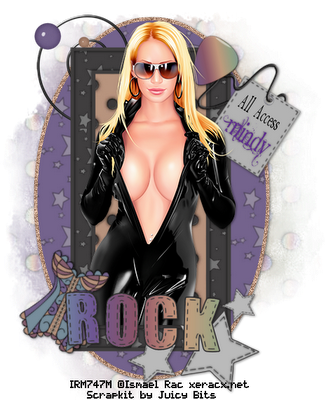
Open frame 12, rotate to the right by 90%, make sure all layers is checked. Resize by 80% and then change the canvas size to 500x600.
Click inside your frame with your magic wand, selections, modify, expand by 5, open paper 22, copy and paste as a new layer. Resize by 80%, selections, invert, make sure you are on your paper layer, and click delete on your keyboard. Selections, invert, modify, contract by 5 then invert again.
Copy and paste your tube as a new layer, take your eraser tool and erase the bits that hang over on the bottom. Deselect and add a drop shadow.
Using your preset shapes tool, on elipse, open paper 5, click on the background color and click on pattern, on the drop down box find your paper and select that. Change the angle to 0 and the scale to 50, click ok. Draw out a largish circle. Click on that layer in your layer palette, click arrange, send to bottom. Convert to raster layer. Selections, select all, float, modify, expand by 5, add a new raster layer, flood fill with #b7937d, deselect. Adjust, add/remove noise with the following settings: uniform, monochrome checked, percent at 50.
Open paper 16, copy and paste as a new layer, drag to the bottom, resize by 75%, apply your mask. Make sure to delete the mask and merge the group together. Depending on the mask you use, you may have to resize.
Add any elements you like, resizing as necessary.
Add your copyright and credits as needed.
Add your name and save.
Tuesday, July 6, 2010
Gorjuss Circles
For this tutorial you will need the following:
Paint Shop Pro, I am using PSP X, you should be able to use any version.
Tube of choice, I am using the artwork of Suzanne Woolcott which you need a license to use.
I purchased mine at AMI, but she is now selling her art on her own site. You can get it HERE
Font of choice, I am using
Plugins:
MuRa Meister Copies
L en K's Mayra
Filter Factory A Rings
Let's get started!
Open a new canvas 600 x 250 with a transparent background.
Open your tube and coy and paste as a new layer. Apply MuRa Meister Copies using the Wallpaper Rotate preset.
Duplicate it and hide the top layer. On the bottom layer apply Effects>Art Media Effects>Brush Strokes with the following settings:
Softness 20
Bristles 160
Width 5
Opacity 50
Length 10
Density 25
Angle 102
Color #505050
Apply this affect a total of 2 times. Apply Gaussian blur at 20.
Unhide your top layer and apply the L en K's Mayra with the following settings top to bottom:
0
149
76
2
Now apply Filter Factory A Rings. Click inside several of the lines with your magic wand and hold down your shift key
at the same time until you get them all selected. Hit the delete key on your keyboard.
Change the opacity to about 25 or 30.
Copy your tube and paste as a new layer, resize as necessary. Move to the left side, add a drop shadow.
Paste your tube again, move to the right side, resize if necessary, mirror and add a drop shadow.
Change the blend mode to Soft Light and change the opacity to 65.
Add a new raster layer, selections, select all, modify, contract by 3, invert. Pick a dark color
from your tube and flood fill. Deselect. Add a drop shadow.
Add your copyright info and your name.
Subscribe to:
Posts (Atom)