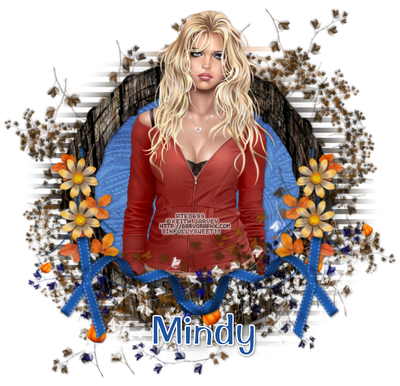
For this tutorial you will need the following:
Paint Shop Pro, I am using PSP X, you should be able to use any version.
Tube of choice, I am using the artwork of Keith Garvey, which you need a license to use. You can get it at PTE.
Scrap kit of choice. I am using Autumn Blues by Farrah's Designer Scraps.
Font of choice, I am using Impress BT
Mask: We're going to make our own!
Plugins: Visman Extravaganza-Transmission
Drop shadow used throughout 1, 1, 50, 5, black
Just remember that my choices of papers and elements is just a suggestion, change it up and make it yours! You don't have to follow mine exactly.
Let's get started!
Open a new canvas 650 x 650, white background.
Open frame 3, resize by 30%, copy and paste as a new layer. Click inside the frame with your magic wand tool, selections, modify, expand by 4.
Open paper 7, resize by 25%, copy and paste above the white background layer, below the frame layers, selections, invert, click delete on your keyboard. Leave selected.
Open your tube, copy and paste as a new layer, resize if needed. If you're using the same tube as I am, it should be the right size. Arrange where you want it then duplicate. Hide the top layer and make sure the original tube layer is below your frame layer. Take your eraser and erase the bits hanging below the frame. Deselect and add a drop shadow.
Un-hide the duplicate tube and make sure it's above your frame. Take your eraser and erase the parts that hang below the frame. You don't have to be careful about where you erase because you have the one on the bottom to show through.
Add a drop shadow to your tube.
Now hide your white background layer and merge visible the rest of the layers, then duplicate, then you can un-hide your background layer.
On the bottom merged layer, adjust blur, gaussian blur at 20. Now apply Visman Extravaganza, Transmission using the following settings top to bottom: 6, 10, 40.
If yours has a rather odd shape at the top because of the head of your tube, you may want to take your eraser tool and erase the top part of the lines from the transmission plugin. Mine just had an odd shape that made it look like a stem coming from the top of it that I didn't like.
Now we can start adding our elements.
This is a list of what I used and what percentage I resized them by. You can look at my tag for placement. I also add a drop shadow to each element.
Vine 4, resize by 25% then 70%, arrange across bottom, duplicate, flip, mirror and drag the top (duplicated) copy below the frame layer.
Scatter 2, resize by 25% then 70%, arrange across bottom over top of Vine 4
Leaves 3, resize by 25% then by 30%, rotate to the left by 45, arrange on right side of frame, duplicate, mirror
Bow, resize by 25% then by 55%, rotate to the left by 45, duplicate, image mirror
Crop, resize, add credits and text then save.

No comments:
Post a Comment