Pages

Tuesday, July 31, 2012

Tiki Island Fun


For this tutorial you will need the following:

Paint Shop Pro, I am using PSP X, you should be able to use any version.

Tube of choice, I am using the artwork of Keith Garvey, which you need a license to use. At the time of this tut, he was still at PTE. The store is closing and he announced that he is going independent. 

Scrap kit of choice. I am using LK Designs kit Island Fun.

Font of choice, I am using KonTikiKona

Plugins: No outside filters used.


Just remember that my choices of papers and elements is just a suggestion, change it up and make it yours! You don't have to follow mine exactly.

Add a drop shadow of your choosing to tubes & elements throughout. I usually use 1, 1, 50, 5 unless otherwise noted.


Let's get started!

Open a new canvas 600 x 250, white background.

Open paper 3, copy and paste as a new layer, arrange it where you want in the canvas. Now make the white background layer active, grab your crop tool, up on the top of your toolbar, click snap selection to and then pick the middle icon (layer opaque) then double click on your canvas.

Open your tube, copy and paste as a new layer on the right. 

Add the following elements, amounts to resize are beside the element name
Torch
Palm Tree, 75%, duplicate, mirror
Cloud 1, 75%
Tiki Mask 2, 56%
Hammock, 54%

Set your background color to #64cae2 and foreground to #de5d9c
Click on the white background layer. 
Selections, select all, modify, set selection borders, set at 2
Add a new raster layer at the top, fill with the foreground color. Deselect.

Click the little arrows to switch the foreground and background color. 
Now do the above steps again, this time make the new layer below the pink layer we just did, and set the selection borders at 4, fill with the blue.

Switch your colors again, repeat the above steps, set selection borders at 7, fill with the pink.

Merge these three layers together, add your drop shadow if you like it there.

Pull the tube layer up so it's above the frame layer.

Delete the bottom white background layer.

Add your copyright and any text you'd like


Avatar:

Open a new canvas 150 x 150
Copy and paste your background layer from your tag into the avatar.
Do the same with the Tiki Mask and your tube.

Do the frame around the avatar the same way we did with the tag using the same settings we used for the tag.
Add your text and copyright info as needed.

Save the tag and avatar and you're done!

Saturday, July 28, 2012

Bad Love


For this tutorial you will need the following:

Paint Shop Pro, I am using PSP X, you should be able to use any version.

Tube of choice, I am using the artwork of Industrial Aardvark which you need a license to use.  

Scrap kit of choice. I am using Valentine Arrows by Wicked Princess Scraps.

Font of choice, I am using Rock Bottom.

Plugins: No outside plugins used.


Just remember that my choices of papers and elements is just a suggestion, change it up and make it yours! You don't have to follow mine exactly.

Add a drop shadow of your choosing to tubes & elements throughout. I usually use 1, 1, 50, 5 unless otherwise noted.


Let's get started!

Open a new canvas 750x 750 white background.

Open frame 1, copy and paste as a new layer, resize by 75%
Click inside it with your magic wand, selections, modify, expand by 2, selections, invert.
Copy and paste paper 1 as a new layer, drag below the frame layer, click delete on your keyboard.
Leave selected. 
Copy and paste your close-up as a new layer. I used close-up 2. Resize if needed, I did mine by 75%
Click delete on your keyboard and change the blend mode to Luminance(L).

Copy and paste swirly frame as a new layer, drag down so it's on the bottom, resize by 85%. Change the opacity to around 65 or 70. Erase the bits that hang below the frame. Leave it showing above the top and around the two sides.

Copy and paste your main tube as a new layer. Resize if needed, I resized mine by 75%.

Add any elements you'd like. I used the following with the amount I resized them beside

Cat, 35%
Thorned heart, 30%
Voodoo doll, 30%
Cupcake, 30%
Rose cupcake, 30%
Love Pills, 30%
Demon Skull, 30%
Spiked shoe, 25%
Devil bird, 25%


Beaded string, copy and paste as a new layer, arrange it along the bottom so it's just over top of the elements that run along there. Now, duplicate it and drag the bottom one so that the layer is below all the elements but above the frame layer. 
Now take your eraser tool and erase the parts of the top beaded string (your duplicate copy) that is over the elements on the right side of the tag. You'll have the beads showing above the cupcakes on the left side, and then it will look on the right side like it's gone below the elements because you have the bottom layer showing through. 

Crop your tag and resize it.
Add your text and copyrights as needed, then save.

Tuesday, July 24, 2012

Time Heals


For this tutorial you will need the following:

Paint Shop Pro, I am using PSP X, you should be able to use any version.

Three tubes of choice, I am using the artwork of Keith Garvey which you need a license to use. At the time of writing this tut, he was at PTE, but they announced they will be closing as of the end of August 2012. You might check his site here to see where his store is, as he announced he will be going independent.

Scrap kit of choice. I am using Time Heals by Farrah's Designer Scraps.


Font of choice, I am using Scriptina


Plugins: no outside plugins used.


Just remember that my choices of papers and elements is just a suggestion, change it up and make it yours! You don't have to follow mine exactly.

Add a drop shadow of your choosing to tubes & elements throughout. I usually use 1, 1, 50, 5 unless otherwise noted. 


Let's get started!

Open the template, delete the top layer (my credits).

Change the canvas size to about 850 x 750, we'll crop it in the end, we just want room to work for now.

Make background one layer active, click in it with your magic wand, selections, invert.
Open paper 1, resize by 20%, copy and paste as a new layer. Click delete on your keyboard, leave selected.
Open your first tube, copy and paste as a new layer, arrange within the frame how you want it. Click delete on your keyboard. Deselect. Change the blend mode to Luminance(L) or another that suits you. Delete the original template background layer.

Do the same for backgrounds 2 and 3, using papers 8 & 3 and using a different tube in each one.

Now go back to frame 1 layer, make sure you are on that layer, click inside it with your magic wand. Add a new raster layer, flood fill with a color that compliments. Adjust, add/remove noise, add noise, with the following settings:
Uniform, monochrome checked, 100%. Make sure to add your drop shadow to the frame. Delete the original template frame.

Do the same for frames 2 & 3.

Once you get done with filling all the frames, Click on frame one, merge down onto the tube layer and again onto the background layer. Do this again for frame 2 and frame 3 sets. This way you have each tube, frame and background separate So that we can move them around a bit more easily.

Grab your crop tool, click on your tag, and drag the edges so that they are almost touching the edges of your tag, then double click on it. We're doing this because some of the papers may have hung over the edge of the tag and when we move the picture frames around the hidden bits outside your canvas will show and we don't want that!

Move your frames around a bit so they are more to your liking.

Open your tube, copy and paste as a new layer. If you use the same tube as me, resize by 85%

 Now we'll start adding elements.
Add whichever you'd like. I added the following and any amount I resized will be beside it.

Lace 2, 25%, erase any bits that hang too far over the frames, arrange along the bottom

Flower, 15%, arrange around the bottom middle, duplicate & mirror arrange on the top (see tag for reference). Duplicate the one on the bottom again, image, rotate to the right by 90. Take the eraser tool and erase most of the white bits from it.

Shells, 14%
Light, 20%
Bottle, 14%
Flower 2, 10%, rotate left by 88, mirror, duplicate, merge down

Crop it, then resize.
Open paper 5, resize to 600 x 600 pixels. Copy and paste as a new layer, drag it to just above the white background layer.
Open your mask, go to layers, new mask, from image, find the mask in the drop down menu,
click ok. Go to your layer palette, click on the mask and choose to delete it.
Merge group. 
It wasn't dark enough or large enough but I wanted that paper and mask, 
so I duplicated the mask a few times, resized it by 130%, then went to
Brightness and Contrast with the brightness set at -53 and contrast at 53.

Add your copyrights and credits as needed and your name and you're done.

Monday, July 23, 2012

Little Love Notes


For this tutorial you will need the following:

Paint Shop Pro, I am using PSP X, you should be able to use any version.

Tube of choice, I am using the artwork of Ismael Rac, which you need a license to use. 

Scrap kit of choice. I am using Tearful Love by Alika's Scraps. 

Font of choice, I am using Dagobert.

Plugins: No outside plugins used.


Just remember that my choices of papers and elements is just a suggestion, change it up and make it yours! You don't have to follow mine exactly.


Let's get started!

Add a drop shadow to the elements as you need to throughout the tut. I used 1, 1, 50, ,5 unless otherwise noted.

Open a new canvas 750 x 750 with a white background.

Open element AS26, copy and paste as a new layer, resize by 50%, rotate to the right by 90.
Click inside with your magic wand, selections, modify, expand by 3, invert.

Open paper 10, copy and paste as a new layer, drag below the frame, click delete on your keyboard.

Open your tube, copy and paste as a new layer, arrange where you want, take your eraser tool and erase the bits that hang over the frame.

Add the following elements resized to the amount beside it:

AS46, arrange on top left, duplicate, mirror, flip, merge together
drop opacity to about 60
AS95, 65%
AS81, 75%
AS70, mirror
AS83, 45%
AS54, 45%
AS85, 35%

Crop, resize, add text, copyright info and/or credits as needed.
Save and you're done!

Punk


For this tutorial you will need the following:

Paint Shop Pro, I am using PSP X, you should be able to use any version.

Tube of choice, I am using the artwork of Ismael Rac which you need a license to use.

Scrap kit of choice. I am using Emo Funk by Ditsy Designs.

Font of choice, I am using Jolana


Plugins: Eye Candy 4000-Gradient Glow


Just remember that my choices of papers and elements is just a suggestion, change it up and make it yours! You don't have to follow mine exactly.


Let's get started!

Add your drop shadow to the elements throughout as you want to add it. I used 1, 1, 50, 5 on mine unless otherwise noted.

Open a new canvas 750 x 750, white background

Open frame 4, copy and paste as a new layer, resize by 85%. Click inside with your magic wand tool, selections, modify, expand by 3. Open paper 5, copy and paste as a new layer, drag below your frame. Selection, invert, make sure you are still on the paper layer, click delete on your keyboard and leave selected.

Open your tube, copy and paste as a new layer. Resize if needed. If you are using the same tube as me, I resized by 45%. Duplicate your tube, hide the top layer, drag the bottom one below your frame. Take your eraser tool and erase the bits you don't want showing outside the frame. Add your drop shadow to this bottom tube, and deselect.

Unhide the top tube layer and erase the bits hanging out of the frame that you don't want showing. You don't have to be super careful, because you'll have the tube below showing.

Open frame 3, copy and paste as a new layer, resize by 75%. Fill it like you did with the frame above, using paper 6. Merge the frame and paper layers together, duplicate, resize by 65%. Put the larger one on the upper left, the smaller one on the middle to lower right. Make sure they are dragged down below the large frame and papers.

Do the same with frame 1, using paper 3. Resize the frame by 50%, merge together, duplicate and resize by 65%. Arrange the larger one on the bottom , to the left of the purple one. Arrange the smaller one up around the top. (See my tag for reference).

Do the same with frame 2 using paper 8.  Resize the frame by 45%, duplicate and resize the duplicate by 85%. Arrange the larger one on the top right, the smaller on the bottom left (see tag for reference)

Now, after you get them all arranged, you may find you have an empty space somewhere. If that is the case, just duplicate and resize on of your frames and arrange it into the empty spot, or just leave it empty if you like how it looks.

Now it's time to add elements. Use whichever ones you like. I used the following, and if I resized, I put that amount next to the name of the element.

Emo Heart 3, 45%
Sparkle Hearts 3, 30%, 
gradient glow width 3, soft corners 25, opacity 100
 white
Emo Bunny 3, 45%
Sad Teddy 3, 28%
Word Art 1, 25%
Sparkles 2
Ribbon 3
Ribbon 2, 85, flipped

Copy and paste paper 4, drag it down to just above the white background.
Take your crop tool and crop your canvas so that it's the same size as the paper.
Open your mask, go to Layers, New Mask Layer, From Image. 
Find your mask in the drop down box, click ok.
Go to your layer palette, delete the mask, click yes.
Merge group. You may want to resize the mask a little. 
I resized by 105%

Crop, resize, add text, and copyrights as needed, and save.

Saturday, July 21, 2012

Cat Attack


For this tutorial you will need the following:

Paint Shop Pro, I am using PSP X, you should be able to use any version.

Tube of choice, I am using the artwork of Ismael Rac which you need a license to use.  

Scrap kit of choice. I am using Cat Attack by Alika's Scraps

Font of choice, I am using Imelda

Plugins: No outside filters used


Just remember that my choices of papers and elements is just a suggestion, change it up and make it yours! You don't have to follow mine exactly.


Let's get started!

I use a drop shadow on the tubes and elements throughout as needed, and I use 1, 1, 50, 5 unless otherwise note.

Open a new canvas 750 x 750 white background.

Open AS25 (the green and blue frames)
Click inside the blue frame, selections, modify, expand by 3, selections, invert.
Open paper 2, copy and paste as a new layer, drag it below the frame. Click delete on your keyboard.
Do the same for the green section of the frame, using paper 7.
Merge these 3 layers together, add your drop shadow, 
rotate to the right by 40.

Open AS21 (pink frame) copy and paste as a new layer, resize by 75%.

Take your magic wand, click in the center of the frame, make sure you also click in the two spots where the bow crosses over into the center part of the frame.
Selections, modify, expand by 3.

Open paper 5, copy and paste as a new layer, drag below your frame, selections, invert,
make sure you are on the paper layer, click delete on your keyboard, leave selected.

Open your tube, copy and paste as a new layer, arrange it in the frame how you want it, resize if necessary.
If you are using the same tube as me, I resized by 85%.

Open AS26, resize by 50%, copy and paste as a new layer, arrange along the bottom of the frames.

Add any elements you like. I used the following, with any resizing info beside it.

AS7, 75%, rotate left 25
AS47, 85%, rotate right 25
AS24, 55%
AS70, duplicate, flip
AS55, 55%
AS01, 55%
AS45, 20% rotate right 25

Crop, resize, add text, copyright and credits as needed
then save!

Wednesday, July 18, 2012

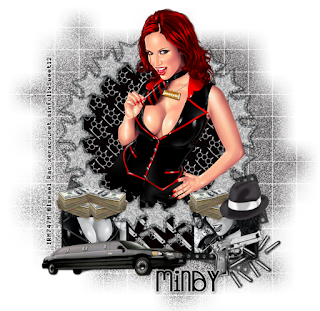
Mafia Girl


For this tutorial you will need the following:

Paint Shop Pro, I am using PSP X, you should be able to use any version.

Tube of choice, I am using the artwork of Ismael Rac which you need a license to use.  

Scrap kit of choice. I am using Mobsters  by Purple's Kreations, available at Artistically Inclined Licensing.

Font of choice, I am using Not Enough (Small)

Mask: WSLMask84 Her links to her older masks are on the right side
about 1/2 way down the blog.

Plugins: No outside plugins used


Just remember that my choices of papers and elements is just a suggestion, change it up and make it yours! You don't have to follow mine exactly.


Let's get started!

I use a drop shadow on the tube and some elements throughout. I'm leaving it out of the directions. You can decide where you'd like to use it. 
I use 1, 1, 50, 5 unless otherwise noted. 

Open a new canvas 750 x 750, white background.

Open frame 1, copy and paste as a new layer. Pull it up a little so it's slightly higher than center of canvas.

Click inside the frame with your magic wand, selections, modify, expand by 3.

Open paper 9, copy and paste as a new layer, drag between the frame and white background layers. 

Selections, invert, make sure you are on the paper layer, click delete on your keyboard, leave selected.

Copy and paste your tube as a new layer, drag it above the frame and arrange it how you want it. Duplicate the tube layer, hide the top copy and drag the bottom copy below your frame. Now, take the eraser tool and erase the parts that are hanging outside the frame that you don't want showing. (I just did the legs, because I want her head and arm outside the frame.) Deselect. Add the drop shadow to this tube, NOT to the top one.

Now go unhide the top tube layer, and erase the parts that hang over the frame where you don't want them. Try to get just right around the frame, BUT because we have the tube under the frame to show through, you don't have to be super careful.

Open the film reel. Shift D to duplicate and close the original.

Click inside each of the 2 outside big rectangles. Selections, modify, expand 3.

Open paper 10, copy and paste as a new layer, drag below the frame. Selections, invert, make sure you are on the paper layer, click delete on your keyboard and leave selected.

Copy and paste your tube as a new layer, drag to the right, arrange how you like it, click delete on your keyboard.

Mirror the tube, copy and paste as a new layer, arrange in the left rectangle how you want it, click delete on your keyboard. Deselect.

Merge the two tube layers together, change the blend mode to Luminance(L).

Click in the middle rectangle layer with your magic wand, selections, modify, expand 3. 

Open paper 8, copy and paste as a new layer, drag to the bottom, selections, invert, make sure you're on the paper layer, click delete on your keyboard.

Copy merged, paste as a new layer onto your tag canvas. Go ahead and delete the one we were working with, you won't need it now.

Resize the filmstrip layer by 85%, drag it to the bottom, just above the white background. 

Duplicate twice. Rotate the middle filmstrip to the right by 15, rotate the bottom one to the left by 15. Merge the bottom two together, drop the opacity to around 75%. 

Add any elements you'd like. I used the following. If I resized them
that is the number beside it.

Limo 65%
Bullets 45% (mirror & flip)
Gun 50% (rotate left 15)
Money 50% (duplicate, mirror, merge down, arrange on right,
duplicate, arrange on left, duplicate, mirror, also arrange on left)
Hat 50%

Open paper 17, copy and paste as a new layer, drag it to the bottom, just above the white background.
Resize by 150%
Open the mask in psp
Apply the mask by going to layer, new mask layer, from image, find the mask in the drop down box, click ok.
In the layer palette, delete the mask, click ok.
Merge group.
Resize by about 110%

Crop, resize, then add name, copyrights and credits as needed & save!

Monday, July 16, 2012

Goddess


For this tutorial you will need the following:

Paint Shop Pro, I am using PSP X, you should be able to use any version.

Tube of choice, I am using the artwork of Michael Miles which you need a license to use. You can get it at Artistically Inclined Licensing. 

Template 167 by Becky P.'s Creations

Scrap kit of choice. I am using Erotica by Pimp'd Designs, which you can purchase at Pimp My Tags W/Scraps. 

Font of choice, I am using

Just remember that my choices of papers and elements is just a suggestion, change it up and make it yours! You don't have to follow mine exactly.


Let's get started!

Open your template, shift D to duplicate and close the original.

Delete the following layers: Credits, rectangle frame, rectangle frame fill, leaf outline, left frame 2 diamond fill, right frame 2 diamond fill,  and leaf fill.

Change the canvas size to 750 x 600 and flood fill the rest of the background layer in with white. 

As you add layers and elements, add a drop shadow as needed. I used 1, 1, 50, 5 throughout unless otherwise noted.

Make big circle 3 layer active, click inside it with your magic wand. Open paper 7, copy and paste as a new layer, selections, invert, make sure you are on the paper layer, click delete on your keyboard, deselect. Delete the original circle layer. (after this I will not tell you to delete the original layer -the actual template layer- just go ahead and do this each time you fill a layer with a paper) 

Do the same with big circle 1, using the same paper as you did above.

Do the same for big circle 2, using paper 6.

Fill double big rectangle using paper 2.

Fill left frame 2 and right frame 2 using paper 6.

Fill left frame fill 2 and right frame fill 2 using paper 3.

Leave left frame and right frame as they are, just add a drop shadow (the top sets of frames that are sort of goldish colored)

Fill left frame fill and right frame fill with paper 1.

Go back and make the right frame fill paper layer active, selections, select all, float, defloat, invert. Open your tube close up, copy and paste as a new layer, arrange in the frame, click delete on your keyboard. Change the blend mode to Luminance(L)

Mirror the tube close up and do the same with the left frame fill paper layer, arranging the tube within it, invert the selection and clicking delete on your keyboard. Change the blend mode to Luminance(L)

Copy and paste your main tube as a new layer. Resize if needed. If you are using the same tube I used, I resized mine by 75%.

Add any elements you'd like. I added the following:

Staple, resize by 75%, put one on each corner of frame & tube layers. See tag for reference.

Flower 3, resized by 25%, put one on each rectangle and bottom left and right frame layers. See tag for reference.

Feather resized by 30%, rotate to right by 90. Duplicate and slide over, duplicate again and mirror, duplicate and arrange. I had two with the small edge facing right, two with the small edge facing left, and just arranged them together. See my tag for reference. Then merge them all together and drag down below the entire template.

Diamonds 2, resize by 35%, arrange on the top right, arrange between the bottom left frame & fill layer and the rectangle below it. Duplicate and mirror, drag duplicate over further left, and arrange below the rectangle layer.

Duplicate the left diamond layer, image flip, arrange and drag below all tag layers, just above white background layer. Duplicate this layer and mirror. 

Add any text you'd like. Add name & copyright info as needed. Crop, resize and save.

Friday, July 13, 2012

Sirena of the Sea


For this tutorial you will need the following:

Paint Shop Pro, I am using PSP X, you should be able to use any version.

Tube of choice, I am using the artwork of Elias Chatzoudis, which you need a license to use. You can get it at PSP Tubes Emporium here. For this month, PTE is having a Fun in the Sun sale, and this particular tube can be found in that catagory. After the sale, you will be able to find it in the artist listing.

Scrap kit of choice. I am using Under the Sea by Wicked Princess Scraps which you can purchase exclusively at The PSP Project. It was made to match the tube Anime Mermaid by Erica Leigh Currey, although I didn't use it for this tut. It's so cute, though, so check it out here.

Font of choice, I am using Twelve Ton Fishstick

Plugins: No outside plugins


Just remember that my choices of papers and elements is just a suggestion, change it up and make it yours! You don't have to follow mine exactly.


Let's get started!

Open a new canvas 750 x 750 pixels, white background. You can crop it and remove the white background if you'd like at the end. This just gives us a good canvas to work on and you can see what you're doing with the white background.

Open the Frame element, copy and paste as a new layer, resize by 70%.

Using your freehand selection button set on point to point and add, click around the frame, using the stars and the screws as points to click on. Once you get all the way around, double click on the last of the four points. You'll have marching ants around the frame sort of in the middle of the sticks. 

Open a paper (I used 5), copy and paste as a new layer below the frame, resize by 70%, arrange how you want. Once you get it where you want it, go to selections, invert, make sure you are on the paper layer, and click delete on your keyboard, leave selected.

Open the closeup of your tube, copy and paste. If you want to mirror it, mirror it prior to copy and pasting. Arrange in the frame, click delete on your keyboard. Drop the opacity way down so you can just see the tube through the paper. Deselect.

Open your main tube, copy and paste as a new layer, resize if needed. Add a drop shadow.

Add any other elements you'd like to it, adding drop shadows as needed. I added:

beach resize by 75%
water resize by 40%
boat 3 resize by 40%
cattail resize by 40% 
foilage resize by 18%
Hibiscus resize by 20%

Crop, resize, add name, copyrights and credits as needed and save.

Bite Me


For this tutorial you will need the following:

Paint Shop Pro, I am using PSP X, you should be able to use any version.

Tube of choice, I am using the artwork of Jorge Packer which you need a license to use. You can get it at Artistically Inclined Licencing

Font of choice, I am using Abbadon for the text and A&S Speedway for the name.

Plugins: Alien Skin Eye Candy 4000- HSB Noise, Visman Extravaganza-Transmission


Just remember that my choices of papers and elements is just a suggestion, change it up and make it yours! You don't have to follow mine exactly.


Let's get started!

Open a new canvas 750 x 750 pixels, white background. You can crop it and delete the white background in the end, this just helps us see what we're working on.

Copy and paste your image or tube as a new layer. If you're using the same tube as I am, resize by 75%.

Set your background to black, foreground closed out. Using your rectangle tool, draw around the tube so that you have a rectangle the same size as your tube. Convert to raster layer, drag below the tube and merge the tube and rectangle layer together. 

Selections, select all, float, modify, select selection borders, outside, border width 5. Click ok. 

Add a new raster layer under the tube layer. Flood fill with black (or whatever color you made the rectangle. Select none.

Back on the tube layer do the same as above, but set the border width at 8. Make sure you do the new layer under the black border you did. Fill with a complementary color.

Back on the tube layer, do the same as above, but set the border width at 12. Again, make sure to add the new layer under the last border you did. Flood fill this one with the black or whatever color you did the rectangle with.

Merge these 3 border layers together.

Apply HSB Noise with the following settings top to bottom (or play around with it until you get something else you like)
25
30
40
0
10.08
10.08
Smooth Lumps
Seamless Tile checked
Random Seed 1

Merge the tube layer and border together. Then duplicate & resize the duplicate to 60%, mirror it and arrange at the bottom left. Rotate to the right by 20.

Duplicate and resize by 75%, rotate by 35 to the left. 

Duplicate and resize by 50% and mirror it. Arrange below the small one on the top right. Then duplicate.

Rotate to the left by 25, then arrange on the bottom left side.

Add drop shadows to all layers. I used 1, 1, 50, 5 throughout.

Duplicate the largest one in the center that we first worked with. Apply gaussian blur on the bottom one, by going to adjust, blur, gaussian blur, change the Radius to 20.

Apply VM Extravaganza-Transmission with the following settings top to bottom:
6, 10, 40

Drag this layer to the top left, duplicate, image, flip, image, mirror, drag to the bottom right. Merge together, drop the opacity to around 70.

Add any text you'd like to it.

Add your name and copyright info as needed & save.

Wednesday, July 11, 2012

Fairy Whispers Facebook Timeline


For this tutorial you will need the following:

Paint Shop Pro, I am using PSP X, you should be able to use any version.

We are making a Facebook timeline cover, so please be sure that you are working with a tube from a company or artist that allows you to use their work on a Facebook cover WITHOUT using the artist URL, as Facebook has changed their TOU stating we cannot use URLs on our covers. You can find out if the store allows this by going to their FAQ pages.

Tube of choice, I am using the artwork of Erica Leigh Currey, which you need a license to use. You can get it at The PSP Project.

Scrap kit of choice. I am using Fairy Whispers, by Wicked Princess Scraps, which is exclusive to The PSP Project and made to go with the tube I am using. 

Font of choice, I am using Mardian

Plugins: Eye Candy 4000-HSB Noise & gradient glow


Just remember that my choices of papers and elements is just a suggestion, change it up and make it yours! You don't have to follow mine exactly.


Let's get started!

Add drop shadow throughout the tut on different elements as you like. I used 1, 1, 50, 5.

Open a new canvas 849 x 312 pixels, white background.

Add a new raster layer and flood fill with a blue gradient. I used one that alternated between blue and white and had the blue at each end and white in the middle. You can make your own by putting blue and white in your color palette, then clicking foreground, click gradients, then go to foreground background, and play with the repeats and angle until you get something you like. 

Open grass, copy and paste as a new layer, resize by 75%, adjust, sharpness, sharpen. Arrange in the bottom middle area.

Open pod trio, resize by 55%, arrange on the bottom right. Duplicate, mirror, move back to the right, and arrange them overlapping however you like it. You may need to use your eraser tool and erase one or two. Merge down. Duplicate & mirror. Arrange the duplicate layer on the left side.

Open your tube, copy and paste as a new layer, resize to fit, I think I resized mine around 30% then went to adjust, sharpness, sharpen, then add a drop shadow. To make her look like she's standing in the pod, I lowered the opacity of the tube to about 40, then used the eraser tool to erase the parts of her toes that looked like they were over the edge of the pod. Make sure to bring the opacity back to 100% when you're done.

Open Mushroom house, resize by 20%, arrange on hill. 

Open Mushroom, resize by 15%, arrange to the left of mushroom house, drag layer behind mushroom house layer.

Open poppy, copy and paste as new layer, resize by 20%, duplicate, resize by 80%, arrange on the hill.

Open rainbow, copy and paste as a new layer, arrange on left side. 

We're going to make the border now, before we finish adding elements on the timeline banner, just so we can kind of see where things will disappear behind the border.

Make your background layer active. Pick two colors from your tube or elements in the tag. I used #416a00 & #3e80b1

On your white background layer choose selections, select all, modify, select selection borders, and set it at 3. Go to the top layer, make it active, then add a new raster layer. Flood fill with your darker color. Deselect.

Do the same as above (always doing select all on the WHITE BACKGROUND LAYER), but change the select selection borders to 5 & fill with your lighter color.

Repeat the above steps, but change the number on the Select selection borders to 7, fill with the dark color.

Merge these three layers together by making the top layer active, clicking merge down, then click merge down again. 

Apply Eye Candy 4000-HSB Noise using the following settings from top to bottom:

7
8
20
0
10.08
10.08
Smooth Lumps
Seamless Tile
Set the random seed to whatever you like, I left mine on 1

Add drop shadow of 1, 1, 50, 5 then add it again using -1, -1, 50, 5

Open the cloud element, copy and paste as a new layer, resize by 65%, arrange on the top left above the rainbow but below the frame. Duplicate, mirror and arrange on the right top.

Open flowers2, resize by 30%, copy and paste as a new layer, arrange on the far right.

Open hummingbird, resize by 20%, arrange on tag where you like.

Add your copyright, credits, and name as needed, then save!

For my name, I added the text, convert to raster layer, then added a gradient glow of white, size 3.


Sunday, July 1, 2012

Helen Of Troy


For this tutorial you will need the following:

Paint Shop Pro, I am using PSP X, you should be able to use any version.

Tube of choice, I am using the artwork of Jason Lan, which you need a license to use. You can get it at AIL.

Brushes of choice. I am using Decorative Leaf Brushes by Frostbo on DeviantArt. Download, unzip, then open PSP, go to File>Import>Custom Brush. Then find the brushes, click add then ok.

Font of choice, I am using Zebra

Plugins: Mura Meister - Copies, 


Just remember that my choices of papers and elements is just a suggestion, change it up and make it yours! You don't have to follow mine exactly.


Let's get started!

Open a new canvas 600 x 250 white background.

Open your tube, copy and paste as a new layer.

Apply Mura Meisters copies, wallpaper rotate with the default settings.

Adjust, blur, motion blur angle 120 strength 100, repeat. 

On the top layer apply effects>reflection effects>kaleidoscope. Use default settings but change edge mode to wrap. Change the blend mode to Luminence(L).

Add a new layer below this and fill it with a color from your tube.

Copy and paste your tube, resize if necessary. Arrange slightly away from the edge add a drop shadow. 

Add a new layer and apply your decorate leaf brush 2 to the left side. Make sure that the top color in your color palette is green. Duplicate it and merge down. Duplicate again and merge down. Duplicate it again, this time image, mirror.

Add a new raster layer and change the rotation of your brush to 90 and apply it. On each end you'll have a part that is sort of hanging down. Erase it on the left side and pull that layer over so that it's overlapping the leaves on the right side. Duplicate and mirror. Pull it to the left, then merge down. Duplicate, merge down, duplicate and merge down. Duplicate one last time and image, flip. Merge all 4 leaf layers together and add a light drop shadow.

Drag the tube layer above the leaf brush layers.

Add a new layer below the leaf border layer. Add any brushes that you'd like to it.

Add a big, blurry drop shadow to the tube. 

Add your name, copyright info and any other credits if needed.