Pages

Friday, October 31, 2014

October Girl


For this tutorial you will need the following:

Paint Shop Pro, I am using PSP X, you should be able to use any version.

Tube of choice, I am using the artwork of Alicia Mujica (October tube) which you need a license to use. 

Scrap kit of choice. I am using a PTU kit, Golden Girl, by Niqui's Designs

Font of choice, I am using Sweet Memories

Mask: Vix big mask 1

Plugins: No outside plugins used
I do use Eye Candy 4000 Gradient Glow on all my copyrights/credits layers
I do this because some forums will make a .png tag show up with a black background and then your
copyright doesn't show.


Just remember that my choices of papers and elements is just a suggestion, change it up and make it yours! You don't have to follow mine exactly.

Add a drop shadow of your choosing to tubes & elements throughout. I usually use 1, 1, 50, 5 unless otherwise noted.


Let's get started!

Open a new canvas 850 x 850 pixels with a white background

open element 45 copy and paste as a new layer resize 65%
click inside with your magic wand, selections, modify, expand 2, selections, invert
open paper 12 copy and paste as a new layer
click delete on your keyboard,
copy and paste your tube as a new layer, resize by 70%
arrange in your frame
erase the bits that hang out of your frame where you don't want them

 add your elements:
element 34 resize 45% arrange on bottom left
element 14 resize 30% arrange on bottom right on the right side of the bag
element 7 resize 30% mirror arrange to the left of the purse, in front of the bag
element 47 resize 45% mirror & arrange on bottom right
element 39 resize 30% arrange between purse and cat on bottom
element 36 resize 60% arrange behind cat
element 51 resize 25% arrange above & behind bag layers
element 30 resize 35% arrange behind brown flower
element 42 resize 45% arrange between the two flowers, duplicate, rotate right 90, drag down
element 2 resize 45% rotate right 90 arrange behind flowers on left
element 43 resize 30% arrange on top right


add paper 3 above the white background
apply your mask, merge group
drop the opacity to 60

crop and resize
add your copyright and credits as needed
add your text and save

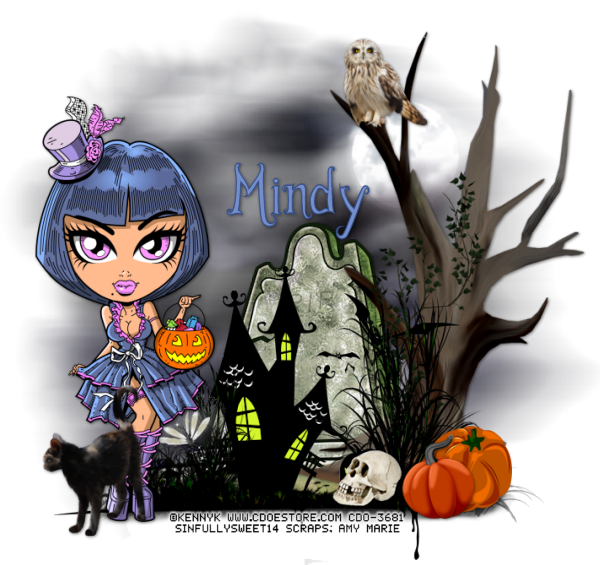
Tag Show Off KennyK


New tag show off using the artwork of KennyK-Individual Tube - 31-3
Snaggable tags in my Fotki album

Wednesday, October 29, 2014

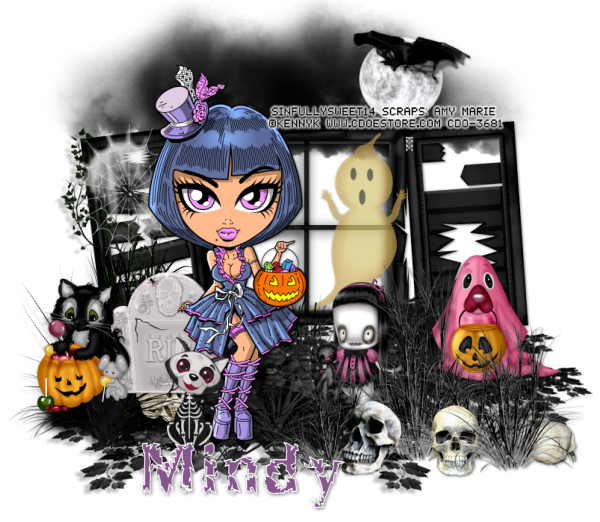
Trixie Treat


Snaggable tags for this available in my Fotki album

For this tutorial you will need the following:

Paint Shop Pro, I am using PSP X, you should be able to use any version.

Tube of choice, I am using the artwork of KennyK-Individual Tube- 31-3 which you need a license to use.  You can purchase this tube at CDO

Scrap kit of choice. I am using a PTU Kit, BooNita by Amy Marie Kits

Font of choice, I am using Breakable

Plugins: No outside plugins used
I do use Eye Candy 4000 Gradient Glow on all my copyrights/credits layers
I do this because some forums will make a .png tag show up with a black background and then your
copyright doesn't show.


Just remember that my choices of papers and elements is just a suggestion, change it up and make it yours! You don't have to follow mine exactly.

Add a drop shadow of your choosing to tubes & elements throughout. I usually use 1, 1, 50, 5 unless otherwise noted.


Let's get started!

Open a new canvas 850 x 850 pixels with a white background

add the following elements to your canvas:
element 44 arrange above center
element 54 arrange below window on left
element 57 resize 80% arrange on the right of element 54
element 55 arrange on bottom right

Copy and paste your tube and arrange on left side of window

element 51 arrange on top left, duplicate, mirror, drag over against the original layer, merge down, duplicate, drag to the right. Arrange them how you want them, merge down then flip and drag back to the top, resize 80%

element 67 resize 40% arrange on top right
element 17 resize 45% arrange to the left of your tube
element 38 resize 45% arrange just in front of the window on the right
element 2 resize 45% arrange on the far left
element 34 resize 45% arrange between element 2 and the tube

element 26 resize 45% arrange over window shutter on the left
element 28 resize 45% arrange over the moon
element 48 resize 45% arrange in center


crop and resize
add your copyright and credits as needed
add your text and save

Monday, October 27, 2014

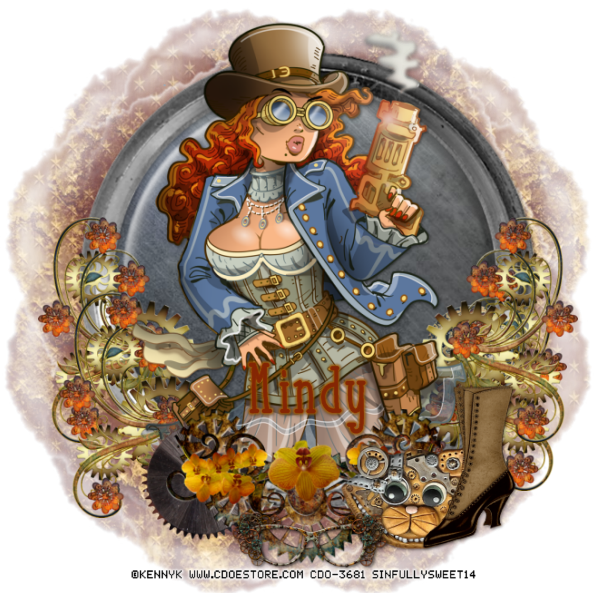
Steampunk Mae


For this tutorial you will need the following:

Paint Shop Pro, I am using PSP X, you should be able to use any version.

Tube of choice, I am using the artwork of Kenny K - Individual tube 27-3 which you need a license to use.  This tube is available at CDO

Scrap kit of choice. I am using a PTU kit, Steampunk Love by Scottish Butterfly

Font of choice, I am using Take It Or Leave It Serif

Mask: Horse Play's Pasture Mask 7

Plugins: No outside plugins used
I do use Eye Candy 4000 Gradient Glow on all my copyrights/credits layers
I do this because some forums will make a .png tag show up with a black background and then your
copyright doesn't show.


Just remember that my choices of papers and elements is just a suggestion, change it up and make it yours! You don't have to follow mine exactly.

Add a drop shadow of your choosing to tubes & elements throughout. I usually use 1, 1, 50, 5 unless otherwise noted.


Let's get started!

Open a new canvas 850 x 850 pixels with a white background

open element 65 copy and paste as a new layer, erase the little square thing at the top, resize 110%
Take your selection tool set on circle, place your cursor in the center of the frame, left click
and hold down, draw out a circle that fits in the frame, let go of the mouse button when you get it how you want it, selections, invert
open paper 1 copy and paste as a new layer
click delete on your keyboard,

copy and paste your close up tube as a new layer, erase any parts of the legs that stick out below the frame edge on the bottom

 Now add your elements:
element 51 resize 65% flip, arrange bottom center
element 57 resize 65% arrange on right of element 51, below tube layer, duplicate & mirror
duplicate each one and drag up

element 63 resize 45% arrange below element 51 on the left
element 54 resize 35% arrange on bottom left
element 56 resize 45% arrange on bottom right

element 13 resize 41% arrange on bottom right
element 23 resize 35% arrange bottom center

Add paper 9 above the white background
apply your mask, merge group, resize 80%

crop and resize
add your copyright and credits as needed
add your text and save
Friday, October 24, 2014

Rosita's Christmas

Snag tags for this available in my Fotki album

For this tutorial you will need the following:

Paint Shop Pro, I am using PSP X, you should be able to use any version.

Tube of choice, I am using the artwork of Alicia Mujica (Rosita tube) which you need a license to use. 

Scrap kit of choice. I am using a PTU kit, Christmas Spirit by Scrappin With Little Ole Me 

Font of choice, I am using Yaquote Script

Mask: WSL84

Plugins: No plugins used
I do use Eye Candy 4000 Gradient Glow on all my copyrights/credits layers
I do this because some forums will make a .png tag show up with a black background and then your
copyright doesn't show.


Just remember that my choices of papers and elements is just a suggestion, change it up and make it yours! You don't have to follow mine exactly.

Add a drop shadow of your choosing to tubes & elements throughout. I usually use 1, 1, 50, 5 unless otherwise noted.


Let's get started!

Open a new canvas 850 x 850 pixels with a white background

Open element 60 copy and paste as a new layer resize 100%
click inside with your magic wand, selections, modify, expand 2, selections, invert
open paper 3 copy and paste as a new layer
click delete on your keyboard,

Copy and paste your tube as a new layer, resize by 45%
arrange in your frame
erase the bits that hang out of your frame where you don't want them
 Now add your elements:
 element 47 resize 45% arrange on bottom center
element 43 resize 65% rotate left 24 arrange to the right of el27, duplicate & mirror
element 67 resize 25% arrange in between the two elements on the left
element 87 resize 25% arrange on right side of element 67

element 84 resize 30% arrange between chocolates and element 47 on left
element 13 resize 55% arrange on bottom right
element 27 resize 27% arrange to the right of the snowman
element 100 resize 25% arrange on bottom center

element 19 resize 25% rotate left 20 arrange in front of snowman & drums
element 5 resize 35% arrange behind snowman
 element 109 resize 35% arrange on left

add paper 16 above the white background
apply your mask, merge group

crop and resize
add your copyright and credits as needed
add your text and save
Thursday, October 23, 2014

Diry Art Monica tube CT tag & snag tags


New tag with Diry Art Monica tube and PTU kit Sweetness
Snag tags available in my Fotki album

Tube available at the following stores:


Kit available at the following stores:


______________________________________________________________________________

And... CHECK OUT THIS GREAT PROMOS!
• SPU: *Every Sunday 50% OFF* http://sweetpinup.net/shop/index.php?main_page=index&manufacturers_id=21
• SPU: *October Crazy Sale* https://www.facebook.com/DiryArt/photos/a.140992049361177.25951.140918789368503/584801148313596/?type=1&theater
• Diry Art StoreYa: *HALLOWEEN COMBO* 4 scrapkits + tube https://www.storeya.com/shop/product?p=13994406&id=57128AB7
• RAW: PU Tubes ONLY USD 1.00
http://renderartworld.com/shop/index.php?main_page=index&cPath=198_202
• Diry Art StoreYa: *BUILD your own CU or PU Combo*
- PU combo: https://www.storeya.com/shop/product?p=14037921&id=57128AB7
- CU combo: https://www.storeya.com/shop/product?p=14037922&id=57128AB7
• Diry Art StoreYa: * Vip CU Membership *
- 1 month membership:https://www.storeya.com/shop/product?p=14116016&id=57128AB7
- 6 months membership here:https://www.storeya.com/shop/product?p=14116018&id=57128

Wednesday, October 22, 2014

September Romance


Snaggable tag set for this tag is available in my Fotki album

For this tutorial you will need the following:

Paint Shop Pro, I am using PSP X, you should be able to use any version.

Tube of choice, I am using the artwork of Nocturne (Statice tube) which you need a license to use. 


Scrap kit of choice. I am using a PTU kit, September Romance by BLT Dezignz
I am using the tagger size kit, if you use the full size kit, you will need to resize your elements a bit differently  

Font of choice, I am using Geordie Girl

Mask: DVB Mask 80
Plugins: No outside plugins used
I do use Eye Candy 4000 Gradient Glow on all my copyrights/credits layers
I do this because some forums will make a .png tag show up with a black background and then your
copyright doesn't show.


Just remember that my choices of papers and elements is just a suggestion, change it up and make it yours! You don't have to follow mine exactly.

Add a drop shadow of your choosing to tubes & elements throughout. I usually use 1, 1, 50, 5 unless otherwise noted.


Let's get started!

Open a new canvas 850 x 850 pixels with a white background

open frame 2 copy and paste as a new layer resize 85%
click inside with your magic wand, selections, modify, expand 2, selections, invert
open paper 4 copy and paste as a new layer
click delete on your keyboard, leave selected
copy and paste your tube as a new layer, resize by 60%
arrange in your frame
erase the bits that hang out of your frame where you don't want them
 Now add your elements:
branch 3 resize 45% arrange on bottom left, duplicate, mirror, 
duplicate again, rotate left 30, drag down so it's below the original, duplicate, mirror

wreath resize 35% arrange between 2 leaves on left, duplicate, mirror, 
arrange between the other two leaf layers

heart 1 resize 35% arrange on bottom center
branch 4 resize 45% arrange below wreath on left, duplicate, mirror arrange below other wreath

flower 5 resize 35% arrange behind heart on left, duplicate & mirror
flower 4 resize 35% arrange behind flower 5, duplicate & mirror
 flower 7 resize 30% arrange between branch and leaves, duplicate & mirror

ribbon 1 resize 45% arrange behind heart

 apply paper 5 above the white background
apply your mask, merge group, resize 110%

crop and resize
add your copyright and credits as needed
add your text and save

Rosita tag & snaggables

New tag using the artwork of Alicia Mujica. 
This little cutie is called Rosita and you can find her in Alicia's store

Snaggable tags for this are in my Fotki album

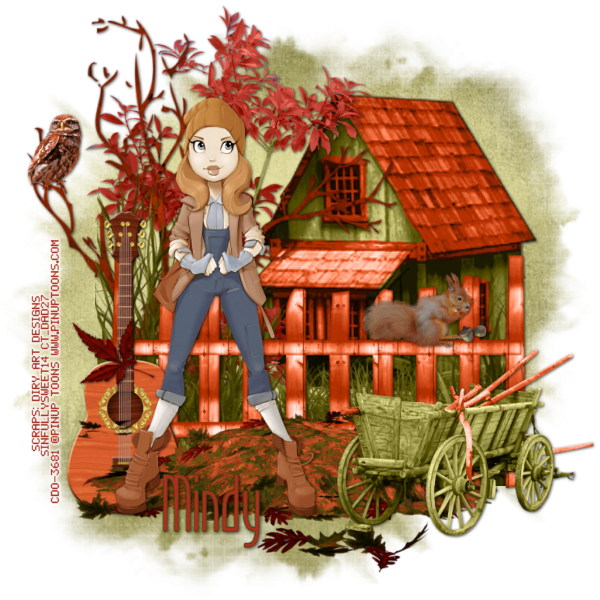
Ct Tag Diry Art


Snaggable tags in my fotki album

Ct tag using the artwork Monica by Diry Art
and PTU kit Autumn Leaves also by Diry art

the tube can be found at

the kit can be found at

Monday, October 20, 2014

Sultana


Snaggable tags for this tag can be found in my fotki album here

For this tutorial you will need the following:

Paint Shop Pro, I am using PSP X, you should be able to use any version.

Tube of choice, I am using the artwork of Keith Garvey (Bollywood tube) which you need a license to use. 

Scrap kit of choice. I am using Sultan's Treasure a PTU scrap kit by BLT Dezigns
which is only available with Fan Club Membership (Facebook group you must join to get further info)

Font of choice, I am using Authentic Hilton

Mask of your choice

Plugins: no outside plugins
I do use Eye Candy 4000 Gradient Glow on all my copyrights/credits layers
I do this because some forums will make a .png tag show up with a black background and then your
copyright doesn't show.


Just remember that my choices of papers and elements is just a suggestion, change it up and make it yours! You don't have to follow mine exactly.

Add a drop shadow of your choosing to tubes & elements throughout. I usually use 1, 1, 50, 5 unless otherwise noted.


Let's get started!

Open a new canvas 850 x 850 pixels with a white background

open frame 2 copy and paste as a new layer resize 25%
click inside with your magic wand, selections, modify, expand 2, selections, invert
open paper 3 copy and paste as a new layer resize 800 X 800 pixels
click delete on your keyboard,

opy and paste your close up tube as a new layer, resize by 80%
arrange in your frame
erase the bits that hang out of your frame where you don't want them

add your elements:
brooch resize 55% arrange bottom center
flower 10 resize 8% rotate right 60 arrange on right, behind red brooch, duplicate & mirror
jewel 2 resize 20% arrange behind the purple flower on right, duplicate & mirror
flower 1 resize 12% rotate right 45 arrange under brooch on right, duplicate & mirror
sword resize 8% rotate right 60 arrange on bottom below red brooch, mirror
mask resize 12% arrange on left below green jewel
ladybug resize 12% arrange on right, below green jewel
berries resize 11% arrange above green jewel, duplicate, mirror


resize paper 12 to 850 x 850 copy and paste as a new layer above the white background
apply your mask, merge group, resize 80%


crop and resize
add your copyright and credits as needed
add your text and save
Saturday, October 18, 2014

Go Go Music


For this tutorial you will need the following:

Paint Shop Pro, I am using PSP X, you should be able to use any version.

Tube of choice, I am using the artwork of Keith Garvey (Dottie Go Go tube)
which you need a license to use. 

Scrap kit of choice. I am using a PTU scrap kit, Music, by Schnegge

Font of choice, I am using Mandala Home

Plugins: No outside plugins used
I do use Eye Candy 4000 Gradient Glow on all my copyrights/credits layers
I do this because some forums will make a .png tag show up with a black background and then your
copyright doesn't show.


Just remember that my choices of papers and elements is just a suggestion, change it up and make it yours! You don't have to follow mine exactly.

Add a drop shadow of your choosing to tubes & elements throughout. I usually use 1, 1, 50, 5 unless otherwise noted.


Let's get started!

Open a new canvas 850 x 850 pixels with a white background

open frame 3 copy and paste as a new layer rotate left 90, resize 85%
click inside with your magic wand, make sure you get in the little sections of the ribbon that are inside the frame area
selections, modify, expand 2, selections, invert
open paper 7 copy and paste as a new layer
click delete on your keyboard,
leave selected, open your close up tube, copy and paste as a new layer
arrange in the frame, click delete on your keyboard, and deselect
change the blend mode to Luminance(L) and drop the opacity to 70

Open your main tube, copy and paste as a new layer and arrange on the right side
 
 add the following elements:
 element 9 resize 25% arrange on left bottom corner
 element 8 resize 25% arrange to the right of element 9
element 7 resize 30% arrange to the right of element 8

element 6 resize 20% arrange in front of amp and speaker (elements 8 & 9)
element 11 resize 20% arrange on top right
element 3 resize 40% arrange in front of amp and speaker

element 2 resize 17% arrange so it's over her hand, drop the opacity low enough that you can see her
hand through the tambourine and then erase the part that shows over her hand, then bring the opacity back up to 100. It should look like she's holding it.

element 19 resize 45% arrange above the elements on the left
element 29 resize 32% arrange to the right of element 19
element 17 resize 40% arrange on bottom behind the other elements

element 5 resize 40% arrange at the top, duplicate, resize 75% drag up and right
element 15 resize 75% rotate left 30 arrange at top behind the frame & paper, duplicate, drag down

Copy and paste your tube as a new layer, resize by %
arrange in your frame
erase the bits that hang out of your frame where you don't want them


crop and resize
add your copyright and credits as needed
add your text and save

Friday, October 17, 2014

All For Fall


For this tutorial you will need the following:

Paint Shop Pro, I am using PSP X, you should be able to use any version.

Tube of choice, I am using the artwork of Keith Garvey (Spoiled tube) which you need a license to use. 

Scrap kit of choice. I am using  a PTU kit, All For Fall by Scrappin With Lil Ole Me 

Font of choice, I am using Good Karma

Mask: Horse Play's Pasture, mask 11

Plugins: No outside plugins
I do use Eye Candy 4000 Gradient Glow on all my copyrights/credits layers
I do this because some forums will make a .png tag show up with a black background and then your
copyright doesn't show.


Just remember that my choices of papers and elements is just a suggestion, change it up and make it yours! You don't have to follow mine exactly.

Add a drop shadow of your choosing to tubes & elements throughout. I usually use 1, 1, 50, 5 unless otherwise noted.


Let's get started!

Open a new canvas 850 x 850 pixels with a white background

open element 22 (frame) copy and paste as a new layer resize 85%

Take your freehand selection tool set on point to point and click around the center edge of the frame, slightly inside the blue area. When you get back where you started, put the mouse pointer over where you started and double click instead of single click, this brings the two points together

open paper 14, make a new raster layer below the frame make sure you are on that layer, copy the paper and paste into selection

copy and paste your tube as a new layer, resize by %
arrange in your frame, selections, invert
erase the bits that hang out of your frame where you don't want them

 add the following elements:
 element 119 resize 60% arrange on bottom right, duplicate & mirror
element 117 resize 50% arrange on bottom right
element 92 resize 55% arrange on bottom right
element 103 resize 40% arrange to the left of the birdhouse

element 71 resize 30% arrange in front of birdhouse
element 113 resize 15% arrange in front of candle
element 2 resize 55% rotate left 90 arrange along the bottom
element 140 resize 75% arrange on bottom left

element 133 resize 36% mirror and arrange to the right of and behind the rabbit
element 25 resize 35% arrange between birdhouse and glass bottles
element 75 resize 20% arrange between glass bottle and candle

element 57 resize 25% arrange below the yellow flower cluster layer on the bottom right
element 56 resize 15% arrange in front of rabbit
element 55 resize 25% then 90% arrange on top of birdhouse

element 7 resize 25% arrange by white vase that is right of the rabbit
element 66 resize 45% arrange on left behind rabbit, duplicate, mirror, resize 65% arrange below original layer

element 18 resize 40% rotate left 25 arrange below both layers of blue leaves
element 31 resize 40% arrange above the blue leaves layers
element 45 resize 40% arrange behind white leaves layers

copy and paste paper 10 above the white background
apply your mask merge group

crop and resize
add your copyright and credits as needed
add your text and save

Thursday, October 16, 2014

Autumnal Melancholy

**CT TAG #2 FOR DIRY ART**
Scrap kit Autumnal Melancholy available at these stores:
* Diry ART StoreYa:
* SPU: 
* PFD: 
 
Snaggable tags of this tag in my fotki album here

New Releases by Alicia Mujica


New releases by Alicia Mujica - She is called October and you can get her here

New release by Alicia Mujica - She is called Rosita and you can get her here


Wednesday, October 15, 2014

CT Tag Diry Art Designs


New CT tag using the artwork of Pinup Toons
and PTU scrap kit Autumnal Melancholy by Diry Art Designs available at the following stores:

Snaggable tags for this tag available in my fotki album
Click here for all snaggables
Click here for fall snaggables where this tag is located

Tuesday, October 14, 2014

Plush Romance Tutorial and Snaggable Tags


For this tutorial you will need the following:

Paint Shop Pro, I am using PSP X, you should be able to use any version.

Tube of choice, I am using the artwork of Nocturne (Statice tube) which you need a license to use. 

Scrap kit of choice. I am using a PTU kit, Royal Plush by BLT Dezignz 

Font of choice, I am using Impact and Authentic Hilton

Plugins: Xero Porcelain, Eye Candy 4000 Shadow Lab
I do use Eye Candy 4000 Gradient Glow on all my copyrights/credits layers
I do this because some forums will make a .png tag show up with a black background and then your
copyright doesn't show.


Just remember that my choices of papers and elements is just a suggestion, change it up and make it yours! You don't have to follow mine exactly.

Add a drop shadow of your choosing to tubes & elements throughout. I usually use 1, 1, 50, 5 unless otherwise noted.


Let's get started!

Open a new canvas 1000 x 750 pixels with a white background
 
With your width set on 3 and foreground color on #5e3634 use a thick font, I used Impact
and write out the word "ROMANCE" in all caps (or whatever word you want to use)
convert to raster layer

click inside each letter with your magic wand, selections, modify, expand 1, invert
copy and paste paper 8 as a new layer below the word, arrange it, click delete on your keyboard

Copy and paste your tube, arrange in the wordart, click delete on your keyboard. If you want to erase part of the tube from letters, just invert selection again, then erase what you want, then invert again,

keep pasting the tube into the wordart until you have what you want, you can resize the tube, mirror the tube, whatever you want until you have something you're happy with.
 
 Hide all the layers except the tubes, merge visible, unhide the other layers

Duplicate the merged tube layer, on the top layer, adjust blur, gaussian 3, 
change the blend mode to soft light
on the bottom layer, apply Xero Porcelain default settings except change blue to zero
change the blend mode to Luminance(L)

Hide the white background layer, merge visible

Using Eye Candy 4000 Shadow Lab, apply it with the following settings:
Center Offset Direction: 331
Center Offset Distance: 14.21
Overall Opacity: 42
Overall Blur: 20.16
Perspective Blur: 0
Color: black
Draw Only Outside Selection checked

 doves resize 15% arrange on top of letters A & M
feather resize 15% twice arrange below the birds
fan resize 15% then 85% rotate left 30 mirror & arrange on bottom left
boot resize 15% then 45% arrange on bottom left
ribbon 2 resize 25% then 55% rotate left 15 arrange on top of fan
flower 8 resize 10% then 45% arrange on top right
flower 5 resize 10% arrange behind other flower
leaves resize 25% arrange behind flowers, duplicate, mirror, flip arrange behind flowers on other side
 

crop and resize
add your copyright and credits as needed
add your text and save
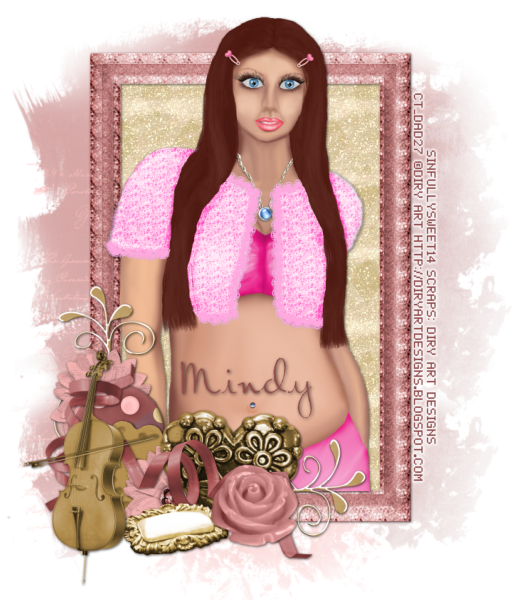


And here are some snaggable tags for you


Monday, October 13, 2014

Glorious Autumn


For this tutorial you will need the following:

Paint Shop Pro, I am using PSP X, you should be able to use any version.

Tube of choice, I am using the artwork of Alicia Mujica which you need a license to use. 

Scrap kit of choice. I am using a PTU kit by Mellie Beans called Autumn, Glorious Autumn 

Font of choice, I am using Mademoiselle Camille

Mask of your choice

Plugins: No outside plugins used
I do use Eye Candy 4000 Gradient Glow on all my copyrights/credits layers
I do this because some forums will make a .png tag show up with a black background and then your
copyright doesn't show.


Just remember that my choices of papers and elements is just a suggestion, change it up and make it yours! You don't have to follow mine exactly.

Add a drop shadow of your choosing to tubes & elements throughout. I usually use 1, 1, 50, 5 unless otherwise noted.


Let's get started!

Open a new canvas 850 x 850 pixels with a white background

open element 21 copy and paste as a new layer
click inside with your magic wand, selections, modify, expand 2, selections, invert
open paper 7 copy and paste as a new layer
click delete on your keyboard and deselect

Copy and paste your tube as a new layer, resize 45% arrange so she's sitting on the bottom of the frame
 
 now add your elements:
element 7 resize 65% arrange on bottom right below tube layer, duplicate & mirror
element 20 resize 45% arrange on bottom right
element 2 resize 25% arrange behind basket on right

element 3 resize 40% arrange to the left of the pink flower
 element 23 resize 25% & 90% arrange in front of basket
element 22 rotate right 90 and mirror, arrange under other elements on right side
element 4 resize 35% arrange behind tube on left side

duplicate the two flowers and the leaves that are on the right side, mirror them and arrange on the left

element 7 resize 75% arrange across center of tag, duplicate & drag down & to right

add paper 3 above the white background
apply your mask and merge group

crop and resize
add your copyright and credits as needed
add your text and save

Bootilicious Witch


For this tutorial you will need the following:

Paint Shop Pro, I am using PSP X, you should be able to use any version.

Tube of choice, I am using the artwork of Misticheskaya (Witch Janette tube)
which you need a license to use. 

Scrap kit of choice. I am using a PTU kit, Bootylicious Boo by Scrappin With Lil Ole Me

Font of choice, I am using Mademoiselle Camille

Mask: gemsmask217 by Gems Taggin Scraps

Plugins: No outside plugins used
I do use Eye Candy 4000 Gradient Glow on all my copyrights/credits layers
I do this because some forums will make a .png tag show up with a black background and then your
copyright doesn't show.


Just remember that my choices of papers and elements is just a suggestion, change it up and make it yours! You don't have to follow mine exactly.

Add a drop shadow of your choosing to tubes & elements throughout. I usually use 1, 1, 50, 5 unless otherwise noted.


Let's get started!

Open a new canvas 850 x 850 pixels with a white background

Copy and paste your tube as a new layer, resize by 45%

add these elements:
element 42 resize 80% arrange on the right of the tube & behind it
element 22 resize 40% arrange on left side of tube
element 92 resize  25% arrange in front of cauldron
element 30 resize 45% arrange behind tube & cauldron

element 14 resize 45% arrange in front of house
element 118 resize 35% arrange in front of tube & bone pile
element 76 arrange behind house, duplicate several times arranging behind the house, mirror some

apply paper 20 above the white background
apply your mask, merge group, resize 94%, drop the opacity to 80

crop and resize
add your copyright and credits as needed
add your text and save

For my name, I did the font with #175d03 and a stroke width of 1 also with #175d03
then I added a gradient glow, width of 3 and color #ea69a2
then a drop shadow

Sunday, October 12, 2014

Witch Hour


For this tutorial you will need the following:

Paint Shop Pro, I am using PSP X, you should be able to use any version.

Tube of choice, I am using the artwork of Alicia Mujica (Selina tube) which you need a license to use. 

Font of choice, I am using Reaching For Heaven

Plugins: MuRa Meister Copies, Xenofex 1.1 Shower Door, Eye Candy 4000 Shadow Lab

I do use Eye Candy 4000 Gradient Glow on all my copyrights/credits layers
I do this because some forums will make a .png tag show up with a black background and then your
copyright doesn't show.


Just remember that my choices of papers and elements is just a suggestion, change it up and make it yours! You don't have to follow mine exactly.

Add a drop shadow of your choosing to tubes & elements throughout. I usually use 1, 1, 50, 5 unless otherwise noted.


Let's get started!

Banner

Open a  new canvas 600 x 250 pixels with a white background

Open your tube, copy and paste as a new layer, arrange so her face is in the canvas, then crop the tag by clicking on the white background, get your crop tool active, then at the top where it says snap crop rectangle to, click on "layer opaque, then double click on the canvas

Apply MuRa Meister Copies - wallpaper rotate with the default settings

adjust blur, motion blur with the following settings:
angle 62, strength 100
then
angle 141, strength 100

 
Apply Xenofex 1.1 Shower Door with the following settings:
Setting Fuzzed Out, Dot Size 4, Random Seed 60

 Copy and paste your tube as a new layer, drag it to the right & arrange it, change the blend mode to Luminance(L) and drop the opacity to about 38

Paste your tube as a new layer again, resize 45% arrange it on the left
apply Alien Skin Eye Candy 4000 Shadow Lab with the following settings:
Center offset direction: 16
Center offset distance: 28.80
Overall opacity: 100
Overall blur (pixels) 20.16
Perspective Blur: 0
Color: Black
Draw only outside selection checked

Make sure you're on the white background layer and crop the tag again like we did earlier
 
 Still on the white background layer, selections, select all, modify, set selection borders, set at 5
make a new layer at the very top, flood fill with #a10999

 add noise, monochrome, uniform, set at 55

delete the white background layer
 
add your copyright and credits as needed
add your text and save


Avatar

Open a new canvas 200 x 200 or whatever size you need for your forum

copy and paste the background from your banner, arrange in the canvas how you want it

copy and paste the small tube from your banner to your avatar, arrange how you want it.

crop it as we did with the banner

make a frame the same way we did with the banner, except on set selection borders, set it at 3

delete the white background layer

add your copyright and credits as needed
add your text and save
Saturday, October 11, 2014

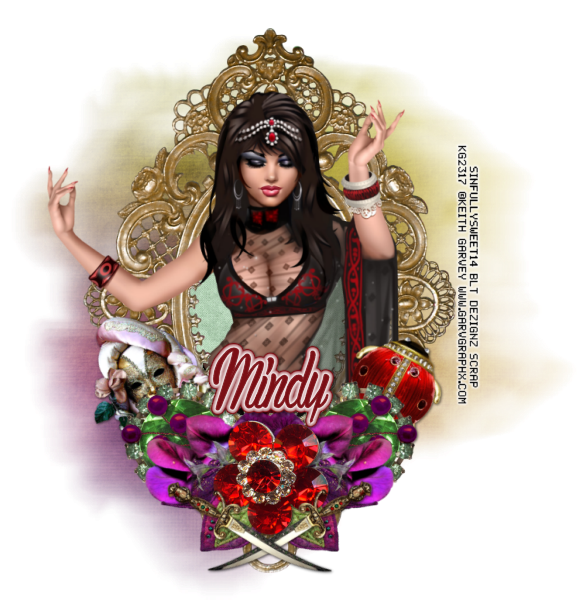
Harvest Festival Tutorial & Snaggable Tags


For this tutorial you will need the following:

Paint Shop Pro, I am using PSP X, you should be able to use any version.

Tube of choice, I am using the artwork of Ellie Milk (Jessica tube) which you need a license to use. 

Scrap kit of choice. I am using a PTU kit, Harvest Festival by BLT Dezignz

Font of choice, I am using DJB Danielle

Mask of your choice

Plugins: No outside plugins used
I do use Eye Candy 4000 Gradient Glow on all my copyrights/credits layers
I do this because some forums will make a .png tag show up with a black background and then your
copyright doesn't show.


Just remember that my choices of papers and elements is just a suggestion, change it up and make it yours! You don't have to follow mine exactly.

Add a drop shadow of your choosing to tubes & elements throughout. I usually use 1, 1, 50, 5 unless otherwise noted.


Let's get started!

Open a new canvas 850 x 850 pixels with a white background

Open frame 1 copy and paste as a new layer, resize 30%
click inside with your magic wand, selections, modify, expand 2, selections, invert
open paper 11, resize 850 x 850 pixels copy and paste as a new layer below the frame
click delete on your keyboard,
copy and paste your tube as a new layer, resize by 50%
arrange in your frame
erase the bits that hang out of your frame where you don't want them & then deselect

 add the elements:
bags resize 13% arrange on bottom left
bowls resize 13% arrange behind and to the left of the bags
flower pots resize 13% arrange to the right of and in front of the bags

milk can resize 9% arrange on bottom right
tea pot resize 9% arrange to the left of milk can
pumpkin resize 13% arrange behind tea pot and flower pots
rabbit resize 25% arrange to the left of cups

branch resize 25% arrange behind the other elements at the bottom, erase the bits that stick out
duplicate & mirror

flower 2 resize 15% arrange over leaves on right, duplicate & mirror
branch 2 resize 15%, flip, arrange behind other branches on the bottom
feather resize 9% arrange in front of milk can
birdhouse resize 15% arrange on left, below the tube layer
bird resize 6% arrange on birdhouse

copy and paste paper 8 as a new layer
apply your mask, merge group, resize 90%, duplicate & merge 

crop and resize
add your copyright and credits as needed
add your text and save
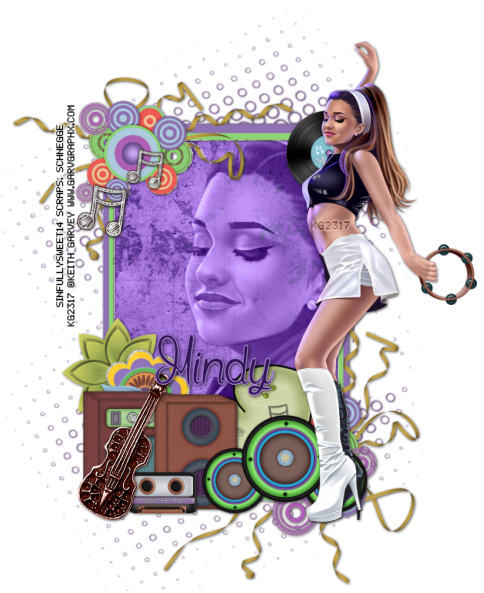


Here are some snag tags for you.


Selina

The tag below was made using Alicia Mujica's creepy cute new witch tube called Selina 
and using a FTU scrap kit which is part of a blog train, Cute Halloween by Bibi's Collection


The tag below was also made using Alicia's witch tube, Selina
and Kizzed by Kelz portion of the Cute Halloween blog train


Sunday, October 5, 2014

Rowena 3 Forum Set


For this tutorial you will need the following:

Paint Shop Pro, I am using PSP X, you should be able to use any version.

Tube of choice, I am using the artwork of Alicia Mujica (Rowena tube) which you need a license to use.

Scrap kit of choice. I am using Autumn Bliss by Scrappin With Lil Ole Me

Font of choice, I am using Articulate

Plugins: No outside plugins
I do use Eye Candy 4000 Gradient Glow on all my copyrights/credits layers
I do this because some forums will make a .png tag show up with a black background and then your
copyright doesn't show.


Just remember that my choices of papers and elements is just a suggestion, change it up and make it yours! You don't have to follow mine exactly.

Add a drop shadow of your choosing to tubes & elements throughout. I usually use 1, 1, 50, 5 unless otherwise noted.


Let's get started!

Banner Tag
Open a new canvas 600 x 250 pixels with a white background

open paper 27 copy and paste as a new layer
copy and paste your tube as a new layer, resize by 55% then 90%

add the following elements
element 13 resize  75% arrange on right, duplicate & mirror
element 15 resize  75% arrange on left, duplicate & mirror
element 107 resize  35% arrange behind tube on bottom, duplicate & mirror
element 85 resize  45% arrange above rocks on left
element 118 resize  45% arrange behind grass
element 23 resize  45% arrange behind element 118
element 68 resize  20% arrange in leaves on right
element 55 resize  20% arrange on the rocks
element 110 resize  16% arrange on stump

Make sure you are on your white background
activate your crop tool, and snap crop rectangle to layer opaque

still on the white background
selections, select all, modify, set selection borders 5
add a new raster layer at the top
flood fill with #4a3525
add noise, uniform, monochrome 45
add drop shadow 1, 1, 50, 5 then -1, -1, 50, 5

add your copyright and credits as needed
add your text and save
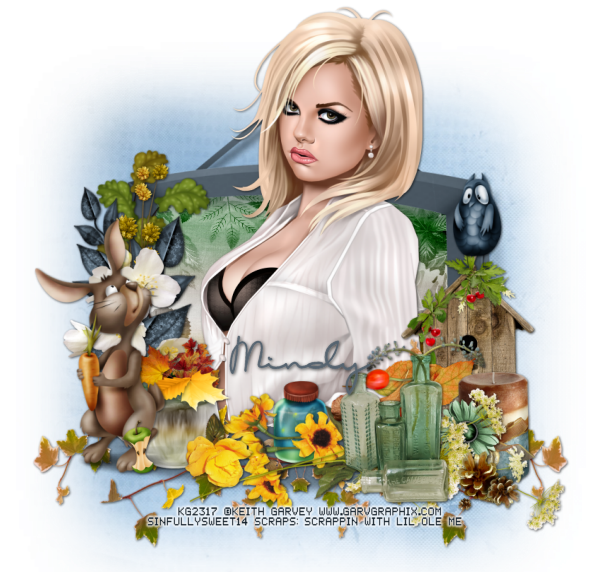


Avatar
 
open a new raster layer 200 x 200 or whatever size you need for your forum

Go back to your banner tag, hide the copyright, tube and frame, 
copy merged, paste into your avatar, arrange it where you want
 
unhide tube, copy and paste the tube into your avatar & arrange, 
then unhide the other layers on your banner

Make sure you are on your white background
activate your crop tool, and snap crop rectangle to layer opaque

still on the white background
selections, select all, modify, set selection borders 3
add a new raster layer at the top
flood fill with #4a3525
add noise, uniform, monochrome 45
add drop shadow 1, 1, 50, 5 then -1, -1, 50, 5

add your copyright and credits as needed
add your text and save
 

Rowena 2


For this tutorial you will need the following:

Paint Shop Pro, I am using PSP X, you should be able to use any version.

Tube of choice, I am using the artwork of Alicia Mujica (Rowena tube) which you need a license to use. 

Scrap kit of choice. I am using a PTU kit, Autumn Bliss by Scrappin With Lil Ole Me

Font of choice, I am using Articulate

Mask: gemsmasks192 by Gems Taggin Scraps

Plugins: no outside plugins
I do use Eye Candy 4000 Gradient Glow on all my copyrights/credits layers
I do this because some forums will make a .png tag show up with a black background and then your
copyright doesn't show.


Just remember that my choices of papers and elements is just a suggestion, change it up and make it yours! You don't have to follow mine exactly.

Add a drop shadow of your choosing to tubes & elements throughout. I usually use 1, 1, 50, 5 unless otherwise noted.


Let's get started!

Open a new canvas 850 x 850 pixels with a white background

open element 43 copy and paste as a new layer
click inside with your magic wand, selections, modify, expand 2
make a new raster layer below the frame, make sure you are on it
open paper 5, copy & paste into selection

 Copy and paste your tube as a new layer, resize by 60%
arrange in your frame, selections, invert
erase the bits that hang out of your frame where you don't want them

 add your elements:
 element 15 resize  85% arrange below tube on left, duplicate & mirror
element 23 resize  45% arrange on bottom right corner
element 45 resize  55% arrange on bottom of frame in the center

element 16 resize  55% arrange on right under element 23
element 5 resize  30% arrange below sticks layer on bottom left
element 51 resize 40% arrange behind the sticks

 element 17 resize  45% mirror & arrange in the center of the flowery 
element that runs along the left side, duplicate & mirror

element 49 resize  25% arrange on right side, above the yellow sunflower

add paper 27 above the white background
apply your mask, merge group, resize 85%

crop and resize
add your copyright and credits as needed
add your text and save