Pages

Showing posts with label Sugar Kissed Design Tuts. Show all posts

Wednesday, July 6, 2011

A Girl Thing

For this tutorial you will need the following:
Paint Shop Pro, I am using PSP X, you should be able to use any version.
Tube of choice, I am using the artwork of Robert Alvarado, which you need a license to use. You can get it at MPT.
Scrap kit of choice. I am using a PTU kit, A Girl Thing by Sugar Kissed Designs, which you can find here.
Template 1 by Millie from the Xeracx Stalkers June Blog Challenge, which you can find here. It's the last set on this post.
Font of choice, I am using Blue Cabin.
Plugins: Xero Porcelain
Just remember that my choices of papers and elements is just a suggestion, change it up and make it yours! You don't have to follow mine exactly.
Let's get started!
Open the template, press Shift D to duplicate the template, close the original.
Change canvas size to 650 x 650 to give yourself a little working room.
Merge down copy of raster 6 to raster 6, click inside with your magic wand, invert open paper 9, copy and paste as a new layer, deselect. Delete the original layer.
Click inside the grey part of raster 2, selections, invert, open paper 3, copy and paste as a new layer, click delete on your keyboard.
Do the same for the other grey borders on the template.
Click inside the green part of raster 3 with your magic wand, selections, invert. Open paper 12, copy and paste as a new layer, leave selected.
Open your close up of your tube, copy and paste as a new layer, arrange it how you want, click delete on your keyboard. Deselect.
Duplicate your tube, on the top layer, adjust blur, gaussian blur by 3, change blend mode to soft light. On the original tube layer, apply Xero Porcelain with the original settings, if you're not sure they're right, just click reset, then click ok. Add a drop shadow to your bottom tube, delete the original raster 3 layer.
Add papers to each of the remaining green parts of your layers as we did in the step above.
Add a drop shadow to the back layer (the very bottom one) and to each frame layer.
Open paper 13, copy and paste as a new layer, drag it down so that it's just above your background layer, free rotate to the right by 22, add a drop shadow.
Open element 6, copy and paste as a new layer, mirror, rotate to the left by 22.
Open element 15, copy and paste as a new layer, drag it down below the small circle and frame layer at the bottom, add drop shadow.
Open element 11, copy and paste it, arrange it at the top of your tag, add drop shadow.
Add any credits you need to add, and text, crop and resize.

Tuesday, July 5, 2011

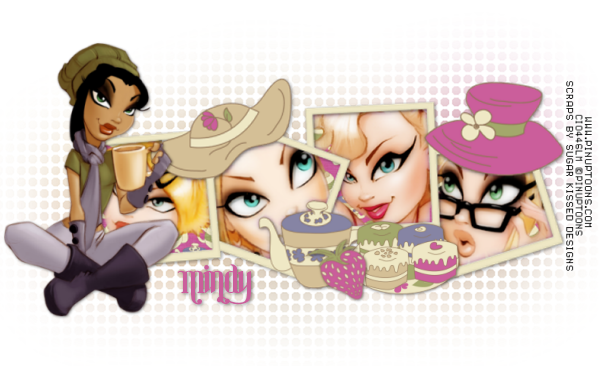
Tea 4 Two

For this tutorial you will need the following:
Paint Shop Pro, I am using PSP X, you should be able to use any version.
Tubes of choice, I am using the artwork of Pin Up Toons, which you need a license to use. You can get it at CDO. I got mine at CILM when he was selling tubes there. You will need 4 or 5 tubes.
Scrap kit of choice. I am using a FTU kit Tea4Two by Sugar Kissed Designs which you can get here and here.
Font of choice, I am using
Plugins: Xero Porcelain, Vanderlee Unplugged Tools Spice Dots
Just remember that my choices of papers and elements is just a suggestion, change it up and make it yours! You don't have to follow mine exactly.
Let's get started!
Open a new canvas 650 x 650 white background.
Open frame element 8, resize by 30%, then again by 60%. Click inside each square with your magic wand and selections, modify, expand by 1.
Open paper 9, resize it to 600 x 600, copy and paste it between the background layer and frame layer, selections, invert, click delete on your keyboard. Leave selected.
Open each of your tubes, copy and paste them, arrange them how you want them and delete the sections outside the frame by clicking delete on your keyboard. Deselect and erase the parts of your tubes that might be overhanging into another frame.
Hide all layers except your tubes and merge visible. Duplicate and on the duplicate layer, adjust blur, gaussian blur by 3, change the blend mode to soft light. On the bottom layer apply Xero Porcelain and change the bottom slider to 0.
Add a drop shadow to your frame and then hide the background layer and merge visible. Duplicate your frame.
On the bottom layer, adjust blur, gaussian blur by 20.
Apply Vanderlee Unplugged Spice Dots leave the settings at the original settings.
If you are going to add a full tube, open that, copy and paste, arrange where you want it and add a drop shadow, resize if necessary.
Add any other elements if you'd like.
Add your credits and text.

Sunday, May 15, 2011

Melt With You

For this tutorial you will need the following:
Paint Shop Pro, I am using PSP X, you should be able to use any version.
Tube of choice, I am using the artwork of Ismael Rac which you need a license to use.
Scrap kit of choice. I am using Lovely by Sugar Kissed Designs.
Font of choice, I am using Written on His Hands.
Plugins: MuRa Miesters Copies, Andrews filter 43 Double Fun
Just remember that my choices of papers and elements is just a suggestion, change it up and make it yours! You don't have to follow mine exactly.
Let's get started!
Open a new canvas 600x250.
Open element 11, copy and paste as a new layer, rotate to the right by 45.
Apply MuRa Miester Copies with the following settings:
Line, wraparound, behind, change the top slider to 4.
Adjust blur, motion blur, angle 243, strength 55.
Apply Andrews Filter Double Fun with default settings. Change the blend mode to overlay.
Open paper 13, copy and paste it below the layer we just applied the Double fun filter to.
Open your tube, copy and paste, arrange in the middle of your tag. Add a drop shadow.
Add elements, 08 and 07.
Add a new raster layer. Selections, select all, modify, contract 3, selections, invert, flood fill with a color from the tube or background. Deselect. While on this layer, use crop tool and click "snap crop rectangle to" and click "layer opaque" in the center.
change your canvas size to 700x350.
Use your text tool to add whatever text you'd like around the outside of your tag, your name, copyright info and credits as needed.
Crop and resize as needed.