Pages

Sunday, July 31, 2011

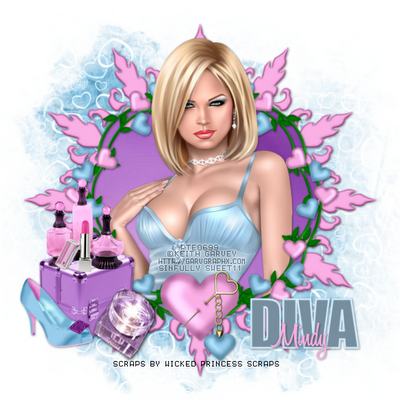
Garvey Diva

For this tutorial you will need the following:
Paint Shop Pro, I am using PSP X, you should be able to use any version.
Tube of choice, I am using the artwork of Keith Garvey which you need a license to use. You can get it at PTE.
Scrap kit of choice. I am using Opposites Attract Lovey by Shani of Wicked Princess Scraps. You can find the stores she sells at shown on the top left side of her blog.
Font of choice, I am using Impact for the word Diva and Honey Script Semi Bold for my name.
Mask: gemsmasks160 by Gems Taggin Scraps.
Plugins: no outside plugins
Just remember that my choices of papers and elements is just a suggestion, change it up and make it yours! You don't have to follow mine exactly.
Let's get started!
Open a new canvas 650 x 650 white.
Open the scalloped frame element, copy and paste as a new layer, resize by 65%. Add a drop shadow.
Open the heart wreath frame, copy and paste as a new layer, resize by 55%. Click inside it with your magic wand, make sure you click in the little parts around the outside edge, get in between all the vines, make sure you either hold down the shift key while doing so or make sure the mode on your magic wand is set to add (shift) then modify, expand by 2.
Open paper 6, copy and paste as a new layer, selections modify, invert, click delete on your keyboard. Drag the paper between the two frame layers and leave it selected.
Open your close up tube, copy and paste as a new layer and arrange it where you want it in the frame. Duplicate the tube and hide the duplicate for now. Drag the original under your wreath frame and erase the bits that hang out of the bottom. Deselect and add a drop shadow to your tube and wreath frame.
Unhide your duplicate tube, drag it above the wreath frame layer. Erase the bits that hang over the bottom. This way you have her head above the frame and you can erase the parts on the lower part without having to spend a lot of time erasing tiny bits of frame at the top or her on the bottom. This works really well when you have tiny little parts to erase.
Open up the elements you want to use, resize as needed and add them to your tag, drop shadow on each layer. The ones I used are as follows:
Makeup box resized at 45%
Makeup resized at 25% mirrored
Perfume bottles resized at 25%
Shoe resized at 25%
Lipstick resized at 25%
Open a paper, copy and paste as a new layer, drag it down just above the background layer, open your mask. Apply mask by going to layers, new mask layer, from image, find your mask in the drop down menu, click ok. Delete the mask and merge group.
Add your name, any other text you'd like, copyrights and credits as needed.

Friday, July 29, 2011

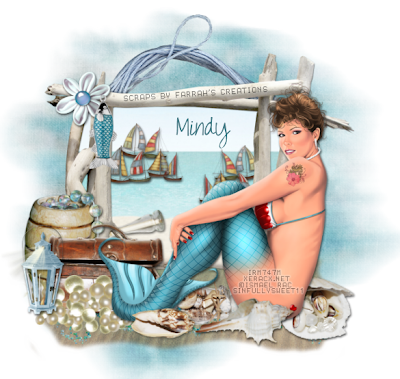
Beach Day Mermaid

For this tutorial you will need the following:
Paint Shop Pro, I am using PSP X, you should be able to use any version.
Tube of choice, I am using the artwork of Ismael Rac which you need a license to use. You can get it at his store here.
Scrap kit of choice. I am using Day At The Beach by Farrah's Designer Scraps.
Font of choice, I am using
Mask: Becky Mask023, she isn't online anymore, and I have supplied the mask here.
Plugins: No outside plugins used.
Just remember that my choices of papers and elements is just a suggestion, change it up and make it yours! You don't have to follow mine exactly.
Let's get started!
Drop shadow throughout is 1, 1, 50, 5 unless otherwise noted.
Open a new image 650 x 650 white.
Open frame 1, copy and paste as a new layer, resize by 35%.
Take your magic wand and click inside all the little areas between the sticks, and in the big middle part, selections, modify, expand by 5.
Open paper 3, copy and paste as a new layer, resize by 35% three times, selections invert, click delete on your keyboard. Deselect and drag it below your frame layer.
Open the ships element copy and paste as a new layer, resize by 20% then by 40%, add a drop shadow, I used 2, 1, 70, 5. Move the ships over near the top left side of the frame so it looks like they're floating in the water.
Duplicate the ships, mirror and drag down a little lower in the water and to the right.
Open the bottle element, copy and paste as a new layer, resize by 20% then again by 30% add drop shadow move near bottom left side of frame.
Open your tube, copy and paste to the right side of your frame. If you are using the same tube as me, mirror it and then resize by 65% add a drop shadow.
Open paper 6, copy and paste as a new layer, resize by 20% then by 75%, drag below your frame layer.
Take your selection tool set on rectangle, make sure you are on your paper layer, Takeand select the top 2/3 of the paper, so that it's just a little bit above where the stick goes across the bottom of the frame. Click delete on your keyboard.
Take your eraser tool set on round, hardness at 8, step 1, density at 100, thickness 100, rotation 0, opacity 100. Run your eraser around the edges of the sand to make it look wavy/irregular around the edges. When you get something you're happy with, drop the opacity down to about 60.
Open the chest, resize by 25% then by 60%. Move to the bottom left of the frame, add drop shadow.
Do the same with the barrel.
Open the glitter, copy and paste as a new layer, reize twice by 45%, drag down below your tube, on the sand, duplicate and mirror.
Open the fish charm, resize by 20%, then by 60%, arrange on the top left side of frame.
Open the lantern, resize by 15%, copy and paste as a new layer, arrange on the bottom left side with the chest and barrel, add drop shadow.
Open flower 2 element, copy and paste as a new layer, resize by 25%, arrange on top left side of frame, drag below fish charm layer
Add the pearls element, resize by 15 then by 80% drag it below the lantern but on top of the chest on the left side.
Open some of the shells, resize as necessary and arrange around the tube.
Open paper 8, copy and paste as a new layer, resize by 25%, drag it just above the background layer, open the mask, apply mask by going to layers, new mask layer, from image, find the mask in the drop down box and click ok. Delete the mask and merge group. Duplicate and merge again.
Add your name, copyright and other credits as needed.

Thursday, July 28, 2011

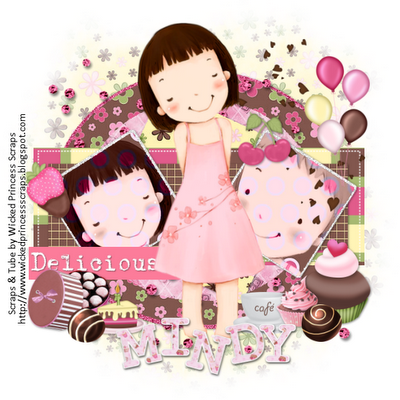
Chef Otelia

For this tutorial you will need the following:
Paint Shop Pro, I am using PSP X, you should be able to use any version.
Tube of choice, I am using the tube that came with the kit.
Scrap kit of choice. I am using Chef Otelia by Wicked Princess Scraps, you can find it on her blog here, and the stores she sells at are located on her top left side of the blog. Isn't it just the cutest kits?
Collab template #3 by Tamie and Deb which you can find at the Creative Misfits Creations blog. It's the last link of the post for June 15th 2011.
Font of choice, I did not use a font, I used the alphas provided in the kit.
Mask: DVB Mask 111 by Designs By Vaybs
Plugins: none used
Just remember that my choices of papers and elements is just a suggestion, change it up and make it yours! You don't have to follow mine exactly.
Let's get started!
Open your template, shift D to duplicate. delete raster 5 layer (credits) and raster 9. Note: if you are using different papers than me, you might want to leave raster 9 til the end and decide if the dotted lines look good over the paper you have chosen to use.
Since it's pretty large, I like to resize my template to start out, so I resized it to 600 x 456 then changed the canvas size to 650 x 650.
Make raster 3 layer active, click on it with your magic wand. Open paper 8, copy and paste as a new layer, selections invert, make sure you are on the paper layer, click delete on your keyboard. Selections invert again, selections modify, expand by 5, add a new raster layer below the paper layer, flood fill with a pink from the paper. Deselect.
Add noise to the frame layer, uniform, monochrome checked 75%. Add a drop shadow. Delete the original layer.
Add papers to the following layers the same way as above. Make sure to delete the original raster layers as you go along.
Copy of raster 3 using paper 5
Raster 6 using paper 7, add a drop shadow.
Raster 2 using paper 10 resized by 73% add drop shadow
Raster 4 using paper 13 add drop shadow
Raster 1 and copy of raster 1 using paper 14
On raster 7 and raster 9, add the same noise setting you did on the outside oval frame and add a drop shadow.
Open your tubes, go back and select the left side small square layer by going to selections, select all, float, defloat, invert. Copy and paste one of your tubes over the square, arrange how you want, click delete on your keyboard. Do the same for the other square on the other side.
Change the blend mode of these tubes to luminence (L)
Copy and paste your full size tube, arrange in the middle of the tag, add your drop shadow.
Open the bead splatter element, copy and paste as a new layer, drag it down so that it is just above all the oval layers in the middle.
Copy and paste various elements that you like, resizing and adding drop shadow as necessary.
I used:
Candybox resize by 25%
Birthday cake resize by 25%
Chococupcake resize by 20%
Heartcupcake resize by 28%
Cafecup resize by 20%
Tag 3 resize by 45%
Chocohearts resize by 75%
Cherry resize by 20%
Strawberry resize by 20%
Balloons resized by 45%
Choco4 resize by 15%
Choco2 resize by 15%
Open paper 11, copy and paste as a new layer, drag down so it is just above your background layer. Open your mask, layers, new mask layer, from image, find your mask in the drop down menu and apply. Delete the mask and merge group. Drop opacity to 60%.
Open up the letters you need for your name using the alphas provided in the kit, resizing as necessary.
Crop, resize and save!

Wednesday, July 27, 2011

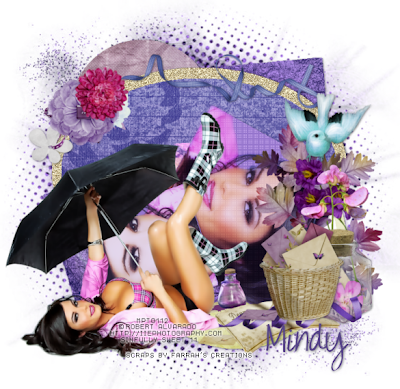
Rainy Day Love Letters

For this tutorial you will need the following:
Paint Shop Pro, I am using PSP X, you should be able to use any version.
Tube of choice, I am using the artwork of Robert Alvarado which you need a license to use. You can get it at MPT.
Scrap kit of choice. I am using Love Letters by Farrah at Designer Scraps.
udooaktemplate By Brutal Designs from template pack 9.
Font of choice, I am using Just Realize.
Mask: Any mask of your choice, I used ACD Mask 1 by Chas, which is available to ACD Divas members only.
Plugins: Penta Color Dot, Xero Porcelain, Xero Radiance
Just remember that my choices of papers and elements is just a suggestion, change it up and make it yours! You don't have to follow mine exactly.
Let's get started!
Open the template, shift D to duplicate, close the original. Delete the following layers: credits, word art, and word art 2.
(optional step) Resize to around 600 x 600 then change the canvas size to 650 x 650. I just do this so that I'm not resizing my tube a lot, so that the tag itself is closer to what I like it in size. If you want to just increase the canvas size and resize the whole thing at the end, that's fine too.
Flood fill your background with white to make it easier to see what you are doing.
Make your blk circle top layer active, click on it with your magic wand. Open paper 3, resize by 30% then by 65%. Copy and paste as a new layer, selections invert, make sure you are on the paper layer, and click delete on your keyboard. Delete the original layer.
Do the same using various papers for the following layers: blk circle bottom, dk grey square top and bottom, resizing the papers as needed.
Click on the pink oval layer with your magic wand, add a new raster layer and flood fill with #d6c59c. Add/remove noise 75% uniform monochrome checked, add a drop shadow.
Click on purple oval with your magic wand, open paper 9, resize by 30%, copy and paste as a new layer, selections invert, click delete on your keyboard, leave selected. Open your tube, copy and paste the close up as a new layer, arrange inside the oval layer to the left side, click delete on your keyboard.
Change the blend mode on your tube to screen. Delete the original oval layer.
Click on the green square layer with your magic wand, add a new raster layer, flood fill with #9676cd, apply penta dot and cross with the default settings, mirror your close up tube, copy and paste as a new layer, selections invert, click delete on your keyboard. Deselect.
Duplicate your tube, on the top layer, gaussian blur 3, change blend mode to soft light. On the bottom layer, apply Xero Porcelain at the default settings, drop the opacity on this tube to about 60.
Delete the original green square layer.
Click on grey square right, add a new raster layer and flood fill with #9676cd, mirror your tube back to how it was originally, copy and paste as a new layer and arrange it in the square, selections invert, click delete on your keyboard, deselect and delete the original layer.
Apply Xero Radiance at default settings drop the opacity to 70.
Apply drop shadow to all shape layers.
Copy and paste your tube, resize if necessary, add a drop shadow. If you are using the same tube as I did, I resized mine by 85%.
Open some of your flower elements, copy and paste and resize as needed and arrange them over the top of the tag.
Open ribbon 2 element, resize 3 times by 50%, rotate to the left by 90 and mirror, drag it under the flowers and add drop shadow.
Do the same with ribbon 1 element, drag it between the diary and basket layers.
Open the bird element, resize 3 times by 50, arrange near the top right, add drop shadow.
Open the basket, image mirror, resize by 50 twice, copy and paste as a new layer, add drop shadow.
Open the diary, resize 3 times by 50, copy and paste drag below basket layer, add drop shadow.
Open jar element resize 3 times by 50, copy and paste as a new layer, drag below basket layer, add drop shadow.
Open tag element, resize same as above, copy and paste move to the top of the tag.
Open paper 10, copy and paste as a new layer, just above your white background layer, open your mask, go to layers, new mask layer, from image, find your mask in your drop down menu, apply it, delete the mask layer and merge group. I resized mine by 110%.
Add your name, copyright and credits as needed. Crop, resize, and save.

Tuesday, July 26, 2011

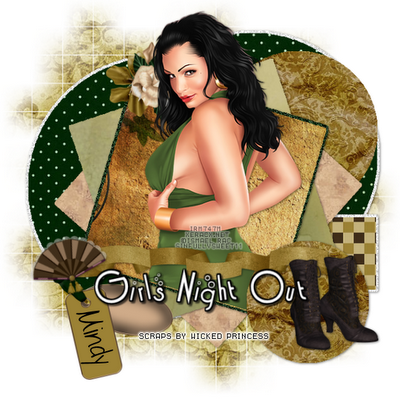
Girls Night Out

For this tutorial you will need the following:
Paint Shop Pro, I am using PSP X, you should be able to use any version.
Tube of choice, I am using the artwork of Ismael Rac which you need a license to use. You can get it at his store here.
Scrap kit of choice. I am using Cornelia Marie Qunicy by Wicked Princess which you can find on her blog here. Links to the stores where she sells are at the top left side of the blog.
Girls Night Out template from template pack 9 by Brutal Designs.
Font of choice, I am using
Mask: WSL84 which you can find at her site Weescotslass Creations
Plugins: No plugins used
Just remember that my choices of papers and elements is just a suggestion, change it up and make it yours! You don't have to follow mine exactly.
Let's get started!
Open your template, shift D to duplicate, close the original. Delete the copyright layer, pink rectangle top and green rectangle top.
Resize to about 585 x 585 or 600 x 600 pixels then adjust canvas size to 650 x 650. Flood fill the background layer with white to make it easier to see what you're doing.
Fill all the background circles and rectangles (except the top green square one) by clicking on them with your magic wand, opening the paper, copy and paste as a new raster layer, selections, invert, make sure you are on the paper layer, and click delete on your keyboard. Add a drop shadow and then delete the original layers.
If you want to add a frame to your layers, instead of adding a drop shadow, keep them selected, do selections invert, modify, expand by 4 or 5 pixels, add a new raster layer below your paper layer flood fill white, add/remove noise, uniform, monochrome 75, deselect and add a drop shadow to the frame layer.
On the top green square layer, fill with a paper as you did above, but leave selected.
Open your tube, copy and paste as a new layer. Arrange it how you want it and then use your eraser tool to erase the bits that hang over.
Add whatever elements you like, resizing as necessary. I used the following elements:
Banner - resized 35% - placed over top of tube layer - added drop shadow
Boots - resized by 20% - placed over banner on right side -added drop shadow
Fan - resized by 20% - rotate to left by 15 - placed over banner on left side -added drop shadow
Waterpaint Rose - resized by 20% - placed over top left corner of top square layer, drag below tube layer
Pearl Blossom - resized by 28% - placed over top left side of top square layer, drag Waterpaint Rose layer
Double tag - resize by 35% - drag below fan layer.
Add your name to the tag, put it on the double tag element.
Open a paper, copy and paste just above background layer. Open your mask, layers, new mask layer, from image, find the mask in the drop down box, click ok. Find the mask in your layers pallette and delete it. Merge group the remaining two layers. Resize by 115%
Add your copyright and credits as needed, crop and resize.

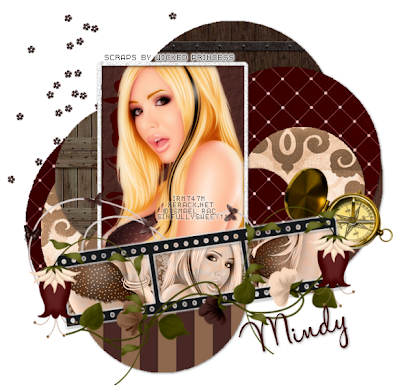
Georgetta

For this tutorial you will need the following:
Paint Shop Pro, I am using PSP X, you should be able to use any version.
Tube of choice, I am using the artwork of Ismael Rac, which you need a license to use. You can get it at his store here.
Scrap kit of choice. I am using Georgetta Cartrite by Wicked Princess. You can find it on her blog here, and the stores she sells at are listed on the top left side of her blog.
Circles template 3 by Brutal Designs from template pack 11 which you can find here.
Font of choice, I am using Halo Handletter
Plugins: Xero Porcelain, Eye Candy 4000 Gradient Glow
Just remember that my choices of papers and elements is just a suggestion, change it up and make it yours! You don't have to follow mine exactly.
Let's get started!
Open your template, shift D to duplicate, close the original. Resize to 600 x 600, then change the canvas size to 650x650.
Fill each of the circle layers with a paper from the kit by clicking on the layer with your magic wand, selections invert, open the paper, copy and paste as a new layer, selections, invert, make sure you are on the paper layer, and click delete on your keyboard. You can look at mine for an example or just fill with whichever papers you want to use.
As you fill each circle, delete the original layer and add a drop shadow to your layers that you added the papers to.
On your rectangle frame layer, add noise, uniform, monochrome about 55%, and add a drop shadow.
Click on the pink rectangle layer, add a paper background the same way you did the circle layers. Leave selected and open your tube. Copy and paste your tube as a new layer. Click delete on your keyboard. Deselect.
Duplicate your tube. On the top layer, adjust, blur gaussian blur 3, change the blend mode to soft light. On the bottom layer, apply Xero Porcelain at the default settings except change the blue to zero.
Merge the 3 purple rectangle layers (for your filmstrip) down together. Click on it with your magic wand, fill with a paper and leave selected.
copy and paste your tube as a new layer, arrange it in the film strip how you'd like it, click delete on your keyboard. Do this 3 times to fill the filmstrip. Change the blend mode on your tube layers to Luminance (L)
Add a gradient glow to your black film strip layer, I used a glow width of 4, white, then add a drop shadow.
Add whatever elements you'd like, resizing if necessary. I used the following:
Bling flower - bottom layer left side
Butterfly string - resize by 40% - drag it below the filmstrip layer, arrange over the rectangle frame layer so it shows over the top of your large tube.
Pansy flower - rotate to left by 12 add a drop shadow, arrange it so that this layer is on top of your filmstrip layer so it lays across the bottom of the filmstrip.
Gold compass - resize by 45% arrange near the top left of filmstrip.
Teardrop - resize by 45% arrange over the top right of filmstrip, duplicate, mirror, arrange over the top left side of filmstrip.
Add your name and credits, crop and resize!

On a new CT

As of today I have joined another CT, Farrah's Designer Scraps. You can find her blog here, and she sells her scraps at Cool Scraps Digital, and Designer Scraps. Check out her stuff, she's got some great kits!
Thank you so much Farrah for adding me to your team!

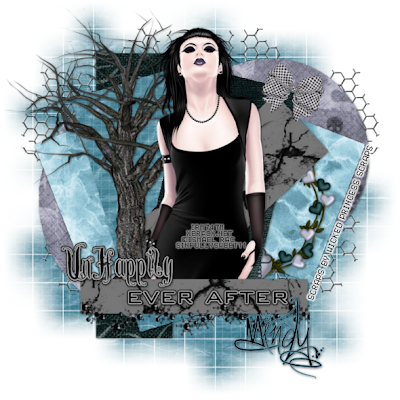
Wicked Goth

For this tutorial you will need the following:
Paint Shop Pro, I am using PSP X, you should be able to use any version.
Tube of choice, I am using the artwork of Ismael Rac which you need a license to use. You can get it at his store here.
Scrap kit of choice. I am using Dark Angel by Wicked Princess Scraps. You can find it on her blog here and the links to the stores she sells at are on the left sidebar at the top.
Template by Brutal Designs. You can find it in template pack 9 here.
Font of choice, I am using sick capital vice
Mask: WSL84 from Weescotslass Creations
Plugins: Eye Candy 4000 Gradient Glow
Just remember that my choices of papers and elements is just a suggestion, change it up and make it yours! You don't have to follow mine exactly.
Let's get started!
Open your template, shift D to duplicate it, close the original, delete the copyright layer and blk rect top layer. I then cropped it and resized it to 600 on the longest side then changed the canvas size to 650x650. You can do that or not, it's just that I like the template a little smaller to work with.
Starting with the bottom layer, click inside it with your magic wand, then open the paper you want to use, copy and paste it as a new layer, then go to selections, invert and then making sure you are on the paper layer, click delete on your keyboard. Add a drop shadow.
Do this for each of the shape layers.
Merge your two text layers together, make your foreground white and background black, click on your color replacer tool and go over the text with that. It will change to black. Now apply eye candy 4000 gradient glow width 3 and for the color, click on the little arrow shaped slider under the color box, click the white color, then drag it over and click on black so that it's white fading into black then apply it.
Add a drop shadow.
Add your tube, resize if necessary, add a drop shadow.
Drag the top horizontal rectangle down a little to cover the bottom of your tube. Do the same with your word art. If necessary, erase the bits of tube still hanging below the rectangle layer.
Open the creepy tree element, copy and paste as a new layer, drag it below your tube layer, add a drop shadow, erase any bits that stick out where they don't look right.
Open Heart wreath frame, copy and paste as a new layer, resize by 55%, drag it so it is just above the small rectangle on the bottom right side. Add a drop shadow.
Open the wire element, copy and paste as a new layer, drag to the bottom, arrange it so it's sticking out of the left side, then duplicate and mirror.
Open doodad, copy and paste as a new layer, drag it to the bottom, just over the bottom edge of the small rectangle that your word art is on. Resize by 80%.
Open the bow, copy and paste as a new layer, resize by 20% free rotate to the right by 20, add a drop shadow. See my tag for placement reference.
Open your mask, open paper 11, copy and paste as a new layer. Drag it down to the bottom. Apply mask by going to layer, new mask layer, from image, find the mask in the drop down box, click ok. Delete the mask then merge group.
Add your name or any other text you want. Add your copyright and necessary credits. Crop and save.

Wednesday, July 6, 2011

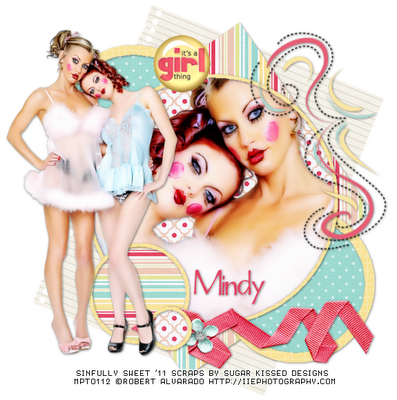
A Girl Thing

For this tutorial you will need the following:
Paint Shop Pro, I am using PSP X, you should be able to use any version.
Tube of choice, I am using the artwork of Robert Alvarado, which you need a license to use. You can get it at MPT.
Scrap kit of choice. I am using a PTU kit, A Girl Thing by Sugar Kissed Designs, which you can find here.
Template 1 by Millie from the Xeracx Stalkers June Blog Challenge, which you can find here. It's the last set on this post.
Font of choice, I am using Blue Cabin.
Plugins: Xero Porcelain
Just remember that my choices of papers and elements is just a suggestion, change it up and make it yours! You don't have to follow mine exactly.
Let's get started!
Open the template, press Shift D to duplicate the template, close the original.
Change canvas size to 650 x 650 to give yourself a little working room.
Merge down copy of raster 6 to raster 6, click inside with your magic wand, invert open paper 9, copy and paste as a new layer, deselect. Delete the original layer.
Click inside the grey part of raster 2, selections, invert, open paper 3, copy and paste as a new layer, click delete on your keyboard.
Do the same for the other grey borders on the template.
Click inside the green part of raster 3 with your magic wand, selections, invert. Open paper 12, copy and paste as a new layer, leave selected.
Open your close up of your tube, copy and paste as a new layer, arrange it how you want, click delete on your keyboard. Deselect.
Duplicate your tube, on the top layer, adjust blur, gaussian blur by 3, change blend mode to soft light. On the original tube layer, apply Xero Porcelain with the original settings, if you're not sure they're right, just click reset, then click ok. Add a drop shadow to your bottom tube, delete the original raster 3 layer.
Add papers to each of the remaining green parts of your layers as we did in the step above.
Add a drop shadow to the back layer (the very bottom one) and to each frame layer.
Open paper 13, copy and paste as a new layer, drag it down so that it's just above your background layer, free rotate to the right by 22, add a drop shadow.
Open element 6, copy and paste as a new layer, mirror, rotate to the left by 22.
Open element 15, copy and paste as a new layer, drag it down below the small circle and frame layer at the bottom, add drop shadow.
Open element 11, copy and paste it, arrange it at the top of your tag, add drop shadow.
Add any credits you need to add, and text, crop and resize.

Tuesday, July 5, 2011

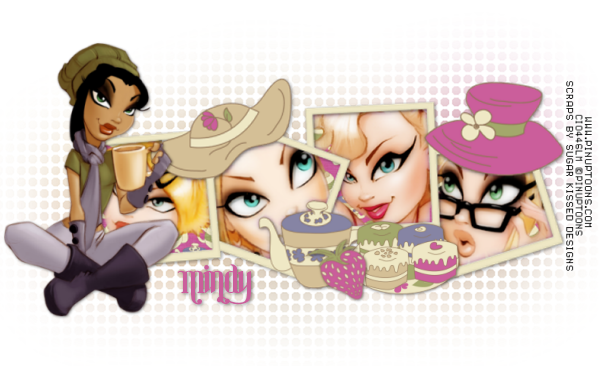
Tea 4 Two

For this tutorial you will need the following:
Paint Shop Pro, I am using PSP X, you should be able to use any version.
Tubes of choice, I am using the artwork of Pin Up Toons, which you need a license to use. You can get it at CDO. I got mine at CILM when he was selling tubes there. You will need 4 or 5 tubes.
Scrap kit of choice. I am using a FTU kit Tea4Two by Sugar Kissed Designs which you can get here and here.
Font of choice, I am using
Plugins: Xero Porcelain, Vanderlee Unplugged Tools Spice Dots
Just remember that my choices of papers and elements is just a suggestion, change it up and make it yours! You don't have to follow mine exactly.
Let's get started!
Open a new canvas 650 x 650 white background.
Open frame element 8, resize by 30%, then again by 60%. Click inside each square with your magic wand and selections, modify, expand by 1.
Open paper 9, resize it to 600 x 600, copy and paste it between the background layer and frame layer, selections, invert, click delete on your keyboard. Leave selected.
Open each of your tubes, copy and paste them, arrange them how you want them and delete the sections outside the frame by clicking delete on your keyboard. Deselect and erase the parts of your tubes that might be overhanging into another frame.
Hide all layers except your tubes and merge visible. Duplicate and on the duplicate layer, adjust blur, gaussian blur by 3, change the blend mode to soft light. On the bottom layer apply Xero Porcelain and change the bottom slider to 0.
Add a drop shadow to your frame and then hide the background layer and merge visible. Duplicate your frame.
On the bottom layer, adjust blur, gaussian blur by 20.
Apply Vanderlee Unplugged Spice Dots leave the settings at the original settings.
If you are going to add a full tube, open that, copy and paste, arrange where you want it and add a drop shadow, resize if necessary.
Add any other elements if you'd like.
Add your credits and text.